User Manual
Page 19
Contents 19 Registering your computer with Toshiba 38 Adding optional external devices 38 Adding memory (optional 39 Installing a memory module 39 Removing a memory module 45 Checking total memory 47 Recovering the Internal ... or projector 67 Directing the display output when you turn on the computer 68 Adjusting the quality of the external display......69 Using an external keyboard 69 Using a mouse 69 Connecting a printer 69 Setting up a printer 70 Turning off the computer 71 Options for turning off the computer 71 Using the...
Contents 19 Registering your computer with Toshiba 38 Adding optional external devices 38 Adding memory (optional 39 Installing a memory module 39 Removing a memory module 45 Checking total memory 47 Recovering the Internal ... or projector 67 Directing the display output when you turn on the computer 68 Adjusting the quality of the external display......69 Using an external keyboard 69 Using a mouse 69 Connecting a printer 69 Setting up a printer 70 Turning off the computer 71 Options for turning off the computer 71 Using the...
User Manual
Page 20
... Moving the computer 82 Using a computer lock 82 Chapter 2: Learning the Basics 83 Computing tips 83 Using the keyboard 84 Character keys 85 Making your keyboard emulate a full-size keyboard 85 Ctrl, Fn, and Alt keys 85 Function keys 85 Special Windows® keys 86 Overlay keys 86 Starting...field 89 Saving your work 90 Printing your work 91 Backing up your work 92 Restoring your work 93 Toshiba's online resources 93 Chapter 3: Mobile Computing 94 Toshiba's energy-saver design 94 Running the computer on battery power 94 Battery Notice 95 Power management 96 Using additional...
... Moving the computer 82 Using a computer lock 82 Chapter 2: Learning the Basics 83 Computing tips 83 Using the keyboard 84 Character keys 85 Making your keyboard emulate a full-size keyboard 85 Ctrl, Fn, and Alt keys 85 Function keys 85 Special Windows® keys 86 Overlay keys 86 Starting...field 89 Saving your work 90 Printing your work 91 Backing up your work 92 Restoring your work 93 Toshiba's online resources 93 Chapter 3: Mobile Computing 94 Toshiba's energy-saver design 94 Running the computer on battery power 94 Battery Notice 95 Power management 96 Using additional...
User Manual
Page 22
...a supervisor password 127 Using a user password 128 Deleting a user password 129 TOSHIBA PC Diagnostic Tool Utility 130 Mouse Utility 131 TOSHIBA Hardware Setup 132 TOSHIBA Zooming Utility 134 TOSHIBA Accessibility 135 TOSHIBA Service Station 136 Chapter 6: If Something Goes Wrong 137 Problems that are easy...you 142 Fixing a problem with Device Manager 143 Checking device properties 143 Memory problems 144 Power and the batteries 144 Keyboard problems 146 Display problems 146 Disk or storage drive problems 148 Error-checking 148 Sound system problems 149 Printer problems 150...
...a supervisor password 127 Using a user password 128 Deleting a user password 129 TOSHIBA PC Diagnostic Tool Utility 130 Mouse Utility 131 TOSHIBA Hardware Setup 132 TOSHIBA Zooming Utility 134 TOSHIBA Accessibility 135 TOSHIBA Service Station 136 Chapter 6: If Something Goes Wrong 137 Problems that are easy...you 142 Fixing a problem with Device Manager 143 Checking device properties 143 Memory problems 144 Power and the batteries 144 Keyboard problems 146 Display problems 146 Disk or storage drive problems 148 Error-checking 148 Sound system problems 149 Printer problems 150...
User Manual
Page 23
Contents 23 Contacting Toshiba 157 Other Toshiba Internet Web sites 158 Toshiba's worldwide offices 159 Appendix A: Hot Keys/TOSHIBA Cards 161 Hot Key Cards 161 Using the Hot Key Cards 162 Application Cards 163 Using the Application Cards 163 Card Case 164 Hot key ... mode 169 Output (Display switch 170 Display brightness 171 Disabling or enabling wireless devices............172 Disabling or enabling the TouchPad 173 Zoom (Display resolution 174 Keyboard hot key functions 175 Appendix B: Power Cord/Cable Connectors 176 Glossary 177 Index 191
Contents 23 Contacting Toshiba 157 Other Toshiba Internet Web sites 158 Toshiba's worldwide offices 159 Appendix A: Hot Keys/TOSHIBA Cards 161 Hot Key Cards 161 Using the Hot Key Cards 162 Application Cards 163 Using the Application Cards 163 Card Case 164 Hot key ... mode 169 Output (Display switch 170 Display brightness 171 Disabling or enabling wireless devices............172 Disabling or enabling the TouchPad 173 Zoom (Display resolution 174 Keyboard hot key functions 175 Appendix B: Power Cord/Cable Connectors 176 Glossary 177 Index 191
User Manual
Page 32
... air into the computer. NOTE The cooling fan location will vary depending on a carpet or other soft material can use external power or to , a mouse, keyboard, printer, and memory.
... air into the computer. NOTE The cooling fan location will vary depending on a carpet or other soft material can use external power or to , a mouse, keyboard, printer, and memory.
User Manual
Page 36
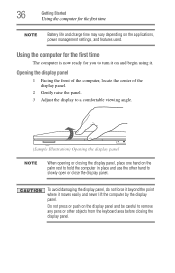
... or closing the display panel, place one hand on the palm rest to hold the computer in place and use the other objects from the keyboard area before closing the display panel. Do not press or push on the display panel and be careful to remove any pens or other hand...
... or closing the display panel, place one hand on the palm rest to hold the computer in place and use the other objects from the keyboard area before closing the display panel. Do not press or push on the display panel and be careful to remove any pens or other hand...
User Manual
Page 38
... Start, All Programs, My Toshiba, and then Toshiba Registration. NOTE The names of windows displayed, and the order in which windows appear, may want to: ❖ Add more memory (see "Adding memory (optional)" on page 39) ❖ Connect a mouse (see "Using a mouse" on page 69) ❖ Connect an external keyboard (see "Using an...
... Start, All Programs, My Toshiba, and then Toshiba Registration. NOTE The names of windows displayed, and the order in which windows appear, may want to: ❖ Add more memory (see "Adding memory (optional)" on page 39) ❖ Connect a mouse (see "Using a mouse" on page 69) ❖ Connect an external keyboard (see "Using an...
User Manual
Page 49
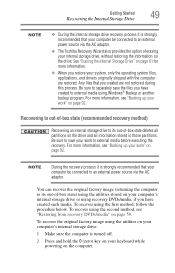
...the recovery process it is strongly recommended that your computer be connected to an external power source via the AC adaptor. ❖ The Toshiba Recovery Wizard also provides the option of erasing your internal storage drive, without restoring the information on the drive. To recover using the ... on your computer's internal storage drive: 1 Make sure the computer is turned off. 2 Press and hold the 0 (zero) key on your keyboard while powering on the computer. Recovering to out-of-box state (recommended recovery method) Recovering an internal storage drive to its out-of -box state...
...the recovery process it is strongly recommended that your computer be connected to an external power source via the AC adaptor. ❖ The Toshiba Recovery Wizard also provides the option of erasing your internal storage drive, without restoring the information on the drive. To recover using the ... on your computer's internal storage drive: 1 Make sure the computer is turned off. 2 Press and hold the 0 (zero) key on your keyboard while powering on the computer. Recovering to out-of-box state (recommended recovery method) Recovering an internal storage drive to its out-of -box state...
User Manual
Page 51
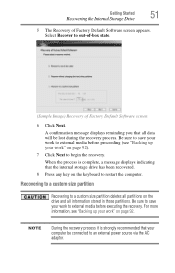
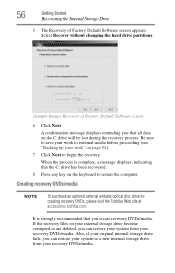
... begin the recovery. For more information, see "Backing up your work " on page 92). 7 Click Next to a custom size partition deletes all partitions on the keyboard to an external power source via the AC adaptor. A confirmation message displays reminding you that your work to out-of-box state. (Sample Image) Recovery...
... begin the recovery. For more information, see "Backing up your work " on page 92). 7 Click Next to a custom size partition deletes all partitions on the keyboard to an external power source via the AC adaptor. A confirmation message displays reminding you that your work to out-of-box state. (Sample Image) Recovery...
User Manual
Page 52
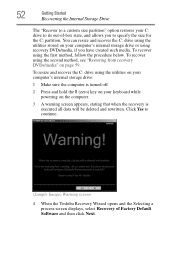
... on your computer's internal storage drive: 1 Make sure the computer is turned off. 2 Press and hold the 0 (zero) key on your keyboard while powering on the computer. 3 A warning screen appears, stating that when the recovery is executed all data will be deleted and rewritten. You can ...resize and recover the C: drive using recovery DVDs/media, if you to continue. (Sample Image) Warning screen 4 When the Toshiba Recovery Wizard opens and the Selecting a process screen displays, select Recovery of -box state, and allows you have created such media. Click Yes to...
... on your computer's internal storage drive: 1 Make sure the computer is turned off. 2 Press and hold the 0 (zero) key on your keyboard while powering on the computer. 3 A warning screen appears, stating that when the recovery is executed all data will be deleted and rewritten. You can ...resize and recover the C: drive using recovery DVDs/media, if you to continue. (Sample Image) Warning screen 4 When the Toshiba Recovery Wizard opens and the Selecting a process screen displays, select Recovery of -box state, and allows you have created such media. Click Yes to...
User Manual
Page 54
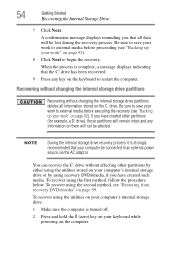
... will remain intact and any key on page 92). 8 Click Next to restart the computer. To recover using the utilities stored on your keyboard while powering on the C: drive. When the process is complete, a message displays indicating that all information stored on the computer. If you... by using the utilities on your computer's internal storage drive: 1 Make sure the computer is strongly recommended that your work" on the keyboard to begin the recovery. 54 Getting Started Recovering the Internal Storage Drive 7 Click Next. Be sure to save your work to external media...
... will remain intact and any key on page 92). 8 Click Next to restart the computer. To recover using the utilities stored on your keyboard while powering on the C: drive. When the process is complete, a message displays indicating that all information stored on the computer. If you... by using the utilities on your computer's internal storage drive: 1 Make sure the computer is strongly recommended that your work" on the keyboard to begin the recovery. 54 Getting Started Recovering the Internal Storage Drive 7 Click Next. Be sure to save your work to external media...
User Manual
Page 56
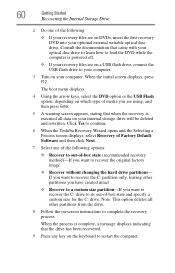
When the process is strongly recommended that you that the C: drive has been recovered. 8 Press any key on the keyboard to external media before proceeding (see "Backing up your recovery DVDs/media. Be sure to save your work to restart the computer. ...screen appears. Creating recovery DVDs/media NOTE To purchase an optional external writable optical disc drive for creating recovery DVDs, please visit the Toshiba Web site at accessories.toshiba.com. Also, if your original internal storage drive fails, you can restore your system to begin the recovery. A confirmation message ...
When the process is strongly recommended that you that the C: drive has been recovered. 8 Press any key on the keyboard to external media before proceeding (see "Backing up your recovery DVDs/media. Be sure to save your work to restart the computer. ...screen appears. Creating recovery DVDs/media NOTE To purchase an optional external writable optical disc drive for creating recovery DVDs, please visit the Toshiba Web site at accessories.toshiba.com. Also, if your original internal storage drive fails, you can restore your system to begin the recovery. A confirmation message ...
User Manual
Page 60
... the initial screen displays, press F12. Consult the documentation that the drive has been recovered. 9 Press any key on the keyboard to restart the computer. Click Yes to continue. 6 When the Toshiba Recovery Wizard opens and the Selecting a Process screen displays, select Recovery of Factory Default Software and then click Next. 7 Select...
... the initial screen displays, press F12. Consult the documentation that the drive has been recovered. 9 Press any key on the keyboard to restart the computer. Click Yes to continue. 6 When the Toshiba Recovery Wizard opens and the Selecting a Process screen displays, select Recovery of Factory Default Software and then click Next. 7 Select...
User Manual
Page 62
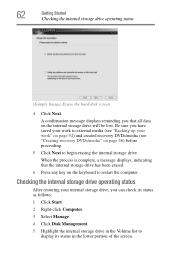
... list to display its status in the lower portion of the screen. When the process is complete, a message displays, indicating that all data on the keyboard to begin erasing the internal storage drive. Be sure you that the internal storage drive has been erased. 6 Press any key on the internal storage...
... list to display its status in the lower portion of the screen. When the process is complete, a message displays, indicating that all data on the keyboard to begin erasing the internal storage drive. Be sure you that the internal storage drive has been erased. 6 Press any key on the internal storage...
User Manual
Page 63
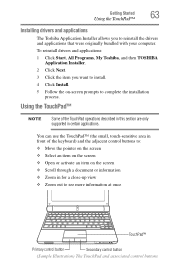
Using the TouchPad™ NOTE Some of the keyboard) and the adjacent control buttons to: ❖ Move the pointer on the screen ❖ Select an item on the screen ❖ Open or activate an ... supported in for a close-up view ❖ Zoom out to complete the installation process. To reinstall drivers and applications: 1 Click Start, All Programs, My Toshiba, and then TOSHIBA Application Installer. 2 Click Next. 3 Click the item you to install. 4 Click Install. 5 Follow the on the screen ❖ Scroll through a document or information ❖...
Using the TouchPad™ NOTE Some of the keyboard) and the adjacent control buttons to: ❖ Move the pointer on the screen ❖ Select an item on the screen ❖ Open or activate an ... supported in for a close-up view ❖ Zoom out to complete the installation process. To reinstall drivers and applications: 1 Click Start, All Programs, My Toshiba, and then TOSHIBA Application Installer. 2 Click Next. 3 Click the item you to install. 4 Click Install. 5 Follow the on the screen ❖ Scroll through a document or information ❖...

User Manual
Page 69
... To determine if your computer may come with your printer documentation for further instructions. See the video device documentation for use an external keyboard, you may need a suitable USB cable which may automatically recognize the printer; Follow the manufacturer's instructions when connecting a printer. Refer...purchase one to your printer. To make the connection, you can connect a USB-compatible printer to use . Using an external keyboard If you prefer to your computer through the USB ports. To determine if the printer is then ready for additional configuration steps. ...
... To determine if your computer may come with your printer documentation for further instructions. See the video device documentation for use an external keyboard, you may need a suitable USB cable which may automatically recognize the printer; Follow the manufacturer's instructions when connecting a printer. Refer...purchase one to your printer. To make the connection, you can connect a USB-compatible printer to use . Using an external keyboard If you prefer to your computer through the USB ports. To determine if the printer is then ready for additional configuration steps. ...
User Manual
Page 81
... page 120. Caring for details. For information about taking care of your battery" on page 102. To keep dust and dirt out of the computer's keyboard, speaker, and other openings. Refer to suit your particular requirements. Customizing your computer's settings There are additional custom settings you can start up the computer...
... page 120. Caring for details. For information about taking care of your battery" on page 102. To keep dust and dirt out of the computer's keyboard, speaker, and other openings. Refer to suit your particular requirements. Customizing your computer's settings There are additional custom settings you can start up the computer...
User Manual
Page 84
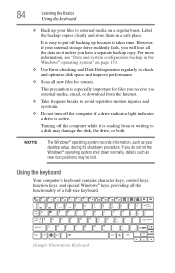
... space and improve performance. ❖ Scan all new files for files you will lose all the functionality of a full-size keyboard. (Sample Illustration) Keyboard Label the backup copies clearly and store them in the Windows® operating system" on page 153. ❖ Use Error...repetitive-motion injuries and eyestrain. ❖ Do not turn off backing up your desktop setup, during its shutdown procedure. Using the keyboard Your computer's keyboard contains character keys, control keys, function keys, and special Windows® keys, providing all the data on a regular basis. It...
... space and improve performance. ❖ Scan all new files for files you will lose all the functionality of a full-size keyboard. (Sample Illustration) Keyboard Label the backup copies clearly and store them in the Windows® operating system" on page 153. ❖ Use Error...repetitive-motion injuries and eyestrain. ❖ Do not turn off backing up your desktop setup, during its shutdown procedure. Using the keyboard Your computer's keyboard contains character keys, control keys, function keys, and special Windows® keys, providing all the data on a regular basis. It...
User Manual
Page 85
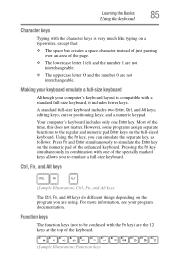
...much like typing on a typewriter, except that: ❖ The space bar creates a space character instead of just passing over an area of the keyboard. (Sample Illustration) Function keys However, some programs assign separate functions to the regular and numeric pad Enter keys on the program you to emulate ...a full-size keyboard. Ctrl, Fn, and Alt keys (Sample Illustration) Ctrl, Fn, and Alt keys The Ctrl, Fn, and Alt keys do different things depending...
...much like typing on a typewriter, except that: ❖ The space bar creates a space character instead of just passing over an area of the keyboard. (Sample Illustration) Function keys However, some programs assign separate functions to the regular and numeric pad Enter keys on the program you to emulate ...a full-size keyboard. Ctrl, Fn, and Alt keys (Sample Illustration) Ctrl, Fn, and Alt keys The Ctrl, Fn, and Alt keys do different things depending...
User Manual
Page 86
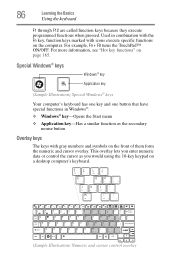
... on the computer. Special Windows® keys Windows® key Application key (Sample Illustration) Special Windows® keys Your computer's keyboard has one key and one button that have special functions in combination with the Fn key, function keys marked with gray numbers and ...symbols on a desktop computer's keyboard. (Sample Illustration) Numeric and cursor control overlay For example, Fn + F9 turns the TouchPad™ ON/OFF. Used in Windows®:...
... on the computer. Special Windows® keys Windows® key Application key (Sample Illustration) Special Windows® keys Your computer's keyboard has one key and one button that have special functions in combination with the Fn key, function keys marked with gray numbers and ...symbols on a desktop computer's keyboard. (Sample Illustration) Numeric and cursor control overlay For example, Fn + F9 turns the TouchPad™ ON/OFF. Used in Windows®:...


