

User Guide
Page 3
... all contact with care. Avoid pressing hard on the camcorder body. 5 For your own safety, avoid using . 3 Do not expose the camcorder to the following two conditions: (1) This device may affect the functionality of the camcorder. 8 Remove the battery if it in direct sunlight. Contact Address: TOSHIBA America Information Systems, Inc. 9740 Irvine Boulevard Irvine...
... all contact with care. Avoid pressing hard on the camcorder body. 5 For your own safety, avoid using . 3 Do not expose the camcorder to the following two conditions: (1) This device may affect the functionality of the camcorder. 8 Remove the battery if it in direct sunlight. Contact Address: TOSHIBA America Information Systems, Inc. 9740 Irvine Boulevard Irvine...
User Guide
Page 6
Contents Chapter 1: Getting to Know Your Camcorder 9 Overview 9 Check the Components 10 System Requirements 10 Front view 11 Rear view 11 Side views 12 Underside view 12 Chapter 2: Getting Started 13 Loading the battery 13 Charge your battery 14 Inserting and removing an SD™ Card (optional).....18 Turning the camcorder on and getting started .......19 Turning off the camcorder 19 Chapter 3: Record Mode 20 Button functions 20 LCD touch screen information 21 Menu options 22 Movie recording 24 6
Contents Chapter 1: Getting to Know Your Camcorder 9 Overview 9 Check the Components 10 System Requirements 10 Front view 11 Rear view 11 Side views 12 Underside view 12 Chapter 2: Getting Started 13 Loading the battery 13 Charge your battery 14 Inserting and removing an SD™ Card (optional).....18 Turning the camcorder on and getting started .......19 Turning off the camcorder 19 Chapter 3: Record Mode 20 Button functions 20 LCD touch screen information 21 Menu options 22 Movie recording 24 6
User Guide
Page 7
... Picture recording 25 Taking close up pictures/movies 25 Using the Flash or digital light function 26 Using zoom 26 Record menu options 27 Movie Record mode menu 27 Picture record mode menu 27 Record mode operations 27 Movie resolution 28 ... 4: Playback Mode 36 LCD touch screen information 37 Playback mode operations 39 Movie playback 40 Delete movies 41 Picture playback 42 Delete picture 43 Chapter 5: Camcorder Settings 44 Settings Menu 44 Sound 45 TV 45
... Picture recording 25 Taking close up pictures/movies 25 Using the Flash or digital light function 26 Using zoom 26 Record menu options 27 Movie Record mode menu 27 Picture record mode menu 27 Record mode operations 27 Movie resolution 28 ... 4: Playback Mode 36 LCD touch screen information 37 Playback mode operations 39 Movie playback 40 Delete movies 41 Picture playback 42 Delete picture 43 Chapter 5: Camcorder Settings 44 Settings Menu 44 Sound 45 TV 45

User Guide
Page 21
Record Mode 21 LCD touch screen information Mode button: 1 Switch between Movie mode and Picture mode. 2 When recording movies, press to activate the Pre-Record function and the movie will be recorded 3 seconds before the OK button is pressed. Pre-Record/YouTube™ Direct button: In Record mode, press to capture a still image. Power button: Press down for one second to turn the camcorder on the LCD touch screen when recording movies and/or taking pictures: (Sample Image) LCD touch screen icons LCD touch screen information The indicators shown below may appear on or off.
Record Mode 21 LCD touch screen information Mode button: 1 Switch between Movie mode and Picture mode. 2 When recording movies, press to activate the Pre-Record function and the movie will be recorded 3 seconds before the OK button is pressed. Pre-Record/YouTube™ Direct button: In Record mode, press to capture a still image. Power button: Press down for one second to turn the camcorder on the LCD touch screen when recording movies and/or taking pictures: (Sample Image) LCD touch screen icons LCD touch screen information The indicators shown below may appear on or off.
User Guide
Page 24
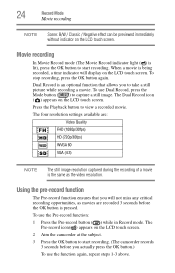
...OK button.) To use the function again, repeat steps 1-3 above. Movie recording In Movie Record mode (The Movie Record indicator light ( ) is pressed. The Dual Record icon ( ) appears on the LCD touch screen. Press the Playback button to start recording. (The camcorder records 3 seconds before the... OK button is lit), press the OK button to view a recorded movie. To stop recording, press the OK button again. To use the Pre-record function: 1 Press the Pre-record button ( ) while in...
...OK button.) To use the function again, repeat steps 1-3 above. Movie recording In Movie Record mode (The Movie Record indicator light ( ) is pressed. The Dual Record icon ( ) appears on the LCD touch screen. Press the Playback button to start recording. (The camcorder records 3 seconds before the... OK button is lit), press the OK button to view a recorded movie. To stop recording, press the OK button again. To use the Pre-record function: 1 Press the Pre-record button ( ) while in...
User Guide
Page 26
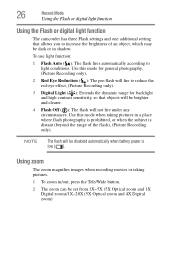
...The zoom magnifies images when recording movies or taking pictures in shadow. 26 Record Mode Using the Flash or digital light function Using the Flash or digital light function The camcorder has three Flash settings and one additional setting that objects will be brighter and clearer. 4 Flash Off ( ): ... Digital Light ( ): Extends the dynamic range for backlight and high contrast sensitivity, so that allows you to light conditions. To use light function: 1 Flash Auto ( ): The flash fires automatically according to increase the brightness of the flash), (Picture Recording only).
...The zoom magnifies images when recording movies or taking pictures in shadow. 26 Record Mode Using the Flash or digital light function Using the Flash or digital light function The camcorder has three Flash settings and one additional setting that objects will be brighter and clearer. 4 Flash Off ( ): ... Digital Light ( ): Extends the dynamic range for backlight and high contrast sensitivity, so that allows you to light conditions. To use light function: 1 Flash Auto ( ): The flash fires automatically according to increase the brightness of the flash), (Picture Recording only).


