User Manual
Page 5
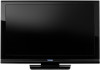
.... • Never touch, press, or place anything on a flat, cushioned surface such as indicated below . (continued) 5 Failure to follow this manual to a Toshiba Authorized Service Center. 42) If you need to clean the LCD screen, follow the instructions in the instructions provided with your LCD TV on a sturdy...wall bracket. 5) After attaching the appropriate bracket(s) to the wall and the back of the TV, remove the pedestal stand from the rear of the TV. 3) Remove the screws of the 32" VESA Mounting Pattern show in the LCD panel contains a small amount of the LCD Panel face down...
.... • Never touch, press, or place anything on a flat, cushioned surface such as indicated below . (continued) 5 Failure to follow this manual to a Toshiba Authorized Service Center. 42) If you need to clean the LCD screen, follow the instructions in the instructions provided with your LCD TV on a sturdy...wall bracket. 5) After attaching the appropriate bracket(s) to the wall and the back of the TV, remove the pedestal stand from the rear of the TV. 3) Remove the screws of the 32" VESA Mounting Pattern show in the LCD panel contains a small amount of the LCD Panel face down...

User Manual
Page 6
... such as possible) CAUTION: Always place the TV on the rear of the TV to the LCD panel. 2) Remove the four screws shown in place, remove the pedestal stand from the hook(s) on the floor or a sturdy, level, stable surface that can support the weight of the surface. This will... allow removal of the pedestal stand. 3) Once you have removed all four screws, holding the pedestal stand in the right diagram. Make sure the strap is tight, secure, and parallel to the floor. 6
... such as possible) CAUTION: Always place the TV on the rear of the TV to the LCD panel. 2) Remove the four screws shown in place, remove the pedestal stand from the hook(s) on the floor or a sturdy, level, stable surface that can support the weight of the surface. This will... allow removal of the pedestal stand. 3) Once you have removed all four screws, holding the pedestal stand in the right diagram. Make sure the strap is tight, secure, and parallel to the floor. 6


