User Guide
Page 1
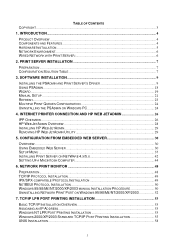
...INSTALLATION 49 NETBEUI PROTOCOL INSTALLATION 50 WINDOWS 95/98/ME/NT/2000/XP/2003 MANUAL INSTALLATION PROCEDURE 50 UNINSTALLING NETWORK PRINT PORT ON WINDOWS 95/98/ME/NT/2000/XP/2003 52 7. INTERNET PRINTER CONNECTION AND HP WEB JETADMIN 26 IPP OVERVIEW... INSTALLATION 53 BASIC TCP/IP INSTALLATION OVERVIEW 53 ASSIGNING AN IP ADDRESS...53 WINDOWS NT LPR PORT PRINTING INSTALLATION 53 WINDOWS 2000/XP/2003 STANDARD TCP/IP PORT PRINTING INSTALLATION 55 UNIX INSTALLATION ...58 1 INTRODUCTION...4 PRODUCT OVERVIEW ...4 COMPONENTS AND FEATURES ...4 HARDWARE INSTALLATION...5 NETWORK ENVIRONMENT...6...
...INSTALLATION 49 NETBEUI PROTOCOL INSTALLATION 50 WINDOWS 95/98/ME/NT/2000/XP/2003 MANUAL INSTALLATION PROCEDURE 50 UNINSTALLING NETWORK PRINT PORT ON WINDOWS 95/98/ME/NT/2000/XP/2003 52 7. INTERNET PRINTER CONNECTION AND HP WEB JETADMIN 26 IPP OVERVIEW... INSTALLATION 53 BASIC TCP/IP INSTALLATION OVERVIEW 53 ASSIGNING AN IP ADDRESS...53 WINDOWS NT LPR PORT PRINTING INSTALLATION 53 WINDOWS 2000/XP/2003 STANDARD TCP/IP PORT PRINTING INSTALLATION 55 UNIX INSTALLATION ...58 1 INTRODUCTION...4 PRODUCT OVERVIEW ...4 COMPONENTS AND FEATURES ...4 HARDWARE INSTALLATION...5 NETWORK ENVIRONMENT...6...
User Guide
Page 2
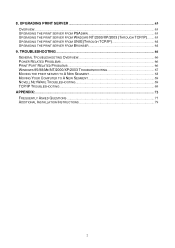
TROUBLESHOOTING ...66 GENERAL TROUBLESHOOTING OVERVIEW 66 POWER RELATED PROBLEMS...66 PRINT PORT RELATED PROBLEMS 66 WINDOWS 95/98/ME/NT/2000/XP/2003 TROUBLESHOOTING 67 MOVING THE PRINT SERVER TO A NEW SEGMENT 68 MOVING YOUR COMPUTER TO A ...
TROUBLESHOOTING ...66 GENERAL TROUBLESHOOTING OVERVIEW 66 POWER RELATED PROBLEMS...66 PRINT PORT RELATED PROBLEMS 66 WINDOWS 95/98/ME/NT/2000/XP/2003 TROUBLESHOOTING 67 MOVING THE PRINT SERVER TO A NEW SEGMENT 68 MOVING YOUR COMPUTER TO A ...
User Guide
Page 4
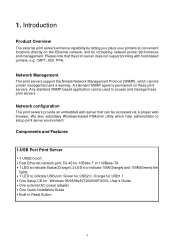
... agent is permanent on the Ethernet network, and by increasing network printer performance and management. Components and Features 1-USB Port Print Server ․1 USB2.0 port ․Fast Ethernet network port: RJ-45 for Windows 95/98/Me/NT/2000/XP/2003, User's Guide ․One external AC power adapter... Setup CD for 10Base-T or 100Base-TX ․1 LED to indicate Status(Orange), 2 LED's to indicate 10M(Orange) and 100M(Green) link lights ․1 LED to setup print server environment. Network configuration The print servers provide an embedded web server that the print server does not...
... agent is permanent on the Ethernet network, and by increasing network printer performance and management. Components and Features 1-USB Port Print Server ․1 USB2.0 port ․Fast Ethernet network port: RJ-45 for Windows 95/98/Me/NT/2000/XP/2003, User's Guide ․One external AC power adapter... Setup CD for 10Base-T or 100Base-TX ․1 LED to indicate Status(Orange), 2 LED's to indicate 10M(Orange) and 100M(Green) link lights ․1 LED to setup print server environment. Network configuration The print servers provide an embedded web server that the print server does not...

User Guide
Page 5
...for POST When power switched on, the Status indicator will flash five (Orange) times, and then on. 100Mbps On (Green) 10Mbps On (Orange) LAN Port has a valid network connection at 10Mbps. Turn off the printer's power. 2. Plug the AC power adapter into the power connector on . 4. Wait ...10 seconds until all the LEDs have stopped flashing. LAN Port has a valid network connection at 100Mbps. Connect the print server to your printer USB port works well. ․Connect the print server to the print server: 1. Follow these steps: ․...
...for POST When power switched on, the Status indicator will flash five (Orange) times, and then on. 100Mbps On (Green) 10Mbps On (Orange) LAN Port has a valid network connection at 10Mbps. Turn off the printer's power. 2. Plug the AC power adapter into the power connector on . 4. Wait ...10 seconds until all the LEDs have stopped flashing. LAN Port has a valid network connection at 100Mbps. Connect the print server to your printer USB port works well. ․Connect the print server to the print server: 1. Follow these steps: ․...

User Guide
Page 15
Then click Next. 15 Then click Next. 11. Select Manufacturer and Printer from the pull-down list. Make sure the Use the following port radio-button is clicked and select LPT1: (recommended Printer Port) from the lists of printer's driver. 10.
Then click Next. 15 Then click Next. 11. Select Manufacturer and Printer from the pull-down list. Make sure the Use the following port radio-button is clicked and select LPT1: (recommended Printer Port) from the lists of printer's driver. 10.

User Guide
Page 17
Right-click, select Properties -> Ports and verify that the print server's port appears. 17 16.
Right-click, select Properties -> Ports and verify that the print server's port appears. 17 16.

User Guide
Page 20
... gateway. 6 When done, click OK button. Type in a Print Queue Names. Click OK. 7. From your LAN or network segment is connected (redirected) to each print port of the NetWare print queues serviced by the print server. 20 Click Wizard button just like a picture < picture. >.and select NetWare Wizard, as...
... gateway. 6 When done, click OK button. Type in a Print Queue Names. Click OK. 7. From your LAN or network segment is connected (redirected) to each print port of the NetWare print queues serviced by the print server. 20 Click Wizard button just like a picture < picture. >.and select NetWare Wizard, as...

User Guide
Page 27
Then Click OK. 8. Select the appropriate printer manufacturer and printer type and click "Next", appear as follow picture. 27 6.In URL's box, input print server's IP address, for example, http://192.168.10.182/lp1. Then Click Next. ** One port should be the port name as lp1. 7.It will check print server to connect to HP printer, if not, it will appear as follow picture.
Then Click OK. 8. Select the appropriate printer manufacturer and printer type and click "Next", appear as follow picture. 27 6.In URL's box, input print server's IP address, for example, http://192.168.10.182/lp1. Then Click Next. ** One port should be the port name as lp1. 7.It will check print server to connect to HP printer, if not, it will appear as follow picture.

User Guide
Page 29
... to it with your browser, navigate to install the HP Web JetAdmin software. For example: http://server.domain:port/ Follow the instructions on the screen to HP Web JetAdmin's URL. Note: Installation instructions are also contained in... software from HP Customer Care Online at http://www.hp.com/go/webjetadmin/. For example: http://server.domain:port/ Configuring and Modifying a Device Using your browser as shown in the HP Web JetAdmin install file. Note:...Installation and Supply Access ․Confirming that is correctly installed by adding a link to HP Web JetAdmin's URL.
... to it with your browser, navigate to install the HP Web JetAdmin software. For example: http://server.domain:port/ Follow the instructions on the screen to HP Web JetAdmin's URL. Note: Installation instructions are also contained in... software from HP Customer Care Online at http://www.hp.com/go/webjetadmin/. For example: http://server.domain:port/ Configuring and Modifying a Device Using your browser as shown in the HP Web JetAdmin install file. Note:...Installation and Supply Access ․Confirming that is correctly installed by adding a link to HP Web JetAdmin's URL.

User Guide
Page 35
... the print server. AppleTalk Settings: If no any zone exists, the print server itself displays the zone name as shown in the following picture. 35 Port Name: -xxxxxx-1, where xxxxxx represents the last six digits of the print server in the web browser. If you are using a PostScript printer you can...
... the print server. AppleTalk Settings: If no any zone exists, the print server itself displays the zone name as shown in the following picture. 35 Port Name: -xxxxxx-1, where xxxxxx represents the last six digits of the print server in the web browser. If you are using a PostScript printer you can...

User Guide
Page 43
...set on the network. The basic configuration is for identification purpose or just leave it in default (This enables the print server automatically search and link itself to the default zone that is as shown as shown in the following picture. 3.Zone Name: In this option, type an AppleTalk ...exists, the print server itself displays the zone name as an asterisk (*) in the current AppleTalk Status of the print server in the web browser. 4.Port Name: In this option, type a name for the print server in an AppleTalk environment is performed simply by opening the Chooser window and selecting a...
...set on the network. The basic configuration is for identification purpose or just leave it in default (This enables the print server automatically search and link itself to the default zone that is as shown as shown in the following picture. 3.Zone Name: In this option, type an AppleTalk ...exists, the print server itself displays the zone name as an asterisk (*) in the current AppleTalk Status of the print server in the web browser. 4.Port Name: In this option, type a name for the print server in an AppleTalk environment is performed simply by opening the Chooser window and selecting a...

User Guide
Page 47
Windows uses it to print server on the Network. 4. Workgroup Name: This option allows you to assign a name to print server's port. 47 The print server supports the SMB (Server Message Block) protocol, user can send the print jobs through Network Neighborhood without installing print server's driver. 1. Click Setup, it as shown in the following picture. 3. Click SMB, it appears the sub-menu. 2. Shared Name: This option allows you to assign a workgroup name to identify the print server on the Network Neighborhood.
Windows uses it to print server on the Network. 4. Workgroup Name: This option allows you to assign a name to print server's port. 47 The print server supports the SMB (Server Message Block) protocol, user can send the print jobs through Network Neighborhood without installing print server's driver. 1. Click Setup, it as shown in the following picture. 3. Click SMB, it appears the sub-menu. 2. Shared Name: This option allows you to assign a workgroup name to identify the print server on the Network Neighborhood.
User Guide
Page 50
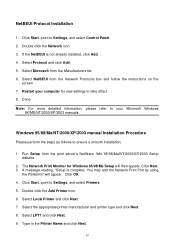
Restart your Microsoft Windows 9X/ME/NT/2000/XP/2003 manuals. You may add the Network Print Port by using the PSAdmin" will then appear. Click Start, point to take effect. 8. Select LPT1 and click Next. 9. Done. The Network Print Monitor for new ...
Restart your Microsoft Windows 9X/ME/NT/2000/XP/2003 manuals. You may add the Network Print Port by using the PSAdmin" will then appear. Click Start, point to take effect. 8. Select LPT1 and click Next. 9. Done. The Network Print Monitor for new ...
User Guide
Page 51
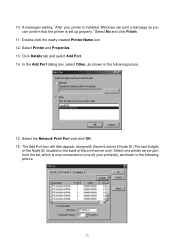
...(s), as shown in the following picture. 15. Click Details tab and select Add Port. 14. 10. Select one printer server port from the list, which is set up properly." Select Printer and Properties. 13. In the Add Port dialog box, select Other, as shown in the following picture. 51 Select the... Network Print Port and click OK. 16. The Add Port box will then appear, along with the print server's Node ID (The last 6...
...(s), as shown in the following picture. 15. Click Details tab and select Add Port. 14. 10. Select one printer server port from the list, which is set up properly." Select Printer and Properties. 13. In the Add Port dialog box, select Other, as shown in the following picture. 51 Select the... Network Print Port and click OK. 16. The Add Port box will then appear, along with the print server's Node ID (The last 6...
User Guide
Page 52
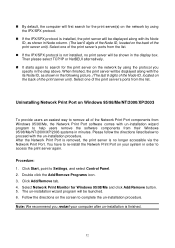
... on your computer after un-installation is finished. 52 You have to re-install the Network Print Port on the screen to help users remove the software components from their Windows 95/98/Me/NT/2000... picture. (The last 6 digits of the Node ID, located on the back of the print server's ports from the list. Select one of the print server unit). Then please select TCP/IP or NetBEUI alternatively...of the print server unit). When finished, the print server will be launched. 6. Uninstalling Network Print Port on Windows 95/98/Me/NT/2000/XP/2003 To provide users an easiest way to search for...
... on your computer after un-installation is finished. 52 You have to re-install the Network Print Port on the screen to help users remove the software components from their Windows 95/98/Me/NT/2000... picture. (The last 6 digits of the Node ID, located on the back of the print server's ports from the list. Select one of the print server unit). Then please select TCP/IP or NetBEUI alternatively...of the print server unit). When finished, the print server will be launched. 6. Uninstalling Network Print Port on Windows 95/98/Me/NT/2000/XP/2003 To provide users an easiest way to search for...
User Guide
Page 53
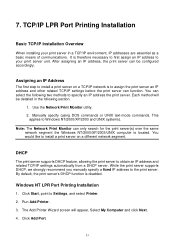
Use the Network Print Monitor utility. 2. Windows NT LPR Port Printing Installation 1. Click Add Port. 53 After assigning an IP address, the print server can only search for the print server(s) over the same network segment the Windows NT/2000/... following two methods to Windows NT/2000/XP/2003 and UNIX systems). Manually specify (using DOS commands or UNIX text-mode commands. TCP/IP LPR Port Printing Installation Basic TCP/IP Installation Overview When installing your print server unit.
Use the Network Print Monitor utility. 2. Windows NT LPR Port Printing Installation 1. Click Add Port. 53 After assigning an IP address, the print server can only search for the print server(s) over the same network segment the Windows NT/2000/... following two methods to Windows NT/2000/XP/2003 and UNIX systems). Manually specify (using DOS commands or UNIX text-mode commands. TCP/IP LPR Port Printing Installation Basic TCP/IP Installation Overview When installing your print server unit.
User Guide
Page 54
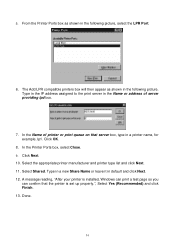
... of printer or print queue on that the printer is set up properly.", Select Yes (Recommended) and click Finish. 13. Done. 54 In the Printer Ports box, select Close. 9. Select the appropriate printer manufacturer and printer type list and click Next. 11. Type in a new Share Name or leave it... the Name of server providing lpd box. 7. The Add LPR compatible printers box will then appear as shown in the following picture, select the LPR Port. 6. A message reading, "After your printer is installed, Windows can print a test page so you can confirm that server box, type in default and click...
... of printer or print queue on that the printer is set up properly.", Select Yes (Recommended) and click Finish. 13. Done. 54 In the Printer Ports box, select Close. 9. Select the appropriate printer manufacturer and printer type list and click Next. 11. Type in a new Share Name or leave it... the Name of server providing lpd box. 7. The Add LPR compatible printers box will then appear as shown in the following picture, select the LPR Port. 6. A message reading, "After your printer is installed, Windows can print a test page so you can confirm that server box, type in default and click...
User Guide
Page 55
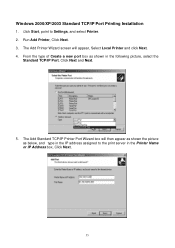
The Add Printer Wizard screen will then appear as shown the picture as shown in the following picture, select the Standard TCP/IP Port, Click Next and Next. 5. Windows 2000/XP/2003 Standard TCP/IP Port Printing Installation 1. Run Add Printer, Click Next. 3. From the type of Create a new port box as below, and type in the Printer Name or IP Address box, Click Next. 55 The Add Standard TCP/IP Printer Port Wizard box will appear, Select Local Printer and click Next. 4. Click Start, point to the print server in the IP address assigned to Settings, and select Printer. 2.
The Add Printer Wizard screen will then appear as shown the picture as shown in the following picture, select the Standard TCP/IP Port, Click Next and Next. 5. Windows 2000/XP/2003 Standard TCP/IP Port Printing Installation 1. Run Add Printer, Click Next. 3. From the type of Create a new port box as below, and type in the Printer Name or IP Address box, Click Next. 55 The Add Standard TCP/IP Printer Port Wizard box will appear, Select Local Printer and click Next. 4. Click Start, point to the print server in the IP address assigned to Settings, and select Printer. 2.

User Guide
Page 56
In the Add Standard TCP/IP Printer Port Wizard box as shown in the following picture, Select Custom, Click Settings button, and click Next. 7. Click OK, and Next. Click Finish. 56 6. Note: Please DO NOT type any other name than lp1 in the following picture, select LPR form Protocol, type in a queue name, for example, lp1. 8. In the Configure Standard TCP/IP Port Monitor box as shown in this step. 9.
In the Add Standard TCP/IP Printer Port Wizard box as shown in the following picture, Select Custom, Click Settings button, and click Next. 7. Click OK, and Next. Click Finish. 56 6. Note: Please DO NOT type any other name than lp1 in the following picture, select LPR form Protocol, type in a queue name, for example, lp1. 8. In the Configure Standard TCP/IP Port Monitor box as shown in this step. 9.

User Guide
Page 58
...example: Test. Input "enable a1". 58 Remote Printer: lp1 or lp2 or lp3. (fixed) If the printer connected to the second print server port, please choose lp2. For example: the print server has a static IP address: 192.168.1.100 2. lp1 for the "remote printing system". Select ..."SCO Admin". 2. If the printer connected to the first print server port, please choose lp1. Printer Connection Type: Choose "On Remote Server". Protocol Type: Choose "lpd (BSD)". Input "accept a1". 5. Name: Input a name...
...example: Test. Input "enable a1". 58 Remote Printer: lp1 or lp2 or lp3. (fixed) If the printer connected to the second print server port, please choose lp2. For example: the print server has a static IP address: 192.168.1.100 2. lp1 for the "remote printing system". Select ..."SCO Admin". 2. If the printer connected to the first print server port, please choose lp1. Printer Connection Type: Choose "On Remote Server". Protocol Type: Choose "lpd (BSD)". Input "accept a1". 5. Name: Input a name...