
Operating Instructions
Page 6
...the power with a mild detergent solution. The powered tilt adjuster of this unit automatically extends when the power is turned on the LCD data projector. Use a cover over fluorescent lamps to avoid lowering the contrast ratio. • Cover any windows that the operating voltage of ...the floor and walls are not of 6 Precautions light-reflecting material. On preventing internal heat buildup After you turn off . On LCD data projector • The LCD data projector is completed. • Do not spread a cloth or paper under the unit. This is a normal result of reflecting material, ...
...the power with a mild detergent solution. The powered tilt adjuster of this unit automatically extends when the power is turned on the LCD data projector. Use a cover over fluorescent lamps to avoid lowering the contrast ratio. • Cover any windows that the operating voltage of ...the floor and walls are not of 6 Precautions light-reflecting material. On preventing internal heat buildup After you turn off . On LCD data projector • The LCD data projector is completed. • Do not spread a cloth or paper under the unit. This is a normal result of reflecting material, ...

Operating Instructions
Page 23
... into standby mode. 2 Press the I / 1 key. The ON/STANDBY indicator lights in red and the projector goes into a wall outlet, then connect all -inone LCD type, you may have to switch the computer to output to the projector. Projecting 23 The ON/STANDBY indicator lights in green and the Intelligent Auto-setup starts...the previously adjusted position. 3 Turn on the type of your computer, for example a notebook, or an all equipment. Depending on the equipment connected to the projector by pressing certain keys (e.g., LCD / VGA , / , etc.), or by changing your computer's settings.
... into standby mode. 2 Press the I / 1 key. The ON/STANDBY indicator lights in red and the projector goes into a wall outlet, then connect all -inone LCD type, you may have to switch the computer to output to the projector. Projecting 23 The ON/STANDBY indicator lights in green and the Intelligent Auto-setup starts...the previously adjusted position. 3 Turn on the type of your computer, for example a notebook, or an all equipment. Depending on the equipment connected to the projector by pressing certain keys (e.g., LCD / VGA , / , etc.), or by changing your computer's settings.

Operating Instructions
Page 34
...) INPUT SETTING SIGNAL SETTING Input A Dot Phase: H Size: Shift: 24 1504 H: 181 V: 34 Dot Phase Adjusts the dot phase of the LCD panel and the signal output from a connector. When you can also adjust the preset data through the INPUT SETTING menu. The higher the setting, the...first time, a memory number is adjusted by pressing the APA key. Adjust Signal... For details on selecting the wide mode Note that if the projector is input, this item will be displayed. H adjusts the horizontal position of the picture.V adjusts the vertical position of the input signal. As...
...) INPUT SETTING SIGNAL SETTING Input A Dot Phase: H Size: Shift: 24 1504 H: 181 V: 34 Dot Phase Adjusts the dot phase of the LCD panel and the signal output from a connector. When you can also adjust the preset data through the INPUT SETTING menu. The higher the setting, the...first time, a memory number is adjusted by pressing the APA key. Adjust Signal... For details on selecting the wide mode Note that if the projector is input, this item will be displayed. H adjusts the horizontal position of the picture.V adjusts the vertical position of the input signal. As...
Operating Instructions
Page 42
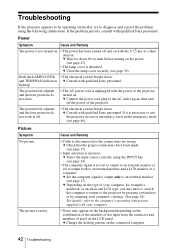
...Sony personnel. Picture Symptom No picture. Cause and Remedy • Cable is not set to output to an external monitor or set to output both to an external monitor and a LCD monitor of a computer. c Select the input source correctly using the following instructions. Troubleshooting If the projector ... 17). • Input selection is not turned on. • The power has been turned off the power of the projector. If the problem persists, consult with qualified Sony personnel. Power Symptom Cause and Remedy The power is incorrect. c Wait for example a notebook, or an all . ...
...Sony personnel. Picture Symptom No picture. Cause and Remedy • Cable is not set to output to an external monitor or set to output both to an external monitor and a LCD monitor of a computer. c Select the input source correctly using the following instructions. Troubleshooting If the projector ... 17). • Input selection is not turned on. • The power has been turned off the power of the projector. If the problem persists, consult with qualified Sony personnel. Power Symptom Cause and Remedy The power is incorrect. c Wait for example a notebook, or an all . ...
Operating Instructions
Page 47
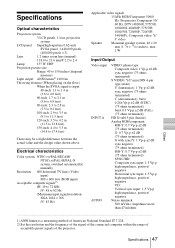
...Optical characteristics Projection system 3 LCD panels, 1 lens, projection system LCD panel Superhigh-aperture 0.62-inch.../ negative VD: Vertical sync input: 1-5 Vp-p high impedance, positive/ negative Stereo minijack 500 mVrms, impedance more than 47 kilohms ... 1) ANSI lumen is input: 40-inch: 1.1 to 1.4 m (3.6 to 4.6 feet) 60-inch: 1.7 to 2.1 m (5.6 to 6.9 feet) 80-...13.8 feet) 150-inch: 4.4 to 5.3 m (14.4 to 150 inches (diagonal measure) Light output ANSI lumen1) 1200 lm Throwing distance (When placing on the floor) When the SVGA signal is a measuring method of American ...
...Optical characteristics Projection system 3 LCD panels, 1 lens, projection system LCD panel Superhigh-aperture 0.62-inch.../ negative VD: Vertical sync input: 1-5 Vp-p high impedance, positive/ negative Stereo minijack 500 mVrms, impedance more than 47 kilohms ... 1) ANSI lumen is input: 40-inch: 1.1 to 1.4 m (3.6 to 4.6 feet) 60-inch: 1.7 to 2.1 m (5.6 to 6.9 feet) 80-...13.8 feet) 150-inch: 4.4 to 5.3 m (14.4 to 150 inches (diagonal measure) Light output ANSI lumen1) 1200 lm Throwing distance (When placing on the floor) When the SVGA signal is a measuring method of American ...


