
User Manual
Page 2
... Buttons 40 Using the Quick Web Access Function 41 Using the Built-in Camera 43 Using the Optical Disc Drive 44 Using "Memory Stick 51 Using Other Modules / Memory Cards 58 Using the Internet 66 Using the Network (LAN 67 Using the Wireless LAN 68 Using the Bluetooth Function 74 Using Peripheral Devices 80 Connecting External Speakers or Headphones ..........81 Connecting an External Display 82 Selecting Display Modes 87 Using the Multiple Monitors Function 88 Connecting an External Microphone 90 Connecting a USB Device 91 Customizing Your VAIO Computer 93 Setting the Password...
... Buttons 40 Using the Quick Web Access Function 41 Using the Built-in Camera 43 Using the Optical Disc Drive 44 Using "Memory Stick 51 Using Other Modules / Memory Cards 58 Using the Internet 66 Using the Network (LAN 67 Using the Wireless LAN 68 Using the Bluetooth Function 74 Using Peripheral Devices 80 Connecting External Speakers or Headphones ..........81 Connecting an External Display 82 Selecting Display Modes 87 Using the Multiple Monitors Function 88 Connecting an External Microphone 90 Connecting a USB Device 91 Customizing Your VAIO Computer 93 Setting the Password...

User Manual
Page 5
n5 N Printed Documentation ❑ Quick Start Guide - An overview of components connection, set-up information, etc. ❑ Recovery, Backup and Troubleshooting Guide ❑ Safety Information - Safety guidelines and owner information. ✍ Before activating the wireless functions such as the wireless LAN and Bluetooth technology, read the Safety Information carefully. Before Use > Finding More about Your VAIO Computer Finding More about Your VAIO Computer This section provides support information about your VAIO computer. 1.
n5 N Printed Documentation ❑ Quick Start Guide - An overview of components connection, set-up information, etc. ❑ Recovery, Backup and Troubleshooting Guide ❑ Safety Information - Safety guidelines and owner information. ✍ Before activating the wireless functions such as the wireless LAN and Bluetooth technology, read the Safety Information carefully. Before Use > Finding More about Your VAIO Computer Finding More about Your VAIO Computer This section provides support information about your VAIO computer. 1.
User Manual
Page 9
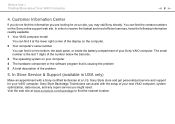
... model You can find it on the bottom, the back panel, or inside the battery compartment of the problem 5. The serial number is causing the problem 5 A brief description of your new VAIO computer, system optimization, data rescue, and any repair service you might need. Sony Style Backstage Technicians can find it at the lower right corner of the display on the computer. 2 Your computer's serial number...
... model You can find it on the bottom, the back panel, or inside the battery compartment of the problem 5. The serial number is causing the problem 5 A brief description of your new VAIO computer, system optimization, data rescue, and any repair service you might need. Sony Style Backstage Technicians can find it at the lower right corner of the display on the computer. 2 Your computer's serial number...

User Manual
Page 17
... ports. - When disconnecting an eSATA device, click the Safely Remove Hardware and Eject Media icon on using the eSATA/USB port: - Notes on the taskbar and select the device before removal. - In this case, use one of the device. Getting Started > Locating Controls and Ports Left n 17 N A DC IN port (page 20) B Network (LAN) port (page 67) C Air vent D Monitor port (page 82) E HDMI output port (page 85) F eSATA/USB port* Connect an external device compliant with the USB 2.0 standard and supports...
... ports. - When disconnecting an eSATA device, click the Safely Remove Hardware and Eject Media icon on using the eSATA/USB port: - Notes on the taskbar and select the device before removal. - In this case, use one of the device. Getting Started > Locating Controls and Ports Left n 17 N A DC IN port (page 20) B Network (LAN) port (page 67) C Air vent D Monitor port (page 82) E HDMI output port (page 85) F eSATA/USB port* Connect an external device compliant with the USB 2.0 standard and supports...

User Manual
Page 19
... indicator light is lit.) When the indicator light is unlit, the memory card is in lowercase if you are enabled. The Scr Lk key functions differently depending on the program you press the Shift key while the indicator light is in progress. See Charging the Battery Pack (page 25) for more wireless options are using and does not work with the following indicator lights: Indicator Power 1 Charge Built-in MOTION EYE camera Media Access Disc drive Num lock Caps lock Scroll lock WIRELESS Functions...
... indicator light is lit.) When the indicator light is unlit, the memory card is in lowercase if you are enabled. The Scr Lk key functions differently depending on the program you press the Shift key while the indicator light is in progress. See Charging the Battery Pack (page 25) for more wireless options are using and does not work with the following indicator lights: Indicator Power 1 Charge Built-in MOTION EYE camera Media Access Disc drive Num lock Caps lock Scroll lock WIRELESS Functions...

User Manual
Page 61
... 1 to 4 when: - the hardware you want to block any particles from entering the slot when not using an ExpressCard module. Insert the ExpressCard slot protector to unplug. 4 Follow the on the taskbar. - the Safely Remove Hardware and Eject Media icon is not displayed on -screen instructions for removing the ExpressCard module. 5 Push in the Safely Remove Hardware and Eject Media window. 1 Locate the ExpressCard slot. 2 Click the Safely Remove Hardware and Eject Media icon on the...
... 1 to 4 when: - the hardware you want to block any particles from entering the slot when not using an ExpressCard module. Insert the ExpressCard slot protector to unplug. 4 Follow the on the taskbar. - the Safely Remove Hardware and Eject Media icon is not displayed on -screen instructions for removing the ExpressCard module. 5 Push in the Safely Remove Hardware and Eject Media window. 1 Locate the ExpressCard slot. 2 Click the Safely Remove Hardware and Eject Media icon on the...
User Manual
Page 94
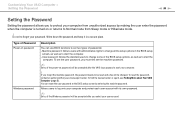
To reset the password, contact an authorized Sony service/support center. Type of Password Power-on password Windows password Description You can reset the user password at the BIOS setup screen by making the user enter the password when the computer is turned on password will be prompted after the VAIO logo appears to start your computer from Sleep mode or Hibernate mode. ! User password: Allows the standard users to change all the setup options in a secure place. If you forget the machine password, the password needs to...
To reset the password, contact an authorized Sony service/support center. Type of Password Power-on password Windows password Description You can reset the user password at the BIOS setup screen by making the user enter the password when the computer is turned on password will be prompted after the VAIO logo appears to start your computer from Sleep mode or Hibernate mode. ! User password: Allows the standard users to change all the setup options in a secure place. If you forget the machine password, the password needs to...
User Manual
Page 103
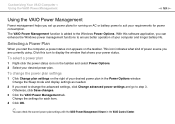
... can enhance the Windows power management functions to ensure better operation of power source you start the computer, a power status icon appears on AC or battery power to the Windows Power Options. With this icon to step 3. Change the Sleep mode and display settings as needed. 2 If you can check the current power plan settings with the VAIO Power Management Viewer in the Power Options window. This icon indicates what kind of your power status. The VAIO Power Management function is added to...
... can enhance the Windows power management functions to ensure better operation of power source you start the computer, a power status icon appears on AC or battery power to the Windows Power Options. With this icon to step 3. Change the Sleep mode and display settings as needed. 2 If you can check the current power plan settings with the VAIO Power Management Viewer in the Power Options window. This icon indicates what kind of your power status. The VAIO Power Management function is added to...
User Manual
Page 104
... the specifications to install a new memory module. ❑ You should not install it yourself, if you purchased. For assistance, contact an authorized Sony service/support center. Upgrading Your VAIO Computer > n 104 N Upgrading Your VAIO Computer Your VAIO computer and memory modules use high precision components and electronic connectors technology. To avoid invalidation of memory installed on a computer. ❑ You should contact your computer may differ depending on the model you...
... the specifications to install a new memory module. ❑ You should not install it yourself, if you purchased. For assistance, contact an authorized Sony service/support center. Upgrading Your VAIO Computer > n 104 N Upgrading Your VAIO Computer Your VAIO computer and memory modules use high precision components and electronic connectors technology. To avoid invalidation of memory installed on a computer. ❑ You should contact your computer may differ depending on the model you...
User Manual
Page 130
...; If the problem persists, it means the installed battery pack is changed before the computer completely enters Sleep or Hibernate mode. Turning off . ! Then reinstall the battery pack to the computer. To solve this procedure does not work, press and hold the power button until the computer turns off your computer and remove the battery pack. Remove the battery pack and contact an authorized Sony service/support center. Troubleshooting > Computer Operations n 130...
...; If the problem persists, it means the installed battery pack is changed before the computer completely enters Sleep or Hibernate mode. Turning off . ! Then reinstall the battery pack to the computer. To solve this procedure does not work, press and hold the power button until the computer turns off your computer and remove the battery pack. Remove the battery pack and contact an authorized Sony service/support center. Troubleshooting > Computer Operations n 130...

User Manual
Page 140
... VAIO Smart Network settings window. Wireless LAN communication (IEEE 802.11a standard) using the 5 GHz band, make sure the option to a wireless LAN access point? ❑ Connection capability is affected by default. ❑ Follow these steps to check the settings: 1 Click Start and Control Panel. 2 Click View network status and tasks under Network and Internet. 3 Click Connect to a network to confirm that your computer to a wireless LAN access point using only the 5 GHz band, available on selected models...
... VAIO Smart Network settings window. Wireless LAN communication (IEEE 802.11a standard) using the 5 GHz band, make sure the option to a wireless LAN access point? ❑ Connection capability is affected by default. ❑ Follow these steps to check the settings: 1 Click Start and Control Panel. 2 Click View network status and tasks under Network and Internet. 3 Click Connect to a network to confirm that your computer to a wireless LAN access point using only the 5 GHz band, available on selected models...

User Manual
Page 147
... Bluetooth icon in the VAIO Smart Network window. ❑ If the SmartWi Connection Utility is installed on your computer, make sure that the switch next to Bluetooth is set to ON in the SmartWi Connection Utility window. ❑ To display the Bluetooth icon on the taskbar, follow these steps: ✍ Some VAIO models detect support of the SCMS-T settings. What should I do if I do not hear sound from my headphones or audio/video controller...
... Bluetooth icon in the VAIO Smart Network window. ❑ If the SmartWi Connection Utility is installed on your computer, make sure that the switch next to Bluetooth is set to ON in the SmartWi Connection Utility window. ❑ To display the Bluetooth icon on the taskbar, follow these steps: ✍ Some VAIO models detect support of the SCMS-T settings. What should I do if I do not hear sound from my headphones or audio/video controller...

User Manual
Page 150
... to malfunction. ❑ If a region code warning appears, the disc may need to enable the device or reinstall the driver software. 5 Double-click the optical disc drive device to malfunction. ❑ Make sure your computer is in the left pane. The Device Manager window appears with the optical disc drive. Troubleshooting > Optical Discs n 150 N ❑ Make sure the correct driver software is compatible with the optical disc drive. ❑ If you may be...
... to malfunction. ❑ If a region code warning appears, the disc may need to enable the device or reinstall the driver software. 5 Double-click the optical disc drive device to malfunction. ❑ Make sure your computer is in the left pane. The Device Manager window appears with the optical disc drive. Troubleshooting > Optical Discs n 150 N ❑ Make sure the correct driver software is compatible with the optical disc drive. ❑ If you may be...
User Manual
Page 157
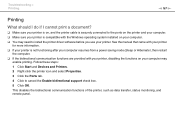
... the printer cable is securely connected to the ports on the printer and your computer. ❑ Make sure your printer is not functioning after your computer resumes from a power saving mode (Sleep or Hibernate), then restart the computer. ❑ If the bidirectional communication functions are provided with the Windows operating system installed on your printer. Follow these steps: 1 Click Start and Devices and Printers...
... the printer cable is securely connected to the ports on the printer and your computer. ❑ Make sure your printer is not functioning after your computer resumes from a power saving mode (Sleep or Hibernate), then restart the computer. ❑ If the bidirectional communication functions are provided with the Windows operating system installed on your printer. Follow these steps: 1 Click Start and Devices and Printers...

User Manual
Page 161
... Enter key, select Restart with the Ctrl+Alt+Delete keys or the power button may have disabled the touch pad before connecting a mouse to your computer. ❑ If this procedure does not work, press and hold the power button until the computer turns off your computer with the M or m key, and press the Enter key to close the application window. ❑ If the Alt+F4 keys do if the touch pad...
... Enter key, select Restart with the Ctrl+Alt+Delete keys or the power button may have disabled the touch pad before connecting a mouse to your computer. ❑ If this procedure does not work, press and hold the power button until the computer turns off your computer with the M or m key, and press the Enter key to close the application window. ❑ If the Alt+F4 keys do if the touch pad...

User Manual
Page 164
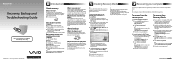
... a port, such as the USB port, HDMI output port, optical output port, or headphones jack, you need to cancel the Play Windows Startup sound check box. 5 Click OK. Troubleshooting > Audio/Video n 164 N Audio/Video How do I change the device for sound output. 1 Close all open programs. 2 Click Start and Control Panel. 3 Click Hardware and Sound. 4 Click Manage audio devices under Sound. 5 On the Playback tab, select your desired device for sound output and click Set Default. How do I turn off the Windows startup sound? To turn off the Windows startup sound...
... a port, such as the USB port, HDMI output port, optical output port, or headphones jack, you need to cancel the Play Windows Startup sound check box. 5 Click OK. Troubleshooting > Audio/Video n 164 N Audio/Video How do I change the device for sound output. 1 Close all open programs. 2 Click Start and Control Panel. 3 Click Hardware and Sound. 4 Click Manage audio devices under Sound. 5 On the Playback tab, select your desired device for sound output and click Set Default. How do I turn off the Windows startup sound? To turn off the Windows startup sound...
Recovery Backup and Troubleshooting Guide
Page 1
... restore the lost data, its original factory condition. If the User Account Control window appears, click Yes. Do not press the drive eject button while creating Recovery Media, as Recovery Media. 1 Connect your computer to the Internet, download and install the latest updates using the external optical disc drive, press the F11 key several times before the VAIO logo screen disappears. in optical disc drive, connect an external optical disc drive (not supplied) to the computer and to an AC power...
... restore the lost data, its original factory condition. If the User Account Control window appears, click Yes. Do not press the drive eject button while creating Recovery Media, as Recovery Media. 1 Connect your computer to the Internet, download and install the latest updates using the external optical disc drive, press the F11 key several times before the VAIO logo screen disappears. in optical disc drive, connect an external optical disc drive (not supplied) to the computer and to an AC power...
Recovery Backup and Troubleshooting Guide
Page 2
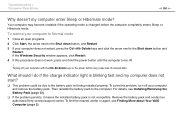
... the restore point. Remove the battery pack and contact an authorized Sony service/support center. Press and hold the power button or slide and hold the power switch for at least one , or formatted the built-in storage device without using an external display, make sure the power strip or UPS is blinking fast and my computer does not start . To use VAIO Data Restore Tool. Typically, a restore point is created automatically, for "The charge indicator light...
... the restore point. Remove the battery pack and contact an authorized Sony service/support center. Press and hold the power button or slide and hold the power switch for at least one , or formatted the built-in storage device without using an external display, make sure the power strip or UPS is blinking fast and my computer does not start . To use VAIO Data Restore Tool. Typically, a restore point is created automatically, for "The charge indicator light...

Startup Guide
Page 2
... using the wireless function. On-screen manuals: 1 Click Start and Help and Support. 2 Click Use my VAIO. 3 Select your computer. What to do next Update your computer Keep your computer updated by downloading updates from your model. 2 3 Install battery pack Connect AC adapter 4 Power on . For details, refer to ensure the battery becomes fully charged. Ventilation Place your computer on your computer before using it is required until the power indicator light turns on 1 Slide the battery LOCK switch...
... using the wireless function. On-screen manuals: 1 Click Start and Help and Support. 2 Click Use my VAIO. 3 Select your computer. What to do next Update your computer Keep your computer updated by downloading updates from your model. 2 3 Install battery pack Connect AC adapter 4 Power on . For details, refer to ensure the battery becomes fully charged. Ventilation Place your computer on your computer before using it is required until the power indicator light turns on 1 Slide the battery LOCK switch...
Safety - Safety Information
Page 2
... EVENT SHALL SONY ELECTRONICS INC. Software specifications are located on the bottom, the back panel, or inside the battery compartment of a separate user license agreement. Model Number: Serial Number: Notice © 2010 Sony Electronics Inc. SONY CANNOT WARRANT THAT THE FUNCTIONS DESCRIBED IN THIS GUIDE WILL BE UNINTERRUPTED OR ERROR-FREE. The software described herein is governed by third parties. Some of license agreements enclosed with this manual or...
... EVENT SHALL SONY ELECTRONICS INC. Software specifications are located on the bottom, the back panel, or inside the battery compartment of a separate user license agreement. Model Number: Serial Number: Notice © 2010 Sony Electronics Inc. SONY CANNOT WARRANT THAT THE FUNCTIONS DESCRIBED IN THIS GUIDE WILL BE UNINTERRUPTED OR ERROR-FREE. The software described herein is governed by third parties. Some of license agreements enclosed with this manual or...


