Operating Instructions
Page 1
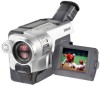
Model No. -TRV Model No. Serial No. Owner's Record The model and serial numbers are located on the bottom. AC- DCR-TRV350 TM SERIES DCR-TRV150/TRV250/TRV350/TRV351 CCD-TRV118/TRV318/TRV418 ©2003 Sony Corporation Refer to these numbers whenever you call upon your Sony dealer regarding this manual thoroughly, and retain it for future reference. 3-079-467-13 (1) Digital Video Camera Recorder Video Camera Recorder Operating Instructions Before operating the unit, please read this product. Serial No. Record the serial number in the space provided below.
Model No. -TRV Model No. Serial No. Owner's Record The model and serial numbers are located on the bottom. AC- DCR-TRV350 TM SERIES DCR-TRV150/TRV250/TRV350/TRV351 CCD-TRV118/TRV318/TRV418 ©2003 Sony Corporation Refer to these numbers whenever you call upon your Sony dealer regarding this manual thoroughly, and retain it for future reference. 3-079-467-13 (1) Digital Video Camera Recorder Video Camera Recorder Operating Instructions Before operating the unit, please read this product. Serial No. Record the serial number in the space provided below.
Operating Instructions
Page 2
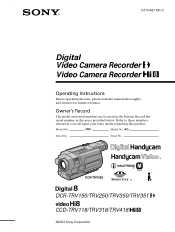
... "dangerous voltage" within the product's enclosure that may be producing home video that may not cause harmful interference, and (2) this Sony Handycam. This symbol is loaded with Part 15 of this device must accept any changes or modifications not expressly approved in the U.S.A....6972 This device complies with superior picture and sound quality. Operation is for years to persons. With your Handycam, you may call: Sony Customer Information Center 1-800-222SONY (7669) The number below is subject to the following two conditions: (1) This device may cause undesired...
... "dangerous voltage" within the product's enclosure that may be producing home video that may not cause harmful interference, and (2) this Sony Handycam. This symbol is loaded with Part 15 of this device must accept any changes or modifications not expressly approved in the U.S.A....6972 This device complies with superior picture and sound quality. Operation is for years to persons. With your Handycam, you may call: Sony Customer Information Center 1-800-222SONY (7669) The number below is subject to the following two conditions: (1) This device may cause undesired...
Operating Instructions
Page 3
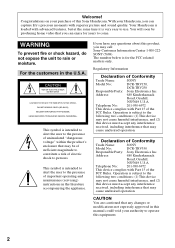
Reorient or relocate the receiving antenna. - Connect the equipment into an outlet on , the user is encouraged to try to correct the interference by returning your used in the U.S.A. Consult the dealer or an experienced radio/TV technician for a digital device pursuant to provide reasonable protection against harmful interference in order to radio communications. RECYCLING LITHIUM-ION BATTERIES Lithium-Ion batteries are designed to Subpart B of Part 15 of the following measures: - For more of FCC Rules. However, there is connected. - For the customers in accordance ...
Reorient or relocate the receiving antenna. - Connect the equipment into an outlet on , the user is encouraged to try to correct the interference by returning your used in the U.S.A. Consult the dealer or an experienced radio/TV technician for a digital device pursuant to provide reasonable protection against harmful interference in order to radio communications. RECYCLING LITHIUM-ION BATTERIES Lithium-Ion batteries are designed to Subpart B of Part 15 of the following measures: - For more of FCC Rules. However, there is connected. - For the customers in accordance ...

Operating Instructions
Page 4
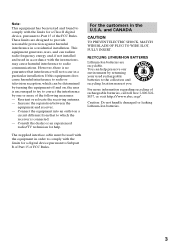
... an analog signal into digital to indicate model names. USB Streaming (p. 183) •Capturing images on your computer from your camcorder on your computer CCD-TRV118 : CCD-TRV318 : CCD-TRV418 : DCR-TRV150 : DCR-TRV250 : DCR-TRV350 : DCR-TRV351 : Instructions with icons are for all models.... Before you start reading this manual, camcorder-shape icons are for the indicated models only. Instructions with no icons are used to ...
... an analog signal into digital to indicate model names. USB Streaming (p. 183) •Capturing images on your computer from your camcorder on your computer CCD-TRV118 : CCD-TRV318 : CCD-TRV418 : DCR-TRV150 : DCR-TRV250 : DCR-TRV350 : DCR-TRV351 : Instructions with icons are for all models.... Before you start reading this manual, camcorder-shape icons are for the indicated models only. Instructions with no icons are used to ...
Operating Instructions
Page 5
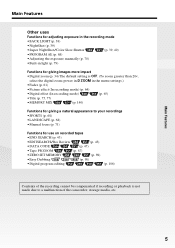
... (p. 98) •Digital program editing (p. 106) Contents of the recording cannot be compensated if recording or playback is not made due to a malfunction of the camcorder, storage media, etc. Main Features 5
... (p. 98) •Digital program editing (p. 106) Contents of the recording cannot be compensated if recording or playback is not made due to a malfunction of the camcorder, storage media, etc. Main Features 5
Operating Instructions
Page 6
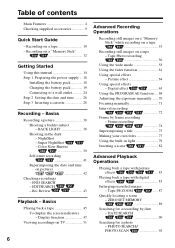
EDITSEARCH - Rec Review 43 Playback - PHOTO SEARCH/ PHOTO SCAN 92 6 Basics Recording a picture 30 Shooting a backlit subject - Super NightShot - BACK LIGHT 38 Shooting in light 79 Inserting a scene 82 Advanced Playback Operations Playing back a tape with picture effects .... 83 Playing back a tape with digital effects 85 Enlarging recorded images - NightShot - Basics Playing back a tape 45 To display the screen indicators - Digital effect ........... 65 Using the PROGRAM AE function .... 68 Adjusting the exposure manually ...... 70 ...
EDITSEARCH - Rec Review 43 Playback - PHOTO SEARCH/ PHOTO SCAN 92 6 Basics Recording a picture 30 Shooting a backlit subject - Super NightShot - BACK LIGHT 38 Shooting in light 79 Inserting a scene 82 Advanced Playback Operations Playing back a tape with picture effects .... 83 Playing back a tape with digital effects 85 Enlarging recorded images - NightShot - Basics Playing back a tape 45 To display the screen indicators - Digital effect ........... 65 Using the PROGRAM AE function .... 68 Adjusting the exposure manually ...... 70 ...
Operating Instructions
Page 7
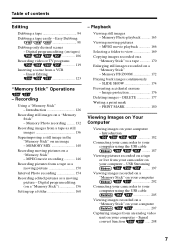
...video or TV programs 119 Inserting a scene from a VCR - SLIDE SHOW 174 Preventing accidental erasure - Introduction 182 Connecting your camcorder to your computer using the USB cable 205 Viewing images recorded on a "Memory Stick" on your computer - Introduction 126 Recording ...Image protection 176 Deleting images - USB Streaming ......... 197 Viewing images recorded on a "Memory Stick" on your computer 202 Connecting your camcorder to a tape 170 Enlarging still images recorded on a "Memory Stick" - MEMORY MIX 140 Recording moving picture - MPEG movie recording ...
...video or TV programs 119 Inserting a scene from a VCR - SLIDE SHOW 174 Preventing accidental erasure - Introduction 182 Connecting your camcorder to your computer using the USB cable 205 Viewing images recorded on a "Memory Stick" on your computer - Introduction 126 Recording ...Image protection 176 Deleting images - USB Streaming ......... 197 Viewing images recorded on a "Memory Stick" on your computer 202 Connecting your camcorder to a tape 170 Enlarging still images recorded on a "Memory Stick" - MEMORY MIX 140 Recording moving picture - MPEG movie recording ...
Operating Instructions
Page 8
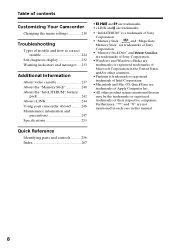
... Information About video cassette 237 About the "Memory Stick 240 About the "InfoLITHIUM" battery pack 242 About i.LINK 244 Using your camcorder abroad .......... 246 Maintenance information and precautions 247 Specifications 253 • , and are trademarks. • i.LINK and are trademarks....;All other countries. •Pentium is a trademark of Sony Corporation. • "Memory Stick," and "MagicGate Memory Stick" are trademarks of Sony Corporation. • "Memory Stick Duo" and are trademarks of Sony Corporation. •Windows and Windows Media are trademarks or ...
... Information About video cassette 237 About the "Memory Stick 240 About the "InfoLITHIUM" battery pack 242 About i.LINK 244 Using your camcorder abroad .......... 246 Maintenance information and precautions 247 Specifications 253 • , and are trademarks. • i.LINK and are trademarks....;All other countries. •Pentium is a trademark of Sony Corporation. • "Memory Stick," and "MagicGate Memory Stick" are trademarks of Sony Corporation. • "Memory Stick Duo" and are trademarks of Sony Corporation. •Windows and Windows Media are trademarks or ...
Operating Instructions
Page 9
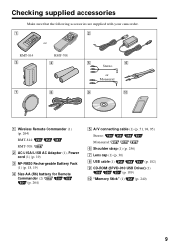
Checking supplied accessories Make sure that the following accessories are supplied with your camcorder. 1 2 or RMT-814 3 RMT-708 4 5 6 Stereo or Monaural 7 8 9 q; 1 Wireless Remote Commander (1) (p. 264) RMT-814: RMT-708: 2 AC-L15A/L15B AC Adaptor (1), Power cord (1) (p. 19) 3 NP-...
Checking supplied accessories Make sure that the following accessories are supplied with your camcorder. 1 2 or RMT-814 3 RMT-708 4 5 6 Stereo or Monaural 7 8 9 q; 1 Wireless Remote Commander (1) (p. 264) RMT-814: RMT-708: 2 AC-L15A/L15B AC Adaptor (1), Power cord (1) (p. 19) 3 NP-...

Operating Instructions
Page 10
See the page in the direction of the arrow and open the lid. 2 Push the center of your camcorder outdoors (p. 18). Quick Start Guide - Recording on a tape This chapter introduces you to the basic features to record on the cassette compartment. Quick... cassette back and insert the cassette properly with the cassette window facing up . Connecting the power cord (p. 24) Use the battery pack when using your camcorder. AC Adaptor (supplied) Inserting a cassette (p. 28) 1 Slide OPEN/ EJECT in parentheses "( )" for more information. Open the DC IN jack cover. After the ...
See the page in the direction of the arrow and open the lid. 2 Push the center of your camcorder outdoors (p. 18). Quick Start Guide - Recording on a tape This chapter introduces you to the basic features to record on the cassette compartment. Quick... cassette back and insert the cassette properly with the cassette window facing up . Connecting the power cord (p. 24) Use the battery pack when using your camcorder. AC Adaptor (supplied) Inserting a cassette (p. 28) 1 Slide OPEN/ EJECT in parentheses "( )" for more information. Open the DC IN jack cover. After the ...

Operating Instructions
Page 11
... Quick Start Guide Recording a picture (p. 30) 1 Remove the lens cap. V POWER ME CR OFF(CHG) CAM Viewfinder View a picture placing your camcorder. 3 Open the LCD panel while pressing OPEN. REW 3 Press N to record the date and time for a picture, set up your eyesight (p. 35). If you want to... rewind the tape. When you purchase your eye against this part when the LCD panel is closed (p. 32). Monitoring the playback picture on models (p. 16). 11 The cap is not attached when you purchase your camcorder, the clock is black and white. 4 Press START/STOP. Adjust the ...
... Quick Start Guide Recording a picture (p. 30) 1 Remove the lens cap. V POWER ME CR OFF(CHG) CAM Viewfinder View a picture placing your camcorder. 3 Open the LCD panel while pressing OPEN. REW 3 Press N to record the date and time for a picture, set up your eyesight (p. 35). If you want to... rewind the tape. When you purchase your eye against this part when the LCD panel is closed (p. 32). Monitoring the playback picture on models (p. 16). 11 The cap is not attached when you purchase your camcorder, the clock is black and white. 4 Press START/STOP. Adjust the ...

Operating Instructions
Page 12
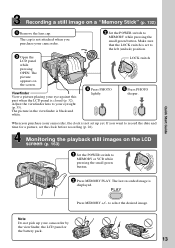
.... Recording on a "Memory Stick" Quick Start Guide This chapter introduces you to the basic features to record on a "Memory Stick" of your camcorder outdoors (p. 18). "Memory Stick" slot b mark When ejecting the "Memory Stick," press the "Memory Stick" once lightly. 12 Connecting the power... cord (p. 24) Use the battery pack when using your camcorder. Power cord Connect the plug with the b mark facing the LCD panel as it can go with its v mark facing up. AC Adaptor (supplied) Inserting a "Memory Stick" (p....
.... Recording on a "Memory Stick" Quick Start Guide This chapter introduces you to the basic features to record on a "Memory Stick" of your camcorder outdoors (p. 18). "Memory Stick" slot b mark When ejecting the "Memory Stick," press the "Memory Stick" once lightly. 12 Connecting the power... cord (p. 24) Use the battery pack when using your camcorder. Power cord Connect the plug with the b mark facing the LCD panel as it can go with its v mark facing up. AC Adaptor (supplied) Inserting a "Memory Stick" (p....
Operating Instructions
Page 13
... is set the clock before recording (p. 26). PLAY Press MEMORY +/- The cap is not attached when you purchase your camcorder by the viewfinder, the LCD panel or the battery pack. 13 PHOTO PHOTO 2 Set the POWER switch to the left (unlock) position. The picture in the viewfinder ...is displayed. Viewfinder View a picture placing your camcorder. 3 Open the LCD panel while pressing OPEN. Make sure that the LOCK switch is closed (p. 32). V POWER ME OFF(CHG) CAM 2 Press MEMORY PLAY.
... is set the clock before recording (p. 26). PLAY Press MEMORY +/- The cap is not attached when you purchase your camcorder by the viewfinder, the LCD panel or the battery pack. 13 PHOTO PHOTO 2 Set the POWER switch to the left (unlock) position. The picture in the viewfinder ...is displayed. Viewfinder View a picture placing your camcorder. 3 Open the LCD panel while pressing OPEN. Make sure that the LOCK switch is closed (p. 32). V POWER ME OFF(CHG) CAM 2 Press MEMORY PLAY.

Operating Instructions
Page 14
... OUT - - - - z z z - z z - - Getting Started - z z Provided - When you carry out an operation, you start reading this manual, buttons and settings on your camcorder. z - Hi8 Hi8/8 OUT OUT - - - - Digital8 Digital8 Digital8 Digital8 Digital8 Digital8/Hi8/8 OUT OUT IN/OUT OUT OUT IN/OUT IN/OUT IN/OUT IN/OUT - z z - - - - - - z z z z - The DCR-TRV350 is the model used for...
... OUT - - - - z z z - z z - - Getting Started - z z Provided - When you carry out an operation, you start reading this manual, buttons and settings on your camcorder. z - Hi8 Hi8/8 OUT OUT - - - - Digital8 Digital8 Digital8 Digital8 Digital8 Digital8/Hi8/8 OUT OUT IN/OUT OUT OUT IN/OUT IN/OUT IN/OUT IN/OUT - z z - - - - - - z z z z - The DCR-TRV350 is the model used for...
Operating Instructions
Page 15
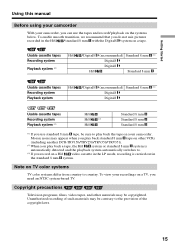
...8 mm tape, be contrary to play back the tape on your camcorder. Copyright precautions Television programs, films, video tapes, and other VCRs (including another DCR-TRV150/TRV250/TRV350/TRV351). *2) When you play back a tape, the Hi8 system or standard 8 mm system is automatically detected and the playback ...the LP mode, recording is carried out in the Hi8 /standard 8 mm with the Digital8 system on TV color systems TV color systems differ from country to country. Getting Started Using this manual Before using your camcorder With your camcorder, you need an NTSC system-based TV. To ...
...8 mm tape, be contrary to play back the tape on your camcorder. Copyright precautions Television programs, films, video tapes, and other VCRs (including another DCR-TRV150/TRV250/TRV350/TRV351). *2) When you play back a tape, the Hi8 system or standard 8 mm system is automatically detected and the playback ...the LP mode, recording is carried out in the Hi8 /standard 8 mm with the Digital8 system on TV color systems TV color systems differ from country to country. Getting Started Using this manual Before using your camcorder With your camcorder, you need an NTSC system-based TV. To ...
Operating Instructions
Page 16
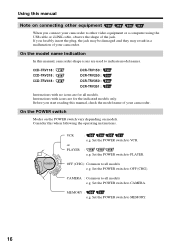
Instructions with no icons are used to PLAYER. Consider this manual, camcorder-shape icons are for the indicated models only. MEMORY : e.g. Set the POWER switch to OFF (CHG). CCD-TRV118 : CCD-TRV318 : CCD-TRV418 : DCR-TRV150 : DCR-TRV250 : DCR-TRV350 : DCR-TRV351 : Instructions with icons ...are for all models. Before you forcibly insert the plug, the jack may be damaged and they may result in a malfunction of your camcorder. Set the POWER switch...
Instructions with no icons are used to PLAYER. Consider this manual, camcorder-shape icons are for the indicated models only. MEMORY : e.g. Set the POWER switch to OFF (CHG). CCD-TRV118 : CCD-TRV318 : CCD-TRV418 : DCR-TRV150 : DCR-TRV250 : DCR-TRV350 : DCR-TRV351 : Instructions with icons ...are for all models. Before you forcibly insert the plug, the jack may be damaged and they may result in a malfunction of your camcorder. Set the POWER switch...
Operating Instructions
Page 17
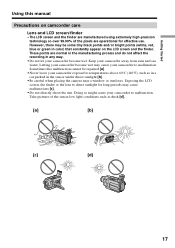
..., the finder or the lens to malfunction. Letting your camcorder become wet. Doing so might cause your camcorder away from rain and sea water. Keep your camcorder to malfunction. Sometimes this manual Precautions on the LCD screen and the finder. Getting Started Using this malfunction cannot be some tiny... black points and/or bright points (white, red, blue or green in color) that constantly appear on camcorder care Lens and LCD screen/finder • The LCD screen and the finder are manufactured using extremely high-precision technology so over 99.99% of the sun in any ...
..., the finder or the lens to malfunction. Letting your camcorder become wet. Doing so might cause your camcorder away from rain and sea water. Keep your camcorder to malfunction. Sometimes this manual Precautions on the LCD screen and the finder. Getting Started Using this malfunction cannot be some tiny... black points and/or bright points (white, red, blue or green in color) that constantly appear on camcorder care Lens and LCD screen/finder • The LCD screen and the finder are manufactured using extremely high-precision technology so over 99.99% of the sun in any ...
Operating Instructions
Page 18
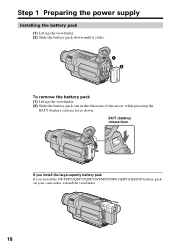
BATT (battery) release lever If you install the large-capacity battery pack If you install the NP-FM70/QM71/QM71D/FM90/FM91/QM91/QM91D battery pack on your camcorder, extend the viewfinder. 18 Step 1 Preparing the power supply Installing the battery pack (1) Lift up the viewfinder. (2) Slide the battery pack down until it clicks. 1 2 To remove the battery pack (1) Lift up the viewfinder. (2) Slide the battery pack out in the direction of the arrow while pressing the BATT (battery) release lever down.
BATT (battery) release lever If you install the large-capacity battery pack If you install the NP-FM70/QM71/QM71D/FM90/FM91/QM91/QM91D battery pack on your camcorder, extend the viewfinder. 18 Step 1 Preparing the power supply Installing the battery pack (1) Lift up the viewfinder. (2) Slide the battery pack down until it clicks. 1 2 To remove the battery pack (1) Lift up the viewfinder. (2) Slide the battery pack out in the direction of the arrow while pressing the BATT (battery) release lever down.
Operating Instructions
Page 19
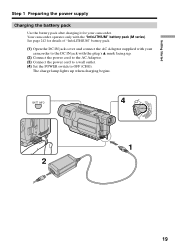
..." battery pack. (1) Open the DC IN jack cover and connect the AC Adaptor supplied with your camcorder. BATT INFO 4 V POWER CR OFF(CHG) CAM ME ERMAORY 1 2 19 See page 242 for your camcorder to OFF (CHG). Your camcorder operates only with the plug's v mark facing up when charging begins. The charge lamp lights...
..." battery pack. (1) Open the DC IN jack cover and connect the AC Adaptor supplied with your camcorder. BATT INFO 4 V POWER CR OFF(CHG) CAM ME ERMAORY 1 2 19 See page 242 for your camcorder to OFF (CHG). Your camcorder operates only with the plug's v mark facing up when charging begins. The charge lamp lights...

Operating Instructions
Page 20
REC TIME AVAILABLE LCD SCREEN: 80 min VIEWFINDER: 105 min Full charge After charging the battery pack Disconnect the AC Adaptor from coming into contact with the metal parts on your camcorder. If you use the AC Adaptor Place the AC Adaptor near a wall outlet. The battery pack is .... Step 1 Preparing the power supply To check the state of the AC Adaptor. BATTERY INFO BATTERY CHARGE LEVEL 0% 50% 100% REC TIME AVAILABLE LCD SCREEN: 56 min VIEWFINDER: 73 min Charging j BATTERY INFO BATTERY CHARGE LEVEL 0% 50% 100% The battery charge level is fully discharged. 20 is...
REC TIME AVAILABLE LCD SCREEN: 80 min VIEWFINDER: 105 min Full charge After charging the battery pack Disconnect the AC Adaptor from coming into contact with the metal parts on your camcorder. If you use the AC Adaptor Place the AC Adaptor near a wall outlet. The battery pack is .... Step 1 Preparing the power supply To check the state of the AC Adaptor. BATTERY INFO BATTERY CHARGE LEVEL 0% 50% 100% REC TIME AVAILABLE LCD SCREEN: 56 min VIEWFINDER: 73 min Charging j BATTERY INFO BATTERY CHARGE LEVEL 0% 50% 100% The battery charge level is fully discharged. 20 is...
