
Quick Start Guide
Page 4
...fire, use of optical instruments with this product is specifically designed for the Sony Service Center nearest you have purchased. Safety Information and Caution Your computer's installed optical drives may vary, depending on your installed optical drives. See the online specifications sheet for details on the system configuration...MS2) Carrier frequency Output power 27.045 MHz Less than 100 nW ❑ To prevent fire or shock hazard, do not expose your desktop to rain or moisture. ❑ To avoid electrical shock, do not attempt to report a gas leak in the vicinity of the ...
...fire, use of optical instruments with this product is specifically designed for the Sony Service Center nearest you have purchased. Safety Information and Caution Your computer's installed optical drives may vary, depending on your installed optical drives. See the online specifications sheet for details on the system configuration...MS2) Carrier frequency Output power 27.045 MHz Less than 100 nW ❑ To prevent fire or shock hazard, do not expose your desktop to rain or moisture. ❑ To avoid electrical shock, do not attempt to report a gas leak in the vicinity of the ...
Quick Start Guide
Page 6
... to comply with the instructions, may cause undesired operation of Conformity Trade Name: SONY Model No.: PCV-V100G Responsible Party: Sony Electronics Inc. This equipment has been tested and found to radio communications. Address:... 680 Kinderkamack Rd. Operation is no guarantee that may cause undesired operation. However, there is subject to provide reasonable protection against harmful interference in a particular installation...
... to comply with the instructions, may cause undesired operation of Conformity Trade Name: SONY Model No.: PCV-V100G Responsible Party: Sony Electronics Inc. This equipment has been tested and found to radio communications. Address:... 680 Kinderkamack Rd. Operation is no guarantee that may cause undesired operation. However, there is subject to provide reasonable protection against harmful interference in a particular installation...
Quick Start Guide
Page 7
...the telephone line may result in the devices not ringing in response to an incoming call 1-888-4-SONY-PC (1-888-476-6972), or visit the Sony Computing Web site at http://www.sony.com/pcsupport. A telephone plug and jack used to connect this equipment to the premises wiring and... its facilities, equipment, operations or procedures that could void your telephone company or a qualified installer. If your home has specially wired alarm equipment connected to the telephone line, ensure the installation of this equipment does not disable your right to file a complaint with the applicable FCC ...
...the telephone line may result in the devices not ringing in response to an incoming call 1-888-4-SONY-PC (1-888-476-6972), or visit the Sony Computing Web site at http://www.sony.com/pcsupport. A telephone plug and jack used to connect this equipment to the premises wiring and... its facilities, equipment, operations or procedures that could void your telephone company or a qualified installer. If your home has specially wired alarm equipment connected to the telephone line, ensure the installation of this equipment does not disable your right to file a complaint with the applicable FCC ...

Quick Start Guide
Page 35
Inserting the power cord into the clamp 5 Plug the power cord into a grounded AC wall outlet, surge protector, or UPS. Connecting the power cord To AC wall outlet ✍ Install your computer so you can easily reach the power outlet in the event of an emergency. 35 Connecting the Power Cord 4 Use a coin to open the clamp, and then insert the power cord.
Inserting the power cord into the clamp 5 Plug the power cord into a grounded AC wall outlet, surge protector, or UPS. Connecting the power cord To AC wall outlet ✍ Install your computer so you can easily reach the power outlet in the event of an emergency. 35 Connecting the Power Cord 4 Use a coin to open the clamp, and then insert the power cord.

Quick Start Guide
Page 36
... supplied with the system unit for proper operation. ❑ Do not exceed a maximum distance of 2 feet between your VAIO® computer and your wireless keyboard. ❑ Confirm that the AA batteries (supplied) are properly installed. ❑ Press the CONNECT buttons located on the left panel of the keyboard, to establish communication between the...
... supplied with the system unit for proper operation. ❑ Do not exceed a maximum distance of 2 feet between your VAIO® computer and your wireless keyboard. ❑ Confirm that the AA batteries (supplied) are properly installed. ❑ Press the CONNECT buttons located on the left panel of the keyboard, to establish communication between the...
Quick Start Guide
Page 38
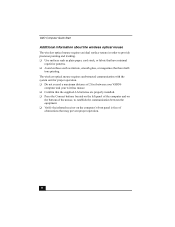
... 2 feet between the equipment. ❑ Verify the infrared receiver on the bottom of obstructions that have half- tone printing. VAIO Computer Quick Start Additional information about the wireless optical mouse The wireless optical mouse requires an ideal surface texture in order to establish the... communication between your VAIO® computer and your wireless mouse. ❑ Confirm that the supplied AA batteries are properly installed. ❑ Press the Connect buttons located on the left panel of the computer and on the computer's front panel is free of the...
... 2 feet between the equipment. ❑ Verify the infrared receiver on the bottom of obstructions that have half- tone printing. VAIO Computer Quick Start Additional information about the wireless optical mouse The wireless optical mouse requires an ideal surface texture in order to establish the... communication between your VAIO® computer and your wireless mouse. ❑ Confirm that the supplied AA batteries are properly installed. ❑ Press the Connect buttons located on the left panel of the computer and on the computer's front panel is free of the...

VAIO User Guide (primary manual)
Page 21
Page 21 Connecting the power cord Install your wireless keyboard and wireless mouse. 1. Plug the power cord into a grounded AC wall outlet, surge protector, or UPS. Plug the power cord into the AC input port on the back panel of an emergency. Connecting the Power Cord The computer's power cord must be plugged into an AC power source, such as an AC wall outlet, surge protector, or Uninterruptible Power Supply (UPS), before you can establish communication with your computer so you can easily reach the power outlet in the event of the computer. 2.
Page 21 Connecting the power cord Install your wireless keyboard and wireless mouse. 1. Plug the power cord into a grounded AC wall outlet, surge protector, or UPS. Plug the power cord into the AC input port on the back panel of an emergency. Connecting the Power Cord The computer's power cord must be plugged into an AC power source, such as an AC wall outlet, surge protector, or Uninterruptible Power Supply (UPS), before you can establish communication with your computer so you can easily reach the power outlet in the event of the computer. 2.

VAIO User Guide (primary manual)
Page 23
...over. 3. Press the CONNECT button on the bottom of the keyboard, to activate communication between the wireless keyboard and the computer Connecting the keyboard Additional information about the wireless keyboard The wireless keyboard requires unobstructed communication with the system unit for proper operation.... Do not exceed a maximum distance of 2 feet between your VAIO® computer and your wireless keyboard. Confirm that the supplied AA batteries are properly installed. Press the CONNECT buttons located on the left panel of the...
...over. 3. Press the CONNECT button on the bottom of the keyboard, to activate communication between the wireless keyboard and the computer Connecting the keyboard Additional information about the wireless keyboard The wireless keyboard requires unobstructed communication with the system unit for proper operation.... Do not exceed a maximum distance of 2 feet between your VAIO® computer and your wireless keyboard. Confirm that the supplied AA batteries are properly installed. Press the CONNECT buttons located on the left panel of the...

VAIO User Guide (primary manual)
Page 25
tone printing. Page 25 Press the CONNECT button on the left panel of the computer and on the bottom of the computer. 2. Additional information about the wireless optical mouse The wireless optical mouse requires an ideal surface texture in order to the.... Verify the infrared receiver on the computer's front panel is free of obstructions that the supplied AA batteries are properly installed. Press the Connect buttons located on an appropriate surface to establish the communication between your VAIO® computer and your wireless mouse. Confirm that ...
tone printing. Page 25 Press the CONNECT button on the left panel of the computer and on the bottom of the computer. 2. Additional information about the wireless optical mouse The wireless optical mouse requires an ideal surface texture in order to the.... Verify the infrared receiver on the computer's front panel is free of obstructions that the supplied AA batteries are properly installed. Press the Connect buttons located on an appropriate surface to establish the communication between your VAIO® computer and your wireless mouse. Confirm that ...

VAIO User Guide (primary manual)
Page 60
On the Giga Pocket Explorer Toolbar, click Make DVD. 3. The Click to DVD-R/DVD-RW media with the Make DVD feature. Follow the on-screen instructions. Page 60 Recording Video Capsules onto recordable DVD media You can record Video Capsules to DVD software starts. The Click to DVD software must be installed in order to burn Video Capsules to burn onto a DVD. 2. From the Giga Pocket Explorer main window, select the Video Capsules you want to recordable DVD media. 1.
On the Giga Pocket Explorer Toolbar, click Make DVD. 3. The Click to DVD-R/DVD-RW media with the Make DVD feature. Follow the on-screen instructions. Page 60 Recording Video Capsules onto recordable DVD media You can record Video Capsules to DVD software starts. The Click to DVD software must be installed in order to burn Video Capsules to burn onto a DVD. 2. From the Giga Pocket Explorer main window, select the Video Capsules you want to recordable DVD media. 1.

VAIO User Guide (primary manual)
Page 61
... want to create the Video Capsule. MPEG-2 files need a specific system environment for playback: A VAIO computer that has Giga Pocket Personal Video Recorder installed. A VAIO computer that was created using Long Play (LP) mode can be converted and exported as MPEG-1, MPEG-2, or AVI... you want to play your Video Capsule using MPEG-1 format. Video Capsules that are recorded using DVgate Assemble or other VAIO AV applications. Exporting Video Capsules You can select the option, Delete Video Capsule after export, leave the option disabled. 4. The ...
... want to create the Video Capsule. MPEG-2 files need a specific system environment for playback: A VAIO computer that has Giga Pocket Personal Video Recorder installed. A VAIO computer that was created using Long Play (LP) mode can be converted and exported as MPEG-1, MPEG-2, or AVI... you want to play your Video Capsule using MPEG-1 format. Video Capsules that are recorded using DVgate Assemble or other VAIO AV applications. Exporting Video Capsules You can select the option, Delete Video Capsule after export, leave the option disabled. 4. The ...

VAIO User Guide (primary manual)
Page 63
Powered by the Palm operating system, the CLIÉ handheld is a plug-in application, make sure you have install all required software for viewing with amazing clarity. For more information on this exciting device, go to deliver music and video with...201; Converter plug-in application that enables the conversion of Video Capsules into gMovie format. The Sony CLIÉ Handheld personal entertainment organizers provide a rich and compelling handheld computing experience. In order to convert your Sony CLIÉ Handheld. CLIÉ Converter The CLIÉ Converter is ready to the...
Powered by the Palm operating system, the CLIÉ handheld is a plug-in application, make sure you have install all required software for viewing with amazing clarity. For more information on this exciting device, go to deliver music and video with...201; Converter plug-in application that enables the conversion of Video Capsules into gMovie format. The Sony CLIÉ Handheld personal entertainment organizers provide a rich and compelling handheld computing experience. In order to convert your Sony CLIÉ Handheld. CLIÉ Converter The CLIÉ Converter is ready to the...

VAIO User Guide (primary manual)
Page 72
...compatible i.LINK devices to the documentation that came with each other end of Sony used only to connect your computer, see the online Specifications sheet. Plug the other . or 6-pin i.LINK port on installation and use. See the instructions that a product contains an IEEE 1394 ...of the cable into this port. 2. About i.LINK Compatibility Your VAIO® computer may be equipped with a 4-pin and/or a 6-pin i.LINK® port, depending on your computer. For PCV-W series models only Your PCV-W series computer has two 4-pin i.LINK ports available to locate the i.LINK port...
...compatible i.LINK devices to the documentation that came with each other end of Sony used only to connect your computer, see the online Specifications sheet. Plug the other . or 6-pin i.LINK port on installation and use. See the instructions that a product contains an IEEE 1394 ...of the cable into this port. 2. About i.LINK Compatibility Your VAIO® computer may be equipped with a 4-pin and/or a 6-pin i.LINK® port, depending on your computer. For PCV-W series models only Your PCV-W series computer has two 4-pin i.LINK ports available to locate the i.LINK port...

VAIO User Guide (primary manual)
Page 78
This section provides information about upgrading your VAIO® computer. Upgrading and Maintaining your VAIO Computer In the future you may want to increase the functionality of your system's memory. Overview Installing Memory Installing a Hard Disk Drive Replacing the Lithium Battery Page 78
This section provides information about upgrading your VAIO® computer. Upgrading and Maintaining your VAIO Computer In the future you may want to increase the functionality of your system's memory. Overview Installing Memory Installing a Hard Disk Drive Replacing the Lithium Battery Page 78

VAIO User Guide (primary manual)
Page 80
Do not attempt to remove or replace the memory modules. Installing Memory The amount of preinstalled memory may ship with all available memory slots filled. See the online Specifications sheet for memory replacement and upgrades. Your computer may vary, depending on the system configuration you purchased. Contact your local dealer for details about the memory installed in your computer. Page 80
Do not attempt to remove or replace the memory modules. Installing Memory The amount of preinstalled memory may ship with all available memory slots filled. See the online Specifications sheet for memory replacement and upgrades. Your computer may vary, depending on the system configuration you purchased. Contact your local dealer for details about the memory installed in your computer. Page 80

VAIO User Guide (primary manual)
Page 81
Page 81 Contact your local dealer for replacement or upgrade of the hard disk drive. Do not attempt to replace the hard drive. Installing a Hard Disk Drive Your computer has an installed ATA-100, 3½-inch hard disk drive.
Page 81 Contact your local dealer for replacement or upgrade of the hard disk drive. Do not attempt to replace the hard drive. Installing a Hard Disk Drive Your computer has an installed ATA-100, 3½-inch hard disk drive.

VAIO User Guide (primary manual)
Page 88
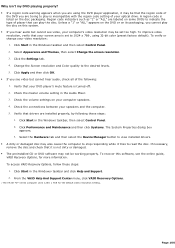
Why is my system running slowly? The system responsiveness varies depending with the number of applications that you are open and running. For information on installing memory, please see the online VAIO User Guide. Page 88 Click Start in the Windows taskbar, and then click Help and Support. 2. To access the online User Guide: 1. Close any applications that are not currently using. Increasing the system memory may also help. From the VAIO Help And Support Center menu, click VAIO User Guide.
Why is my system running slowly? The system responsiveness varies depending with the number of applications that you are open and running. For information on installing memory, please see the online VAIO User Guide. Page 88 Click Start in the Windows taskbar, and then click Help and Support. 2. To access the online User Guide: 1. Close any applications that are not currently using. Increasing the system memory may also help. From the VAIO Help And Support Center menu, click VAIO User Guide.

VAIO User Guide (primary manual)
Page 99
.... The preinstalled CD or DVD software may not be working properly. Page 99 To access VAIO Recovery Options, follow these steps: 1. Click Start in the tray with the label side facing up. Install your drive reads some DVDs or CDs, but not others, check the shiny side of the disc... for more information. From the VAIO Help And Support Center menu, click VAIO Recovery Options. Why can't I play a DVD or CD media? ...
.... The preinstalled CD or DVD software may not be working properly. Page 99 To access VAIO Recovery Options, follow these steps: 1. Click Start in the tray with the label side facing up. Install your drive reads some DVDs or CDs, but not others, check the shiny side of the disc... for more information. From the VAIO Help And Support Center menu, click VAIO Recovery Options. Why can't I play a DVD or CD media? ...
VAIO User Guide (primary manual)
Page 100
...and then select Control Panel. 2. Select the Hardware tab and then select the Device Manager button to view installed drivers. A dirty or damaged disc may also cause the computer to indicate the type of the following these steps: 1. Click Start in the Audio Mixer. 3. To ... Change the screen resolution. 3. Click the Settings tab. 4. Click Apply and then click OK. If you see the online guide, VAIO Recovery Options, for the default video res olution s etting. Check the master volume setting in the Windows® taskbar and click Help and Support...
...and then select Control Panel. 2. Select the Hardware tab and then select the Device Manager button to view installed drivers. A dirty or damaged disc may also cause the computer to indicate the type of the following these steps: 1. Click Start in the Audio Mixer. 3. To ... Change the screen resolution. 3. Click the Settings tab. 4. Click Apply and then click OK. If you see the online guide, VAIO Recovery Options, for the default video res olution s etting. Check the master volume setting in the Windows® taskbar and click Help and Support...
VAIO User Guide (primary manual)
Page 101
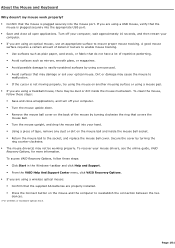
...steps: Click Start in the Windows® taskbar and click Help and Support. From the VAIO Help And Support Center menu, click VAIO Recovery Options. If you are properly installed. Press the Connect button on the mouse ball and inside the mouse mechanism. About the Mouse and Keyboard...mouse upside down. Remove the mouse ball cover on the back of tape, remove any dust or dirt on the mouse and the computer to the socket, and replace the mouse ball cover. Secure the cover by turning clockwise the ring that may not be dust or dirt ...
...steps: Click Start in the Windows® taskbar and click Help and Support. From the VAIO Help And Support Center menu, click VAIO Recovery Options. If you are properly installed. Press the Connect button on the mouse ball and inside the mouse mechanism. About the Mouse and Keyboard...mouse upside down. Remove the mouse ball cover on the back of tape, remove any dust or dirt on the mouse and the computer to the socket, and replace the mouse ball cover. Secure the cover by turning clockwise the ring that may not be dust or dirt ...


