
Service Manual
Page 1
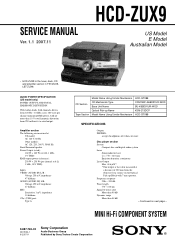
... 250 milliwatts to rated output. SERVICE MANUAL Ver. 1.1 2007.11 HCD-ZUX9 US Model E Model Australian Model • HCD-ZUX9 is the value measured at 6 Ω, 1 kHz, 10% THD) Inputs VIDEO (AUDIO IN) L/R : Voltage 250 mV, impedance 47 kilohms AUDIO (AUDIO IN) L/R: Voltage 450 mV, impedance 47 kilohms MIC: Sensitivity 1 mV, impedance 10 kilohms (USB) port: Type A CD Section Tape Section Model Name Using Similar Mechanism CD Mechanism Type Base Unit...
... 250 milliwatts to rated output. SERVICE MANUAL Ver. 1.1 2007.11 HCD-ZUX9 US Model E Model Australian Model • HCD-ZUX9 is the value measured at 6 Ω, 1 kHz, 10% THD) Inputs VIDEO (AUDIO IN) L/R : Voltage 250 mV, impedance 47 kilohms AUDIO (AUDIO IN) L/R: Voltage 450 mV, impedance 47 kilohms MIC: Sensitivity 1 mV, impedance 10 kilohms (USB) port: Type A CD Section Tape Section Model Name Using Similar Mechanism CD Mechanism Type Base Unit...

Service Manual
Page 2
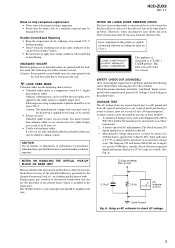
... DOTTED LINE WITH MARK 0 ON THE SCHEMATIC DIAGRAMS AND IN THE PARTS LIST ARE CRITICAL TO SAFE OPERATION. HCD-ZUX9 Ver. 1.1 Tape deck section Recording system 4-track 2-channel stereo Frequency response 50 - 13,000 Hz (±3 dB), using Sony TYPE I tape Tuner section FM stereo, FM/AM superheterodyne tuner FM tuner section Tuning range US model: 87.5 - 108.0 MHz (100 kHz step) Other models: 87.5 - 108.0 MHz (50 kHz step) Antenna FM lead antenna Antenna terminals...
... DOTTED LINE WITH MARK 0 ON THE SCHEMATIC DIAGRAMS AND IN THE PARTS LIST ARE CRITICAL TO SAFE OPERATION. HCD-ZUX9 Ver. 1.1 Tape deck section Recording system 4-track 2-channel stereo Frequency response 50 - 13,000 Hz (±3 dB), using Sony TYPE I tape Tuner section FM stereo, FM/AM superheterodyne tuner FM tuner section Tuning range US model: 87.5 - 108.0 MHz (100 kHz step) Other models: 87.5 - 108.0 MHz (50 kHz step) Antenna FM lead antenna Antenna terminals...
Service Manual
Page 3
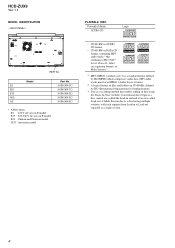
... BLOCK OR BASE UNIT The laser diode in the repair parts. on the disc reflective surface by the charged electrostatic load, etc. Therefore, when checking the laser diode emission, observe from all other than ordinary solder so use the procedure in the optical pickup block. SAFETY CHECK-OUT (US MODEL) After correcting the original service problem, perform the following characteristics...
... BLOCK OR BASE UNIT The laser diode in the repair parts. on the disc reflective surface by the charged electrostatic load, etc. Therefore, when checking the laser diode emission, observe from all other than ordinary solder so use the procedure in the optical pickup block. SAFETY CHECK-OUT (US MODEL) After correcting the original service problem, perform the following characteristics...
Service Manual
Page 4
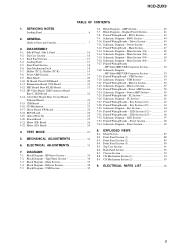
..., containing MP3 audio tracks 1) that enables adding of files and folders on CD-ROMs, defined by ISO (International Organization for Standardization). 3) This is a recording method that conforms to Lead-out regarded as a single session. 4 PART No. HCD-ZUX9 Ver. 1.1 MODEL IDENTIFICATION - A Multi Session disc is a standard format defined by ISO/MPEG which compresses audio data. Conventional discs begin at a disc control area called...
..., containing MP3 audio tracks 1) that enables adding of files and folders on CD-ROMs, defined by ISO (International Organization for Standardization). 3) This is a recording method that conforms to Lead-out regarded as a single session. 4 PART No. HCD-ZUX9 Ver. 1.1 MODEL IDENTIFICATION - A Multi Session disc is a standard format defined by ISO/MPEG which compresses audio data. Conventional discs begin at a disc control area called...
Service Manual
Page 5
... Guide to Parts and Controls 7 3. Schematic Diagram - HP-Video/MIC/USB Connector Section 52 7-18. Schematic Diagram - LED Section 67 7-33. DISASSEMBLY 3-1. TEST MODE 27 5. RF/Servo Section 35 7-2. Tape/Tuner Section 36 7-3. BD91 Section 44 7-10. Printed Wiring Boards - Front Panel Section (3 90 8-5. HCD-ZUX9 TABLE OF CONTENTS 1. Top Case Section 16 3-3. ELECTRICAL ADJUSTMENTS 31 7. Block Diagram - BD91 Section 43 7-9. Main Section (1/4 48 7-14. Printed Wiring Board - Schematic Diagram...
... Guide to Parts and Controls 7 3. Schematic Diagram - HP-Video/MIC/USB Connector Section 52 7-18. Schematic Diagram - LED Section 67 7-33. DISASSEMBLY 3-1. TEST MODE 27 5. RF/Servo Section 35 7-2. Tape/Tuner Section 36 7-3. BD91 Section 44 7-10. Printed Wiring Boards - Front Panel Section (3 90 8-5. HCD-ZUX9 TABLE OF CONTENTS 1. Top Case Section 16 3-3. ELECTRICAL ADJUSTMENTS 31 7. Block Diagram - BD91 Section 43 7-9. Main Section (1/4 48 7-14. Printed Wiring Board - Schematic Diagram...

Service Manual
Page 8
... MP3 audio tracks from a disc onto the connected optional USB device (Digital music player or USB storage media). H DISPLAY (pages 43, 44) Press to change the information on or off. HCD-ZUX9 1 "/1 (on/standby) (pages 15, 16, 17, 24, 30, 42, 47, 53) Press to turn the system on the display. Continued l 7GB 8 N Power illuminator (page 42) O MIC (jack) (pages 40, 47, 57) Connect an optional microphone. B Function buttons: CD (pages...
... MP3 audio tracks from a disc onto the connected optional USB device (Digital music player or USB storage media). H DISPLAY (pages 43, 44) Press to change the information on or off. HCD-ZUX9 1 "/1 (on/standby) (pages 15, 16, 17, 24, 30, 42, 47, 53) Press to turn the system on the display. Continued l 7GB 8 N Power illuminator (page 42) O MIC (jack) (pages 40, 47, 57) Connect an optional microphone. B Function buttons: CD (pages...

Service Manual
Page 9
... a tape. Press to switch to turn on the connected optional USB device (Digital music player or USB storage media). HCD-ZUX9 T PHONES (jack) (pages 37, 40, 47, 57) Connect the headphones. Y AMP MENU (page 42) Press to change the lighting effect of the display and built-in beam or change the power illuminator pattern. Deck B (pages 32, 42, 53) wk A Z PUSH OPEN/CLOSE (Deck A) (page 31) Press to select a disc. Z BEAM MODE...
... a tape. Press to switch to turn on the connected optional USB device (Digital music player or USB storage media). HCD-ZUX9 T PHONES (jack) (pages 37, 40, 47, 57) Connect the headphones. Y AMP MENU (page 42) Press to change the lighting effect of the display and built-in beam or change the power illuminator pattern. Deck B (pages 32, 42, 53) wk A Z PUSH OPEN/CLOSE (Deck A) (page 31) Press to select a disc. Z BEAM MODE...

Service Manual
Page 10
.... BPM CONTROL (page 39) Press to record a track from a disc onto the connected optional USB device (Digital music player or USB storage media). ed NX (play/pause) (pages 18, 20, 23, 25, 31, 49, 52) Press to find a point in a radio station. +/- (pages 18, 21, 24, 26, 32) Press to record onto a tape. m/M (rewind/fast forward) (pages 18, 26, 31) Press to start or pause playback...
.... BPM CONTROL (page 39) Press to record a track from a disc onto the connected optional USB device (Digital music player or USB storage media). ed NX (play/pause) (pages 18, 20, 23, 25, 31, 49, 52) Press to find a point in a radio station. +/- (pages 18, 21, 24, 26, 32) Press to record onto a tape. m/M (rewind/fast forward) (pages 18, 26, 31) Press to start or pause playback...

Service Manual
Page 11
... BLEND function (page 38). H Indicators for the speaker system (page 40). P Lights up when the Sleep Timer is recognized. HCD-ZUX9 - I Indicators for the TUNER function (page 29). N Indicators for the disc tray (page 18). O Lights up when the Play Timer or Recording Timer is displayed. D Lights up when an MP3 audio track is selected (page 25). B "MP3" lights up when an optional USB device (Digital music player or USB storage...
... BLEND function (page 38). H Indicators for the speaker system (page 40). P Lights up when the Sleep Timer is recognized. HCD-ZUX9 - I Indicators for the TUNER function (page 29). N Indicators for the disc tray (page 18). O Lights up when the Play Timer or Recording Timer is displayed. D Lights up when an MP3 audio track is selected (page 25). B "MP3" lights up when an optional USB device (Digital music player or USB storage...

Service Manual
Page 12
... select a function. Press to adjust the time when setting the clock or timer. +/- (tuning) (pages 29, 30) Press to select the FM monaural or stereo reception. Press to tune in a track or tape. (play) (pages 18, 23, 31, 49, 52) X (pause) (pages 18, 31) Press to change the Repeat Play setting. m/M (rewind/fast forward) (pages 18, 26, 31) Press to find a point in a radio station. C REPEAT/FM MODE (pages 22...
... select a function. Press to adjust the time when setting the clock or timer. +/- (tuning) (pages 29, 30) Press to select the FM monaural or stereo reception. Press to tune in a track or tape. (play) (pages 18, 23, 31, 49, 52) X (pause) (pages 18, 31) Press to change the Repeat Play setting. m/M (rewind/fast forward) (pages 18, 26, 31) Press to find a point in a radio station. C REPEAT/FM MODE (pages 22...

Service Manual
Page 13
... the display. JUMP PAD (page 37) Press to switch the sound position to select a preset effect. I VOLUME +/-* (pages 18, 25, 42, 47) Press to adjust the volume. * The VOLUME + button has a tactile dot Use the tactile dot as a reference when operating the system J EQ (page 34) Press to the opposite direction instantly. X-ROUND MODE (pages 36, 37) Press to select the next disc. HCD-ZUX9 G DISC SKIP...
... the display. JUMP PAD (page 37) Press to switch the sound position to select a preset effect. I VOLUME +/-* (pages 18, 25, 42, 47) Press to adjust the volume. * The VOLUME + button has a tactile dot Use the tactile dot as a reference when operating the system J EQ (page 34) Press to the opposite direction instantly. X-ROUND MODE (pages 36, 37) Press to select the next disc. HCD-ZUX9 G DISC SKIP...

Service Manual
Page 14
... a track. +/- (tuning) (page 29) Press to tune in a radio station. (play) (page 18) X (pause) (pages 18, 31) Press to reinforce the bass. F BEAT LEVEL (page 38) Press to select a function. 13GB 14 D FRONT BUILT-IN BEAM (page 43) BOTTOM BUILT-IN BEAM (page 43) Press to add percussion sound. K FUNCTION (pages 18, 29, 43, 46) Press to adjust the beat level. HCD-ZUX9...
... a track. +/- (tuning) (page 29) Press to tune in a radio station. (play) (page 18) X (pause) (pages 18, 31) Press to reinforce the bass. F BEAT LEVEL (page 38) Press to select a function. 13GB 14 D FRONT BUILT-IN BEAM (page 43) BOTTOM BUILT-IN BEAM (page 43) Press to add percussion sound. K FUNCTION (pages 18, 29, 43, 46) Press to adjust the beat level. HCD-ZUX9...
Service Manual
Page 27
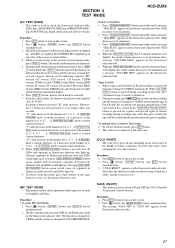
.... Each time a button is turned counterclockwise. 8. GEQ decreases to turn on the system. 2. Press x button, [ENTER] button, and @/1 button simultaneously. 3. When [CD-TAPE SYNC] button is pressed during recording time, when the tape is rewind, the tape will stop the recording and the function is changed to VOLUME MIN/MAX. [VACS ON/OFF] • This mode is used to initial conditions. Execute this mode when returning the set to the software version display mode, press [DISC 1] button...
.... Each time a button is turned counterclockwise. 8. GEQ decreases to turn on the system. 2. Press x button, [ENTER] button, and @/1 button simultaneously. 3. When [CD-TAPE SYNC] button is pressed during recording time, when the tape is rewind, the tape will stop the recording and the function is changed to VOLUME MIN/MAX. [VACS ON/OFF] • This mode is used to initial conditions. Execute this mode when returning the set to the software version display mode, press [DISC 1] button...
Service Manual
Page 28
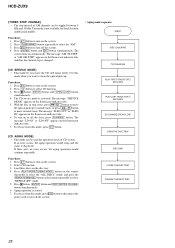
... displayed. Press [PLAY MODE/TUNING MODE] button on the remote repeatedly to select "REPEAT OFF" mode. 5. To release from this mode, press @/1 button. [CD AGING MODE] • This mode can be used for Saudi Arabian and Russian models. Press @/1 button to inside track. Press [CD] button to select the "AM". 3. To turn on the disc tray. 4. Press @/1 button to turn on the fluorescent indicator tube. 7. Press x button, [ENTER] button and [DISC SKIP/EX-CHANGE] button simultaneously. 6. Use this mode, press @/1 button or disconnect the power cord...
... displayed. Press [PLAY MODE/TUNING MODE] button on the remote repeatedly to select "REPEAT OFF" mode. 5. To release from this mode, press @/1 button. [CD AGING MODE] • This mode can be used for Saudi Arabian and Russian models. Press @/1 button to inside track. Press [CD] button to select the "AM". 3. To turn on the disc tray. 4. Press @/1 button to turn on the fluorescent indicator tube. 7. Press x button, [ENTER] button and [DISC SKIP/EX-CHANGE] button simultaneously. 6. Use this mode, press @/1 button or disconnect the power cord...
Service Manual
Page 29
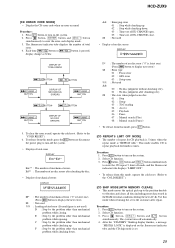
... displays the number of repeat for limitless times. Select CD function. 3. The system turns off mode and the fluorescent indicator tube displays "LIMIT OFF". • To release from this mode, operate the cold reset. (Refer to repeat playback for CD playback is 5 times when the repeat mode is set to display next error) $$ : Error type 01 : Focus error 02 : GFS error 03 : Setup error %% : Not used ) D : Stop by the problem other than mechanical problem while chucking down . 03 : Time-out of EX-CHANGE open...
... displays the number of repeat for limitless times. Select CD function. 3. The system turns off mode and the fluorescent indicator tube displays "LIMIT OFF". • To release from this mode, operate the cold reset. (Refer to repeat playback for CD playback is 5 times when the repeat mode is set to display next error) $$ : Error type 01 : Focus error 02 : GFS error 03 : Setup error %% : Not used ) D : Stop by the problem other than mechanical problem while chucking down . 03 : Time-out of EX-CHANGE open...
Service Manual
Page 30
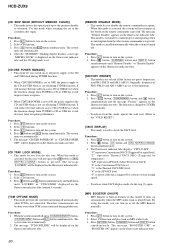
... set to the "COLD RESET"). [VACS DISPLAY] • This mode is triggered by temperature) "AP" represents APVACS (Abuse Protection VACS) "$" is pressed. The message "TCM OFFLINE" will reduce the time taken to access CD or USB device when the function change from this mode, you disable the remote commander reception. "#" is turned off power supply to the CD and USB block is expected. When this model. Press @/1 button...
... set to the "COLD RESET"). [VACS DISPLAY] • This mode is triggered by temperature) "AP" represents APVACS (Abuse Protection VACS) "$" is pressed. The message "TCM OFFLINE" will reduce the time taken to access CD or USB device when the function change from this mode, you disable the remote commander reception. "#" is turned off power supply to the CD and USB block is expected. When this model. Press @/1 button...
Service Manual
Page 31
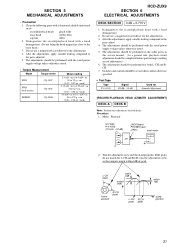
.... 2. Switches and controls should be set + - 2. SECTION 5 MECHANICAL ADJUSTMENTS • Precaution 1. Demagnetize the record/playback head with the rated power supply voltage unless otherwise noted. 5. Mode: Playback test tape P-4-A100 (10 kHz, −10 dB) JACK board PHONES jack (J904) level meter set as follows unless otherwise specified. • Test Tape Tape P-4-A100 Signal 10 kHz, -10 dB Used for L-CH and R-CH, turn the adjustment screw so that outputs match...
.... 2. Switches and controls should be set + - 2. SECTION 5 MECHANICAL ADJUSTMENTS • Precaution 1. Demagnetize the record/playback head with the rated power supply voltage unless otherwise noted. 5. Mode: Playback test tape P-4-A100 (10 kHz, −10 dB) JACK board PHONES jack (J904) level meter set as follows unless otherwise specified. • Test Tape Tape P-4-A100 Signal 10 kHz, -10 dB Used for L-CH and R-CH, turn the adjustment screw so that outputs match...

Service Manual
Page 32
... ANT input : 35 dBu (EMF) Note: Please use SG whose output impedance is lit on . 2. Set to the pats adjusted. Record/Playback/Erase Head (Deck B). After the adjustments, apply suitable locking compound to FM tuner function and tune A, B and C signals. 4. Confirm "TUNED" is 75 ohm. 3. Mode: Playback test tape P-4-A100 JACK board (10 kHz, −10 dB) PHONES jack oscilloscope (J904) VH set . You cannot use video cable for A, B and C signals. HCD-ZUX9 3.
... ANT input : 35 dBu (EMF) Note: Please use SG whose output impedance is lit on . 2. Set to the pats adjusted. Record/Playback/Erase Head (Deck B). After the adjustments, apply suitable locking compound to FM tuner function and tune A, B and C signals. 4. Confirm "TUNED" is 75 ohm. 3. Mode: Playback test tape P-4-A100 JACK board (10 kHz, −10 dB) PHONES jack oscilloscope (J904) VH set . You cannot use video cable for A, B and C signals. HCD-ZUX9 3.

Service Manual
Page 40
... AUS : Australian model E2 : 120V AC area in E model E13 : 220 - 230V AC area in E model E51 : Chilean and Peruvian model HCD-ZUX9 40 40 BLOCK DIAGRAM - TM601 FRONT SPEAKER FAN MOTOR DRIVE Q545-547 FAN DETECT Q601,602 HI SPEED SWITCH Q603 FAN CONTROL SWITCH Q600 FAN MOTOR DRIVE Q604 M M892 DC FAN M M891 DC FAN FUN CONTROL N DISPLAY/POWER SECTION (Page 41) + L - + R - AMP Section - HCD-ZUX9 Ver. 1.1 7-6.
... AUS : Australian model E2 : 120V AC area in E model E13 : 220 - 230V AC area in E model E51 : Chilean and Peruvian model HCD-ZUX9 40 40 BLOCK DIAGRAM - TM601 FRONT SPEAKER FAN MOTOR DRIVE Q545-547 FAN DETECT Q601,602 HI SPEED SWITCH Q603 FAN CONTROL SWITCH Q600 FAN MOTOR DRIVE Q604 M M892 DC FAN M M891 DC FAN FUN CONTROL N DISPLAY/POWER SECTION (Page 41) + L - + R - AMP Section - HCD-ZUX9 Ver. 1.1 7-6.

Service Manual
Page 86
... indicator tube display 48 VKK - Power supply (+3.3 V) 85 to 100 G1 to 16 O Grid drive signal output to the fluorescent indicator tube display 42 VSS-IO - Pin Name I /O port) 43 to 47 P5 to P1 O Segment drive signal output to the fluorescent indicator tube display 11 VSS-IO - Not used. (Open) 77 RESET I System reset signal input from the Master Control controller ("L": reset) 78 NO USE O Not used. (Open) 79 X ROUND...
... indicator tube display 48 VKK - Power supply (+3.3 V) 85 to 100 G1 to 16 O Grid drive signal output to the fluorescent indicator tube display 42 VSS-IO - Pin Name I /O port) 43 to 47 P5 to P1 O Segment drive signal output to the fluorescent indicator tube display 11 VSS-IO - Not used. (Open) 77 RESET I System reset signal input from the Master Control controller ("L": reset) 78 NO USE O Not used. (Open) 79 X ROUND...


