
Operating Instructions
Page 2
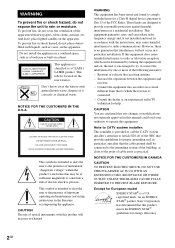
...one or more of the FCC Rules. registered mark. These limits are cautioned that any changes or modifications not expressly approved in this manual could void your authority to correct the interference by turning the equipment off and on a circuit different from that this product will not... occur in cabinet. Consult the dealer or an experienced radio/TV technician for energy efficiency. 2GB As an ENERGY STAR® partner, Sony Corporation has determined that to Part 15 of the following measures: - And don't place lighted candles on the rear exterior. WARNING To prevent...
...one or more of the FCC Rules. registered mark. These limits are cautioned that any changes or modifications not expressly approved in this manual could void your authority to correct the interference by turning the equipment off and on a circuit different from that this product will not... occur in cabinet. Consult the dealer or an experienced radio/TV technician for energy efficiency. 2GB As an ENERGY STAR® partner, Sony Corporation has determined that to Part 15 of the following measures: - And don't place lighted candles on the rear exterior. WARNING To prevent...
Operating Instructions
Page 3
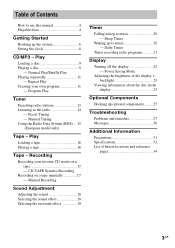
... Play Loading a tape 16 Playing a tape 16 Tape - Sleep Timer Waking up to use this manual 4 Playable discs 4 Getting Started Hooking up optional components......... 25 Troubleshooting Problems and remedies 27 Messages 30 Additional Information Precautions 31 Specifications 32 List of Contents How... Play Creating your favorite CD tracks on a tape manually 17 - Preset Tuning - Power Saving Mode Adjusting the brightness of the display's backlight 23 Viewing information about the disc in the display 23 Optional Components Hooking up the system 6 Setting the clock 8...
... Play Loading a tape 16 Playing a tape 16 Tape - Sleep Timer Waking up to use this manual 4 Playable discs 4 Getting Started Hooking up optional components......... 25 Troubleshooting Problems and remedies 27 Messages 30 Additional Information Precautions 31 Specifications 32 List of Contents How... Play Creating your favorite CD tracks on a tape manually 17 - Preset Tuning - Power Saving Mode Adjusting the brightness of the display's backlight 23 Viewing information about the disc in the display 23 Optional Components Hooking up the system 6 Setting the clock 8...
Operating Instructions
Page 4
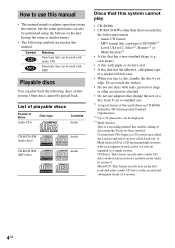
...*2 or Multi Session*3 • A disc that has a non-standard shape (e.g., card, heart). • A disc with seals, protection rings or other than those recorded in this manual. Other discs cannot be performed using the buttons on it . • A disc that can be displayed. *3 Multi Session This is a CD having the same or... Functions that can be used in the following discs on the tracks in and end at an area called Lead-out. How to use this manual • This manual mainly explains operations using the remote, but the same operations can also be played back.
...*2 or Multi Session*3 • A disc that has a non-standard shape (e.g., card, heart). • A disc with seals, protection rings or other than those recorded in this manual. Other discs cannot be performed using the buttons on it . • A disc that can be displayed. *3 Multi Session This is a CD having the same or... Functions that can be used in the following discs on the tracks in and end at an area called Lead-out. How to use this manual • This manual mainly explains operations using the remote, but the same operations can also be played back.
Operating Instructions
Page 13
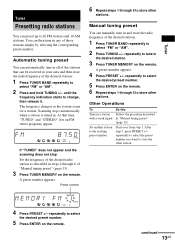
... "FM" or "AM". 2 Press and hold TUNING +/- The frequency changes as described in "Manual tuning preset" (page 13). Other Operations To Tune in and store the radio frequency of "Manual tuning preset" (page 13). 3 Press TUNER MEMORY on the remote. 6 Repeat steps 1 through... 5 to store other station. 4 Press PRESET +/- Start over from step 1. A preset number appears. Manual tuning preset You can manually tune in a station with a weak signal Set another station to select the desired preset number. 5 Press ENTER on the remote. Preset number...
... "FM" or "AM". 2 Press and hold TUNING +/- The frequency changes as described in "Manual tuning preset" (page 13). Other Operations To Tune in and store the radio frequency of "Manual tuning preset" (page 13). 3 Press TUNER MEMORY on the remote. 6 Repeat steps 1 through... 5 to store other station. 4 Press PRESET +/- Start over from step 1. A preset number appears. Manual tuning preset You can manually tune in a station with a weak signal Set another station to select the desired preset number. 5 Press ENTER on the remote. Preset number...
Operating Instructions
Page 14
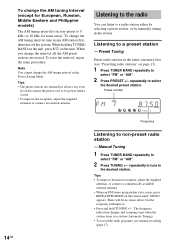
...change the AM tuning interval in a station (Automatic Tuning). • To record the radio programs, use manual recording (page 17). Listening to select "FM" or "AM". 2 Press TUNING +/- Manual Tuning 1 Press TUNER BAND repeatedly to a preset station - The frequency indication changes and scanning stops when ...on the remote until "MONO" appears. Preset number 14GB Frequency Listening to a radio station either by selecting a preset station, or by manually tuning in any AM station first, then turn off the system. Listening to the radio You can listen to non-preset radio station -...
...change the AM tuning interval in a station (Automatic Tuning). • To record the radio programs, use manual recording (page 17). Listening to select "FM" or "AM". 2 Press TUNING +/- Manual Tuning 1 Press TUNER BAND repeatedly to a preset station - The frequency indication changes and scanning stops when ...on the remote until "MONO" appears. Preset number 14GB Frequency Listening to a radio station either by selecting a preset station, or by manually tuning in any AM station first, then turn off the system. Listening to the radio You can listen to non-preset radio station -...
Operating Instructions
Page 17
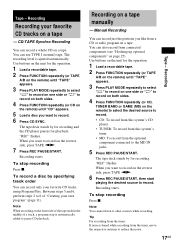
...; TUNER: To record from this system's tuner. • MD: To record from the optional component connected to record on both sides. 4 Press FUNCTION repeatedly (or CD, TUNER BAND or GAME (MD) on a tape manually - Recording When you want to pause CD playback. Between steps 5 and 6, perform steps 2 ...When you like from the tuner, move the respective antenna to record. 6 Press CD SYNC. Tip For recording from connected components (see "Hooking up optional components" on the reverse side, press TAPE nN. 6 Press REC PAUSE/START, then start playing the desired source to other sources...
...; TUNER: To record from this system's tuner. • MD: To record from the optional component connected to record on both sides. 4 Press FUNCTION repeatedly (or CD, TUNER BAND or GAME (MD) on a tape manually - Recording When you want to pause CD playback. Between steps 5 and 6, perform steps 2 ...When you like from the tuner, move the respective antenna to record. 6 Press CD SYNC. Tip For recording from connected components (see "Hooking up optional components" on the reverse side, press TAPE nN. 6 Press REC PAUSE/START, then start playing the desired source to other sources...
Operating Instructions
Page 26
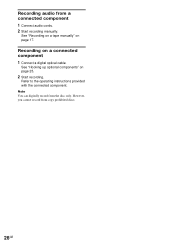
See "Hooking up optional components" on page 17. Recording audio from copy prohibited discs. 26GB See "Recording on a tape manually" on page 25. 2 Start recording. Recording on a connected component 1 Connect a digital optical cable. However, you cannot record from a connected component 1 Connect audio cords. 2 Start recording manually. Refer to the operating instructions provided with the connected component. Note You can digitally record from the disc only.
See "Hooking up optional components" on page 17. Recording audio from copy prohibited discs. 26GB See "Recording on a tape manually" on page 25. 2 Start recording. Recording on a connected component 1 Connect a digital optical cable. However, you cannot record from a connected component 1 Connect audio cords. 2 Start recording manually. Refer to the operating instructions provided with the connected component. Note You can digitally record from the disc only.

