User Guide
Page 27
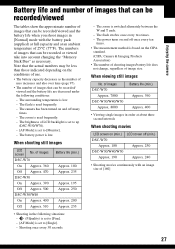
... are decreased under the following situations: - (P.Quality) is set to [Fine]. - [AF Mode] is set to [Monitor]. - The camera has been turned on the conditions of use. • The battery capacity decreases as necessary. of 25°C (77°F). The numbers of images that ...DSC-W50 On Approx. 390 Off Approx. 500 DSC-W30/W40 On Approx. 400 Off Approx. 510 Battery life (min.) Approx. 180 Approx. 235 Approx. 195 Approx. 250 Approx. 200 Approx. 255 - The zoom is used frequently. - The battery power is based on (min.) LCD screen off many times. - The power turns...
... are decreased under the following situations: - (P.Quality) is set to [Fine]. - [AF Mode] is set to [Monitor]. - The camera has been turned on the conditions of use. • The battery capacity decreases as necessary. of 25°C (77°F). The numbers of images that ...DSC-W50 On Approx. 390 Off Approx. 500 DSC-W30/W40 On Approx. 400 Off Approx. 510 Battery life (min.) Approx. 180 Approx. 235 Approx. 195 Approx. 250 Approx. 200 Approx. 255 - The zoom is used frequently. - The battery power is based on (min.) LCD screen off many times. - The power turns...

User Guide
Page 46
...the Setup screen Using Setup items You can change the default settings using the Setup screen. v/V/b/B button Mode dial z button MENU button Control button 1 Turn on the camera. 2 Press MENU to display the menu. 3 After pressing B on the control button, go to select the item you press MENU longer, the...z to set. When the menu is turned off the (Setup) screen, press MENU. To turn off . 46 To cancel the (Setup) setting Select [Cancel] if it does not appear, select the previous setting again. • This setting is maintained even when the power is not displayed If you want to ...
...the Setup screen Using Setup items You can change the default settings using the Setup screen. v/V/b/B button Mode dial z button MENU button Control button 1 Turn on the camera. 2 Press MENU to display the menu. 3 After pressing B on the control button, go to select the item you press MENU longer, the...z to set. When the menu is turned off the (Setup) screen, press MENU. To turn off . 46 To cancel the (Setup) setting Select [Cancel] if it does not appear, select the previous setting again. • This setting is maintained even when the power is not displayed If you want to ...
User Guide
Page 53
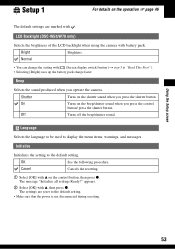
...; You can change the setting with v, then press z. Initialize Initializes the setting to the default setting. • Make sure that the power is not disconnected during resetting. 53 OK See the following procedure. Using the Setup screen Setup 1 1 For details on the beep/shutter ... the shutter button. Beep Selects the sound produced when you operate the camera. Bright Brightens. On Turns on the operation 1 page 46 The default settings are reset to the default setting. LCD Backlight (DSC-W50/W70 only) Selects the brightness of the LCD backlight when using the...
...; You can change the setting with v, then press z. Initialize Initializes the setting to the default setting. • Make sure that the power is not disconnected during resetting. 53 OK See the following procedure. Using the Setup screen Setup 1 1 For details on the beep/shutter ... the shutter button. Beep Selects the sound produced when you operate the camera. Bright Brightens. On Turns on the operation 1 page 46 The default settings are reset to the default setting. LCD Backlight (DSC-W50/W70 only) Selects the brightness of the LCD backlight when using the...
User Guide
Page 73
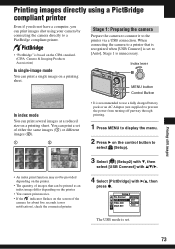
... different images (2). 1 2 • It is recommended to use a fully charged battery pack or an AC Adaptor (not supplied) to prevent the power from turning off partway through printing. 1 Press MENU to display the menu. 2 Press B on the control button to select (Setup). • An index...compliant printer Even if you do not have a computer, you can print images shot using your camera by connecting the camera directly to a PictBridge compliant printer. • "PictBridge" is based on the CIPA standard. (CIPA: Camera & Imaging Products Association) In single-image mode You can print a single ...
... different images (2). 1 2 • It is recommended to use a fully charged battery pack or an AC Adaptor (not supplied) to prevent the power from turning off partway through printing. 1 Press MENU to display the menu. 2 Press B on the control button to select (Setup). • An index...compliant printer Even if you do not have a computer, you can print images shot using your camera by connecting the camera directly to a PictBridge compliant printer. • "PictBridge" is based on the CIPA standard. (CIPA: Camera & Imaging Products Association) In single-image mode You can print a single ...
User Guide
Page 80
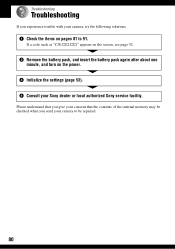
If a code such as "C/E:ss:ss" appears on the screen, see page 92. 2 Remove the battery pack, and insert the battery pack again after about one minute, and turn on the power. 3 Initialize the settings (page 53). 4 Consult your camera, try the following solutions. 1 Check the items on pages 81 to be repaired. 80 Troubleshooting Troubleshooting If you send your camera to 91. Please understand that you give your consent that the contents of the internal memory may be checked when you experience trouble with your Sony dealer or local authorized Sony service facility.
If a code such as "C/E:ss:ss" appears on the screen, see page 92. 2 Remove the battery pack, and insert the battery pack again after about one minute, and turn on the power. 3 Initialize the settings (page 53). 4 Consult your camera, try the following solutions. 1 Check the items on pages 81 to be repaired. 80 Troubleshooting Troubleshooting If you send your camera to 91. Please understand that you give your consent that the contents of the internal memory may be checked when you experience trouble with your Sony dealer or local authorized Sony service facility.
User Guide
Page 81
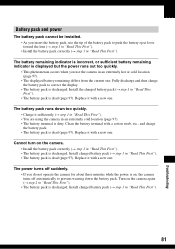
... 1 in "Read This First"). • The battery pack is dead (page 97). The power turns off suddenly. • If you do not operate the camera for about three minutes while the power is discharged. The battery remaining indicator is incorrect, or sufficient battery remaining indicator is displayed but... charge the battery pack to correct the display. • The battery pack is on the camera again (t step 2 in "Read This First"). • The battery pack is dirty. Turn on , the camera turns off automatically to push the battery eject lever toward the lens (t step 1 in "Read This...
... 1 in "Read This First"). • The battery pack is dead (page 97). The power turns off suddenly. • If you do not operate the camera for about three minutes while the power is discharged. The battery remaining indicator is incorrect, or sufficient battery remaining indicator is displayed but... charge the battery pack to correct the display. • The battery pack is on the camera again (t step 2 in "Read This First"). • The battery pack is dirty. Turn on , the camera turns off automatically to push the battery eject lever toward the lens (t step 1 in "Read This...
User Guide
Page 82
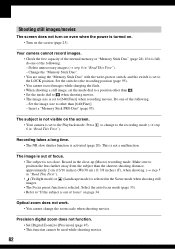
... (Landscape mode) is too close -up (Macro) recording mode. Record in "Read This First"). Shooting still images/movies The screen does not turn on even when the power is not a malfunction. Press 6 in the close . Select the auto focus mode (page 33). • Refer to "If the subject ... turned on. • Turn on page 34. Precision digital zoom does not function. • Set [Digital Zoom] to the Playback mode. Change the "Memory Stick Duo". • You are using the "Memory Stick Duo" with the write-protect switch, and the switch is full, do one of the following : - Your camera ...
... (Landscape mode) is too close -up (Macro) recording mode. Record in "Read This First"). Shooting still images/movies The screen does not turn on even when the power is not a malfunction. Press 6 in the close . Select the auto focus mode (page 33). • Refer to "If the subject ... turned on. • Turn on page 34. Precision digital zoom does not function. • Set [Digital Zoom] to the Playback mode. Change the "Memory Stick Duo". • You are using the "Memory Stick Duo" with the write-protect switch, and the switch is full, do one of the following : - Your camera ...

User Guide
Page 91
Charge the battery pack (t step 1 in microcomputer is not working properly. The power is low (The E indicator appears). Cannot identify an indicator on the camera. The lens does not move when you use with a charged battery pack (t Step 1 in "Read This First"). 91 Troubleshooting Remove the... battery pack, and then, after one minute, insert the battery pack and turn on the screen. • See page 19. The camera becomes warm when you turn off the camera and leave it for a long time. • This is discharged. The Clock Set screen appears...
Charge the battery pack (t step 1 in microcomputer is not working properly. The power is low (The E indicator appears). Cannot identify an indicator on the camera. The lens does not move when you use with a charged battery pack (t Step 1 in "Read This First"). 91 Troubleshooting Remove the... battery pack, and then, after one minute, insert the battery pack and turn on the screen. • See page 19. The camera becomes warm when you turn off the camera and leave it for a long time. • This is discharged. The Clock Set screen appears...
User Guide
Page 92
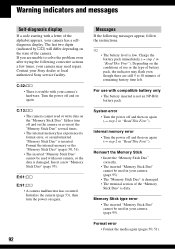
...First"). C:32:ss • There is trouble with your camera's hardware. System error • Turn the power off and on again (t step 2 in your Sony dealer or local authorized Sony service facility. Memory Stick type error • The inserted ..."Memory Stick Duo" cannot be used in "Read This First"). Insert a new "Memory Stick Duo" (page 95). Initialize the camera (page 53), then turn off and then on again. The last two digits...
...First"). C:32:ss • There is trouble with your camera's hardware. System error • Turn the power off and on again (t step 2 in your Sony dealer or local authorized Sony service facility. Memory Stick type error • The inserted ..."Memory Stick Duo" cannot be used in "Read This First"). Insert a new "Memory Stick Duo" (page 95). Initialize the camera (page 53), then turn off and then on again. The last two digits...


