Operating Instructions
Page 1
...computer Printing still images Connecting your camera to these numbers whenever you call upon your TV Troubleshooting Others Index © 2005 Sony Corporation Printed in the space provided below. Model No. DSC-H1 Serial No DSC-H1 "Read This First" (separate ...volume) Explains the set-up and basic operations for future reference. Additional information on 100% recycled paper using VOC (Volatile Organic Compound)-free vegetable oil based ink. Record the serial number in Japan Digital Still Camera User's Guide/ Troubleshooting...
...computer Printing still images Connecting your camera to these numbers whenever you call upon your TV Troubleshooting Others Index © 2005 Sony Corporation Printed in the space provided below. Model No. DSC-H1 Serial No DSC-H1 "Read This First" (separate ...volume) Explains the set-up and basic operations for future reference. Additional information on 100% recycled paper using VOC (Volatile Organic Compound)-free vegetable oil based ink. Record the serial number in Japan Digital Still Camera User's Guide/ Troubleshooting...
Operating Instructions
Page 9
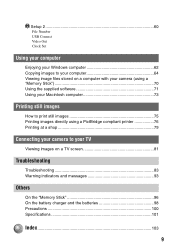
...Set Using your computer Enjoying your Windows computer 62 Copying images to your computer 64 Viewing image files stored on a computer with your camera (using a "Memory Stick 70 Using the supplied software 71 Using your Macintosh computer 73 Printing still images How to print still ...images 75 Printing images directly using a PictBridge compliant printer 76 Printing at a shop 79 Connecting your camera to your TV Viewing images on a TV screen 81 Troubleshooting Troubleshooting 83 Warning indicators and messages 93 Others On the "Memory Stick 96 On the battery charger and the ...
...Set Using your computer Enjoying your Windows computer 62 Copying images to your computer 64 Viewing image files stored on a computer with your camera (using a "Memory Stick 70 Using the supplied software 71 Using your Macintosh computer 73 Printing still images How to print still ...images 75 Printing images directly using a PictBridge compliant printer 76 Printing at a shop 79 Connecting your camera to your TV Viewing images on a TV screen 81 Troubleshooting Troubleshooting 83 Warning indicators and messages 93 Others On the "Memory Stick 96 On the battery charger and the ...
Operating Instructions
Page 83
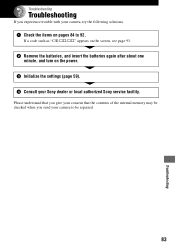
If a code such as "C/E:ss:ss" appears on the screen, see page 93. 2 Remove the batteries, and insert the batteries again after about one minute, and turn on pages 84 to be repaired. 83 Troubleshooting Please understand that you give your consent that the contents of the internal memory may be checked when you experience trouble with your camera, try the following solutions. 1 Check the items on the power. 3 Initialize the settings (page 59). 4 Consult your camera to 92. Troubleshooting Troubleshooting If you send your Sony dealer or local authorized Sony service facility.
If a code such as "C/E:ss:ss" appears on the screen, see page 93. 2 Remove the batteries, and insert the batteries again after about one minute, and turn on pages 84 to be repaired. 83 Troubleshooting Please understand that you give your consent that the contents of the internal memory may be checked when you experience trouble with your camera, try the following solutions. 1 Check the items on the power. 3 Initialize the settings (page 59). 4 Consult your camera to 92. Troubleshooting Troubleshooting If you send your Sony dealer or local authorized Sony service facility.

Operating Instructions
Page 85
...Set the mode dial to when shooting movies. • The image size is set to (No flash) (t step 5 in "Read This First"). 85 Troubleshooting The image size is set to a other position than [640(Fine)]. - Change the "Memory Stick". • Set the write-protect switch on the...movies. The image is out of the following: - Delete unnecessary images (t step 6 in Multi Burst mode. - Smart zoom does not function. • Set [Digital Zoom] to other position than the shortest shooting distance, approximately 2 cm (13/16 inches) (W)/90 cm (35 1/2 inches) (T), when shooting (t step 5 in...
...Set the mode dial to when shooting movies. • The image size is set to (No flash) (t step 5 in "Read This First"). 85 Troubleshooting The image size is set to a other position than [640(Fine)]. - Change the "Memory Stick". • Set the write-protect switch on the...movies. The image is out of the following: - Delete unnecessary images (t step 6 in Multi Burst mode. - Smart zoom does not function. • Set [Digital Zoom] to other position than the shortest shooting distance, approximately 2 cm (13/16 inches) (W)/90 cm (35 1/2 inches) (T), when shooting (t step 5 in...

Operating Instructions
Page 87
... Set the mode dial to image processing. This is full. The image does not appear on your camera is not guaranteed. • The camera is connected. The image appears rough right after playback starts. • The image may appear rough ... 5 in "Read This First"). • Light the room and shoot the subject. Disconnect it (page 81). Deleting/Editing images Your camera cannot delete an image. • Cancel the protection (page 45). • Set the write-protect switch on the "Memory Stick" ... [Red Eye Reduction] in the (Setup) menu to the recording position (page 96). 87 Troubleshooting
... Set the mode dial to image processing. This is full. The image does not appear on your camera is not guaranteed. • The camera is connected. The image appears rough right after playback starts. • The image may appear rough ... 5 in "Read This First"). • Light the room and shoot the subject. Disconnect it (page 81). Deleting/Editing images Your camera cannot delete an image. • Cancel the protection (page 45). • Set the write-protect switch on the "Memory Stick" ... [Red Eye Reduction] in the (Setup) menu to the recording position (page 96). 87 Troubleshooting
Operating Instructions
Page 89
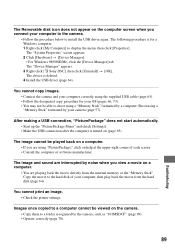
...noise when you view a movie on (page 65). The image and sound are interrupted by the camera, such as "101MSDCF" (page 69). • Operate correctly (page 70). 89 Troubleshooting Images once copied to a computer cannot be played back on a computer. • If you ...camera. • Follow the procedure below to the hard disk of each screen. • Consult the computer or software manufacturer. You cannot print an image. • Check the printer settings. The following procedure is deleted. 4 Install the USB driver (page 64). The "Device Manager" appears. 3 Right-click [ Sony DSC...
...noise when you view a movie on (page 65). The image and sound are interrupted by the camera, such as "101MSDCF" (page 69). • Operate correctly (page 70). 89 Troubleshooting Images once copied to a computer cannot be played back on a computer. • If you ...camera. • Follow the procedure below to the hard disk of each screen. • Consult the computer or software manufacturer. You cannot print an image. • Check the printer settings. The following procedure is deleted. 4 Install the USB driver (page 64). The "Device Manager" appears. 3 Right-click [ Sony DSC...
Operating Instructions
Page 91
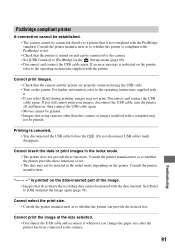
...you change the paper size after the printer has been connected to [Off] and print the image again (page 78). Troubleshooting 91 Set [Date] to the camera. Disconnect and connect the USB cable again. If an error message is canceled. • You disconnected the USB cable before.... If you select [Exit] during printing, images may not be printed. PictBridge compliant printer A connection cannot be established. • The camera cannot be connected directly to a printer that the printer is turned on and can provide the desired size. Consult the printer manufacturer as to...
...you change the paper size after the printer has been connected to [Off] and print the image again (page 78). Troubleshooting 91 Set [Date] to the camera. Disconnect and connect the USB cable again. If an error message is canceled. • You disconnected the USB cable before.... If you select [Exit] during printing, images may not be printed. PictBridge compliant printer A connection cannot be established. • The camera cannot be connected directly to a printer that the printer is turned on and can provide the desired size. Consult the printer manufacturer as to...
Operating Instructions
Page 93
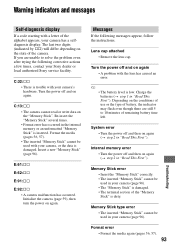
... a new "Memory Stick" (page 96). Format error • Format the media again (pages 56, 57). 93 Troubleshooting Turn the power off and then on again (t step 2 in your camera (page 96). Format the media (pages 56, 57). • The inserted "Memory Stick" cannot be used in ..." is damaged. • The terminal section of the alphabet appears, your Sony dealer or local authorized Sony service facility. The last two digits (indicated by ss) will differ depending on again • A problem with your camera, or the data is trouble with the lens has caused an error. Lens...
... a new "Memory Stick" (page 96). Format error • Format the media again (pages 56, 57). 93 Troubleshooting Turn the power off and then on again (t step 2 in your camera (page 96). Format the media (pages 56, 57). • The inserted "Memory Stick" cannot be used in ..." is damaged. • The terminal section of the alphabet appears, your Sony dealer or local authorized Sony service facility. The last two digits (indicated by ss) will differ depending on again • A problem with your camera, or the data is trouble with the lens has caused an error. Lens...
Operating Instructions
Page 95
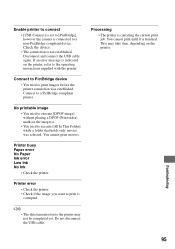
... • You tried to execute [DPOF image] without placing a DPOF (Print order) mark on the printer. Processing • The printer is finished. Troubleshooting • The data transmission to a PictBridge compliant printer. Disconnect and connect the USB cable again. You cannot print movies. You cannot print until it is...error Low Ink No Ink • Check the printer. Enable printer to connect • [USB Connect] is set to [PictBridge], however the camera is not established. Check the device. • The connection is connected to a non-PictBridge compliant device.
... • You tried to execute [DPOF image] without placing a DPOF (Print order) mark on the printer. Processing • The printer is finished. Troubleshooting • The data transmission to a PictBridge compliant printer. Disconnect and connect the USB cable again. You cannot print movies. You cannot print until it is...error Low Ink No Ink • Check the printer. Enable printer to connect • [USB Connect] is set to [PictBridge], however the camera is not established. Check the device. • The connection is connected to a non-PictBridge compliant device.

Operating Instructions
Page 105
..............93 Self-timer t step 5 in "Read This First" Sepia 41 Setting the clock t step 2 in "Read This First" Setup 42, 49, 50 Camera 1 51 Camera 2 54 Internal Memory Tool ... 56 Memory Stick Tool ....... 57 Setup 1 59 Setup 2 60 Setup 1 59 Setup 2 60 Sharpness 42 Shooting Movie t ... zoom 51 Software 71 Specifications 101 Spot metering 38 Spot metering cross hairs ..... 38 Standard 40 STEADY SHOT 54 T Trimming 49 Tripod receptacle 15 Troubleshooting 83 TV 81 Twilight mode t step 5 in "Read This First" Twilight portrait mode t step 5 in "Read This First" U Underexposure 11...
..............93 Self-timer t step 5 in "Read This First" Sepia 41 Setting the clock t step 2 in "Read This First" Setup 42, 49, 50 Camera 1 51 Camera 2 54 Internal Memory Tool ... 56 Memory Stick Tool ....... 57 Setup 1 59 Setup 2 60 Setup 1 59 Setup 2 60 Sharpness 42 Shooting Movie t ... zoom 51 Software 71 Specifications 101 Spot metering 38 Spot metering cross hairs ..... 38 Standard 40 STEADY SHOT 54 T Trimming 49 Tripod receptacle 15 Troubleshooting 83 TV 81 Twilight mode t step 5 in "Read This First" Twilight portrait mode t step 5 in "Read This First" U Underexposure 11...

