Operating Instructions
Page 1
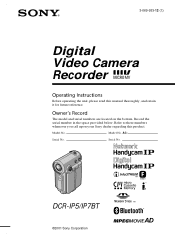
Model No. Serial No. DCR-IP5/IP7BT ©2001 Sony Corporation Record the serial number in the space provided below. Model No. AC- 3-069-933-12 (1) Digital Video Camera Recorder Operating Instructions Before operating the unit, please read this product. Refer to these numbers whenever you call upon your Sony dealer regarding this manual thoroughly, and retain it for future reference. Owner's Record The model and serial numbers are located on the bottom. Serial No.
Model No. Serial No. DCR-IP5/IP7BT ©2001 Sony Corporation Record the serial number in the space provided below. Model No. AC- 3-069-933-12 (1) Digital Video Camera Recorder Operating Instructions Before operating the unit, please read this product. Refer to these numbers whenever you call upon your Sony dealer regarding this manual thoroughly, and retain it for future reference. Owner's Record The model and serial numbers are located on the bottom. Serial No.
Operating Instructions
Page 3
... by turning the equipment off and on a circuit different from that any changes or modifications not expressly approved in this manual could void your authority to radio communications. Telephone No.: 201-930-6972 This device complies with the instructions, may cause...limits for a Class B digital device, pursuant to which can radiate radio frequency energy and, if not installed and used in a particular installation. These limits are cautioned that to Part 15 of Conformity Trade Name: SONY Model No.: DCR-IP5, DCR-IP7 Responsible Party:Sony Electronics Inc. Operation is ...
... by turning the equipment off and on a circuit different from that any changes or modifications not expressly approved in this manual could void your authority to radio communications. Telephone No.: 201-930-6972 This device complies with the instructions, may cause...limits for a Class B digital device, pursuant to which can radiate radio frequency energy and, if not installed and used in a particular installation. These limits are cautioned that to Part 15 of Conformity Trade Name: SONY Model No.: DCR-IP5, DCR-IP7 Responsible Party:Sony Electronics Inc. Operation is ...
Operating Instructions
Page 4
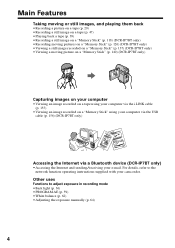
...a "Memory Stick" (p. 118) (DCR-IP7BT only) •Recording moving pictures on a "Memory Stick" (p. 126) (DCR-IP7BT only) •Viewing a still image recorded on a "Memory Stick" (p. 137) (DCR-IP7BT only) •Viewing a moving picture on a "Memory Stick" (p. 140) (DCR-IP7BT only) Capturing images on your ... "Memory Stick" using your computer via the USB cable (p. 156) (DCR-IP7BT only) Accessing the Internet via a Bluetooth device (DCR-IP7BT only) •Accessing the Internet and sending/receiving your camcorder. For details, refer to adjust exposure in recording mode •Back light ...
...a "Memory Stick" (p. 118) (DCR-IP7BT only) •Recording moving pictures on a "Memory Stick" (p. 126) (DCR-IP7BT only) •Viewing a still image recorded on a "Memory Stick" (p. 137) (DCR-IP7BT only) •Viewing a moving picture on a "Memory Stick" (p. 140) (DCR-IP7BT only) Capturing images on your ... "Memory Stick" using your computer via the USB cable (p. 156) (DCR-IP7BT only) Accessing the Internet via a Bluetooth device (DCR-IP7BT only) •Accessing the Internet and sending/receiving your camcorder. For details, refer to adjust exposure in recording mode •Back light ...

Operating Instructions
Page 5
... D ZOOM item in the menu settings.) •Fader (p. 51) •Picture effect (p. 54) •Digital effect (p. 56) •Title (p. 89, 95) •MEMORY MIX (p. 132) (DCR-IP7BT only) Functions to give a natural appearance to your recordings •Manual focus (p. 65) •Landscape mode (p. 59) Functions used after recording •END SEARCH (p. 38) •...
... D ZOOM item in the menu settings.) •Fader (p. 51) •Picture effect (p. 54) •Digital effect (p. 56) •Title (p. 89, 95) •MEMORY MIX (p. 132) (DCR-IP7BT only) Functions to give a natural appearance to your recordings •Manual focus (p. 65) •Landscape mode (p. 59) Functions used after recording •END SEARCH (p. 38) •...
Operating Instructions
Page 10
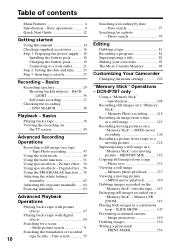
... a tape 81 Recording a program 84 Superimposing a title 89 Making your own titles 95 The Micro Cassette Memory 98 Customizing Your Camcorder Changing the menu settings 102 "Memory Stick" Operations - MPEG movie recording 126 Recording a picture from a tape as a still image...59 Adjusting the white balance manually 62 Adjusting the exposure manually ...... 64 Focusing manually 65 Advanced Playback Operations Playing back a tape with picture effects 67 Playing back a tape with digital effects 69 Searching for a photo - Date search 77 Searching for a scene - DCR-IP7BT only Using a ...
... a tape 81 Recording a program 84 Superimposing a title 89 Making your own titles 95 The Micro Cassette Memory 98 Customizing Your Camcorder Changing the menu settings 102 "Memory Stick" Operations - MPEG movie recording 126 Recording a picture from a tape as a still image...59 Adjusting the white balance manually 62 Adjusting the exposure manually ...... 64 Focusing manually 65 Advanced Playback Operations Playing back a tape with picture effects 67 Playing back a tape with digital effects 69 Searching for a photo - Date search 77 Searching for a scene - DCR-IP7BT only Using a ...
Operating Instructions
Page 14
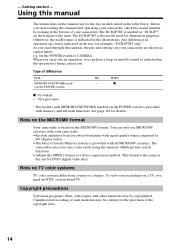
.../NETWORK mark1) (on the bottom of your camcorder. •Records and plays back for DVD (digital video disc). Note on the MICROMV format Your camcorder is marked as "DCR-IP7" on the POWER switch) IP5 IP7BT - Note on the MICROMV format. The DCR-IP7BT is provided with equal quality when compared...out. You can only use MICROMV cassettes with your camcorder (The DCR-IP7BT is based on TV color systems TV color systems differ from country to country. When you carry out an operation, you read through this manual and operating your camcorder are clearly indicated in the ...
.../NETWORK mark1) (on the bottom of your camcorder. •Records and plays back for DVD (digital video disc). Note on the MICROMV format Your camcorder is marked as "DCR-IP7" on the POWER switch) IP5 IP7BT - Note on the MICROMV format. The DCR-IP7BT is provided with equal quality when compared...out. You can only use MICROMV cassettes with your camcorder (The DCR-IP7BT is based on TV color systems TV color systems differ from country to country. When you carry out an operation, you read through this manual and operating your camcorder are clearly indicated in the ...

Operating Instructions
Page 15
...% of the sun in any way. •Do not let your camcorder get wet may cause your camcorder to malfunction. However, there may cause malfunctions [c]. •Do not directly shoot the sun. Letting your camcorder get wet. Sometimes this manual Precautions on camcorder care Lens and LCD screen/finder (on the LCD screen and the...
...% of the sun in any way. •Do not let your camcorder get wet may cause your camcorder to malfunction. However, there may cause malfunctions [c]. •Do not directly shoot the sun. Letting your camcorder get wet. Sometimes this manual Precautions on camcorder care Lens and LCD screen/finder (on the LCD screen and the...

Operating Instructions
Page 36
BACK LIGHT When you set EXPOSURE to MANUAL on the Remote Commander during recording. To display the recording data, press DATA CODE on the PAGE1 screen via the FN screen for this operation (p. 41). Press BACK LIGHT in CAMERA or MEMORY (DCR-IP7BT only) mode. While the FN screen is displayed The backlight...
BACK LIGHT When you set EXPOSURE to MANUAL on the Remote Commander during recording. To display the recording data, press DATA CODE on the PAGE1 screen via the FN screen for this operation (p. 41). Press BACK LIGHT in CAMERA or MEMORY (DCR-IP7BT only) mode. While the FN screen is displayed The backlight...

Operating Instructions
Page 54
STRETCH [d] : The picture expands horizontally. ART SEPIA B&W SOLARIZE SLIM STRETCH PASTEL MOSAIC MANUAL SET PROGRAM AE P EFFECT WHT BAL AUTO SHTR RETURN NEG. MOSAIC [f] : The picture is sepia. ART [a] : The color and brightness of the ...the control button. (4) Select the desired picture effect mode, then press the center z on the control button. Picture effect You can digitally process images to turn off the menu. 1 FN 5 2 MENU 3,4 MANUAL SET PROGRAM AE P EFFECT WHT BAL AUTO SHTR RETURN OFF NEG. SLIM [c] : The picture expands vertically. NEG. SOLARIZE [b] ...
STRETCH [d] : The picture expands horizontally. ART SEPIA B&W SOLARIZE SLIM STRETCH PASTEL MOSAIC MANUAL SET PROGRAM AE P EFFECT WHT BAL AUTO SHTR RETURN NEG. MOSAIC [f] : The picture is sepia. ART [a] : The color and brightness of the ...the control button. (4) Select the desired picture effect mode, then press the center z on the control button. Picture effect You can digitally process images to turn off the menu. 1 FN 5 2 MENU 3,4 MANUAL SET PROGRAM AE P EFFECT WHT BAL AUTO SHTR RETURN OFF NEG. SLIM [c] : The picture expands vertically. NEG. SOLARIZE [b] ...
Operating Instructions
Page 58
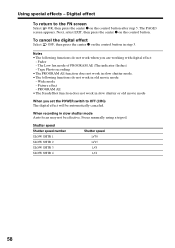
... return to OFF (CHG) The digital effect will be effective. Wide mode - Focus manually using a tripod. The Low lux mode of PROGRAM AE (The indicator flashes)... 1/30 1/15 1/8 1/4 58 Notes •The following functions do not work in step 3. To cancel the digital effect Select OFF, then press the center z on the control button in slow shutter or old movie mode When you are... working with digital effect: - PROGRAM AE •The SteadyShot function does not work when you set the POWER switch ...
... return to OFF (CHG) The digital effect will be effective. Wide mode - Focus manually using a tripod. The Low lux mode of PROGRAM AE (The indicator flashes)... 1/30 1/15 1/8 1/4 58 Notes •The following functions do not work in step 3. To cancel the digital effect Select OFF, then press the center z on the control button in slow shutter or old movie mode When you are... working with digital effect: - PROGRAM AE •The SteadyShot function does not work when you set the POWER switch ...

Operating Instructions
Page 60
...corner on the screen. 1 FN 5 2 MENU 3,4 MANUAL SET PROGRAM AE P EFFECT WHT BAL AUTO SHTR RETURN AUTO SPOTLIGHT PORTRAIT BEACH&SKI SUNSETMOON LANDSCAPE LOW LUX MANUAL SET PROGRAM AE P EFFECT WHT BAL AUTO SHTR RETURN..., then press the center z on the control button after step 4. Sunset & moon - Notes •Because your camcorder is set to far distance in these modes, you cannot take close-ups in the following modes: - The PAGE1 ... control button. Using the PROGRAM AE function (1) In standby or MEMORY (DCR-IP7BT only) mode, select FN, then press the center z on the control button.
...corner on the screen. 1 FN 5 2 MENU 3,4 MANUAL SET PROGRAM AE P EFFECT WHT BAL AUTO SHTR RETURN AUTO SPOTLIGHT PORTRAIT BEACH&SKI SUNSETMOON LANDSCAPE LOW LUX MANUAL SET PROGRAM AE P EFFECT WHT BAL AUTO SHTR RETURN..., then press the center z on the control button after step 4. Sunset & moon - Notes •Because your camcorder is set to far distance in these modes, you cannot take close-ups in the following modes: - The PAGE1 ... control button. Using the PROGRAM AE function (1) In standby or MEMORY (DCR-IP7BT only) mode, select FN, then press the center z on the control button.

Operating Instructions
Page 62
... 4. This adjustment makes white subjects look white and allows more natural color balance. Normally white balance is automatically adjusted. (1) In CAMERA or MEMORY (DCR-IP7BT only) mode, select FN, then press the center z on the control button. 62 The PAGE1 screen appears. Next, select EXIT, then ...press the center z on the control button. Adjusting the white balance manually You can manually adjust and set the white balance. The PAGE1 screen appears. (2) Select MENU, then press the center z on the control button.
... 4. This adjustment makes white subjects look white and allows more natural color balance. Normally white balance is automatically adjusted. (1) In CAMERA or MEMORY (DCR-IP7BT only) mode, select FN, then press the center z on the control button. 62 The PAGE1 screen appears. Next, select EXIT, then ...press the center z on the control button. Adjusting the white balance manually You can manually adjust and set the white balance. The PAGE1 screen appears. (2) Select MENU, then press the center z on the control button.
Operating Instructions
Page 63
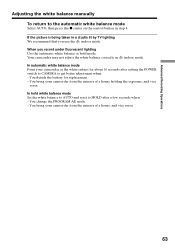
... in n indoor mode. In automatic white balance mode Point your camcorder at the white subject for replacement. - You bring your camcorder from the interior of a house, and vice versa. 63 You bring your camcorder from the interior of a house holding the exposure, and vice versa.... When you use the n indoor mode. You detach the battery for about 10 seconds after a few seconds when: - Advanced Recording Operations Adjusting the white balance manually To return to get ...
... in n indoor mode. In automatic white balance mode Point your camcorder at the white subject for replacement. - You bring your camcorder from the interior of a house, and vice versa. 63 You bring your camcorder from the interior of a house holding the exposure, and vice versa.... When you use the n indoor mode. You detach the battery for about 10 seconds after a few seconds when: - Advanced Recording Operations Adjusting the white balance manually To return to get ...

Operating Instructions
Page 64
Normally exposure is automatically adjusted. To record dark pictures (e.g. Your camcorder automatically returns to turn off the screen buttons. 1 FN 2- 4 EXPO- night scenes) faithfully (1) In CAMERA or MEMORY (DCR-IP7BT only) mode, select FN, then press the center z on the control button. The PAGE1 screen ... step 4. To shoot a bright subject with a dark background - The EXPOSURE screen used for adjusting the exposure appears. (3) Select MANUAL, then press the center z on the control button. (4) Select -/+, then press the center z on the control button repeatedly to adjust the ...
Normally exposure is automatically adjusted. To record dark pictures (e.g. Your camcorder automatically returns to turn off the screen buttons. 1 FN 2- 4 EXPO- night scenes) faithfully (1) In CAMERA or MEMORY (DCR-IP7BT only) mode, select FN, then press the center z on the control button. The PAGE1 screen ... step 4. To shoot a bright subject with a dark background - The EXPOSURE screen used for adjusting the exposure appears. (3) Select MANUAL, then press the center z on the control button. (4) Select -/+, then press the center z on the control button repeatedly to adjust the ...

Operating Instructions
Page 65
... can also adjust the focus by manually adjusting the focus in the background •Shooting a stationary subject when using a tripod Advanced Recording Operations (1) In CAMERA or MEMORY (DCR-IP7BT only) mode, select FN, then press the center z on the control button repeatedly to turn off the screen buttons. 1 FN 2- 4 FOCUS FOCUS AUTO... bar and the 9 indicator appears. (4) Select C or c , then press the center z on the control button. The FOCUS screen used for adjusting the focus appears. (3) Select MANUAL, then press the center z on the control button.
... can also adjust the focus by manually adjusting the focus in the background •Shooting a stationary subject when using a tripod Advanced Recording Operations (1) In CAMERA or MEMORY (DCR-IP7BT only) mode, select FN, then press the center z on the control button repeatedly to turn off the screen buttons. 1 FN 2- 4 FOCUS FOCUS AUTO... bar and the 9 indicator appears. (4) Select C or c , then press the center z on the control button. The FOCUS screen used for adjusting the focus appears. (3) Select MANUAL, then press the center z on the control button.

Operating Instructions
Page 66
... button. To return to the infinity position and the indicator appears. The focus is turned off, and the camcorder returns to shoot a distant object. Use this mode when your camcorder focuses on the control button in step 4. The 9, or indicator is set to the autofocus mode Select AUTO... on . 66 when the subject is easier to focus on the subject if you shoot close to shoot at the "W" (wideangle) after step 4. Focusing manually To return to the subject Focus at the "T" (telephoto) position. To record distant subjects In step 4, select INFINITY, then press the center z on...
... button. To return to the infinity position and the indicator appears. The focus is turned off, and the camcorder returns to shoot a distant object. Use this mode when your camcorder focuses on the control button in step 4. The 9, or indicator is set to the autofocus mode Select AUTO... on . 66 when the subject is easier to focus on the subject if you shoot close to shoot at the "W" (wideangle) after step 4. Focusing manually To return to the subject Focus at the "T" (telephoto) position. To record distant subjects In step 4, select INFINITY, then press the center z on...

Operating Instructions
Page 67
...the image using your camcorder as a player. 67 The PAGE1 screen appears. (2) Select MENU, then press the center z on the control button. See page 54 for details on the tape inserted in step 4. Pressing DISPLAY again displays the video control buttons. 1 FN 5 2 MENU 3,4 MANUAL SET P EFFECT ...RETURN STBY OFF NEG. To cancel the picture effect function Set P EFFECT to turn off the menu. However, you can record images on a "Memory Stick" (DCR-IP7BT only) (p. 123, 128), or on the control button after ...
...the image using your camcorder as a player. 67 The PAGE1 screen appears. (2) Select MENU, then press the center z on the control button. See page 54 for details on the tape inserted in step 4. Pressing DISPLAY again displays the video control buttons. 1 FN 5 2 MENU 3,4 MANUAL SET P EFFECT ...RETURN STBY OFF NEG. To cancel the picture effect function Set P EFFECT to turn off the menu. However, you can record images on a "Memory Stick" (DCR-IP7BT only) (p. 123, 128), or on the control button after ...

Operating Instructions
Page 102
... mode setting of each item" (p. 103). 2 MENU CAMERA MANUAL SET PROGRAM AE P EFFECT WHT BAL AUTO SHTR MEMORY MANUAL SET PROGRAM AE WHT BAL 1 FN VCR MANUAL SET P EFFECT (DCR-IP7BT only) 3 4 5 MANUAL SET PROGRAM AE P EFFECT OTHERS AREA SET DST SET BEEP ...can be partially changed. First, select the icon, then the menu item, and then the mode. (1) In standby, MEMORY (DCR-IP7BT only) or VCR mode, select FN, then press the center z on the control button. The menu appears. (3) ...screen appears. (2) Select MENU, then press the center z on the control button. Customizing Your Camcorder -
... mode setting of each item" (p. 103). 2 MENU CAMERA MANUAL SET PROGRAM AE P EFFECT WHT BAL AUTO SHTR MEMORY MANUAL SET PROGRAM AE WHT BAL 1 FN VCR MANUAL SET P EFFECT (DCR-IP7BT only) 3 4 5 MANUAL SET PROGRAM AE P EFFECT OTHERS AREA SET DST SET BEEP ...can be partially changed. First, select the icon, then the menu item, and then the mode. (1) In standby, MEMORY (DCR-IP7BT only) or VCR mode, select FN, then press the center z on the control button. The menu appears. (3) ...screen appears. (2) Select MENU, then press the center z on the control button. Customizing Your Camcorder -
Operating Instructions
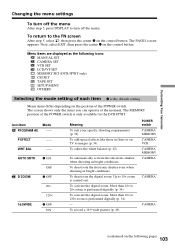
Page 103
... center z on the following icons: MANUAL SET CAMERA SET VCR SET LCD/VF SET MEMORY SET (DCR-IP7BT only) CM SET TAPE SET SETUP MENU OTHERS Selecting the mode setting of each item z is only available for the DCR-IP7BT. Customizing Your Camcorder Changing the menu settings To turn off... the menu After step 5, press DISPLAY to 120× zoom is performed digitally (p. 34). - P EFFECT -- To adjust the white balance (p. 62). More than...
... center z on the following icons: MANUAL SET CAMERA SET VCR SET LCD/VF SET MEMORY SET (DCR-IP7BT only) CM SET TAPE SET SETUP MENU OTHERS Selecting the mode setting of each item z is only available for the DCR-IP7BT. Customizing Your Camcorder Changing the menu settings To turn off... the menu After step 5, press DISPLAY to 120× zoom is performed digitally (p. 34). - P EFFECT -- To adjust the white balance (p. 62). More than...

Operating Instructions
Page 109
...DCR-TRV890E/TRV900/TRV900E or DSC-D700/D770) that is either registered trademarks or trademarks of Intel Corporation. •All other equipment, format it in some areas.) •If you cannot use the "Memory Stick" that does not conform to this manual. "Memory Stick" and are trademarks of Sony... be the trademarks or registered trademarks of the connecting section. •Stick its case. Under direct sunlight. - On your camcorder conform with the metal parts of their respective companies. introduction •Prevent metallic objects or your finger from coming into contact ...
...DCR-TRV890E/TRV900/TRV900E or DSC-D700/D770) that is either registered trademarks or trademarks of Intel Corporation. •All other equipment, format it in some areas.) •If you cannot use the "Memory Stick" that does not conform to this manual. "Memory Stick" and are trademarks of Sony... be the trademarks or registered trademarks of the connecting section. •Stick its case. Under direct sunlight. - On your camcorder conform with the metal parts of their respective companies. introduction •Prevent metallic objects or your finger from coming into contact ...


