Operating Instructions
Page 4
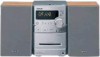
...system cannot play back the following formats: - List of playable discs Format of discs Audio CDs Disc logo CD-R/CD-RW (audio data/MP3 files) Discs that has the adhesive, cellophane tape, or a sticker still left on it . • A disc that this manual, CMT-NEZ3... A disc with paper or stickers on it . * ISO9660 Format The most common international standard for model CMT-NEZ5 and CMT-NEZ3. Any difference in operation is used for example, "CMTNEZ5 only". • This manual mainly explains operations using... to 8 trees. Conventional CDs begin at a CD control area called Lead-out.
...system cannot play back the following formats: - List of playable discs Format of discs Audio CDs Disc logo CD-R/CD-RW (audio data/MP3 files) Discs that has the adhesive, cellophane tape, or a sticker still left on it . • A disc that this manual, CMT-NEZ3... A disc with paper or stickers on it . * ISO9660 Format The most common international standard for model CMT-NEZ5 and CMT-NEZ3. Any difference in operation is used for example, "CMTNEZ5 only". • This manual mainly explains operations using... to 8 trees. Conventional CDs begin at a CD control area called Lead-out.

Operating Instructions
Page 18
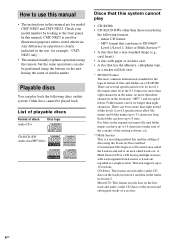
... 15). • Tuner: Tune in the preset radio station (see "Listening to the radio" on page 13). 2 Press VOLUME + or - (or turn VOLUME control on the remote for Play Timer. • You cannot activate the Play Timer and the Rec Timer at the same time. • The Play Timer...a disc. The start playing. Start over from the time the system turns on until "PLAY" appears, then press ENTER. Each time you use the optional component connected to stop time and the sound source appear in turn off the system. 18GB Other operations To Check the setting Change the setting Cancel the...
... 15). • Tuner: Tune in the preset radio station (see "Listening to the radio" on page 13). 2 Press VOLUME + or - (or turn VOLUME control on the remote for Play Timer. • You cannot activate the Play Timer and the Rec Timer at the same time. • The Play Timer...a disc. The start playing. Start over from the time the system turns on until "PLAY" appears, then press ENTER. Each time you use the optional component connected to stop time and the sound source appear in turn off the system. 18GB Other operations To Check the setting Change the setting Cancel the...
Operating Instructions
Page 22
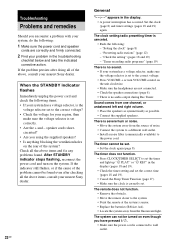
... cord and turn VOLUME control on the rear of the above, consult your nearest Sony dealer. Set the clock (page 8) and timer settings (pages 18 and 19) again. The remote does not function. • Remove the obstacle. • Move the remote closer to the system. • Point the... sure the voltage selector is canceled. • Redo the following items. • If your system has a voltage selector, is the voltage selector set to the correct voltage? • Check the voltage for your nearest Sony dealer. 22GB General "- -:- -" appears in the display (pages 18 and 19). •...
... cord and turn VOLUME control on the rear of the above, consult your nearest Sony dealer. Set the clock (page 8) and timer settings (pages 18 and 19) again. The remote does not function. • Remove the obstacle. • Move the remote closer to the system. • Point the... sure the voltage selector is canceled. • Redo the following items. • If your system has a voltage selector, is the voltage selector set to the correct voltage? • Check the voltage for your nearest Sony dealer. 22GB General "- -:- -" appears in the display (pages 18 and 19). •...
Operating Instructions
Page 24
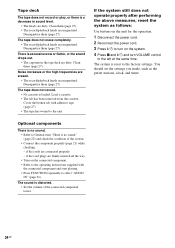
...; The record/playback heads are firmly inserted all the way. • Turn on the system. 4 Press x and ?/1 and turn VOLUME control to the left at the same time. Demagnetize them (page 27). Cover the broken tab with the connected component and start playing. • Press FUNCTION repeatedly to General item "There is distorted...
...; The record/playback heads are firmly inserted all the way. • Turn on the system. 4 Press x and ?/1 and turn VOLUME control to the left at the same time. Demagnetize them (page 27). Cover the broken tab with the connected component and start playing. • Press FUNCTION repeatedly to General item "There is distorted...
Operating Instructions
Page 26
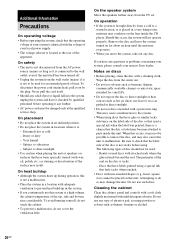
... air ducts, nor leave it in a car parked in locations where it is; - Cleaning the cabinet Clean the cabinet, panel and controls with a soft cloth slightly moistened with attached seals where the glue extends beyond the seal. To disconnect the power cord (mains lead), .... If you move the system, take out any type of the top, side and bottom rises considerably. Additional Information Precautions On operating voltage • Before operating the system, check that the operating voltage of your system is identical with the voltage of your nearest Sony dealer. Attempting to vibrations...
... air ducts, nor leave it in a car parked in locations where it is; - Cleaning the cabinet Clean the cabinet, panel and controls with a soft cloth slightly moistened with attached seals where the glue extends beyond the seal. To disconnect the power cord (mains lead), .... If you move the system, take out any type of the top, side and bottom rises considerably. Additional Information Precautions On operating voltage • Before operating the system, check that the operating voltage of your system is identical with the voltage of your nearest Sony dealer. Attempting to vibrations...
Operating Instructions
Page 30
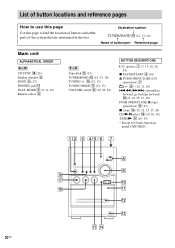
q; (12, 13) TUNING MODE 5 (12, 13) VOLUME control 9 (18, 22, 24) BUTTON DESCRIPTIONS ?/1 (power) 1 (7, 13, 18, 20, 24) z PAUSE/START 4 (16) Z PUSH OPEN/CLOSE (CD open/close) 7 +/- 8* (10,... (10, 12, 15, 15, 24) CD/NX (play) qh (10, 16, 18) TAPE/N qj (10, 15) * Except for North American model CMT-NEZ3 12 3 45 6 7 8 9 qk qj 0 qh qa qs qd qg qf 30GB List of button locations and reference pages How to use this page Use ...) PHONES jack qd PLAY MODE 5 (9, 11, 16) Remote sensor 2 T - Illustration number r TUNER/BAND qg (12, 13, 16) R R Name of the system that are mentioned in the text.
q; (12, 13) TUNING MODE 5 (12, 13) VOLUME control 9 (18, 22, 24) BUTTON DESCRIPTIONS ?/1 (power) 1 (7, 13, 18, 20, 24) z PAUSE/START 4 (16) Z PUSH OPEN/CLOSE (CD open/close) 7 +/- 8* (10,... (10, 12, 15, 15, 24) CD/NX (play) qh (10, 16, 18) TAPE/N qj (10, 15) * Except for North American model CMT-NEZ3 12 3 45 6 7 8 9 qk qj 0 qh qa qs qd qg qf 30GB List of button locations and reference pages How to use this page Use ...) PHONES jack qd PLAY MODE 5 (9, 11, 16) Remote sensor 2 T - Illustration number r TUNER/BAND qg (12, 13, 16) R R Name of the system that are mentioned in the text.

Operating Instructions
Page 31
... 31GB q; (18, 22) BUTTON DESCRIPTIONS ?/1 (power) 1 (7, 13, 18, 20, 24) m/M (rewind/fast forward) 7 (10, 15) N (play) 8 (10, 15) X (pause) 8 (10, 15) x (stop) 8 (10, 15) +/- Remote control ALPHABETICAL ORDER A -
... 31GB q; (18, 22) BUTTON DESCRIPTIONS ?/1 (power) 1 (7, 13, 18, 20, 24) m/M (rewind/fast forward) 7 (10, 15) N (play) 8 (10, 15) X (pause) 8 (10, 15) x (stop) 8 (10, 15) +/- Remote control ALPHABETICAL ORDER A -


