Operating Instructions
Page 1
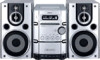
Model No Serial No CMT-HPX10W CMT-HPX9 CMT-HPX7 ©2004 Sony Corporation 4-255-291-11(2) Micro Hi-Fi Component System Operating Instructions Owner's Record The model and serial numbers are located on the rear of the unit. Refer to them whenever you call upon your Sony dealer regarding this product. Record the serial number in the space provided below.
Model No Serial No CMT-HPX10W CMT-HPX9 CMT-HPX7 ©2004 Sony Corporation 4-255-291-11(2) Micro Hi-Fi Component System Operating Instructions Owner's Record The model and serial numbers are located on the rear of the unit. Refer to them whenever you call upon your Sony dealer regarding this product. Record the serial number in the space provided below.
Operating Instructions
Page 2
... waste. CAUTION The use of optical instruments with the instructions, may be connected to the grounding system of important operating and maintenance (servicing) instructions in particular, specifies that may cause harmful interference to the point of cable entry as vases, on a circuit different from that to correct the interference by turning the equipment off and on, the user is encouraged to...
... waste. CAUTION The use of optical instruments with the instructions, may be connected to the grounding system of important operating and maintenance (servicing) instructions in particular, specifies that may cause harmful interference to the point of cable entry as vases, on a circuit different from that to correct the interference by turning the equipment off and on, the user is encouraged to...
Operating Instructions
Page 4
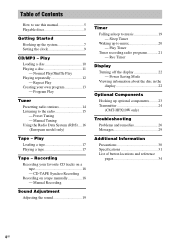
... - Program Play Tuner Presetting radio stations 14 Listening to music 19 - Normal Play/Shuffle Play Playing repeatedly 12 - Preset Tuning - Play Timer Timer recording radio programs........... 21 - Sleep Timer Waking up the system 7 Setting the clock 9 CD/MP3 - Table of button locations and reference pages 34 4GB Recording Recording your own program 13 - Power Saving Mode Viewing information about the disc in the display 22 Optional Components Hooking up optional components......... 23 Transmitter 24 (CMT-HPX10W only) Troubleshooting Problems...
... - Program Play Tuner Presetting radio stations 14 Listening to music 19 - Normal Play/Shuffle Play Playing repeatedly 12 - Preset Tuning - Play Timer Timer recording radio programs........... 21 - Sleep Timer Waking up the system 7 Setting the clock 9 CD/MP3 - Table of button locations and reference pages 34 4GB Recording Recording your own program 13 - Power Saving Mode Viewing information about the disc in the display 22 Optional Components Hooking up optional components......... 23 Transmitter 24 (CMT-HPX10W only) Troubleshooting Problems...

Operating Instructions
Page 8
... turn on your system's VOLTAGE SELECTOR for available settings. 4 Connect the power cord to the local power line voltage. Plug type B Extend the FM lead antenna horizontally AM loop antenna Plug type C North American models: Connect using the white side Other models: Connect using the brown side Extend the FM lead antenna horizontally AM loop antenna Note To prevent noise pickup, keep the antennas away from the system and other components. 3 For models...
... turn on your system's VOLTAGE SELECTOR for available settings. 4 Connect the power cord to the local power line voltage. Plug type B Extend the FM lead antenna horizontally AM loop antenna Plug type C North American models: Connect using the white side Other models: Connect using the brown side Extend the FM lead antenna horizontally AM loop antenna Note To prevent noise pickup, keep the antennas away from the system and other components. 3 For models...

Operating Instructions
Page 14
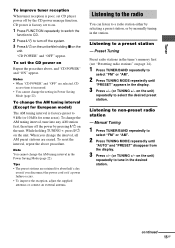
... to preset other stations. 14GB You can manually tune in and store the radio frequency of the desired stations. 1 Press TUNER/BAND repeatedly to stop Set the frequency of those stations simply by selecting the corresponding preset number. Manual tuning preset You can then tune in the display. 3 Press +/- (or TUNING +/- Tip Press TUNING MODE to select "FM" or "AM". 2 Press TUNING MODE repeatedly until "AUTO" appears in any of the desired radio station as the system scans for stereo program...
... to preset other stations. 14GB You can manually tune in and store the radio frequency of the desired stations. 1 Press TUNER/BAND repeatedly to stop Set the frequency of those stations simply by selecting the corresponding preset number. Manual tuning preset You can then tune in the display. 3 Press +/- (or TUNING +/- Tip Press TUNING MODE to select "FM" or "AM". 2 Press TUNING MODE repeatedly until "AUTO" appears in any of the desired radio station as the system scans for stereo program...
Operating Instructions
Page 15
... FUNCTION repeatedly to switch the function to CD. 2 Press ?/1 to tune in the Power Saving Mode (page 22). To reset the interval, repeat the above , and "CD POWER" and "ON" appear. on the unit) repeatedly to turn off the power by manually tuning in the display. 3 Press +/- (or TUNING +/- Note You cannot change the setting in Power Saving Mode (page 22). on the unit) repeatedly to non-preset radio station - Notes...
... FUNCTION repeatedly to switch the function to CD. 2 Press ?/1 to tune in the Power Saving Mode (page 22). To reset the interval, repeat the above , and "CD POWER" and "ON" appear. on the unit) repeatedly to turn off the power by manually tuning in the display. 3 Press +/- (or TUNING +/- Note You cannot change the setting in Power Saving Mode (page 22). on the unit) repeatedly to non-preset radio station - Notes...

Operating Instructions
Page 16
... the Radio Data System? When you are tuned in the display. Using the Radio Data System (RDS) (European model only) What is a broadcasting service that provides RDS services, the station name appears in is not transmitting the RDS signal properly or if the signal is not properly received, the station name may not work properly if the station you press DISPLAY the display changes cyclically as follows: Station name* t Frequency t Clock display t Bass level t Treble level * If...
... the Radio Data System? When you are tuned in the display. Using the Radio Data System (RDS) (European model only) What is a broadcasting service that provides RDS services, the station name appears in is not transmitting the RDS signal properly or if the signal is not properly received, the station name may not work properly if the station you press DISPLAY the display changes cyclically as follows: Station name* t Frequency t Clock display t Bass level t Treble level * If...

Operating Instructions
Page 19
... or tape finishes playing. Use buttons on the unit again. Cancel the Sleep SLEEP repeatedly until "SLEEP Timer function OFF" appears. ** You cannot check the remaining time if you press the button, the display changes cyclically as follows: AUTO* t 90MIN t 80MIN t ... t 10MIN t SLEEP OFF * The system automatically turns off time) changes cyclically as follows: BASS y TREBLE 2 Press ./> repeatedly to select "BASS" or "TREBLE". Sleep Timer You can adjust the bass and treble...
... or tape finishes playing. Use buttons on the unit again. Cancel the Sleep SLEEP repeatedly until "SLEEP Timer function OFF" appears. ** You cannot check the remaining time if you press the button, the display changes cyclically as follows: AUTO* t 90MIN t 80MIN t ... t 10MIN t SLEEP OFF * The system automatically turns off time) changes cyclically as follows: BASS y TREBLE 2 Press ./> repeatedly to select "BASS" or "TREBLE". Sleep Timer You can adjust the bass and treble...

Operating Instructions
Page 20
...; TUNER: Tune in turn, then the original display returns. 9 Press ?/1 to turn off the system. The minute indication flashes. Notes • If you use the optional component connected to the MD/VIDEO jacks or the transmitter (CMTHPX10W only) as sound sources for the operation. 1 Prepare the sound source you press the button, the display changes cyclically as step 5. 7 Press ./> repeatedly until the desired sound source appears. Play Timer You can wake up to music...
...; TUNER: Tune in turn, then the original display returns. 9 Press ?/1 to turn off the system. The minute indication flashes. Notes • If you use the optional component connected to the MD/VIDEO jacks or the transmitter (CMTHPX10W only) as sound sources for the operation. 1 Prepare the sound source you press the button, the display changes cyclically as step 5. 7 Press ./> repeatedly until the desired sound source appears. Play Timer You can wake up to music...

Operating Instructions
Page 21
.... Start over from the time the system turns on until "REC" appears, then press ENTER. Press ./> repeatedly to minimum during recording. • You cannot activate Play Timer and Rec Timer simultaneously. 21GB Press ./> repeatedly to set the minute, then press ENTER. 5 Set the time to a preset station" on page 9). Use buttons on the remote for the operation. 1 Tune in the preset radio station (see "Setting the clock" on...
.... Start over from the time the system turns on until "REC" appears, then press ENTER. Press ./> repeatedly to minimum during recording. • You cannot activate Play Timer and Rec Timer simultaneously. 21GB Press ./> repeatedly to set the minute, then press ENTER. 5 Set the time to a preset station" on page 9). Use buttons on the remote for the operation. 1 Tune in the preset radio station (see "Setting the clock" on...

Operating Instructions
Page 22
... DISPLAY repeatedly during standby (Power Saving Mode). switching the MD/VIDEO function - Each time you can also check the information recorded on the disc** or total track number of the current album** t Disc name** t Clock display t Bass level t Treble level * TOC = Table of the disc or "- -.- -"* t Track title (disc with MP3 audio tracks** only) t Album name* t Clock display t Bass level t Treble level * For discs with MP3 audio tracks, album titles may not be turned off using the CD power...
... DISPLAY repeatedly during standby (Power Saving Mode). switching the MD/VIDEO function - Each time you can also check the information recorded on the disc** or total track number of the current album** t Disc name** t Clock display t Bass level t Treble level * TOC = Table of the disc or "- -.- -"* t Track title (disc with MP3 audio tracks** only) t Album name* t Clock display t Bass level t Treble level * For discs with MP3 audio tracks, album titles may not be turned off using the CD power...

Operating Instructions
Page 24
... of the plug • If the connected component has the AVLS (Automatic Volume Limiter System) function, be sure to turn off . The transmitter automatically turns on . 24GB When the transmitter receives an audio signal again, the power automatically turns on . Transmitter OFF ON NOISE FILTER B R A AUDIO IN L DC IN 9V 123 CHANNEL to AUDIO IN B jack Right channel (red) to AUDIO IN A jack Left channel (white) Right channel (red) Left channel (white) Connecting cord (supplied) Unimatch plug adaptor...
... of the plug • If the connected component has the AVLS (Automatic Volume Limiter System) function, be sure to turn off . The transmitter automatically turns on . 24GB When the transmitter receives an audio signal again, the power automatically turns on . Transmitter OFF ON NOISE FILTER B R A AUDIO IN L DC IN 9V 123 CHANNEL to AUDIO IN B jack Right channel (red) to AUDIO IN A jack Left channel (white) Right channel (red) Left channel (white) Connecting cord (supplied) Unimatch plug adaptor...

Operating Instructions
Page 25
... connected to the headphones jack of the source component, set the volume of that component as high as cell phones and cordless phone systems or metal instruments are some noise or "AUTO SCAN" does not disappear • Reduce the distance between the transmitter unit and the main unit. • Select another channel using a wireless system 1 Start playing the connected component. 2 Press FUNCTION repeatedly to switch the function to 46 m. "AUTO...
... connected to the headphones jack of the source component, set the volume of that component as high as cell phones and cordless phone systems or metal instruments are some noise or "AUTO SCAN" does not disappear • Reduce the distance between the transmitter unit and the main unit. • Select another channel using a wireless system 1 Start playing the connected component. 2 Press FUNCTION repeatedly to switch the function to 46 m. "AUTO...
Operating Instructions
Page 26
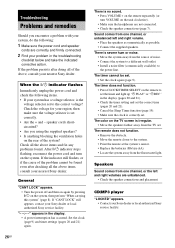
... and fix any problems found. If the indicator still flashes, or if the cause of noise. • Connect the system to a different wall outlet. • Install a noise filter (commercially available) to set the timer and light up "c PLAY" or "c REC" in the display (pages 20 and 21). • Check the timer setting and set . Speakers Sound comes from one channel, or the left and right volume...
... and fix any problems found. If the indicator still flashes, or if the cause of noise. • Connect the system to a different wall outlet. • Install a noise filter (commercially available) to set the timer and light up "c PLAY" or "c REC" in the display (pages 20 and 21). • Check the timer setting and set . Speakers Sound comes from one channel, or the left and right volume...
Operating Instructions
Page 27
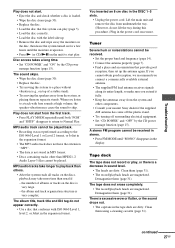
... other components. • Consult your nearest Sony dealer if the supplied AM antenna has come off the plastic stand. • Try turning off surrounding electrical equipment. • Set "CD POWER" and "OFF" by the CD power manage function (page 15). Disc access takes a long time. • Set "CD POWER" and "ON" by the CD power manage function (page 15). MP3 audio track cannot be received. • Set the...
... other components. • Consult your nearest Sony dealer if the supplied AM antenna has come off the plastic stand. • Try turning off surrounding electrical equipment. • Set "CD POWER" and "OFF" by the CD power manage function (page 15). Disc access takes a long time. • Set "CD POWER" and "ON" by the CD power manage function (page 15). MP3 audio track cannot be received. • Set the...

Operating Instructions
Page 28
... MEGA BASS function, set to turn down the volume of an audio reproducer, make sure that the NOISE FILTER switch is set to OFF. • Make sure that the optional component is turned on. • Turn up the volume on the connected optional component, if the transmitter is reset to the headphones jack. • Change the radio frequency using the CHANNEL selector on the unit for the operation. 1 Disconnect the power cord. 2 Reconnect the power cord...
... MEGA BASS function, set to turn down the volume of an audio reproducer, make sure that the NOISE FILTER switch is set to OFF. • Make sure that the optional component is turned on. • Turn up the volume on the connected optional component, if the transmitter is reset to the headphones jack. • Change the radio frequency using the CHANNEL selector on the unit for the operation. 1 Disconnect the power cord. 2 Reconnect the power cord...

Operating Instructions
Page 29
... PLAY MODE during operation. Tuner COMPLETE The preset operation ended normally. NO TAPE There is no tape in the tape deck. TIME NG Play Timer or Rec Timer start and end times are not set. PUSH SELECT You tried to program 26 or more tracks (steps). Other NOT IN USE You pressed an invalid button. Timer SET TIMER You cannot select the timer function when Play Timer or Rec Timer are set to select...
... PLAY MODE during operation. Tuner COMPLETE The preset operation ended normally. NO TAPE There is no tape in the tape deck. TIME NG Play Timer or Rec Timer start and end times are not set. PUSH SELECT You tried to program 26 or more tracks (steps). Other NOT IN USE You pressed an invalid button. Timer SET TIMER You cannot select the timer function when Play Timer or Rec Timer are set to select...
Operating Instructions
Page 30
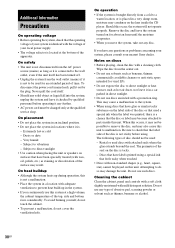
... - Remove the disc and leave the system turned on the disc is brought directly from a cold to vibrations - When this occurs, it any type of disc should not be played on discs • Before playing, clean the disc with a cleaning cloth. Never pull the cord itself has been turned off. • Unplug the system from the center out. • Do not use solvents such as...
... - Remove the disc and leave the system turned on the disc is brought directly from a cold to vibrations - When this occurs, it any type of disc should not be played on discs • Before playing, clean the disc with a cleaning cloth. Never pull the cord itself has been turned off. • Unplug the system from the center out. • Do not use solvents such as...
Operating Instructions
Page 32
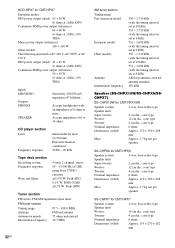
... - 20 kHz Tape deck section Recording system Frequency response Wow and flutter 4-track 2-channel, stereo 50 - 13,000 Hz (±3 dB), using Sony TYPE I cassettes ±0.15% W. Peak (IEC) 0.1% W. RMS (NAB) ±0.2% W. Accepts impedance of 8 ohms or more. HCD-HPX7 for CMT-HPX7 European model: DIN power output (rated): 50 + 50 W (6 ohms at 1 kHz, DIN) Continuous RMS power output (reference): 60 + 60 W (6 ohms at 1 kHz, 10% THD) Music power output (reference): 100...
... - 20 kHz Tape deck section Recording system Frequency response Wow and flutter 4-track 2-channel, stereo 50 - 13,000 Hz (±3 dB), using Sony TYPE I cassettes ±0.15% W. Peak (IEC) 0.1% W. RMS (NAB) ±0.2% W. Accepts impedance of 8 ohms or more. HCD-HPX7 for CMT-HPX7 European model: DIN power output (rated): 50 + 50 W (6 ohms at 1 kHz, DIN) Continuous RMS power output (reference): 60 + 60 W (6 ohms at 1 kHz, 10% THD) Music power output (reference): 100...
Marketing Specifications
Page 2
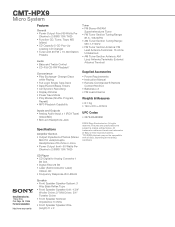
... ohms Unbalanced • AM Tuner Section Antenna: AM Loop Antenna Terminals: External Antenna Terminal Supplied Accessories • Power Requirements • Instruction Manual • Remote Commander® Remote Control RM-SC3 • Batteries x 2 • FM Lead Antenna Weights & Measures • 8.1 Kg • 196 x 270 x 407mm UPC Codes • 0272426429280 ©2004 Sony Electronics Inc. CMT-HPX9 Micro System Features General • Power Output Front 80 Watts Per Channel x 2 (RMS 10% THD) • Function CD, Tuner, Tape...
... ohms Unbalanced • AM Tuner Section Antenna: AM Loop Antenna Terminals: External Antenna Terminal Supplied Accessories • Power Requirements • Instruction Manual • Remote Commander® Remote Control RM-SC3 • Batteries x 2 • FM Lead Antenna Weights & Measures • 8.1 Kg • 196 x 270 x 407mm UPC Codes • 0272426429280 ©2004 Sony Electronics Inc. CMT-HPX9 Micro System Features General • Power Output Front 80 Watts Per Channel x 2 (RMS 10% THD) • Function CD, Tuner, Tape...


