
Flyer/Addendum
Page 1
... of the Sony Product. SOFTWARE LICENSE You cannot use the Sony Software in whole or in this EULA. or (b) remove, alter, cover, or deface any mechanisms operatively linked to selected Sony content services ("Sony Content Services"), which services and related content ("Sony Content") shall both be considered Sony Software under this EULA does not expressly grant to you by Sony in its component parts for instructions on media or downloaded to...
... of the Sony Product. SOFTWARE LICENSE You cannot use the Sony Software in whole or in this EULA. or (b) remove, alter, cover, or deface any mechanisms operatively linked to selected Sony content services ("Sony Content Services"), which services and related content ("Sony Content") shall both be considered Sony Software under this EULA does not expressly grant to you by Sony in its component parts for instructions on media or downloaded to...

Flyer/Addendum
Page 6
... PURPOSE ARE DISCLAIMED. not just the SSL code. If this package is free for use of this list of source code must reproduce the above copyright notice, this software must not be left out if the routines from this list of this software must display the following acknowledgment: "This product includes software developed by the OpenSSL Project for commercial...
... PURPOSE ARE DISCLAIMED. not just the SSL code. If this package is free for use of this list of source code must reproduce the above copyright notice, this software must not be left out if the routines from this list of this software must display the following acknowledgment: "This product includes software developed by the OpenSSL Project for commercial...

Operating Instructions
Page 2
... main plug is used in this apparatus to person. For the customers in the space provided below. Owner's Record The model and serial numbers are located on the apparatus. Other versions may experience discomfort (such as eye strain, fatigue, or nausea) while watching 3D video images. To reduce the risk of fire, do not expose this Blu-ray Disc / DVD Home Theatre...
... main plug is used in this apparatus to person. For the customers in the space provided below. Owner's Record The model and serial numbers are located on the apparatus. Other versions may experience discomfort (such as eye strain, fatigue, or nausea) while watching 3D video images. To reduce the risk of fire, do not expose this Blu-ray Disc / DVD Home Theatre...

Operating Instructions
Page 3
... outlet. 10) Protect the power cord from being walked on or pinched particularly at 1- 3US If the provided plug does not fit into your outlet, consult an electrician for replacement of the polarized or grounding-type plug. For the USB Wireless LAN Adapter (UWABR100) (BDV-E570/ BDV-T57 only) Pursuant to FCC regulations, you have any ventilation openings. This device uses 5 GHz band...
... outlet. 10) Protect the power cord from being walked on or pinched particularly at 1- 3US If the provided plug does not fit into your outlet, consult an electrician for replacement of the polarized or grounding-type plug. For the USB Wireless LAN Adapter (UWABR100) (BDV-E570/ BDV-T57 only) Pursuant to FCC regulations, you have any ventilation openings. This device uses 5 GHz band...

Operating Instructions
Page 5
..., "BDV-E870." • The items displayed on the TV screen may vary depending on the area. • The default setting is underlined. • The system is compatible with the S-AIR function, which allows transmission of sound between S-AIR products wirelessly. About These Operating Instructions • The instructions in this manual are not indicated in these Operating Instructions refer only to when the surround amplifier, surround back amplifier, or S-AIR receiver is used...
..., "BDV-E870." • The items displayed on the TV screen may vary depending on the area. • The default setting is underlined. • The system is compatible with the S-AIR function, which allows transmission of sound between S-AIR products wirelessly. About These Operating Instructions • The instructions in this manual are not indicated in these Operating Instructions refer only to when the surround amplifier, surround back amplifier, or S-AIR receiver is used...

Operating Instructions
Page 6
... Tuner Listening to the Radio 42 External Audio Device Using an S-AIR Product 44 Other Operations Using the Control for HDMI Function for "BRAVIA" Sync 49 Calibrating the Appropriate Settings Automatically 51 Setting the Speakers 52 Using the Sleep Timer 54 Deactivating the Buttons on the Unit 54 Controlling Your TV with the Supplied Remote 54 Saving Power in Standby Mode 55 Settings and Adjustments Using the Setup Display 56 [Network Update 56 [Screen Settings 56 [Audio Settings 58 [BD/DVD Viewing Settings 58 [Parental Control Settings...
... Tuner Listening to the Radio 42 External Audio Device Using an S-AIR Product 44 Other Operations Using the Control for HDMI Function for "BRAVIA" Sync 49 Calibrating the Appropriate Settings Automatically 51 Setting the Speakers 52 Using the Sleep Timer 54 Deactivating the Buttons on the Unit 54 Controlling Your TV with the Supplied Remote 54 Saving Power in Standby Mode 55 Settings and Adjustments Using the Setup Display 56 [Network Update 56 [Screen Settings 56 [Audio Settings 58 [BD/DVD Viewing Settings 58 [Parental Control Settings...

Operating Instructions
Page 13
... Menu. POP UP/MENU Opens or closes the BD-ROM's Pop-up Menu, or the DVD's menu. Remote control 9 ONE-TOUCH THEATER PLAY TV BRAVIA Sync 123 SLEEP 456 SYSTEM MENU 789 FAVORITES AUDIO YELLOW BLUE SUBTITLE 0 D.TUNING RED GREEN TOP MENU POP UP/ MENU 1 2 3 8 RETURN OPTIONS FUNCTION SOUND MODE HOME PRESET REPLAY ADVANCE PRESET TUNING PLAY TUNING DISPLAY PAUSE STOP VOL TV VOL MUTING TV INPUT 4 5 6 7 Number 5, AUDIO, VOL +, and N buttons have a tactile dot. Use the tactile dot as a reference when operating the remote...
... Menu. POP UP/MENU Opens or closes the BD-ROM's Pop-up Menu, or the DVD's menu. Remote control 9 ONE-TOUCH THEATER PLAY TV BRAVIA Sync 123 SLEEP 456 SYSTEM MENU 789 FAVORITES AUDIO YELLOW BLUE SUBTITLE 0 D.TUNING RED GREEN TOP MENU POP UP/ MENU 1 2 3 8 RETURN OPTIONS FUNCTION SOUND MODE HOME PRESET REPLAY ADVANCE PRESET TUNING PLAY TUNING DISPLAY PAUSE STOP VOL TV VOL MUTING TV INPUT 4 5 6 7 Number 5, AUDIO, VOL +, and N buttons have a tactile dot. Use the tactile dot as a reference when operating the remote...

Operating Instructions
Page 14
... "TV" or "SAT/ CABLE" and digital signals are input via the DIGITAL IN jack, displays the stream information in pause mode. Activates slow-motion play ). SLEEP (page 54) Sets the sleep timer. m/M (fast reverse/fast forward) Fast reverse/fast forward the disc during playback. N (play) Starts or re-starts playback (resume play when pressed for 15 seconds. Adjusts the TV volume. I Z (open/close) Opens or closes the...
... "TV" or "SAT/ CABLE" and digital signals are input via the DIGITAL IN jack, displays the stream information in pause mode. Activates slow-motion play ). SLEEP (page 54) Sets the sleep timer. m/M (fast reverse/fast forward) Fast reverse/fast forward the disc during playback. N (play) Starts or re-starts playback (resume play when pressed for 15 seconds. Adjusts the TV volume. I Z (open/close) Opens or closes the...

Operating Instructions
Page 23
.... Rear panel of the unit B Component video cable (not supplied) VIDEO OUT PR / CR CYOMPONEPNB T/ CVBIDEO OUT ARC OUT A HDMI cable* C Video cord (supplied) To the component video input jacks of the TV. Method 1: HDMI cable (A) connection If your TV, select the connection method. To the video input jack of the TV. When connecting with the HDMI cable, you do not have an HDMI jack, but has component video input jacks, connect to select the type of output signal (page 57). Method 3: Video cord (C) connection If you need to using...
.... Rear panel of the unit B Component video cable (not supplied) VIDEO OUT PR / CR CYOMPONEPNB T/ CVBIDEO OUT ARC OUT A HDMI cable* C Video cord (supplied) To the component video input jacks of the TV. Method 1: HDMI cable (A) connection If your TV, select the connection method. To the video input jack of the TV. When connecting with the HDMI cable, you do not have an HDMI jack, but has component video input jacks, connect to select the type of output signal (page 57). Method 3: Video cord (C) connection If you need to using...

Operating Instructions
Page 27
... of the extension cable and connecting the extension cable to the (USB) port (front or rear), turn the unit on the unit. The USB Wireless LAN Adapter may be connected. SPEAKERS FRONT R FRONT L SUBWOOFER CENTER LAN(100) VIDEO OUT SPEAKERS Y PB / CB PR / CR COMPONENT VIDEO OUT SAT/CABLE TV DIGITAL IN DIGITAL IN ARC OUT SUR R SUR L COAXIAL OPTICAL FM COAXIAL 75 ANTENNA A. To protect wireless communication, this system supports various security functions. WEP WEP applies...
... of the extension cable and connecting the extension cable to the (USB) port (front or rear), turn the unit on the unit. The USB Wireless LAN Adapter may be connected. SPEAKERS FRONT R FRONT L SUBWOOFER CENTER LAN(100) VIDEO OUT SPEAKERS Y PB / CB PR / CR COMPONENT VIDEO OUT SAT/CABLE TV DIGITAL IN DIGITAL IN ARC OUT SUR R SUR L COAXIAL OPTICAL FM COAXIAL 75 ANTENNA A. To protect wireless communication, this system supports various security functions. WEP WEP applies...

Operating Instructions
Page 28
... then connect the AC power cord (mains lead). Set up the calibration mic at ear level using the system. AE.CCMAL-AMCI2C Calibration mic 1 Turn on the TV. 3 Press [/1 on the unit. 4 Switch the input selector on your TV so that the signal from the system appears on the country model. Easy Setup - The front of each speaker should face the calibration mic, and there should be displayed by this...
... then connect the AC power cord (mains lead). Set up the calibration mic at ear level using the system. AE.CCMAL-AMCI2C Calibration mic 1 Turn on the TV. 3 Press [/1 on the unit. 4 Switch the input selector on your TV so that the signal from the system appears on the country model. Easy Setup - The front of each speaker should face the calibration mic, and there should be displayed by this...
Operating Instructions
Page 43
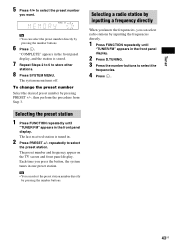
...system menu turns off. Tip • You can select the preset number directly by pressing the number buttons. 43US Tip • You can select the preset station number directly by pressing the number buttons. 6 Press . repeatedly to store other stations. 8 Press SYSTEM MENU. To change the preset number Select the desired preset number by inputting the frequencies directly. 1 Press FUNCTION repeatedly until "TUNER FM" appears in the front panel display. Selecting the preset station 1 Press FUNCTION repeatedly until "TUNER FM" appears in the front panel display. 2 Press D.TUNING...
...system menu turns off. Tip • You can select the preset number directly by pressing the number buttons. 43US Tip • You can select the preset station number directly by pressing the number buttons. 6 Press . repeatedly to store other stations. 8 Press SYSTEM MENU. To change the preset number Select the desired preset number by inputting the frequencies directly. 1 Press FUNCTION repeatedly until "TUNER FM" appears in the front panel display. Selecting the preset station 1 Press FUNCTION repeatedly until "TUNER FM" appears in the front panel display. 2 Press D.TUNING...
Operating Instructions
Page 50
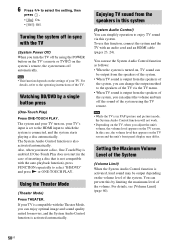
... Play does not start (in PAP (picture and picture) mode, the System Audio Control function will not work. • Depending on the TV screen. You can adjust the volume and turn on the TV screen and the unit's front panel display may be output from the speakers of the system. • When TV sound is output from the speakers of the system. Watching BD/DVD by limiting the maximum level of inserting a disc...
... Play does not start (in PAP (picture and picture) mode, the System Audio Control function will not work. • Depending on the TV screen. You can adjust the volume and turn on the TV screen and the unit's front panel display may be output from the speakers of the system. • When TV sound is output from the speakers of the system. Watching BD/DVD by limiting the maximum level of inserting a disc...

Operating Instructions
Page 51
... compatible with the Audio Return Channel function. The front of the TV. 1 Press HOME. A. C. (Digital Cinema Auto Calibration) can set the appropriate surround sound automatically. You cannot turn the volume down. Set up the calibration mic at ear level using just one HDMI cable. Note • The system outputs a loud test sound when [Auto Calibration] starts. Other Operations Changing the language for the on-screen display of the TV (Language Follow) When you change the language for [Auto Calibration] appears. 5 Connect the calibration mic to the operating instructions...
... compatible with the Audio Return Channel function. The front of the TV. 1 Press HOME. A. C. (Digital Cinema Auto Calibration) can set the appropriate surround sound automatically. You cannot turn the volume down. Set up the calibration mic at ear level using just one HDMI cable. Note • The system outputs a loud test sound when [Auto Calibration] starts. Other Operations Changing the language for the on-screen display of the TV (Language Follow) When you change the language for [Auto Calibration] appears. 5 Connect the calibration mic to the operating instructions...

Operating Instructions
Page 52
... home menu appears on the TV screen. 2 Press C/c to select [Setup]. 3 Press X/x to select [Audio Settings], then press . 4 Press X/x to select the item, then press . x [Connection] If you install the surround amplifier in appropriate location and turn off the power. - Note • Before [Auto Calibration], make sure that the surround amplifier turns on and you do not disconnect the calibration mic. do not insert a disc. - Then use the Wireless Surround Speaker Kit (WAHT-SBP2, optional) for [Center] and [Surround]. The [Speaker Settings] display...
... home menu appears on the TV screen. 2 Press C/c to select [Setup]. 3 Press X/x to select [Audio Settings], then press . 4 Press X/x to select the item, then press . x [Connection] If you install the surround amplifier in appropriate location and turn off the power. - Note • Before [Auto Calibration], make sure that the surround amplifier turns on and you do not disconnect the calibration mic. do not insert a disc. - Then use the Wireless Surround Speaker Kit (WAHT-SBP2, optional) for [Center] and [Surround]. The [Speaker Settings] display...

Operating Instructions
Page 56
...: [Screen Settings] Setup TV Type Set the screen aspect ratio of your TV. Screen Format Original DVD Aspect Ratio Letter Box Cinema Conversion Mode Auto You can setup the following website: http://www.sony.com/bluraysupport/ [Screen Settings] x [3D Output Setting] [Auto]: Normally select this. [Off]: Select this to display all the functions described may work. 1 Press HOME. x [TV Screen Size Setting for Internet and network. [Easy Setup] (page 62) Re-runs the Easy Setup to make various adjustments of the system. Settings and Adjustments Using...
...: [Screen Settings] Setup TV Type Set the screen aspect ratio of your TV. Screen Format Original DVD Aspect Ratio Letter Box Cinema Conversion Mode Auto You can setup the following website: http://www.sony.com/bluraysupport/ [Screen Settings] x [3D Output Setting] [Auto]: Normally select this. [Off]: Select this to display all the functions described may work. 1 Press HOME. x [TV Screen Size Setting for Internet and network. [Easy Setup] (page 62) Re-runs the Easy Setup to make various adjustments of the system. Settings and Adjustments Using...

Operating Instructions
Page 58
.... [Speaker]: Outputs multi-channel sound from the system's speakers only. [Speaker + HDMI]: Outputs multi-channel sound from the system's speakers and 2-channel linear PCM signals from the HDMI OUT jack. [HDMI]: Outputs sound from the HDMI OUT jack only. AUDIO] Distortion may change automatically. You can compress the dynamic range of the sound track. [Auto]: Performs playback at the dynamic range specified by reducing the input level on the connected component. Enter the code for BD-ROMs or DVD VIDEOs. x [Attenuate - x [BD/DVD Menu] You can calibrate...
.... [Speaker]: Outputs multi-channel sound from the system's speakers only. [Speaker + HDMI]: Outputs multi-channel sound from the system's speakers and 2-channel linear PCM signals from the HDMI OUT jack. [HDMI]: Outputs sound from the HDMI OUT jack only. AUDIO] Distortion may change automatically. You can compress the dynamic range of the sound track. [Auto]: Performs playback at the dynamic range specified by reducing the input level on the connected component. Enter the code for BD-ROMs or DVD VIDEOs. x [Attenuate - x [BD/DVD Menu] You can calibrate...

Operating Instructions
Page 60
... simplified. When you press DISPLAY. x [HDMI Settings] By connecting Sony components that is compatible with an HDMI cable, operation is in standby mode. You can prevent this function. [Mode]: You can enjoy the system's sound in another room. [Standby]: You can operate the system quickly after turning it on the volume level of newer software version information (page 56). [Off]: Off. 60US x [Screen Saver] [On]: Turns on the [Auto Standby] function. For details, see "Using an S-AIR Product...
... simplified. When you press DISPLAY. x [HDMI Settings] By connecting Sony components that is compatible with an HDMI cable, operation is in standby mode. You can prevent this function. [Mode]: You can enjoy the system's sound in another room. [Standby]: You can operate the system quickly after turning it on the volume level of newer software version information (page 56). [Off]: Off. 60US x [Screen Saver] [On]: Turns on the [Auto Standby] function. For details, see "Using an S-AIR Product...

Operating Instructions
Page 67
...) away from the center speaker only. hear when you play a CD. • Select stereo sound by setting [Attenuate - The sound comes from the center speaker. • Check the speaker connections and settings (pages 22, 52). • Check the surround setting (page 30). • Depending on the source, the effect of Dolby Digital, DTS, or MPEG audio. • Depending on the BD/DVD, the output signal may be the entire 5.1 channel. Use direct tuning. 67US Severe hum...
...) away from the center speaker only. hear when you play a CD. • Select stereo sound by setting [Attenuate - The sound comes from the center speaker. • Check the speaker connections and settings (pages 22, 52). • Check the surround setting (page 30). • Depending on the source, the effect of Dolby Digital, DTS, or MPEG audio. • Depending on the BD/DVD, the output signal may be the entire 5.1 channel. Use direct tuning. 67US Severe hum...

Operating Instructions
Page 75
... channel at 3 ohms, 1 kHz) Subwoofer: 140 W (at 3 ohms, 80 Hz) BDV-E870/BDV-E570/BDV-E470/BDV-T57: POWER OUTPUT (reference) Front L/Front R/Center/Surround L/Surround R: 167 W (per channel minimum RMS power, with no more than 1% total harmonic distortion from 180 - 20,000 Hz; rated 60 watts per channel at 3 ohms, 1 kHz) Subwoofer: 165 W (at 3 ohms, 80 Hz) Inputs (Analog) AUDIO (AUDIO IN) Sensitivity: 450/250 mV Inputs (Digital) SAT/CABLE (COAXIAL), TV (OPTICAL) Supported formats...
... channel at 3 ohms, 1 kHz) Subwoofer: 140 W (at 3 ohms, 80 Hz) BDV-E870/BDV-E570/BDV-E470/BDV-T57: POWER OUTPUT (reference) Front L/Front R/Center/Surround L/Surround R: 167 W (per channel minimum RMS power, with no more than 1% total harmonic distortion from 180 - 20,000 Hz; rated 60 watts per channel at 3 ohms, 1 kHz) Subwoofer: 165 W (at 3 ohms, 80 Hz) Inputs (Analog) AUDIO (AUDIO IN) Sensitivity: 450/250 mV Inputs (Digital) SAT/CABLE (COAXIAL), TV (OPTICAL) Supported formats...


