Operating Instructions
Page 4
... 3 Precautions 3 Table of Contents 4 About this manual 5 This Player Can Play the Following Discs and Files 5 Examples of discs that the player cannot play .....6 About playback of discs recorded in AVCHD format 6 BD/DVD region code 7 Note on playback operations of BDs/DVDs .........7 Copyrights 7 Main Features 7 Getting Started Step 1: Unpacking 9 ...16 If you want to control your TV with the supplied remote 17 Step 6: Easy Setup 18 Step 7: Additional Adjustments 19 Basic Operations Playing a Disc 20 Guide to Displays 22 Entering characters 23 Guide to the Remote 24 Playing in ...
... 3 Precautions 3 Table of Contents 4 About this manual 5 This Player Can Play the Following Discs and Files 5 Examples of discs that the player cannot play .....6 About playback of discs recorded in AVCHD format 6 BD/DVD region code 7 Note on playback operations of BDs/DVDs .........7 Copyrights 7 Main Features 7 Getting Started Step 1: Unpacking 9 ...16 If you want to control your TV with the supplied remote 17 Step 6: Easy Setup 18 Step 7: Additional Adjustments 19 Basic Operations Playing a Disc 20 Guide to Displays 22 Entering characters 23 Guide to the Remote 24 Playing in ...

Operating Instructions
Page 9
...8226; Plug cords securely to prevent unwanted noise. • Refer to the instructions supplied with BDP-S301 only) • Power cord (1) • Remote commander (remote) (1) • Size AA...8226; Step 4: Connecting the Power Cord 16 • Step 5: Preparing the Remote 16 • Step 6: Easy Setup 18 • Step 7: Additional Adjustments 19 9 Check that you have the following items: • Video cord (...(supplied with the components to be connected. • You cannot connect this player to a TV that does not have a video input jack. • Be sure to disconnect the power cord ...
...8226; Plug cords securely to prevent unwanted noise. • Refer to the instructions supplied with BDP-S301 only) • Power cord (1) • Remote commander (remote) (1) • Size AA...8226; Step 4: Connecting the Power Cord 16 • Step 5: Preparing the Remote 16 • Step 6: Easy Setup 18 • Step 7: Additional Adjustments 19 9 Check that you have the following items: • Video cord (...(supplied with the components to be connected. • You cannot connect this player to a TV that does not have a video input jack. • Be sure to disconnect the power cord ...

Operating Instructions
Page 11
...Sony components that the user switch the connection to the cabinet wall. It may cause artifacts to your TV, projector or AV amplifier (receiver) is connected. Make sure the connector is recommended that are fully compatible with this model 480p/720p/1080p Blu-ray Disc player...HDMI indicator lights up when outputting 720p/1080i/1080p video signals. In the case of "Options" setup to the HDMI OUT jack Observe the ...the player, and start playback with BDP-S301 only) HDMI IN TV, projector, or AV amplifier (receiver) This Blu-ray Disc player incorporates High-Definition Multimedia Interface (...
...Sony components that the user switch the connection to the cabinet wall. It may cause artifacts to your TV, projector or AV amplifier (receiver) is connected. Make sure the connector is recommended that are fully compatible with this model 480p/720p/1080p Blu-ray Disc player...HDMI indicator lights up when outputting 720p/1080i/1080p video signals. In the case of "Options" setup to the HDMI OUT jack Observe the ...the player, and start playback with BDP-S301 only) HDMI IN TV, projector, or AV amplifier (receiver) This Blu-ray Disc player incorporates High-Definition Multimedia Interface (...

Operating Instructions
Page 12
Connection A TV Your setup B Stereo amplifier (receiver) and two speakers Notes about the HDMI OUT jack • When you connect the player to an AV amplifier (receiver) using an HDMI cord, you connect a component that best suits your ears or speakers. Do not bend or apply ...and "DTS Digital Surround" are registered trademarks of the following: - Be sure to read the instructions for up to 96 kHz, 16/20/ 24bit). The player stores the HDMI related settings for the components you change the component connected to the HDMI OUT jack, change "Audio (HDMI)" in addition to Dolby...
Connection A TV Your setup B Stereo amplifier (receiver) and two speakers Notes about the HDMI OUT jack • When you connect the player to an AV amplifier (receiver) using an HDMI cord, you connect a component that best suits your ears or speakers. Do not bend or apply ...and "DTS Digital Surround" are registered trademarks of the following: - Be sure to read the instructions for up to 96 kHz, 16/20/ 24bit). The player stores the HDMI related settings for the components you change the component connected to the HDMI OUT jack, change "Audio (HDMI)" in addition to Dolby...

Operating Instructions
Page 18
The start-up time will appear each time you do not complete Easy Setup, it will be much shorter once Easy Setup is completed. OPEN/ TV CLOSE DIMMER DISPLAY TV/VIDEO 1 4 7 CLEAR 23 56 89 VIDEO FORMAT 0 AUDIO SUBTITLE ANGLE RED GREEN BLUE YELLOW SYSTEM MENU TOP ...MENU "/1 RETURN PREV SLOW/STEP POP UP/ MENU NEXT Step 6: Easy Setup Follow the steps below in the following order. When turned on for using the player. If you turn on and starts Easy Setup. Make the settings below to make the minimum number of basic adjustments for the first...
The start-up time will appear each time you do not complete Easy Setup, it will be much shorter once Easy Setup is completed. OPEN/ TV CLOSE DIMMER DISPLAY TV/VIDEO 1 4 7 CLEAR 23 56 89 VIDEO FORMAT 0 AUDIO SUBTITLE ANGLE RED GREEN BLUE YELLOW SYSTEM MENU TOP ...MENU "/1 RETURN PREV SLOW/STEP POP UP/ MENU NEXT Step 6: Easy Setup Follow the steps below in the following order. When turned on for using the player. If you turn on and starts Easy Setup. Make the settings below to make the minimum number of basic adjustments for the first...

Operating Instructions
Page 19
... your TV by pressing VIDEO FORMAT (page 46). • Select the type of "Video Setup" (page 45). Step 7: Additional Adjustments The following settings and adjustments are necessary when your BD player! Also, check the above items again to see if any additional adjustment is complete! Enjoy... using your connection applies. TV Type 16:9 4:3 Easy Setup Select the screen aspect ratio to select then press ENTER. h Select "Finish Setup," and press ENTER. ...
... your TV by pressing VIDEO FORMAT (page 46). • Select the type of "Video Setup" (page 45). Step 7: Additional Adjustments The following settings and adjustments are necessary when your BD player! Also, check the above items again to see if any additional adjustment is complete! Enjoy... using your connection applies. TV Type 16:9 4:3 Easy Setup Select the screen aspect ratio to select then press ENTER. h Select "Finish Setup," and press ENTER. ...

Operating Instructions
Page 21
... the disc tray. Some BDs/DVDs display the menu automatically. Starts or restarts playback from the same point. About One-Touch Play (for HDMI connections only) With one touch of "Options" setup to start playback. A disc with auto playback function is switched to close the disc tray. To use this function, set "HDMI Control" of the H button, the player and...
... the disc tray. Some BDs/DVDs display the menu automatically. Starts or restarts playback from the same point. About One-Touch Play (for HDMI connections only) With one touch of "Options" setup to start playback. A disc with auto playback function is switched to close the disc tray. To use this function, set "HDMI Control" of the H button, the player and...

Operating Instructions
Page 22
BD DVD DATA DVD CD When 'Select an item, and press ENTER' appears in a similar way. Guide to the Title Lists of content type. The three Title Lists appear similar and are operable in this display leads further to Displays Title List For DATA DVDs, this manual, press the
BD DVD DATA DVD CD When 'Select an item, and press ENTER' appears in a similar way. Guide to the Title Lists of content type. The three Title Lists appear similar and are operable in this display leads further to Displays Title List For DATA DVDs, this manual, press the

Operating Instructions
Page 27
This is effective when playback sound is highlighted, select from "Max" to turn up the volume (e.g., at low volume, you cannot turn on the front panel display (page 59) or ... accentual width (dynamic range). c Select "Audio Control," and press ENTER to "Off" by pressing AUDIO. Clarifying Low Volume Sounds (Audio DRC) BD DVD DATA DVD Even at night) a Press SYSTEM MENU during playback. Convenient when you can make low sounds such as dialogs more audible. d While "Audio DRC" is Dolby Digital. Basic Operations z Hints...
This is effective when playback sound is highlighted, select from "Max" to turn up the volume (e.g., at low volume, you cannot turn on the front panel display (page 59) or ... accentual width (dynamic range). c Select "Audio Control," and press ENTER to "Off" by pressing AUDIO. Clarifying Low Volume Sounds (Audio DRC) BD DVD DATA DVD Even at night) a Press SYSTEM MENU during playback. Convenient when you can make low sounds such as dialogs more audible. d While "Audio DRC" is Dolby Digital. Basic Operations z Hints...

Operating Instructions
Page 29
... Control BD PLAYER Use the number keys to enter the password to set . Enter a new password and press m, then re-enter it for confirmation, and press ENTER. Confirm SYSTEM MENU Exit a Press SYSTEM MENU. b Select "Setup," and press ENTER. d Select "Change Password (Set Password)," and press ENTER. If you can control playback of inappropriate discs...
... Control BD PLAYER Use the number keys to enter the password to set . Enter a new password and press m, then re-enter it for confirmation, and press ENTER. Confirm SYSTEM MENU Exit a Press SYSTEM MENU. b Select "Setup," and press ENTER. d Select "Change Password (Set Password)," and press ENTER. If you can control playback of inappropriate discs...

Operating Instructions
Page 30
Setting the Parental Control for DVD VIDEOs DVD Setting the Parental Control for BDROMs BD Setup Video Setup Change Level Audio Setup Language Parental Control Password Speakers Options Level Off Use the number keys to turn on the above display. This will set the playback limitation level. d Select "DVD Parental Control," and press ENTER. f Enter the password using the...
Setting the Parental Control for DVD VIDEOs DVD Setting the Parental Control for BDROMs BD Setup Video Setup Change Level Audio Setup Language Parental Control Password Speakers Options Level Off Use the number keys to turn on the above display. This will set the playback limitation level. d Select "DVD Parental Control," and press ENTER. f Enter the password using the...

Operating Instructions
Page 44
... defaults. BD DVD DATA DVD CD From the "System Menu," enter the "Setup" displays to change the settings of these settings to the explanations in the disc. c Select the "Setup" display you want to use, from the "System Menu" when you do not operate for 15 minutes. The disc's playback settings take priority over the player's playback settings. Setup Video Setup Audio Setup Language...
... defaults. BD DVD DATA DVD CD From the "System Menu," enter the "Setup" displays to change the settings of these settings to the explanations in the disc. c Select the "Setup" display you want to use, from the "System Menu" when you do not operate for 15 minutes. The disc's playback settings take priority over the player's playback settings. Setup Video Setup Audio Setup Language...

Operating Instructions
Page 45
...Setup Underlined items are the default settings. Displays a wide picture with trimmed sides. Displays a full-height picture on the entire screen, with black bands on the top and DVD picture on a 4:3 screen TV (selectable bottom. Select the type of output from the HDMI OUT jack. RGB (0-255) - ROMs (720p/24 Hz or 1080p.../24 Hz). Note "TV Type" and "DVD Aspect Ratio" can be set to "4:3"). Wide-screen TV, or a TV with black bands on some discs...screen picture on BD- Full - DVD Aspect Ratio Letter Box - Select this for a 16:9 - Sends 1920 × 1080p/24 Hz video...
...Setup Underlined items are the default settings. Displays a wide picture with trimmed sides. Displays a full-height picture on the entire screen, with black bands on the top and DVD picture on a 4:3 screen TV (selectable bottom. Select the type of output from the HDMI OUT jack. RGB (0-255) - ROMs (720p/24 Hz or 1080p.../24 Hz). Note "TV Type" and "DVD Aspect Ratio" can be set to "4:3"). Wide-screen TV, or a TV with black bands on some discs...screen picture on BD- Full - DVD Aspect Ratio Letter Box - Select this for a 16:9 - Sends 1920 × 1080p/24 Hz video...
Operating Instructions
Page 46
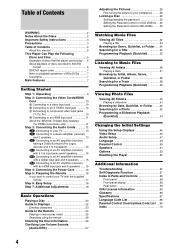
... suits the disc and your TV. 480i 480i 480i 480i 480p 720p 1080i 480p 720p 1080i 480p 480i BD:720p, DVD:480p*3 480i BD:1080i, DVD:480p*3 480i 1080p 1080p 480i 480i Source... Direct Output differs depending on source Output differs depending on source 480i material*1 material*2 *1 Outputs in "Video Setup" to...video signals may be output when you select a setting other than "Auto," the player automatically adjusts the video signals if the TV cannot accept the set the video output ...
... suits the disc and your TV. 480i 480i 480i 480i 480p 720p 1080i 480p 720p 1080i 480p 480i BD:720p, DVD:480p*3 480i BD:1080i, DVD:480p*3 480i 1080p 1080p 480i 480i Source... Direct Output differs depending on source Output differs depending on source 480i material*1 material*2 *1 Outputs in "Video Setup" to...video signals may be output when you select a setting other than "Auto," the player automatically adjusts the video signals if the TV cannot accept the set the video output ...

Operating Instructions
Page 47
.../Rt - Select the output method from the DIGITAL OUT (COAXIAL - Normally, select this when connecting to "Downmix PCM"). Audio Setup Underlined items are the default settings. Dolby Digital Dolby Digital - Dolby Digital discs. Select this . This setting affects the output from multi-channel DTS sources (effective for two channel stereo. Select the...
.../Rt - Select the output method from the DIGITAL OUT (COAXIAL - Normally, select this when connecting to "Downmix PCM"). Audio Setup Underlined items are the default settings. Dolby Digital Dolby Digital - Dolby Digital discs. Select this . This setting affects the output from multi-channel DTS sources (effective for two channel stereo. Select the...

Operating Instructions
Page 48
...Disc/source BDROM Linear PCM 2ch AUDIO OUT L/R jacks*1 2ch 5.1ch 2ch 2ch 5.1ch*5 2ch Downmix 5.1ch 7.1ch 2ch Downmix 5.1ch Downmix Dolby Digital 2ch Downmix 5.1ch Dolby Digital Plus 2ch Downmix 5.1ch Dolby TrueHD 2ch Downmix 5.1ch DTS 2ch Downmix 5.1ch DTS-HD DVD...2ch 2ch 2ch LPCM - 2ch LPCM 2ch LPCM CD Linear PCM 2ch 2ch 2ch 2ch LPCM 2ch ...player downmixes to 2ch signals even if the disc or source is set to "Dolby Digital" or "DTS" (page 47). *3 Selectable under "Audio (HDMI)" in "Audio Setup" (page 47). *4 Selectable under "Audio Output Mode" in "Speakers" Setup...
...Disc/source BDROM Linear PCM 2ch AUDIO OUT L/R jacks*1 2ch 5.1ch 2ch 2ch 5.1ch*5 2ch Downmix 5.1ch 7.1ch 2ch Downmix 5.1ch Downmix Dolby Digital 2ch Downmix 5.1ch Dolby Digital Plus 2ch Downmix 5.1ch Dolby TrueHD 2ch Downmix 5.1ch DTS 2ch Downmix 5.1ch DTS-HD DVD...2ch 2ch 2ch LPCM - 2ch LPCM 2ch LPCM CD Linear PCM 2ch 2ch 2ch 2ch LPCM 2ch ...player downmixes to 2ch signals even if the disc or source is set to "Dolby Digital" or "DTS" (page 47). *3 Selectable under "Audio (HDMI)" in "Audio Setup" (page 47). *4 Selectable under "Audio Output Mode" in "Speakers" Setup...

Operating Instructions
Page 51
Audio Output Mode - Speaker Setup - Select this when connecting to an AV amplifier (receiver) using the 5.1CH OUTPUT jacks. The default settings are necessary when using the 5.1CH OUTPUT jacks. ...
Audio Output Mode - Speaker Setup - Select this when connecting to an AV amplifier (receiver) using the 5.1CH OUTPUT jacks. The default settings are necessary when using the 5.1CH OUTPUT jacks. ...

Operating Instructions
Page 52
... (Stop, Play, etc.). Re-runs the Easy Setup to activate the "Auto Power Off" function of the player (page 11). Off - Playback status is left in stop or pause mode without operation. Plays BD layer. Plays DVD layer. Remove the disc when you change the setting. Easy Setup - Plays CD layer. 52 Options Underlined items are the default...
... (Stop, Play, etc.). Re-runs the Easy Setup to activate the "Auto Power Off" function of the player (page 11). Off - Playback status is left in stop or pause mode without operation. Plays BD layer. Plays DVD layer. Remove the disc when you change the setting. Easy Setup - Plays CD layer. 52 Options Underlined items are the default...

Operating Instructions
Page 55
...file name is turned over. Playback stops automatically. , While playing discs with the playback side facing down. , The disc is skewed. , The player cannot play certain discs (page 6). , The region code on the BD/DVD does not match the player. , Moisture has condensed inside the player (page 3). , The player cannot play mode is not... for audio connection. Other characters may be displayed even if the file size is within this case set in "TV Type" under "Video Setup." , The aspect ratio of the picture is too dark/the bright area is too bright or unnatural. , Set "Video Control" in ...
...file name is turned over. Playback stops automatically. , While playing discs with the playback side facing down. , The disc is skewed. , The player cannot play certain discs (page 6). , The region code on the BD/DVD does not match the player. , Moisture has condensed inside the player (page 3). , The player cannot play mode is not... for audio connection. Other characters may be displayed even if the file size is within this case set in "TV Type" under "Video Setup." , The aspect ratio of the picture is too dark/the bright area is too bright or unnatural. , Set "Video Control" in ...
Operating Instructions
Page 70
...Setup" 47 AVCHD 6, 66 B Batteries 16 Blu-ray Disc 5, 66 'BRAVIA' Theatre Sync 11 C CD 5 Chapter 66 Color buttons 24 Connecting the audio cords 12 the video cords 10 D DIMMER 24 Disc ...Information 26 DISPLAY 24 Display front panel display 59 Dolby Digital 14, 47, 66 Dolby Digital Plus 48, 66 Dolby TrueHD 48, 66 DTS 47, 66 "DTS Downmix" 47 DTS-HD 48, 66 DVD VIDEO 66 DVD+R 67 DVD+RW 67 DVD-R 67 DVD-RW 67 E Easy Setup...Region code 7 Remote 16, 17, 24 Resetting the Player 53 S Searching 26, 34, 38, 42 "Setup" 22 Setup Displays 44 "Slideshow" 41 "Speaker Setup" 51 "Speakers" 12, 51 SUBTITLE 24 T ...
...Setup" 47 AVCHD 6, 66 B Batteries 16 Blu-ray Disc 5, 66 'BRAVIA' Theatre Sync 11 C CD 5 Chapter 66 Color buttons 24 Connecting the audio cords 12 the video cords 10 D DIMMER 24 Disc ...Information 26 DISPLAY 24 Display front panel display 59 Dolby Digital 14, 47, 66 Dolby Digital Plus 48, 66 Dolby TrueHD 48, 66 DTS 47, 66 "DTS Downmix" 47 DTS-HD 48, 66 DVD VIDEO 66 DVD+R 67 DVD+RW 67 DVD-R 67 DVD-RW 67 E Easy Setup...Region code 7 Remote 16, 17, 24 Resetting the Player 53 S Searching 26, 34, 38, 42 "Setup" 22 Setup Displays 44 "Slideshow" 41 "Speaker Setup" 51 "Speakers" 12, 51 SUBTITLE 24 T ...


