Tv Lc32sv29u - Sharp LC 32SV29U
Tv Lc32sv29u
Related Manual Pages


Similar Questions

I Lost The Bolt That Attach The Base To The Sharp Lc-32sv29u Lcd Tv
can you tell me the length and diameter so i can go to lowes and get replacements
can you tell me the length and diameter so i can go to lowes and get replacements
(Posted by hippy1962 10 years ago)


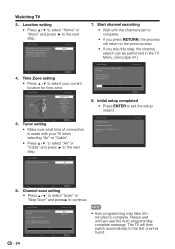
My Voulme Is Not Working. Not Getting Any Sound From The Tv.
CAN ANY ONE TELL ME WHAT'S WRONG WITH MY TV. ALL OF A SUDDEN THE VOLUME STOP WORKING. BEFORE THAT HA...
CAN ANY ONE TELL ME WHAT'S WRONG WITH MY TV. ALL OF A SUDDEN THE VOLUME STOP WORKING. BEFORE THAT HA...
(Posted by tialombard 11 years ago)

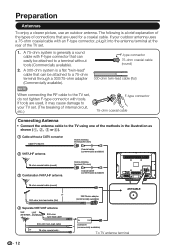
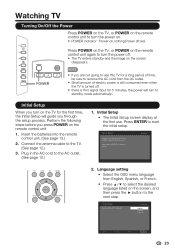
Turning Tv To 'antenna' Or 'over-the-air' Mode
I bought an "Antennacraft" antenna to receive the basic local channels and the manual of the antenna...
I bought an "Antennacraft" antenna to receive the basic local channels and the manual of the antenna...
(Posted by Gregoryjavenson 12 years ago)