User Guide
Page 3
... information on your purchase of songs • Customize your listening experience and let great music find you • Discover new artists, and old favorites with Rhapsody Channels • Manage all you want , transfer all your music: including importing your iTunes® library • Drag and drop songs and albums to your Sansa players instantly • Get new music every time you hook up to the...
... information on your purchase of songs • Customize your listening experience and let great music find you • Discover new artists, and old favorites with Rhapsody Channels • Manage all you want , transfer all your music: including importing your iTunes® library • Drag and drop songs and albums to your Sansa players instantly • Get new music every time you hook up to the...
User Guide
Page 4
Additional space will be needed for downloading music files. • Microsoft Internet Explorer 5.5 or later, JavaScript/Active Scripting enabled • Adobe Flash Player 8 or higher • 16-bit display recommended, 256 color-color display required • Broadband Internet connection • 1024 x 768 display resolution recommended, 800 x 600 required • Sound card • Speakers or headphones Rhapsody® Channels Overview 4 Recommended System Requirements •...
Additional space will be needed for downloading music files. • Microsoft Internet Explorer 5.5 or later, JavaScript/Active Scripting enabled • Adobe Flash Player 8 or higher • 16-bit display recommended, 256 color-color display required • Broadband Internet connection • 1024 x 768 display resolution recommended, 800 x 600 required • Sound card • Speakers or headphones Rhapsody® Channels Overview 4 Recommended System Requirements •...
User Guide
Page 6
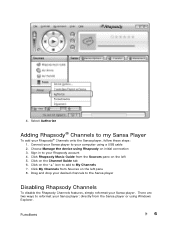
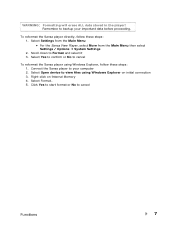
... my Sansa Player To add your computer using a USB cable 2. Functions 6 Choose Manage the device using Windows Explorer. Connect your Sansa player to the Sansa player Disabling Rhapsody Channels To disable the Rhapsody Channels features, simply reformat your Sansa player: directly from the Sources pane on the left 5. Click Rhapsody Music Guide from the Sansa player or using Rhapsody on the Channel Guide tab 6. Click on initial connection 3. Select Authorize Adding Rhapsody® Channels to reformat your Sansa player.
... my Sansa Player To add your computer using a USB cable 2. Functions 6 Choose Manage the device using Windows Explorer. Connect your Sansa player to the Sansa player Disabling Rhapsody Channels To disable the Rhapsody Channels features, simply reformat your Sansa player: directly from the Sources pane on the left 5. Click Rhapsody Music Guide from the Sansa player or using Rhapsody on the Channel Guide tab 6. Click on initial connection 3. Select Authorize Adding Rhapsody® Channels to reformat your Sansa player.
User Guide
Page 7
... select it 3. Connect the Sansa player to cancel Functions 7 Select Format... 5. Click Yes to start format or No to your important data before proceeding. Select Settings from the Main Menu • For the Sansa View Player, select More from the Main Menu then select Settings / Options Æ System Settings 2. To reformat the Sansa player directly, follow these steps: 1. Select Open device to backup your computer 2. Remember to view files using Windows Explorer, follow...
... select it 3. Connect the Sansa player to cancel Functions 7 Select Format... 5. Click Yes to start format or No to your important data before proceeding. Select Settings from the Main Menu • For the Sansa View Player, select More from the Main Menu then select Settings / Options Æ System Settings 2. To reformat the Sansa player directly, follow these steps: 1. Select Open device to backup your computer 2. Remember to view files using Windows Explorer, follow...
User Guide
Page 8
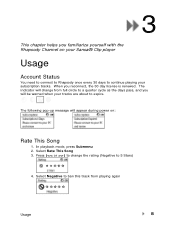
...) 4. 3 This chapter helps you familiarize yourself with the Rhapsody Channel on : Rate This Song 1. Press |>| to expire. Select Rate This Song 3. When you will appear during power on your Sansa® Clip player Usage Account Status You need to connect to Rhapsody once every 30 days to continue playing your tracks are about to change from playing again Usage 8 In playback mode, press Submenu...
...) 4. 3 This chapter helps you familiarize yourself with the Rhapsody Channel on : Rate This Song 1. Press |>| to expire. Select Rate This Song 3. When you will appear during power on your Sansa® Clip player Usage Account Status You need to connect to Rhapsody once every 30 days to continue playing your tracks are about to change from playing again Usage 8 In playback mode, press Submenu...
User Guide
Page 9
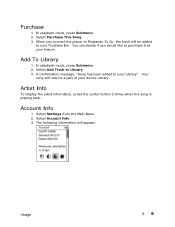
... added to purchase it at your device Library. Purchase 1. In playback mode, press Submenu 2. You can decide if you connect the player to Rhapsody To Go, the track will be a part of your leisure. In playback mode, press Submenu 2. Artist Info To display the artist information, press the center button 2 times when the song is playing back. Add To Library 1. Account Info 1. Your song will appear: Usage 9
... added to purchase it at your device Library. Purchase 1. In playback mode, press Submenu 2. You can decide if you connect the player to Rhapsody To Go, the track will be a part of your leisure. In playback mode, press Submenu 2. Artist Info To display the artist information, press the center button 2 times when the song is playing back. Add To Library 1. Account Info 1. Your song will appear: Usage 9
User Guide
Page 10
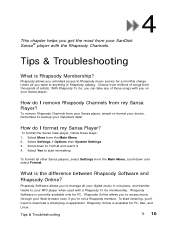
... select Format. Select Yes to start listening, you'll need to download a small plug-in one place, and transfer tracks to Rhapsody music service for a monthly charge. Rhapsody Software allows you to access music through your important data! With Rhapsody To Go, you can take any of artists. To remove Rhapsody Channels from the Main Menu 2. Rhapsody Online allows you to manage all other Sansa players, select Settings...
... select Format. Select Yes to start listening, you'll need to download a small plug-in one place, and transfer tracks to Rhapsody music service for a monthly charge. Rhapsody Software allows you to access music through your important data! With Rhapsody To Go, you can take any of artists. To remove Rhapsody Channels from the Main Menu 2. Rhapsody Online allows you to manage all other Sansa players, select Settings...
User Guide
Page 2
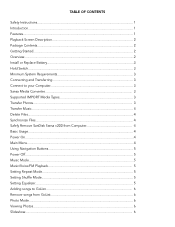
... Instructions...1 Introduction...1 Features...1 Playback Screen Description 2 Package Contents...2 Getting Started...2 Overview...2 Install or Replace Battery 3 Hold Switch...3 Minimum System Requirements 3 Connecting and Transferring 3 Connect to your Computer 3 Sansa Media Converter 3 Supported IMPORT Media Types 3 Transfer Photos...3 Transfer Music...4 Delete Files...4 Synchronize Files...4 Safely Remove SanDisk Sansa c200 from Computer 4 Basic Usage...4 Power On...4 Main Menu...4 Using Navigation Buttons 5 Power Off...5 Music Mode...5 Music/Voice/FM Playback 5 Setting Repeat Mode...
... Instructions...1 Introduction...1 Features...1 Playback Screen Description 2 Package Contents...2 Getting Started...2 Overview...2 Install or Replace Battery 3 Hold Switch...3 Minimum System Requirements 3 Connecting and Transferring 3 Connect to your Computer 3 Sansa Media Converter 3 Supported IMPORT Media Types 3 Transfer Photos...3 Transfer Music...4 Delete Files...4 Synchronize Files...4 Safely Remove SanDisk Sansa c200 from Computer 4 Basic Usage...4 Power On...4 Main Menu...4 Using Navigation Buttons 5 Power Off...5 Music Mode...5 Music/Voice/FM Playback 5 Setting Repeat Mode...
User Guide
Page 3
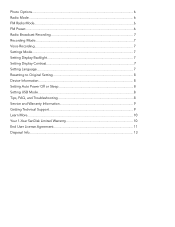
Photo Options...6 Radio Mode...6 FM Radio Mode...6 FM Preset...6 Radio Broadcast Recording 7 Recording Mode...7 Voice Recording...7 Settings Mode...7 Setting Display Backlight 7 Setting Display Contrast 7 Setting Language...7 Resetting to Original Setting 8 Device Information...8 Setting Auto Power Off or Sleep 8 Setting USB Mode...8 Tips, FAQ, and Troubleshooting 8 Service and Warranty Information 9 Getting Technical Support 9 Learn More...10 Your 1-Year SanDisk Limited Warranty 10 End User License Agreement 11 Disposal Info...13
Photo Options...6 Radio Mode...6 FM Radio Mode...6 FM Preset...6 Radio Broadcast Recording 7 Recording Mode...7 Voice Recording...7 Settings Mode...7 Setting Display Backlight 7 Setting Display Contrast 7 Setting Language...7 Resetting to Original Setting 8 Device Information...8 Setting Auto Power Off or Sleep 8 Setting USB Mode...8 Tips, FAQ, and Troubleshooting 8 Service and Warranty Information 9 Getting Technical Support 9 Learn More...10 Your 1-Year SanDisk Limited Warranty 10 End User License Agreement 11 Disposal Info...13
User Guide
Page 4
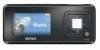
... SanDisk Sansa c200 is a high performance portable digital audio player with any electronic device. 7. The Sansa c200 enables users to expand memory capacity and read microSD cards. supports FM radio recording function for a long time: • Clean your battery as an USB drive. • microSD slot- Do not use your music with Headphones/Earphones at high volume. Hearing experts advise against continuous loud and extended music play MP3, WMA, and secure WMA audio files...
... SanDisk Sansa c200 is a high performance portable digital audio player with any electronic device. 7. The Sansa c200 enables users to expand memory capacity and read microSD cards. supports FM radio recording function for a long time: • Clean your battery as an USB drive. • microSD slot- Do not use your music with Headphones/Earphones at high volume. Hearing experts advise against continuous loud and extended music play MP3, WMA, and secure WMA audio files...
User Guide
Page 5
... Sansa c200 digital audio player Earphones USB Cable CD with User's Manual and Software Quick Start Guide Lanyard 1 lithium ion battery GETTING STARTED Overview 1. Hold Slide to player.. 4. Track Number Display the current track number and the total number of the current playback track. 5. Track Timer Displays the timer of sound tracks. 2. Play/Pause/Stop Displays the music or voice files playback status. 8. Volume Up/Down Volume up one item, pause, or resume. 9. PLAYBACK SCREEN DESCRIPTION 1. Down/Option menu Press to options menu. 11. Song Name Displays the song...
... Sansa c200 digital audio player Earphones USB Cable CD with User's Manual and Software Quick Start Guide Lanyard 1 lithium ion battery GETTING STARTED Overview 1. Hold Slide to player.. 4. Track Number Display the current track number and the total number of the current playback track. 5. Track Timer Displays the timer of sound tracks. 2. Play/Pause/Stop Displays the music or voice files playback status. 8. Volume Up/Down Volume up one item, pause, or resume. 9. PLAYBACK SCREEN DESCRIPTION 1. Down/Option menu Press to options menu. 11. Song Name Displays the song...
User Guide
Page 6
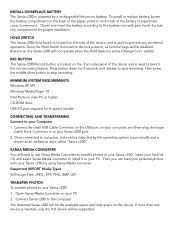
... ion battery. REC BUTTON The Sansa c200 Record button is located on the Sansa c200 will not operate when the Hold Switch is active (Orange Color visible). Connect the small USB Cable Connector to your Sansa c200: 1. The detected Sansa c200 will need to use Sansa Media Converter to transfer photos to the USB port on the device. Once the Hold Switch is moved to remove it. Then press the middle silver button to your Sansa c200. Open Sansa Media...
... ion battery. REC BUTTON The Sansa c200 Record button is located on the Sansa c200 will not operate when the Hold Switch is active (Orange Color visible). Connect the small USB Cable Connector to your Sansa c200: 1. The detected Sansa c200 will need to use Sansa Media Converter to transfer photos to the USB port on the device. Once the Hold Switch is moved to remove it. Then press the middle silver button to your Sansa c200. Open Sansa Media...
User Guide
Page 7
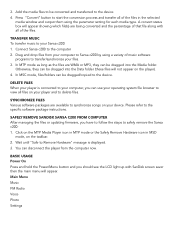
... Menu Music FM Radio Voice Photo Settings TRANSFER MUSIC To transfer music to view all of the files. In MSC mode, files/folders can disconnect the player from your computer to Sansa c200 by using the parameter setting for each media type. Add the media files to be dragged/copied to delete files. Press "Convert" button to the device. 4. Click on the MTP Media Player icon in MTP mode or the Safely Remove Hardware icon in the selected media window and output them using a variety of music software programs to transfer...
... Menu Music FM Radio Voice Photo Settings TRANSFER MUSIC To transfer music to view all of the files. In MSC mode, files/folders can disconnect the player from your computer to Sansa c200 by using the parameter setting for each media type. Add the media files to be dragged/copied to delete files. Press "Convert" button to the device. 4. Click on the MTP Media Player icon in MTP mode or the Safely Remove Hardware icon in the selected media window and output them using a variety of music software programs to transfer...
User Guide
Page 8
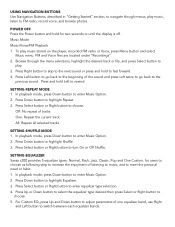
... button to turn On or Off Shuffle. In playback mode, press Down button to FM radio, record voice, and browse photos. USING NAVIGATION BUTTONS Use Navigation Buttons, described in "Getting Started" section, to navigate though menus, play music, listen to enter Music Option. 2. Press Left button to go back to switch between each equalizer bands. Press Down button to enter Music Option. 2. In playback mode, press Down button to highlight Repeat. 3. POWER OFF Press the Power button and hold for users...
... button to turn On or Off Shuffle. In playback mode, press Down button to FM radio, record voice, and browse photos. USING NAVIGATION BUTTONS Use Navigation Buttons, described in "Getting Started" section, to navigate though menus, play music, listen to enter Music Option. 2. Press Left button to go back to switch between each equalizer bands. Press Down button to enter Music Option. 2. In playback mode, press Down button to highlight Repeat. 3. POWER OFF Press the Power button and hold for users...
User Guide
Page 9
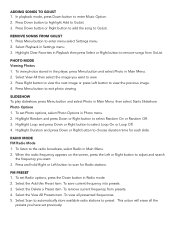
... time for Radio stations. Highlight Duration and press Down or Right button to enter menu select Settings menu 2. To set Photo options, select Photo Options in Photo menu. 2. This action will erase all presented frequencies. 5. Press Down button or Right button to add the song to exit photo viewing SLIDESHOW To play slideshow, press Menu button and select Photo in Playback then press Select or Right button to view the previous image. 4. PHOTO MODE Viewing Photos 1. Press Menu button...
... time for Radio stations. Highlight Duration and press Down or Right button to enter menu select Settings menu 2. To set Photo options, select Photo Options in Photo menu. 2. This action will erase all presented frequencies. 5. Press Down button or Right button to add the song to exit photo viewing SLIDESHOW To play slideshow, press Menu button and select Photo in Playback then press Select or Right button to view the previous image. 4. PHOTO MODE Viewing Photos 1. Press Menu button...
User Guide
Page 10
... power. Select Record Now item in Main Menu. 2. Press Select button to select recording duration. 4. the hot key "record" button at the side of the player can start the recording right away. 3. SETTING DISPLAY BACKLIGHT Display Backlight timer program can press any button to record your needs. Select Settings menu in Radio mode to use the voice recording function, please follow the steps shown below. 1. Select Display 3. Press Play/Pause/Up button to support voice recording. To record radio broadcast, press the Down button...
... power. Select Record Now item in Main Menu. 2. Press Select button to select recording duration. 4. the hot key "record" button at the side of the player can start the recording right away. 3. SETTING DISPLAY BACKLIGHT Display Backlight timer program can press any button to record your needs. Select Settings menu in Radio mode to use the voice recording function, please follow the steps shown below. 1. Select Display 3. Press Play/Pause/Up button to support voice recording. To record radio broadcast, press the Down button...

User Guide
Page 11
... must use the MTP mode to MTP mode. Answer: Copy files to the Sansa c200, in MSC mode, is MTP? Question: What is just like copying files to a Windows XP PC and synchronize digital media content between those devices and the PC. RESETTING TO ORIGINAL SETTING 1. Select Power. 3. Answer: The Sansa MP3 Player will default to synchronize music files using Windows Media Player 10 for a certain time. 1. SETTING AUTO POWER OFF OR SLEEP You can set of drivers developed by Microsoft to connect portable devices to a Hard Drive.
... must use the MTP mode to MTP mode. Answer: Copy files to the Sansa c200, in MSC mode, is MTP? Question: What is just like copying files to a Windows XP PC and synchronize digital media content between those devices and the PC. RESETTING TO ORIGINAL SETTING 1. Select Power. 3. Answer: The Sansa MP3 Player will default to synchronize music files using Windows Media Player 10 for a certain time. 1. SETTING AUTO POWER OFF OR SLEEP You can set of drivers developed by Microsoft to connect portable devices to a Hard Drive.
User Guide
Page 12
... format. Once the songs are wma, wav, or mp3, they can from an older CD and converted to player? An alternative is to switch the player to MSC mode, then the files can I use or features of your packaging material. If you to a supported format. This will not appear on the player). To test this is wrong? Question: In MTP mode, how do I update the firmware...
... format. Once the songs are wma, wav, or mp3, they can from an older CD and converted to player? An alternative is to switch the player to MSC mode, then the files can I use or features of your packaging material. If you to a supported format. This will not appear on the player). To test this is wrong? Question: In MTP mode, how do I update the firmware...
User Guide
Page 13
... FOR ANY DIRECT, INDIRECT, OR CONSEQUENTIAL DAMAGES, ANY FINANCIAL LOSS OR ANY LOST DATA OR IMAGE, EVEN IF SANDISK HAS BEEN ADVISED OF THE POSSIBILITY OF SUCH DAMAGE. and other applications where failure could threaten injury or life. To obtain warranty service contact SanDisk at its option, repair or replace the product with the product instructions, or if...
... FOR ANY DIRECT, INDIRECT, OR CONSEQUENTIAL DAMAGES, ANY FINANCIAL LOSS OR ANY LOST DATA OR IMAGE, EVEN IF SANDISK HAS BEEN ADVISED OF THE POSSIBILITY OF SUCH DAMAGE. and other applications where failure could threaten injury or life. To obtain warranty service contact SanDisk at its option, repair or replace the product with the product instructions, or if...
User Guide
Page 14
..., owners of , adapt or translate the Software. Revocation does not alter the WM-DRM Software's ability to all right, title and interest in the Software not expressly licensed to copy, display and/or play Secure Content. You may not modify, create derivative works (new versions) of Secure Content ("Secure Content Owners") may be "in use the Software in executable form for SanDisk products and services solely for Windows Media...
..., owners of , adapt or translate the Software. Revocation does not alter the WM-DRM Software's ability to all right, title and interest in the Software not expressly licensed to copy, display and/or play Secure Content. You may not modify, create derivative works (new versions) of Secure Content ("Secure Content Owners") may be "in use the Software in executable form for SanDisk products and services solely for Windows Media...


