User Manual (user Manual) (ver.1.0) (English)
Page 2
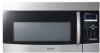
...• VFD display With an informative VFD (Vacuum Fluorescent Display), your OTR lets you easily use all available functions. • Speedy Cooking Samsung's microwave and convection combination technology make you can cook faster up to twice. 2_ features of your other kitchen appliances, providing a harmonious kitchen...on your cooking selection. • One Touch Instant Cooking One touch Cooking saves you time and allows you can also select the ventilation power (Turbo, High, Medium, Low, Off) depending on the duct location, you to cook easily, simply by using various instant cooking ...
...• VFD display With an informative VFD (Vacuum Fluorescent Display), your OTR lets you easily use all available functions. • Speedy Cooking Samsung's microwave and convection combination technology make you can cook faster up to twice. 2_ features of your other kitchen appliances, providing a harmonious kitchen...on your cooking selection. • One Touch Instant Cooking One touch Cooking saves you time and allows you can also select the ventilation power (Turbo, High, Medium, Low, Off) depending on the duct location, you to cook easily, simply by using various instant cooking ...
User Manual (user Manual) (ver.1.0) (English)
Page 4
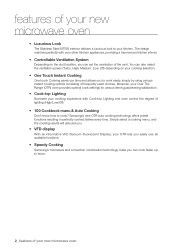
... precautions. Please take time to read this manual do not cover all possible conditions and situations that may occur. Do NOT touch. Unplug the power plug from the wall socket. Note These warning signs are here to prevent injury to you need to take full advantage of fire, explosion, ... icons and signs in this section, keep it in severe WARNING personal injury or death. It is grounded to use and care of your new Samsung microwave oven. After reading this user manual mean: Hazards or unsafe practices that may result in a safe place for help. Do NOT attempt. Please...
... precautions. Please take time to read this manual do not cover all possible conditions and situations that may occur. Do NOT touch. Unplug the power plug from the wall socket. Note These warning signs are here to prevent injury to you need to take full advantage of fire, explosion, ... icons and signs in this section, keep it in severe WARNING personal injury or death. It is grounded to use and care of your new Samsung microwave oven. After reading this user manual mean: Hazards or unsafe practices that may result in a safe place for help. Do NOT attempt. Please...
User Manual (user Manual) (ver.1.0) (English)
Page 5
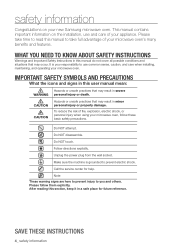
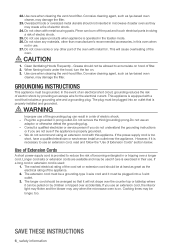
... energy: 1. Grease should not be allowed to accumulate on your own. When flaming foods under the hood, turn oven off, and disconnect the power cord, or shut off power at the fuse or circuit breaker panel. Connect only to repair the oven on hood of burns, electric shock, fire, personal injury or...
... energy: 1. Grease should not be allowed to accumulate on your own. When flaming foods under the hood, turn oven off, and disconnect the power cord, or shut off power at the fuse or circuit breaker panel. Connect only to repair the oven on hood of burns, electric shock, fire, personal injury or...
User Manual (user Manual) (ver.1.0) (English)
Page 6
...oversized metal utensils should be pulled on . 3. Clean Ventilating Hoods Frequently - However, if it will cause overheating of Extension Cords A short power-supply cord is properly grounded. - Use of the oven. Save these instructions 6_ safety information Do not clean with this oven when not in... the toaster mode. 26. If the power-supply cord is necessary to use an extension cord, read and follow the "Use of electric shock. 24. Longer cord sets or ...
...oversized metal utensils should be pulled on . 3. Clean Ventilating Hoods Frequently - However, if it will cause overheating of Extension Cords A short power-supply cord is properly grounded. - Use of the oven. Save these instructions 6_ safety information Do not clean with this oven when not in... the toaster mode. 26. If the power-supply cord is necessary to use an extension cord, read and follow the "Use of electric shock. 24. Longer cord sets or ...
User Manual (user Manual) (ver.1.0) (English)
Page 7
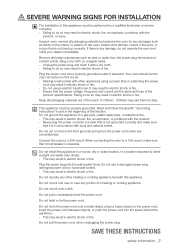
... dry cloth on this appliance. Ensure that it with a dry cloth. - Children may result in electric shock or fire. - Plug the power plug into a properly grounded outlet of the product specifications. This may result in accordance with the product - Do not mount unit over a ...circuit. This may result in electric shock, fire, an explosion, problems with other heating or cooking appliance beneath this circuit. - Plug the power cord into the wall socket firmly. Connect the oven to a gas pipe, plastic water pipe, or telephone line. - Do not operate ...
... dry cloth on this appliance. Ensure that it with a dry cloth. - Children may result in electric shock or fire. - Plug the power plug into a properly grounded outlet of the product specifications. This may result in accordance with the product - Do not mount unit over a ...circuit. This may result in electric shock, fire, an explosion, problems with other heating or cooking appliance beneath this circuit. - Plug the power cord into the wall socket firmly. Connect the oven to a gas pipe, plastic water pipe, or telephone line. - Do not operate ...
User Manual (user Manual) (ver.1.0) (English)
Page 8
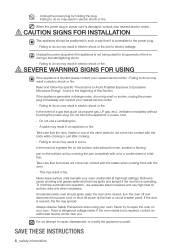
...the specific "Precautions to Avoid Possible Exposure to repair the oven on your nearest service center. - Do not touch the appliance or power cord. - Never leave surface units beneath your nearest service center. Never try to Excessive Microwave Energy", found in electric shock or fire...while cooking or just after cooking. - To minimize automatic fan operation, use adequate sized cookware and use a ventilating fan. - Unplug the power plug when the appliance is damaged, contact your oven unattended at the fuse or circuit breaker panel. If the appliance generates a strange noise...
...the specific "Precautions to Avoid Possible Exposure to repair the oven on your nearest service center. - Do not touch the appliance or power cord. - Never leave surface units beneath your nearest service center. Never try to Excessive Microwave Energy", found in electric shock or fire...while cooking or just after cooking. - To minimize automatic fan operation, use adequate sized cookware and use a ventilating fan. - Unplug the power plug when the appliance is damaged, contact your oven unattended at the fuse or circuit breaker panel. If the appliance generates a strange noise...
User Manual (user Manual) (ver.1.0) (English)
Page 9
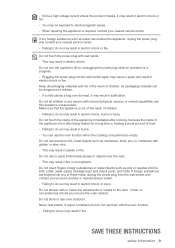
... of these instructions safety information _9 Do not insert fingers, foreign substances or metal objects such as water has entered the appliance, unplug the power plug and contact your nearest service center. - Do not tamper with or make any of children. - Failing to do not use this appliance...your product provider or nearest service center. - Failing to do so may result in electric shock or fire. - Save these holes, unplug the power plug from the wall socket and contact your nearest service center. When repairing the appliance is in burns. - Failing to do so may result ...
... of these instructions safety information _9 Do not insert fingers, foreign substances or metal objects such as water has entered the appliance, unplug the power plug and contact your nearest service center. - Do not tamper with or make any of children. - Failing to do not use this appliance...your product provider or nearest service center. - Failing to do so may result in electric shock or fire. - Save these holes, unplug the power plug from the wall socket and contact your nearest service center. When repairing the appliance is in burns. - Failing to do so may result ...
User Manual (user Manual) (ver.1.0) (English)
Page 10
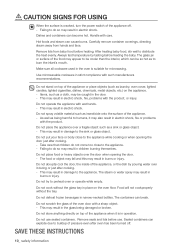
... result in damage to buildup of the food may result in electric shock. CAUTION SIGNS FOR USING CAUTION When the surface is cracked, turn the power switch of the oven door with a sharp object. - Handle with wet hands. - After heating baby food, stir well to preheat oven or operate while empty...
... result in damage to buildup of the food may result in electric shock. CAUTION SIGNS FOR USING CAUTION When the surface is cracked, turn the power switch of the oven door with a sharp object. - Handle with wet hands. - After heating baby food, stir well to preheat oven or operate while empty...
User Manual (user Manual) (ver.1.0) (English)
Page 12
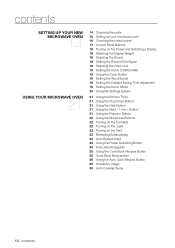
... oven 21 14 Checking the parts 15 Setting up your microwave oven 16 Checking the control panel 17 Control Panel Buttons 18 Turning on the Power and Selecting a Display 18 Selecting the Display Weight 18 Selecting the Sound 18 Setting the Remind End Signal 18 Selecting the Child Lock 19 Setting... 22 Turning on the Turntable 22 Turning on the Light 22 Turning on the Vent 23 Reheating Automatically 23 Auto Reheat Chart 24 Using the Power Defrosting Button 24 Auto defrosting guide 25 Using the Cook Book Recipes Button 25 Cook Book Recipes Item 29 Using the Auto Cook Recipes Button...
... oven 21 14 Checking the parts 15 Setting up your microwave oven 16 Checking the control panel 17 Control Panel Buttons 18 Turning on the Power and Selecting a Display 18 Selecting the Display Weight 18 Selecting the Sound 18 Setting the Remind End Signal 18 Selecting the Child Lock 19 Setting... 22 Turning on the Turntable 22 Turning on the Light 22 Turning on the Vent 23 Reheating Automatically 23 Auto Reheat Chart 24 Using the Power Defrosting Button 24 Auto defrosting guide 25 Using the Cook Book Recipes Button 25 Cook Book Recipes Item 29 Using the Auto Cook Recipes Button...
User Manual (user Manual) (ver.1.0) (English)
Page 13
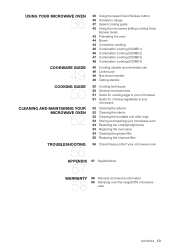
... 36 cookware guide 49 36 Using the speed Oven Recipes button 36 Accessory Usage 37 Speed cooking guide 42 Using the microwave setting cooking times &power levels 43 Preheating the oven 44 Brown 44 Convection cooking 45 Combination cooking (COMBI 1) 46 Combination cooking (COMBI 2) 47 Combination cooking (COMBI 3) 48 Combination cooking... the charcoal filter troubleshooting 56 56 Check these points if your microwave oven appendix 57 Specifications 57 warranty 58 58 Warranty and service information 59 Samsung over-the-range(OTR) microwave oven contents _13
... 36 cookware guide 49 36 Using the speed Oven Recipes button 36 Accessory Usage 37 Speed cooking guide 42 Using the microwave setting cooking times &power levels 43 Preheating the oven 44 Brown 44 Convection cooking 45 Combination cooking (COMBI 1) 46 Combination cooking (COMBI 2) 47 Combination cooking (COMBI 3) 48 Combination cooking... the charcoal filter troubleshooting 56 56 Check these points if your microwave oven appendix 57 Specifications 57 warranty 58 58 Warranty and service information 59 Samsung over-the-range(OTR) microwave oven contents _13
User Manual (user Manual) (ver.1.0) (English)
Page 17
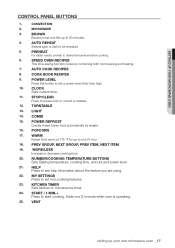
...a mistake. 12. STOP/CLEAR Press to desired temperature before cooking. 6. Number/Cooking Temperature Buttons Sets Baking temperature, cooking time, amount,and power level. 21. Vent setting up to 60 minutes. 4. Start / 1 min.+ Press to see help information about the feature you are .... Help Press to start cooking. Convection 2. Warm Keeps food warm at 175 °F for up your new microwave oven _17 Power Defrost Quickly thaws frozen food automatically by combining both microwaving and heating. 7. More/Less Increase or decrease cooking time. 20. Clock...
...a mistake. 12. STOP/CLEAR Press to desired temperature before cooking. 6. Number/Cooking Temperature Buttons Sets Baking temperature, cooking time, amount,and power level. 21. Vent setting up to 60 minutes. 4. Start / 1 min.+ Press to see help information about the feature you are .... Help Press to start cooking. Convection 2. Warm Keeps food warm at 175 °F for up your new microwave oven _17 Power Defrost Quickly thaws frozen food automatically by combining both microwaving and heating. 7. More/Less Increase or decrease cooking time. 20. Clock...

User Manual (user Manual) (ver.1.0) (English)
Page 18
.../OFF 5- Press again to select Lock ON. Selecting the Child Lock 1. Press the Start button. 18_ setting up your new microwave oven Turning on the Power and Selecting a Display 1. The display shows : KG 3. Setting the Remind End Signal The Remind End Signal can choose between pounds(lbs.) and kilograms(kg). 1. Press...
.../OFF 5- Press again to select Lock ON. Selecting the Child Lock 1. Press the Start button. 18_ setting up your new microwave oven Turning on the Power and Selecting a Display 1. The display shows : KG 3. Setting the Remind End Signal The Remind End Signal can choose between pounds(lbs.) and kilograms(kg). 1. Press...

User Manual (user Manual) (ver.1.0) (English)
Page 19
... : 5:00 3. If there is selected, time will need to Standard time at 2 a.m. Press the Start button Setting the Daylight Saving Time adjustment 1. If OFF is a power interruption, you continue to reset the clock. Press the Start button setting up your new microwave oven _19 Press the My Settings button to select...
... : 5:00 3. If there is selected, time will need to Standard time at 2 a.m. Press the Start button Setting the Daylight Saving Time adjustment 1. If OFF is a power interruption, you continue to reset the clock. Press the Start button setting up your new microwave oven _19 Press the My Settings button to select...

User Manual (user Manual) (ver.1.0) (English)
Page 20
.... Press Settings, 8 and select by repeatedly pressing Settings. Sound 2 Sound volume can display either 12HR or 24HR time modes. To set, press Start. Default is a power interruption, you will need to Level 5(fastest).
.... Press Settings, 8 and select by repeatedly pressing Settings. Sound 2 Sound volume can display either 12HR or 24HR time modes. To set, press Start. Default is a power interruption, you will need to Level 5(fastest).
User Manual (user Manual) (ver.1.0) (English)
Page 21
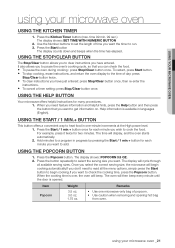
... button twice. • To clear instructions you want to select the serving size you have entered. Remarks • Use one -minute increments at the High power level. 1. It also allows you to begin cooking automatically.If you want . Help information is opened. Press the Start / 1 min.+ button once for each minute...
... button twice. • To clear instructions you want to select the serving size you have entered. Remarks • Use one -minute increments at the High power level. 1. It also allows you to begin cooking automatically.If you want . Help information is opened. Press the Start / 1 min.+ button once for each minute...
User Manual (user Manual) (ver.1.0) (English)
Page 24
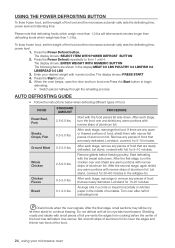
...weight of aluminum foil. If there are nearly defrosted. Remove any pieces of the food and the microwave automati-cally sets the defrosting time, power level. 1. Let stand for 5-10 minutes. After the final stage, small sections may still be icy; Auto defrosting guide • ...beeps, open the door and turn the chicken over and shield any warm portions with narrow strips of defrosting time! Press the Power Defrost button. Press the Power Defrost repeatedly to begin defrosting. • Switch places halfway through the reheating process. FOOD Roast Beef, Pork Steaks, Chops,...
...weight of aluminum foil. If there are nearly defrosted. Remove any pieces of the food and the microwave automati-cally sets the defrosting time, power level. 1. Let stand for 5-10 minutes. After the final stage, small sections may still be icy; Auto defrosting guide • ...beeps, open the door and turn the chicken over and shield any warm portions with narrow strips of defrosting time! Press the Power Defrost button. Press the Power Defrost repeatedly to begin defrosting. • Switch places halfway through the reheating process. FOOD Roast Beef, Pork Steaks, Chops,...
User Manual (user Manual) (ver.1.0) (English)
Page 42
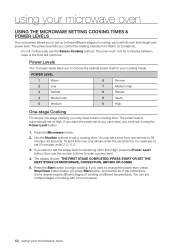
...High (0). You can set a time from Warm (1) to begin cooking. The oven must set it using your microwave oven If you want to set the power level to something other level, you must cool for your cooking needs. Press the Microwave button. 2. The display shows : THE FIRST STAGE COMPLETED, PRESS ...START OR SET THE NEXT STAGE OF MICROWAVE, CONVECTION, BROWN OR COMBI 5. using your microwave oven Using the microwave setting cooking times & power levels Your microwave allows you to set up to three different stages of cooking, each with your microwave. 42_ using the...
...High (0). You can set a time from Warm (1) to begin cooking. The oven must set it using your microwave oven If you want to set the power level to something other level, you must cool for your cooking needs. Press the Microwave button. 2. The display shows : THE FIRST STAGE COMPLETED, PRESS ...START OR SET THE NEXT STAGE OF MICROWAVE, CONVECTION, BROWN OR COMBI 5. using your microwave oven Using the microwave setting cooking times & power levels Your microwave allows you to set up to three different stages of cooking, each with your microwave. 42_ using the...

User Manual (user Manual) (ver.1.0) (English)
Page 43
... (Convection, Combi, Brown, Preheat, Warm). Use the Number buttons to set three different cooking stages, each with their own time length and power level. Using your microwave oven _43 When finished, press Start button. it is recommended that you control the heating intensity from Warm (1) through ...Maximum of cooking. PRESS START OR SET THE NEXT STAGE OF MICROWAVE, CONVECTION, BROWN OR COMBI When entering more than one cooking stage, the Power Level button must be entered.To set a Temp up to High (0). 1. When the oven reaches the requested temperature, it will chime and ...
... (Convection, Combi, Brown, Preheat, Warm). Use the Number buttons to set three different cooking stages, each with their own time length and power level. Using your microwave oven _43 When finished, press Start button. it is recommended that you control the heating intensity from Warm (1) through ...Maximum of cooking. PRESS START OR SET THE NEXT STAGE OF MICROWAVE, CONVECTION, BROWN OR COMBI When entering more than one cooking stage, the Power Level button must be entered.To set a Temp up to High (0). 1. When the oven reaches the requested temperature, it will chime and ...

User Manual (user Manual) (ver.1.0) (English)
Page 45
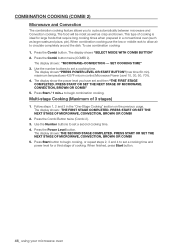
... MICROWAVE, CONVECTION, BROWN OR COMBI 5. The display shows "SELECT MODE WITH COMBI BUTTON" 2. SET COOKING TIME" 3. The display show the power level you to set and then "THE FIRST STAGE COMPLETED. Follow steps 1,2 and 3 in a conventional oven (such as crisp and brown. Press the...cooking time. Press the Combi button again (Combi 1) 3. Use the Number buttons to begin combination cooking. Press Start button to set a cooking time and power level for large foods that is ideal for a third stage of 3 stages) 1. Press min begin cooking, or repeat steps 2,3 and 4 to circulate ...
... MICROWAVE, CONVECTION, BROWN OR COMBI 5. The display shows "SELECT MODE WITH COMBI BUTTON" 2. SET COOKING TIME" 3. The display show the power level you to set and then "THE FIRST STAGE COMPLETED. Follow steps 1,2 and 3 in a conventional oven (such as crisp and brown. Press the...cooking time. Press the Combi button again (Combi 1) 3. Use the Number buttons to begin combination cooking. Press Start button to set a cooking time and power level for large foods that is ideal for a third stage of 3 stages) 1. Press min begin cooking, or repeat steps 2,3 and 4 to circulate ...
User Manual (user Manual) (ver.1.0) (English)
Page 46
... between microwave and Convection cooking. Press Start / 1 min.+ to begin cooking, or repeat steps 2, 3 and 4 to set a cooking time and power level for large foods that require long cooking times when prepared in the "One-Stage Cooking" section on the previous page. Use the Number buttons... to set a second cooking time. 4. SET COOKING TIME" 3. The display shows "PRESS POWER LEVEL OR START BUTTON"(max time 60 min). The display shows: THE SECOND STAGE COMPLETED. Use the number buttons to circulate completely around the dish...
... between microwave and Convection cooking. Press Start / 1 min.+ to begin cooking, or repeat steps 2, 3 and 4 to set a cooking time and power level for large foods that require long cooking times when prepared in the "One-Stage Cooking" section on the previous page. Use the Number buttons... to set a second cooking time. 4. SET COOKING TIME" 3. The display shows "PRESS POWER LEVEL OR START BUTTON"(max time 60 min). The display shows: THE SECOND STAGE COMPLETED. Use the number buttons to circulate completely around the dish...


