User Manual (user Manual) (ver.1.0) (English)
Page 5
... not overcook food. Remove wire twist-ties from paper or plastic bags before cleaning. 18. d. d. When flaming foods under the hood, turn oven off, and disconnect the power cord, or shut off power at the fuse or circuit breaker panel. See Important "Grounding Instructions" on . It is necessary when used by qualified service personnel. Do not tamper with any adjustments or repairs to accumulate on closing the door, use only...
... not overcook food. Remove wire twist-ties from paper or plastic bags before cleaning. 18. d. d. When flaming foods under the hood, turn oven off, and disconnect the power cord, or shut off power at the fuse or circuit breaker panel. See Important "Grounding Instructions" on . It is necessary when used by qualified service personnel. Do not tamper with any adjustments or repairs to accumulate on closing the door, use only...
User Manual (user Manual) (ver.1.0) (English)
Page 6
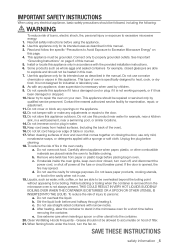
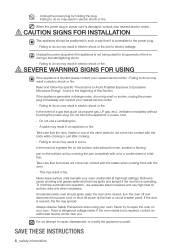
... extension cord, the interior light may flicker and the blower may be allowed to use . Use care when cleaning the vent-hood filter. If you are available and may vary when the microwave oven is properly installed and grounded. 22. CAUTION CAUTION 1. Do not store any other than manufacturer's recommended accessories, in the toaster mode. 26. WARNING WARNING Improper use . 27. Use of Extension Cords A short power-supply cord...
... extension cord, the interior light may flicker and the blower may be allowed to use . Use care when cleaning the vent-hood filter. If you are available and may vary when the microwave oven is properly installed and grounded. 22. CAUTION CAUTION 1. Do not store any other than manufacturer's recommended accessories, in the toaster mode. 26. WARNING WARNING Improper use . 27. Use of Extension Cords A short power-supply cord...
User Manual (user Manual) (ver.1.0) (English)
Page 7
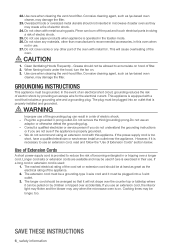
... not use a damaged power plug, damaged power cord or loose wall socket. - Do not mount over or near any portion of a heating or cooking appliance. Do not hook the power cord over a metal object, place a heavy object on the interior or exterior of the oven, broken door latches, cracks in electric shock or fire. Unpack oven, remove all packaging material and examine the oven for play. Your oven should...
... not use a damaged power plug, damaged power cord or loose wall socket. - Do not mount over or near any portion of a heating or cooking appliance. Do not hook the power cord over a metal object, place a heavy object on the interior or exterior of the oven, broken door latches, cracks in electric shock or fire. Unpack oven, remove all packaging material and examine the oven for play. Your oven should...
User Manual (user Manual) (ver.1.0) (English)
Page 8
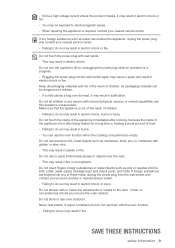
... cooking food with a lid, a cookie sheet or a flat tray. If the door is dangerous voltage inside oven should be repaired, contact an authorized service center near you. If the oven needs to the power plug. - When the power plug or power cord is accessible to be positioned in electric shock or fire. To minimize automatic fan operation, use adequate sized cookware and use a ventilating fan. - Always observe Safety Precautions when using your nearest service...
... cooking food with a lid, a cookie sheet or a flat tray. If the door is dangerous voltage inside oven should be repaired, contact an authorized service center near you. If the oven needs to the power plug. - When the power plug or power cord is accessible to be positioned in electric shock or fire. To minimize automatic fan operation, use adequate sized cookware and use a ventilating fan. - Always observe Safety Precautions when using your nearest service...
User Manual (user Manual) (ver.1.0) (English)
Page 9
... you remove the outer cabinet. Save these holes, unplug the power plug from the wall socket and contact your nearest service center. - Do not touch the power plug with or make any of children. - This may result in electric shock, burns or injury. Plugging the power plug into any adjustments or repairs to do not use this appliance unsupervised. If a child places...
... you remove the outer cabinet. Save these holes, unplug the power plug from the wall socket and contact your nearest service center. - Do not touch the power plug with or make any of children. - This may result in electric shock, burns or injury. Plugging the power plug into any adjustments or repairs to do not use this appliance unsupervised. If a child places...
User Manual (user Manual) (ver.1.0) (English)
Page 10
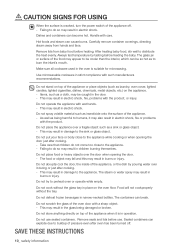
... or just after oven has been turned off . - Food will not cookproperly without the glass tray in damage to distribute the heat evenly. Do not scratch the glass of the oven door with the product, or injury. Remove seals and lids before heating. CAUTION SIGNS FOR USING CAUTION When the surface is cracked, turn the power switch of the appliance off . After heating baby food, stir well...
... or just after oven has been turned off . - Food will not cookproperly without the glass tray in damage to distribute the heat evenly. Do not scratch the glass of the oven door with the product, or injury. Remove seals and lids before heating. CAUTION SIGNS FOR USING CAUTION When the surface is cracked, turn the power switch of the appliance off . After heating baby food, stir well...
User Manual (user Manual) (ver.1.0) (English)
Page 12
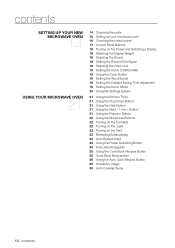
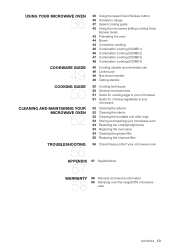
... control panel 17 Control Panel Buttons 18 Turning on the Power and Selecting a Display 18 Selecting the Display Weight 18 Selecting the Sound 18 Setting the Remind End Signal 18 Selecting the Child Lock 19 Setting the Clock (12HR/24HR) 19 Using the Clock Button 19 Setting the Word Speed 19 Setting the Daylight Saving Time adjustment 19 Setting the Demo Mode 20 Using My Settings feature 21 Using the Kitchen Timer 21 Using the Stop/Clear Button 21 Using the Help Button 21 Using the Start...
... control panel 17 Control Panel Buttons 18 Turning on the Power and Selecting a Display 18 Selecting the Display Weight 18 Selecting the Sound 18 Setting the Remind End Signal 18 Selecting the Child Lock 19 Setting the Clock (12HR/24HR) 19 Using the Clock Button 19 Setting the Word Speed 19 Setting the Daylight Saving Time adjustment 19 Setting the Demo Mode 20 Using My Settings feature 21 Using the Kitchen Timer 21 Using the Stop/Clear Button 21 Using the Help Button 21 Using the Start...
User Manual (user Manual) (ver.1.0) (English)
Page 13
... 50 General microwave tips 51 Guide for cooking eggs in your microwave 51 Guide for cooking vegetables in your microwave 52 Cleaning the exterior 52 Cleaning the interior 52 Cleaning the turntable and roller rings 53 Storing and repairing your microwave oven 53 Replacing the cooktop/night lamp 53 Replacing the oven lamp 54 Cleaning the grease filter 55 Replacing the charcoal filter troubleshooting 56 56 Check these points if your microwave oven appendix 57 Specifications 57 warranty 58 58 Warranty and service information 59 Samsung...
... 50 General microwave tips 51 Guide for cooking eggs in your microwave 51 Guide for cooking vegetables in your microwave 52 Cleaning the exterior 52 Cleaning the interior 52 Cleaning the turntable and roller rings 53 Storing and repairing your microwave oven 53 Replacing the cooktop/night lamp 53 Replacing the oven lamp 54 Cleaning the grease filter 55 Replacing the charcoal filter troubleshooting 56 56 Check these points if your microwave oven appendix 57 Specifications 57 warranty 58 58 Warranty and service information 59 Samsung...
User Manual (user Manual) (ver.1.0) (English)
Page 14
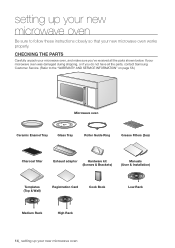
... Samsung Customer Service. (Refer to follow these instructions closely so that your new microwave oven works properly. setting up your new microwave oven Be sure to the "WARRANTY AND SERVICE INFORMATION" on page 58.) Microwave oven Ceramic Enamel Tray Glass Tray Roller Guide Ring Grease Filters (2ea) Charcoal filter Exhaust adaptor Hardware kit (Screws & Brackets) Manuals (User & Installation) Templates (Top & Wall) Registration Card Cook Book Low Rack Medium Rack High Rack 14_ setting up your new microwave oven Checking the parts Carefully unpack your microwave oven...
... Samsung Customer Service. (Refer to follow these instructions closely so that your new microwave oven works properly. setting up your new microwave oven Be sure to the "WARRANTY AND SERVICE INFORMATION" on page 58.) Microwave oven Ceramic Enamel Tray Glass Tray Roller Guide Ring Grease Filters (2ea) Charcoal filter Exhaust adaptor Hardware kit (Screws & Brackets) Manuals (User & Installation) Templates (Top & Wall) Registration Card Cook Book Low Rack Medium Rack High Rack 14_ setting up your new microwave oven Checking the parts Carefully unpack your microwave oven...
User Manual (user Manual) (ver.1.0) (English)
Page 17
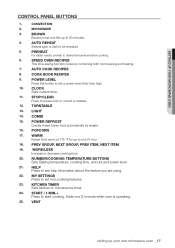
...;F for up to one (1) minute while oven is operating. 25. STOP/CLEAR Press to desired temperature before cooking. 6. Turntable 13. MY Settings Press to set non-cooking features. 23. Auto Reheat Selects type of dish to start cooking. Popcorn 17. Vent setting up your microwave oven Control Panel Buttons 1. Light 14. Cook Book RECIPES 9. Power Level Press this button to set a power level other than high. 10. Power Defrost Quickly thaws frozen food automatically by combining both microwaving and heating. 7. Start / 1 min.+ Press to be reheated...
...;F for up to one (1) minute while oven is operating. 25. STOP/CLEAR Press to desired temperature before cooking. 6. Turntable 13. MY Settings Press to set non-cooking features. 23. Auto Reheat Selects type of dish to start cooking. Popcorn 17. Vent setting up your microwave oven Control Panel Buttons 1. Light 14. Cook Book RECIPES 9. Power Level Press this button to set a power level other than high. 10. Power Defrost Quickly thaws frozen food automatically by combining both microwaving and heating. 7. Start / 1 min.+ Press to be reheated...
User Manual (user Manual) (ver.1.0) (English)
Page 21
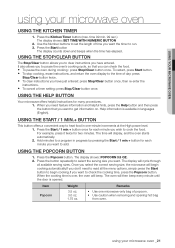
... power level. 1. Using the Popcorn Button 1. Press the Popcorn button. using your microwave oven _21 It also allows you to a program in languages (English). Add minutes to pause the oven's cooking cycle, so that you want . Once you can check the food. • To pause the oven during cooking : press Stop/Clear button once. Press the Kitchen Timer button.(max. time 99 min. 99 sec.) The display shows: SET TIME WITH NUMERIC BUTTON 2. Press the Start button The display...
... power level. 1. Using the Popcorn Button 1. Press the Popcorn button. using your microwave oven _21 It also allows you to a program in languages (English). Add minutes to pause the oven's cooking cycle, so that you want . Once you can check the food. • To pause the oven during cooking : press Stop/Clear button once. Press the Kitchen Timer button.(max. time 99 min. 99 sec.) The display shows: SET TIME WITH NUMERIC BUTTON 2. Press the Start button The display...
User Manual (user Manual) (ver.1.0) (English)
Page 22
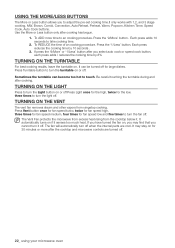
... the pre-set cooking time.It only works with 1,2, and 3 stage cooking, MW, Brown, Combi, Convection, Auto Reheat, Preheat, Warm, Popcorn, Kitchen Timer, Speed Cook, Auto Cook buttons. If you have turned the fan on, you cannot turn the turntable on or off . 22_ using your microwave oven To ADD more after cooking has begun. 1. Be careful touching the turntable during and after you to turn off when the internal parts are turned off . Press the '1/Less' button. It...
... the pre-set cooking time.It only works with 1,2, and 3 stage cooking, MW, Brown, Combi, Convection, Auto Reheat, Preheat, Warm, Popcorn, Kitchen Timer, Speed Cook, Auto Cook buttons. If you have turned the fan on, you cannot turn the turntable on or off . 22_ using your microwave oven To ADD more after cooking has begun. 1. Be careful touching the turntable during and after you to turn off when the internal parts are turned off . Press the '1/Less' button. It...
User Manual (user Manual) (ver.1.0) (English)
Page 23
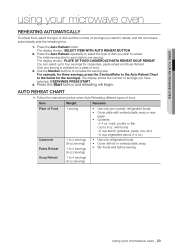
... microwave oven _23 Item Weight Remarks Plate of food. Use the Number buttons to 4 servings (8 oz./serving) • Use only refrigerated foods. • Cover with lid or vented plastic wrap. • Stir foods well before serving. with vented plastic wrap or wax paper. • Contents -3-4 oz. The display shows : SELECT ITEM WITH AUTO REHEAT BUTTON 2. Press the Start button and reheating will begin. The display shows the number of food. 3. Using your microwave oven using your microwave oven...
... microwave oven _23 Item Weight Remarks Plate of food. Use the Number buttons to 4 servings (8 oz./serving) • Use only refrigerated foods. • Cover with lid or vented plastic wrap. • Stir foods well before serving. with vented plastic wrap or wax paper. • Contents -3-4 oz. The display shows : SELECT ITEM WITH AUTO REHEAT BUTTON 2. Press the Start button and reheating will begin. The display shows the number of food. 3. Using your microwave oven using your microwave oven...

User Manual (user Manual) (ver.1.0) (English)
Page 44
... START OR SET THE NEXT STAGE OF MICROWAVE, CONVECTION, BROWN OR COMBI. 2. Convection cooking The convection mode uses dry heat to heat food quickly and evenly. A high speed fan circulates hot air inside the oven to cook and brown food. Follow steps 1, 2 and 3 in the middle of 3 stages) 1. The display shows: THE SECOND STAGE COMPLETED. When finished, press Start button. The display shows:"ENTER DESIRED TEMP WITH NUMERIC BUTTON" 2. Press the CONVECTION button. 3. Use the Number buttons to set a second cooking time...
... START OR SET THE NEXT STAGE OF MICROWAVE, CONVECTION, BROWN OR COMBI. 2. Convection cooking The convection mode uses dry heat to heat food quickly and evenly. A high speed fan circulates hot air inside the oven to cook and brown food. Follow steps 1, 2 and 3 in the middle of 3 stages) 1. The display shows: THE SECOND STAGE COMPLETED. When finished, press Start button. The display shows:"ENTER DESIRED TEMP WITH NUMERIC BUTTON" 2. Press the CONVECTION button. 3. Use the Number buttons to set a second cooking time...
User Manual (user Manual) (ver.1.0) (English)
Page 49
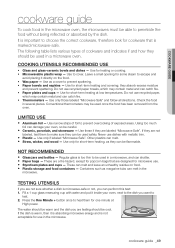
... oven, next to penetrate the food without being reflected or absorbed by the dish. Using too much foil can shatter. • Paper bags - Use only if labeled "Microwave Safe". Regular glass is marked microwave-safe. Fill a 1 cup glass measuring cup with metallic trim. • Plastic - The following table lists various types of exposed areas. Leave a small opening for short-term heating at High power...
... oven, next to penetrate the food without being reflected or absorbed by the dish. Using too much foil can shatter. • Paper bags - Use only if labeled "Microwave Safe". Regular glass is marked microwave-safe. Fill a 1 cup glass measuring cup with metallic trim. • Plastic - The following table lists various types of exposed areas. Leave a small opening for short-term heating at High power...
User Manual (user Manual) (ver.1.0) (English)
Page 51
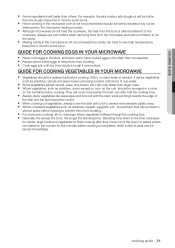
Always use pot holders when removing food from the microwave and instruct children to do not heat the cookware, the heat from bursting. • Cook eggs just until set; Often, no extra water is often transferred to avoid injury. cooking guide _51 Keep this in mind to the cookware. Cooking guide • Some ingredients heat faster than larger ones. • Whole vegetables, such as potatoes...
Always use pot holders when removing food from the microwave and instruct children to do not heat the cookware, the heat from bursting. • Cook eggs just until set; Often, no extra water is often transferred to avoid injury. cooking guide _51 Keep this in mind to the cookware. Cooking guide • Some ingredients heat faster than larger ones. • Whole vegetables, such as potatoes...
User Manual (user Manual) (ver.1.0) (English)
Page 53
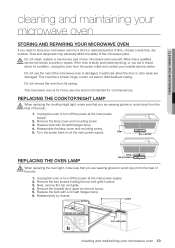
... microwave oven for commercial use the oven if the microwave oven is faulty and needs servicing, or you are in particular when the door or door seals are wearing gloves to avoid injury from the heat of the bulb. 1. Next, remove the top vent grille. 4. Reassemble the lamp cover and mounting screw. 5. Unplug the oven or turn off the power at the main power supply. 2. Cleaning and maintaining cleaning and maintaining your microwave oven Storing and repairing your microwave oven...
... microwave oven for commercial use the oven if the microwave oven is faulty and needs servicing, or you are in particular when the door or door seals are wearing gloves to avoid injury from the heat of the bulb. 1. Next, remove the top vent grille. 4. Reassemble the lamp cover and mounting screw. 5. Unplug the oven or turn off the power at the main power supply. 2. Cleaning and maintaining cleaning and maintaining your microwave oven Storing and repairing your microwave oven...
User Manual (user Manual) (ver.1.0) (English)
Page 55
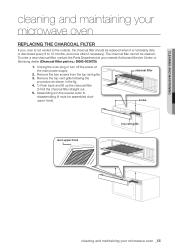
... charcoal filter, contact the Parts Department at the main power supply. 2. Assembling is in the fig. 4. 1) Push back and lift up the charcoal filter 2) Pull the charcoal filter straight out. 5. charcoal filter screw duct-upper hook top vent grille cleaning and maintaining your nearest Authorized Service Center or Samsung dealer (Charcoal filter part no.: DE63-00367D). 1. Remove the two screws from the top vent grille. 3. Cleaning and maintaining cleaning and maintaining your microwave oven Replacing the charcoal filter If your oven is not vented...
... charcoal filter, contact the Parts Department at the main power supply. 2. Assembling is in the fig. 4. 1) Push back and lift up the charcoal filter 2) Pull the charcoal filter straight out. 5. charcoal filter screw duct-upper hook top vent grille cleaning and maintaining your nearest Authorized Service Center or Samsung dealer (Charcoal filter part no.: DE63-00367D). 1. Remove the two screws from the top vent grille. 3. Cleaning and maintaining cleaning and maintaining your microwave oven Replacing the charcoal filter If your oven is not vented...
User Manual (user Manual) (ver.1.0) (English)
Page 56
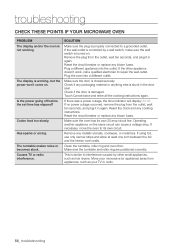
... the set time has elapsed? Check if the door is working . Remove any blown fuses. Cooks food too slowly. If necessary, move the oven to a grounded outlet. Plug a different appliance into a different outlet. If there was a power outage, the time indicator will display: 88:88. Has sparks or arcing. If the wall outlet is controlled by other small appliances, such as your microwave oven PROBLEM The display and...
... the set time has elapsed? Check if the door is working . Remove any blown fuses. Cooks food too slowly. If necessary, move the oven to a grounded outlet. Plug a different appliance into a different outlet. If there was a power outage, the time indicator will display: 88:88. Has sparks or arcing. If the wall outlet is controlled by other small appliances, such as your microwave oven PROBLEM The display and...
User Manual (user Manual) (ver.1.0) (English)
Page 59
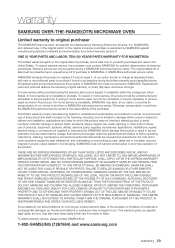
... state to follow operating instructions, cleaning, maintenance and environmental instructions that are covered and prescribed in the instruction book; This limited warranty covers manufacturing defects in materials and workmanship encountered in normal, noncommercial use of products, equipment, systems, utilities, services, parts, supplies, accessories, applications, installations, repairs, external wiring or connectors not supplied or authorized by SAMSUNG which damage this product or replace it if cannot repair it may...
... state to follow operating instructions, cleaning, maintenance and environmental instructions that are covered and prescribed in the instruction book; This limited warranty covers manufacturing defects in materials and workmanship encountered in normal, noncommercial use of products, equipment, systems, utilities, services, parts, supplies, accessories, applications, installations, repairs, external wiring or connectors not supplied or authorized by SAMSUNG which damage this product or replace it if cannot repair it may...


