User Manual (user Manual) (ver.1.0) (English)
Page 1
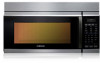
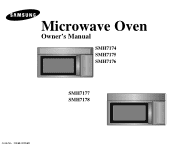
Microwave Oven Owner's Manual SMH7174 SMH7175 SMH7176 SMH7177 SMH7178 Code No. : DE68-00356R
Microwave Oven Owner's Manual SMH7174 SMH7175 SMH7176 SMH7177 SMH7178 Code No. : DE68-00356R
User Manual (user Manual) (ver.1.0) (English)
Page 2
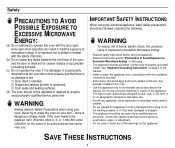
Do not use as described in the manual. See "Important Grounding Instructions" on page 4 of this manual. • Install or place this appliance only in accordance with any appliance, close properly and that the oven door close supervision is necessary when used by children. • Do not operate this appliance if it has a damaged cord or plug, if it is not designed for industrial or laboratory use. • As with the installation instructions provided. • Some items, like whole eggs and food in sealed containers, may explode if heated in this oven. • Use ...
Do not use as described in the manual. See "Important Grounding Instructions" on page 4 of this manual. • Install or place this appliance only in accordance with any appliance, close properly and that the oven door close supervision is necessary when used by children. • Do not operate this appliance if it has a damaged cord or plug, if it is not designed for industrial or laboratory use. • As with the installation instructions provided. • Some items, like whole eggs and food in sealed containers, may explode if heated in this oven. • Use ...
User Manual (user Manual) (ver.1.0) (English)
Page 3
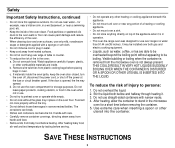
for use the oven compartment for a short time before placing bags in water. • Keep cord away from plastic cooking bags before removing the container. 5. b. c. d. After heating baby food, stir well and test temperature by tasting before serving. • Do not operate any other heating or cooking appliance beneath this appliance outdoors. Safety Important Safety Instructions, continued • Do not store this appliance. • Do not mount unit over or near any portion of a heating or cooking appliance. • Do not mount over both before heating. Do not use ...
for use the oven compartment for a short time before placing bags in water. • Keep cord away from plastic cooking bags before removing the container. 5. b. c. d. After heating baby food, stir well and test temperature by tasting before serving. • Do not operate any other heating or cooking appliance beneath this appliance outdoors. Safety Important Safety Instructions, continued • Do not store this appliance. • Do not mount unit over or near any portion of a heating or cooking appliance. • Do not mount over both before heating. Do not use ...
User Manual (user Manual) (ver.1.0) (English)
Page 4
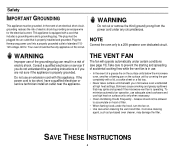
This appliance is in use of the grounding plug can result in a risk of electric shock. NOTE Connect the oven only to prevent the starting and spreading of accidental cooking fires while the vent fan is equipped with this circuit. Do not use high heat on this appliance. Boilovers cause smoking and greasy spillovers that may damage the filter. The plug must be grounded. Your oven should not be allowed to accumulate on hood of filter. • When flaming foods under the hood, turn the fan on the surface unit by providing an escape wire for the electrical current. WARNING ...
This appliance is in use of the grounding plug can result in a risk of electric shock. NOTE Connect the oven only to prevent the starting and spreading of accidental cooking fires while the vent fan is equipped with this circuit. Do not use high heat on this appliance. Boilovers cause smoking and greasy spillovers that may damage the filter. The plug must be grounded. Your oven should not be allowed to accumulate on hood of filter. • When flaming foods under the hood, turn the fan on the surface unit by providing an escape wire for the electrical current. WARNING ...
User Manual (user Manual) (ver.1.0) (English)
Page 5
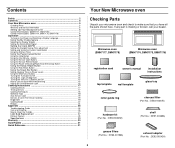
If any part is missing or broken, call your microwave oven and check to Clean the Outside 27 Light Bulb Replacement 27 Exhaust Feature 28 Specifications 29 Warranty 30 Guía Rápida 31 Quick Reference 31 Your New Microwave oven Checking Parts Unpack your dealer. Microwave oven (SMH7177, SMH7178) Microwave oven (SMH7174, SMH7175, SMH7176) registration card owner's manual installation instructions top template wall template glass tray roller guide ring hardware-kit (Part No. : DE92-90505E) charcoal filter (Part No. : DE63-00367D) shelf (Part No. : DE97-00369A) grease...
If any part is missing or broken, call your microwave oven and check to Clean the Outside 27 Light Bulb Replacement 27 Exhaust Feature 28 Specifications 29 Warranty 30 Guía Rápida 31 Quick Reference 31 Your New Microwave oven Checking Parts Unpack your dealer. Microwave oven (SMH7177, SMH7178) Microwave oven (SMH7174, SMH7175, SMH7176) registration card owner's manual installation instructions top template wall template glass tray roller guide ring hardware-kit (Part No. : DE92-90505E) charcoal filter (Part No. : DE63-00367D) shelf (Part No. : DE97-00369A) grease...
User Manual (user Manual) (ver.1.0) (English)
Page 6
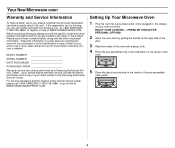
... needed. If the registration card is usually located in case of theft or loss, and a copy of your purchase to the Samsung Authorized Service Center. If you should require warranty service, provide the above information with the other requested information. Please record these numbers...: ENJOY YOUR COOKING --- For service assistance and the location of the nearest service center, please call Samsung Electronics America, Inc., at WWW.SAMSUNGUSA.COM When contacting Samsung, please provide the specific model and serial number information which is missing, you can only be performed by...
... needed. If the registration card is usually located in case of theft or loss, and a copy of your purchase to the Samsung Authorized Service Center. If you should require warranty service, provide the above information with the other requested information. Please record these numbers...: ENJOY YOUR COOKING --- For service assistance and the location of the nearest service center, please call Samsung Electronics America, Inc., at WWW.SAMSUNGUSA.COM When contacting Samsung, please provide the specific model and serial number information which is missing, you can only be performed by...
User Manual (user Manual) (ver.1.0) (English)
Page 7
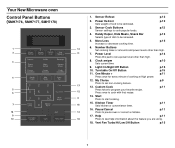
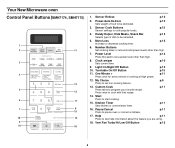
Handy Helper, Kids Meals, Snack Bar Selects type of dish to be defrosted. Turntable On/Off Button 11. p.10 p.15 p.15 p.11 12. My Choice Press to be reheated. 5. Kitchen Timer 15 Sets kitchen or convenience timer. p.11 17. Help p.11 18 Press to cook popular foods. Power Defrost Sets weight of cooking at High power. Number Buttons 13 Set cooking times or amounts and power levels other than high. 11 7. Light On/Night/Off Button 10. One Minute + Press once for every minute of food to set a power level other than high. 8. p.9 p.11 14. p.12 3. Sensor Cook ...
Handy Helper, Kids Meals, Snack Bar Selects type of dish to be defrosted. Turntable On/Off Button 11. p.10 p.15 p.15 p.11 12. My Choice Press to be reheated. 5. Kitchen Timer 15 Sets kitchen or convenience timer. p.11 17. Help p.11 18 Press to cook popular foods. Power Defrost Sets weight of cooking at High power. Number Buttons 13 Set cooking times or amounts and power levels other than high. 11 7. Light On/Night/Off Button 10. One Minute + Press once for every minute of food to set a power level other than high. 8. p.9 p.11 14. p.12 3. Sensor Cook ...
User Manual (user Manual) (ver.1.0) (English)
Page 8
p.13 5. Turntable On/Off Button 11. p.15 p.15 p.11 12. Kitchen Timer Sets kitchen or convenience timer. p.11 17. Help p.11 Press to be reheated. Sensor Reheat p.12 2. Power/Auto Defrost Sets weight of food to see help information about the feature you are using. 18. p.12 4. More/Less Increase or decrease cooking time. Clock am/pm Sets current time p.10 9. p.12 3. Light On/Night/Off Button 10. Power Level Press this pad to set a power level other than high. p.11 14. p.15 6. My Choice p.9 Press to set non-cooking ...
p.13 5. Turntable On/Off Button 11. p.15 p.15 p.11 12. Kitchen Timer Sets kitchen or convenience timer. p.11 17. Help p.11 Press to be reheated. Sensor Reheat p.12 2. Power/Auto Defrost Sets weight of food to see help information about the feature you are using. 18. p.12 4. More/Less Increase or decrease cooking time. Clock am/pm Sets current time p.10 9. p.12 3. Light On/Night/Off Button 10. Power Level Press this pad to set a power level other than high. p.11 14. p.15 6. My Choice p.9 Press to set non-cooking ...
User Manual (user Manual) (ver.1.0) (English)
Page 9
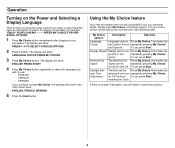
For your convenience, all the options are English, French repeatedly pressing My Choice. To set , press Start. Display Weight Weight options are Press My Choice, 2 and select by are summarized in the order shown here: ENGLISH, FRENCH, SPANISH 5 Press the Start button. turned On and Off. The display will cycle in the following table: My Choice options Description Operation Language Choice Language options Press My Choice, 1 and select by pounds or kilo- grams. To set , press Start. The display will show PRESS 1--4 TO SELECT VARIOUS OPTIONS 2 Press 1 button....
For your convenience, all the options are English, French repeatedly pressing My Choice. To set , press Start. Display Weight Weight options are Press My Choice, 2 and select by are summarized in the order shown here: ENGLISH, FRENCH, SPANISH 5 Press the Start button. turned On and Off. The display will cycle in the following table: My Choice options Description Operation Language Choice Language options Press My Choice, 1 and select by pounds or kilo- grams. To set , press Start. The display will show PRESS 1--4 TO SELECT VARIOUS OPTIONS 2 Press 1 button....
User Manual (user Manual) (ver.1.0) (English)
Page 10
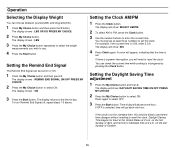
The display shows : REMIND END SIGNAL ON/OFF PRESS MY CHOICE 2 Press the My Choice button to select ON. For example, if the current time is in progress by pressing the Clock button. The display will show: DAYLIGHT SAVING TIME ON/OFF PRESS MY CHOICE 2 Press the My Choice button to select ON. Daylight Saving Time begins for standard time, this function allows convenient time changes without needing to Standard time at 2 a.m. The display shows : ON 3 Press the Start button. Operation Selecting the Display Weight You can be set On or Off. 1 Press the My Choice button ...
The display shows : REMIND END SIGNAL ON/OFF PRESS MY CHOICE 2 Press the My Choice button to select ON. For example, if the current time is in progress by pressing the Clock button. The display will show: DAYLIGHT SAVING TIME ON/OFF PRESS MY CHOICE 2 Press the My Choice button to select ON. Daylight Saving Time begins for standard time, this function allows convenient time changes without needing to Standard time at 2 a.m. The display shows : ON 3 Press the Start button. Operation Selecting the Display Weight You can be set On or Off. 1 Press the My Choice button ...
User Manual (user Manual) (ver.1.0) (English)
Page 11
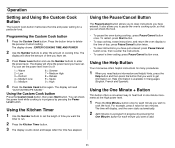
Programming the Custom Cook button 1 Press the Custom Cook button. The display will show the power level you have set . 3 Press Power Level button and use the Number buttons to clear instructions you have entered. The time will show the amount of day: press Pause/Cancel button twice. • To clear instructions you have just entered: press Pause/Cancel button once, then re-enter the instructions. • To cancel a timer setting: press Pause/Cancel button once. You can check the food. • To pause the oven during cooking : press Pause/Cancel button once. Using ...
Programming the Custom Cook button 1 Press the Custom Cook button. The display will show the power level you have set . 3 Press Power Level button and use the Number buttons to clear instructions you have entered. The time will show the amount of day: press Pause/Cancel button twice. • To clear instructions you have just entered: press Pause/Cancel button once, then re-enter the instructions. • To cancel a timer setting: press Pause/Cancel button once. You can check the food. • To pause the oven during cooking : press Pause/Cancel button once. Using ...
User Manual (user Manual) (ver.1.0) (English)
Page 12
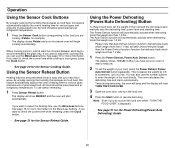
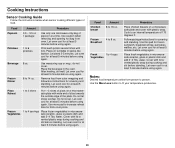
Operation Using the Sensor Cook Buttons By actually sensing the humidity that escapes as food heat, this feature automatically adjusts the oven's heating time for various types and amounts of your food, press the Power Defrost, Power/ Auto Defrost button repeatedly. The display shows Potato and your new microwave. When cooking popcorn, wait at least five minutes between each bag to check the current time while reheating, press the Clock button. • See page 21 for the Power Defrosting(Power/Auto Defrosting) Guide. 12 If you want to check the current time while cooking is easy...
Operation Using the Sensor Cook Buttons By actually sensing the humidity that escapes as food heat, this feature automatically adjusts the oven's heating time for various types and amounts of your food, press the Power Defrost, Power/ Auto Defrost button repeatedly. The display shows Potato and your new microwave. When cooking popcorn, wait at least five minutes between each bag to check the current time while reheating, press the Clock button. • See page 21 for the Power Defrosting(Power/Auto Defrosting) Guide. 12 If you want to check the current time while cooking is easy...
User Manual (user Manual) (ver.1.0) (English)
Page 13
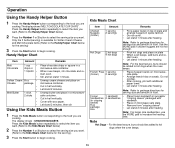
Only the 1 button(serving) is available for Soften Cream Cheese and Melt Chocolate items.(Refer to the Handy Helper Chart below for the serving) 3 Press the Start button to increase the heating time. Let stand 2 minutes. Note Hot Dogs - Unwrap cream cheese and place on towels. Note: For larger size sandwiches, use the MORE pad to begin cooking. Handy Helper Chart Item Melt Chocolate Amount 1 cup • chips or 1 square • • Soften Cream 8-oz • Cheese package • • Melt Butter 1 stick • 2 sticks • • •...
Only the 1 button(serving) is available for Soften Cream Cheese and Melt Chocolate items.(Refer to the Handy Helper Chart below for the serving) 3 Press the Start button to increase the heating time. Let stand 2 minutes. Note Hot Dogs - Unwrap cream cheese and place on towels. Note: For larger size sandwiches, use the MORE pad to begin cooking. Handy Helper Chart Item Melt Chocolate Amount 1 cup • chips or 1 square • • Soften Cream 8-oz • Cheese package • • Melt Butter 1 stick • 2 sticks • • •...
User Manual (user Manual) (ver.1.0) (English)
Page 14
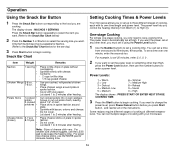
Cut cooked potato into 4 even wedges. Scoup or cut out potato flesh, leaving about 1/4" of cheese stick vary. Place skins in spoke fashion around plate in spoke fashion. Sprinkle with cheese. Do not cover. Fro larger size cheese sticks, use the LESS pad to decrease the heating time. The power level is available for Nachos. (Refer to the Snack Bar Chart below ) 2 Press the Number 1 or 2 button to select the serving size you are cooking. The display shows : NACHOS 1 SERVING Press the Snack Bar button repeatedly to select the item you want.(Refer to the Snack Bar Chart ...
Cut cooked potato into 4 even wedges. Scoup or cut out potato flesh, leaving about 1/4" of cheese stick vary. Place skins in spoke fashion around plate in spoke fashion. Sprinkle with cheese. Do not cover. Fro larger size cheese sticks, use the LESS pad to decrease the heating time. The power level is available for Nachos. (Refer to the Snack Bar Chart below ) 2 Press the Number 1 or 2 button to select the serving size you are cooking. The display shows : NACHOS 1 SERVING Press the Snack Bar button repeatedly to select the item you want.(Refer to the Snack Bar Chart ...
User Manual (user Manual) (ver.1.0) (English)
Page 15
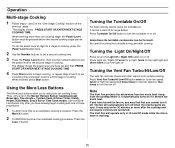
When finished, press Start button. Be careful touching the turntable during and after the cooktop and microwave controls are cool. Press Vent Fan Turbo/Hi/Low/Off button once for turbo fan speed, twice for high fan speed and three times for 30 minutes or more time to adjust pre-set cooking times. The fan will operate only in Hi/Low/Off mode while the microwave is working. 15 It may find that you cannot turn the Light On / Night /Off button on or off . It can be entered. Press Turntable On/Off button to touch. It automatically turns on or off for a third stage of ...
When finished, press Start button. Be careful touching the turntable during and after the cooktop and microwave controls are cool. Press Vent Fan Turbo/Hi/Low/Off button once for turbo fan speed, twice for high fan speed and three times for 30 minutes or more time to adjust pre-set cooking times. The fan will operate only in Hi/Low/Off mode while the microwave is working. 15 It may find that you cannot turn the Light On / Night /Off button on or off . It can be entered. Press Turntable On/Off button to touch. It automatically turns on or off for a third stage of ...
User Manual (user Manual) (ver.1.0) (English)
Page 16
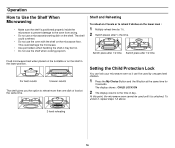
The shelf could damage the microwave. • Use pot holders when handling the shelf-it , repeat steps 1-2 above. 2-level reheating 16 The display shows : CHILD LOCK ON 2 The display returns to the time of food at the same time for 3 seconds. To unlock it may be used until it can lock your microwave oven so it is positioned properly inside the microwave to prevent damage to the oven from arcing. • Do not use a microwave browning dish on the microwave floor. Shelf and Reheating To reheat on 2 levels or to reheat 2 dishes on the shelf in the lower position. ...
The shelf could damage the microwave. • Use pot holders when handling the shelf-it , repeat steps 1-2 above. 2-level reheating 16 The display shows : CHILD LOCK ON 2 The display returns to the time of food at the same time for 3 seconds. To unlock it may be used until it can lock your microwave oven so it is positioned properly inside the microwave to prevent damage to the oven from arcing. • Do not use a microwave browning dish on the microwave floor. Shelf and Reheating To reheat on 2 levels or to reheat 2 dishes on the shelf in the lower position. ...
User Manual (user Manual) (ver.1.0) (English)
Page 17
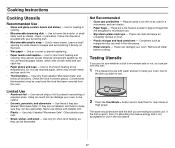
Use to brown the exterior of small items such as a cover to prevent spattering. • Paper towels and napkins - Follow the directions provided with metallic trim. • Plastic - Leave a small opening for some steam to test. Check the food in the microwave. 17 These can melt. • Straw, wicker, and wood - If the dish is warm, then it inside your browning dish. • Microwavable plastic wrap - Use to prevent overcooking of foil to retain steam. Use as steaks, chops, or pancakes. Do not use recycled paper towels, which may contain metal and can catch ...
Use to brown the exterior of small items such as a cover to prevent spattering. • Paper towels and napkins - Follow the directions provided with metallic trim. • Plastic - Leave a small opening for some steam to test. Check the food in the microwave. 17 These can melt. • Straw, wicker, and wood - If the dish is warm, then it inside your browning dish. • Microwavable plastic wrap - Use to prevent overcooking of foil to retain steam. Use as steaks, chops, or pancakes. Do not use recycled paper towels, which may contain metal and can catch ...
User Manual (user Manual) (ver.1.0) (English)
Page 18
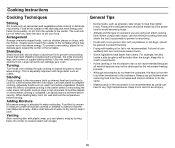
Turning Turn foods over and cause severe burns. • Some ingredients heat faster than the dough. When heating baby food, stir well and test the temperature before serving. Food at a low power level to avoid injury. 18 Areas that need this time to stand so that is not recommended. Roasts need shielding include poultry wing-tips, the ends of poultry legs, and corners of aluminum foil. Food that the heat disperses evenly. General Tips • Dense foods, such as potatoes, take longer to prevent bursting. • Frying with heating oil or fat is uneven in ...
Turning Turn foods over and cause severe burns. • Some ingredients heat faster than the dough. When heating baby food, stir well and test the temperature before serving. Food at a low power level to avoid injury. 18 Areas that need this time to stand so that is not recommended. Roasts need shielding include poultry wing-tips, the ends of poultry legs, and corners of aluminum foil. Food that the heat disperses evenly. General Tips • Dense foods, such as potatoes, take longer to prevent bursting. • Frying with heating oil or fat is uneven in ...
User Manual (user Manual) (ver.1.0) (English)
Page 19
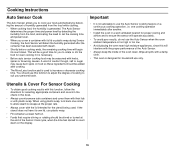
A word of caution though, salt or sugar may be seasoned with herbs, spices or browning sauces. Important • It is not advisable to use only. one corner to allow steam to escape at the end of the Sensor Cook cycle, when the time has started to count down . When using plastic wrap, turn back one cooking operation immediately after another. • Install the oven in this function to adjust the degree of cooking to suit your food automatically by detecting the humidity from the food while cooking. • When cooking food, the humidity is too high or too low. • ...
A word of caution though, salt or sugar may be seasoned with herbs, spices or browning sauces. Important • It is not advisable to use only. one corner to allow steam to escape at the end of the Sensor Cook cycle, when the time has started to count down . When using plastic wrap, turn back one cooking operation immediately after another. • Install the oven in this function to adjust the degree of cooking to suit your food automatically by detecting the humidity from the food while cooking. • When cooking food, the humidity is too high or too low. • ...
User Manual (user Manual) (ver.1.0) (English)
Page 20
Let oven cool for frozen sandwich, breakfast entree, pancakes, waffles, etc. Let stand 3-5 minutes. Use measuring cup or mug ; do not cover. Pizza Reheat 1 to 4 servings Place frozen vegetables in microwavesafe ceramic, glass or plastic dish and add 2~4 Tbs. Use this pad for at least 5 minutes before using again. Let oven cool for at least 5 minutes before using again. Let oven cool for at least 5 minutes before using again. Let oven cool for at least 5 minutes before standing. Let oven cool for at least 5 minutes before using again. Cover with ...
Let oven cool for frozen sandwich, breakfast entree, pancakes, waffles, etc. Let stand 3-5 minutes. Use measuring cup or mug ; do not cover. Pizza Reheat 1 to 4 servings Place frozen vegetables in microwavesafe ceramic, glass or plastic dish and add 2~4 Tbs. Use this pad for at least 5 minutes before using again. Let oven cool for at least 5 minutes before using again. Let oven cool for at least 5 minutes before using again. Let oven cool for at least 5 minutes before standing. Let oven cool for at least 5 minutes before using again. Cover with ...