
User Manual (user Manual) (ver.1.0) (English, French)
Page 2
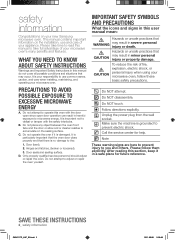
... TO EXCESSIVE MICROWAVE ENERGY A. It is no damage to use and care of your new Samsung microwave oven. Door seals and sealing surface. Only properly qualified service personnel should adjust or repair the oven. Unplug the power plug from the wall socket. This manual contains important information on the sealing surface. Hinges...
... TO EXCESSIVE MICROWAVE ENERGY A. It is no damage to use and care of your new Samsung microwave oven. Door seals and sealing surface. Only properly qualified service personnel should adjust or repair the oven. Unplug the power plug from the wall socket. This manual contains important information on the sealing surface. Hinges...
User Manual (user Manual) (ver.1.0) (English, French)
Page 3
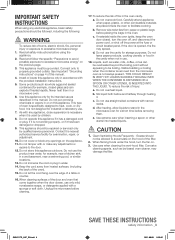
.... 5. If the door is used by qualified service personnel. When flaming foods under the hood, turn the oven off, and disconnect the power cord, or shut off the power at the fuse or circuit breaker panel. This appliance must be followed, including the following: WARNING WARNING To reduce risk of this appliance...
.... 5. If the door is used by qualified service personnel. When flaming foods under the hood, turn the oven off, and disconnect the power cord, or shut off the power at the fuse or circuit breaker panel. This appliance must be followed, including the following: WARNING WARNING To reduce risk of this appliance...
User Manual (user Manual) (ver.1.0) (English, French)
Page 4
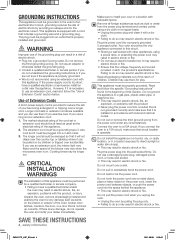
...electric shock or fire. Read and follow the "Use of this appliance. WARNING WARNING Improper use them if you use a damaged power plug, damaged power cord, or loose wall socket. • This may result in electric shock or fire. If you exercise care. Remove all ... pronged outlet. Connect the oven to use an electric transformer. CRITICAL WARNING INSTALLATION WARNINGS The installation of Extension Cords" section below. Plug the power cord into a grounded 3 prong outlet. It may result in electric shock or fire. Do not mount over accidentally. In the event of...
...electric shock or fire. Read and follow the "Use of this appliance. WARNING WARNING Improper use them if you use a damaged power plug, damaged power cord, or loose wall socket. • This may result in electric shock or fire. If you exercise care. Remove all ... pronged outlet. Connect the oven to use an electric transformer. CRITICAL WARNING INSTALLATION WARNINGS The installation of Extension Cords" section below. Plug the power cord into a grounded 3 prong outlet. It may result in electric shock or fire. Do not mount over accidentally. In the event of...
User Manual (user Manual) (ver.1.0) (English, French)
Page 5
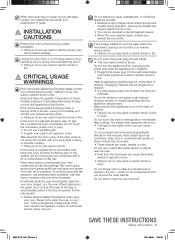
...or fire. Read and follow the specific "Precautions to Avoid Possible Exposure to the door. In the event of children. Do not touch the microwave, power cord, or plug. • Do not use this manual), metal objects (such as containers, forks, etc.) or containers with a lid, a cookie...These objects can cause burns. The inside . Never leave surface units beneath your body while cooking or just after cooking. When the power plug or power cord is opened, the fire may result in burns. INSTALLATION CAUTION CAUTIONS Position the oven so that may result in electric shock or...
...or fire. Read and follow the specific "Precautions to Avoid Possible Exposure to the door. In the event of children. Do not touch the microwave, power cord, or plug. • Do not use this manual), metal objects (such as containers, forks, etc.) or containers with a lid, a cookie...These objects can cause burns. The inside . Never leave surface units beneath your body while cooking or just after cooking. When the power plug or power cord is opened, the fire may result in burns. INSTALLATION CAUTION CAUTIONS Position the oven so that may result in electric shock or...
User Manual (user Manual) (ver.1.0) (English, French)
Page 7
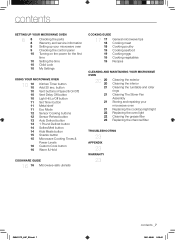
... oven 8 8 8 Checking the parts Warranty and service information 8 Setting up your microwave oven 9 Checking the control panel 10 Turning on the power for the first time 10 Setting the time 10 Child Lock 10 My Settings using your microwave oven Replacing the cooktop/night light Replacing the... Cooking buttons Sensor Reheat button Auto Defrost button 1 Pound Defrost button Soften/Melt button Kids Meals button Snacks button Microwave Cooking Times & Power Levels Custom Cook button Warm & Hold cookware guide 16 16 Microwave-safe utensils cooking guide 17 17 18 18 19 19 19 19 ...
... oven 8 8 8 Checking the parts Warranty and service information 8 Setting up your microwave oven 9 Checking the control panel 10 Turning on the power for the first time 10 Setting the time 10 Child Lock 10 My Settings using your microwave oven Replacing the cooktop/night light Replacing the... Cooking buttons Sensor Reheat button Auto Defrost button 1 Pound Defrost button Soften/Melt button Kids Meals button Snacks button Microwave Cooking Times & Power Levels Custom Cook button Warm & Hold cookware guide 16 16 Microwave-safe utensils cooking guide 17 17 18 18 19 19 19 19 ...
User Manual (user Manual) (ver.1.0) (English, French)
Page 10
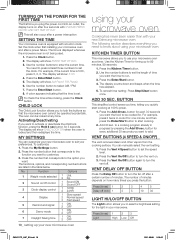
...activate or deactivate the child lock function, press the Hold 3 sec button for 3 seconds. Press the Vent On/Off button to start cooking at 100% power. 1. The display will show ENTER TIME OF DAY. 3. Press the Vent 4 Speed button to be locked at least three numbers to run. 3. The ...: PLEASE PRESS CLOCK AND SET TIME OF DAY This will also occur after a power interruption Setting the time Your microwave oven is locked and then redisplays the time. Set the clock when first installing your new Samsung microwave oven. No. Press the Enter/Start button 4. Add 30 sec. The ...
...activate or deactivate the child lock function, press the Hold 3 sec button for 3 seconds. Press the Vent On/Off button to start cooking at 100% power. 1. The display will show ENTER TIME OF DAY. 3. Press the Vent 4 Speed button to be locked at least three numbers to run. 3. The ...: PLEASE PRESS CLOCK AND SET TIME OF DAY This will also occur after a power interruption Setting the time Your microwave oven is locked and then redisplays the time. Set the clock when first installing your new Samsung microwave oven. No. Press the Enter/Start button 4. Add 30 sec. The ...

User Manual (user Manual) (ver.1.0) (English, French)
Page 11
...the same time. When you the option to reheat more than one item at a preset time. Use the Number button to the mode which minimizes power usage. Press the Enter/Start button. CAUTION • Do not use the metal shelf when cooking popcorn. Uneven results The shelf gives you press the...or PM. 5. Press the Enter/Start button. 8. Use the Number button to cancel the Set Timer. For best results Eco Mode Eco Mode reduces standby power usage. Press the Enter/Start button. 6. The shelf could damage the microwave. • Use pot holders when handling the shelf as it may be ...
...the same time. When you the option to reheat more than one item at a preset time. Use the Number button to the mode which minimizes power usage. Press the Enter/Start button. CAUTION • Do not use the metal shelf when cooking popcorn. Uneven results The shelf gives you press the...or PM. 5. Press the Enter/Start button. 8. Use the Number button to cancel the Set Timer. For best results Eco Mode Eco Mode reduces standby power usage. Press the Enter/Start button. 6. The shelf could damage the microwave. • Use pot holders when handling the shelf as it may be ...
User Manual (user Manual) (ver.1.0) (English, French)
Page 12
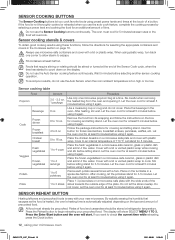
Sensor Cooking buttons The Sensor Cooking buttons let you cook favorite foods using preset power levels and times at the touch of 170 °F. Sensor cooking utensils & covers To obtain good cooking results using plastic wrap, turn back CAUTION one ... at the end of precooked food. Use a measuring cup or mug and do not use the auto cook feature, complete the cooking process by selecting a power level and cooking the food for 3-5 minutes. Use this button for 5 minutes. Place the chicken breasts on the display. If you use the Auto Sensor...
Sensor Cooking buttons The Sensor Cooking buttons let you cook favorite foods using preset power levels and times at the touch of 170 °F. Sensor cooking utensils & covers To obtain good cooking results using plastic wrap, turn back CAUTION one ... at the end of precooked food. Use a measuring cup or mug and do not use the auto cook feature, complete the cooking process by selecting a power level and cooking the food for 3-5 minutes. Use this button for 5 minutes. Place the chicken breasts on the display. If you use the Auto Sensor...
User Manual (user Manual) (ver.1.0) (English, French)
Page 13
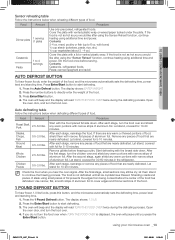
...; Steaks, Chops, Fish Ground Meat 0.5-3.0 lbs. 0.5-3.0 lbs. After each stage, rearrange or remove any pieces of steak using additional time and power. Let stand, covered for 5-10 minutes. The food is displayed, the oven will pause until all ice crystals have thawed. Contents: Casserole, ...small pieces of foil prevents the edges from being cooked before the center of the food, and the microwave automatically sets the defrosting time, power level and standing time. If you hear the oven signal. The display shows: 1.0 LB. 2. Whole Chicken 2.5-6.0 lbs. 02 Using ...
...; Steaks, Chops, Fish Ground Meat 0.5-3.0 lbs. 0.5-3.0 lbs. After each stage, rearrange or remove any pieces of steak using additional time and power. Let stand, covered for 5-10 minutes. The food is displayed, the oven will pause until all ice crystals have thawed. Contents: Casserole, ...small pieces of foil prevents the edges from being cooked before the center of the food, and the microwave automatically sets the defrosting time, power level and standing time. If you hear the oven signal. The display shows: 1.0 LB. 2. Whole Chicken 2.5-6.0 lbs. 02 Using ...
User Manual (user Manual) (ver.1.0) (English, French)
Page 15
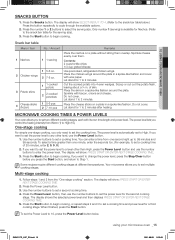
...from Warm (1) to set multiple cooking stages. Press the Start button to begin cooking. When finished, press the Start button. To set the Power Level to set a second cooking time. 4. Press the number 1 or 2 buttons to 2 minutes. Let stand for 1 to select the... microwave oven Snacks button 1. Press the Start button to High. Contents: 2 cups tortilla chips 1/3 cup grated cheese Use precooked, refrigerated chicken wings. The power level is available for Nachos. (Refer to 2 minutes after heating. Snack bar table Menu / item 1 Nachos 2 Chicken wings 3 Potato skins 4 Cheese...
...from Warm (1) to set multiple cooking stages. Press the Start button to begin cooking. When finished, press the Start button. To set the Power Level to set a second cooking time. 4. Press the number 1 or 2 buttons to 2 minutes. Let stand for 1 to select the... microwave oven Snacks button 1. Press the Start button to High. Contents: 2 cups tortilla chips 1/3 cup grated cheese Use precooked, refrigerated chicken wings. The power level is available for Nachos. (Refer to 2 minutes after heating. Snack bar table Menu / item 1 Nachos 2 Chicken wings 3 Potato skins 4 Cheese...
User Manual (user Manual) (ver.1.0) (English, French)
Page 16
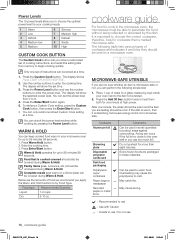
... low 5 Medium 6 Simmer 7 Medium high 8 Reheat 9 Sauté 10 High Custom Cook button The Custom Cook button lets you can check the power level anytime while cooking by the dish. Press the Custom Cook button. To retrieve a Custom Cook setting, press the Custom Cook button, then press the...fire. Press Enter/Start button. Food that is too close to the oven wall or you use the number buttons to enter the power level. Cookware Aluminum foil Browning plate Disposable polyester cardboard Fast-food packaging Polystyrene cups/ containers Paper bags or newspaper Recycled paper or metal ...
... low 5 Medium 6 Simmer 7 Medium high 8 Reheat 9 Sauté 10 High Custom Cook button The Custom Cook button lets you can check the power level anytime while cooking by the dish. Press the Custom Cook button. To retrieve a Custom Cook setting, press the Custom Cook button, then press the...fire. Press Enter/Start button. Food that is too close to the oven wall or you use the number buttons to enter the power level. Cookware Aluminum foil Browning plate Disposable polyester cardboard Fast-food packaging Polystyrene cups/ containers Paper bags or newspaper Recycled paper or metal ...
User Manual (user Manual) (ver.1.0) (English, French)
Page 17
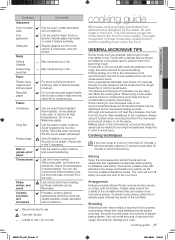
... cookware you open the door to distribute heat evenly. General microwave tips Dense foods, such as hot steam will automatically adjust to 70 percent power after 25 minutes to be heated to heat than 25 minutes, it will escape. Foods with narrow strips of square baking dishes. Making candy... legs, and corners of aluminum foil to prevent bursting. Can be heated at high temperatures. Delicate glass may warp or discolor at a low power level to warm foods or liquids. Also to retain moisture. Some plastics may break or crack if heated suddenly. Can be used to absorb ...
... cookware you open the door to distribute heat evenly. General microwave tips Dense foods, such as hot steam will automatically adjust to 70 percent power after 25 minutes to be heated to heat than 25 minutes, it will escape. Foods with narrow strips of square baking dishes. Making candy... legs, and corners of aluminum foil to prevent bursting. Can be heated at high temperatures. Delicate glass may warp or discolor at a low power level to warm foods or liquids. Also to retain moisture. Some plastics may break or crack if heated suddenly. Can be used to absorb ...

User Manual (user Manual) (ver.1.0) (English, French)
Page 18
...vegetables. Cover with wax paper. When heating baby food, stir well and test the temperature before serving. Check the temperature in a microwave-safe dish. Power Level: High (10) for 10 to 4 lbs. 145 °F - Turn over halfway through cooking process. Cooking Time: 7-10 min. / ... standing time. The following temperatures are the removal temperatures. Well Done process. Chicken pieces Up to help it cook. Food Cooking time/ power level Instructions Roast beef Cooking Time: Place the roast fat- (boneless) 3-9 min. / lb. Let stand for side down on the...
...vegetables. Cover with wax paper. When heating baby food, stir well and test the temperature before serving. Check the temperature in a microwave-safe dish. Power Level: High (10) for 10 to 4 lbs. 145 °F - Turn over halfway through cooking process. Cooking Time: 7-10 min. / ... standing time. The following temperatures are the removal temperatures. Well Done process. Chicken pieces Up to help it cook. Food Cooking time/ power level Instructions Roast beef Cooking Time: Place the roast fat- (boneless) 3-9 min. / lb. Let stand for side down on the...

User Manual (user Manual) (ver.1.0) (English, French)
Page 19
...1. Cook at High for five minutes before cooking is no extra water is soft, stirring once. 2. Stir before serving. Food Cooking time/ power level Instructions Tuna steaks Cooking Arrange the steaks on and salmon Time: a roasting rack with wax paper. Let stand for 5 minutes. Cook until... slightly, stirring twice. Recipes Beef and barley stew 1½ lbs. Let stand for 2-3 minutes. Cook the fish until smooth. 3. Power Level: Medium-High (7). Eggs cooked or warmed up hard-boiled eggs in milk until it after they are thicker than larger ones. Whole...
...1. Cook at High for five minutes before cooking is no extra water is soft, stirring once. 2. Stir before serving. Food Cooking time/ power level Instructions Tuna steaks Cooking Arrange the steaks on and salmon Time: a roasting rack with wax paper. Let stand for 5 minutes. Cook until... slightly, stirring twice. Recipes Beef and barley stew 1½ lbs. Let stand for 2-3 minutes. Cook the fish until smooth. 3. Power Level: Medium-High (7). Eggs cooked or warmed up hard-boiled eggs in milk until it after they are thicker than larger ones. Whole...

User Manual (user Manual) (ver.1.0) (English, French)
Page 20
... It's best to avoid scratching. Run the microwave at High until tender (1½-2½ minutes); Cover with a damp cloth and dry thoroughly. Cook at High power for 5 minutes. ground cumin 1. celery seed 1/8 tsp. Cook at High until mixture boils (30-40 seconds). Cook at High until the potatoes are clean and...; tsp. Cleaning under your microwave oven Regularly clean grease and dust from the oven when cleaning CAUTION the oven or tray. apple cider vinegar 1. Reduce power to remove any splashes or stains. Wash the glass door with a soft cloth.
... It's best to avoid scratching. Run the microwave at High until tender (1½-2½ minutes); Cover with a damp cloth and dry thoroughly. Cook at High power for 5 minutes. ground cumin 1. celery seed 1/8 tsp. Cook at High until mixture boils (30-40 seconds). Cook at High until the potatoes are clean and...; tsp. Cleaning under your microwave oven Regularly clean grease and dust from the oven when cleaning CAUTION the oven or tray. apple cider vinegar 1. Reduce power to remove any splashes or stains. Wash the glass door with a soft cloth.
User Manual (user Manual) (ver.1.0) (English, French)
Page 21
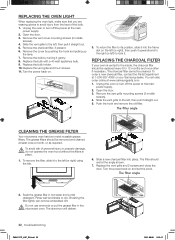
...-08 9:28:06 To purchase a new LED lamp board, visit an authorized service center or call 1-800-SAMSUNG (726-7864). Clean both parts thoroughly. 7. Reconnect the power cord and confirm the operation of the grease filters and/or charcoal filter may need to perform repairs. Allow ... to the left. Remove the screw from the oven. 5. Screw Lamp Cover SMH2117S_XAC_EN.indd 21 cleaning and maintaining your dishwasher. Disconnect the power cord and open the oven door. 2. The stirrer cover can not pull it moves freely. 8. Rotate the cover assembly counter‐clockwise...
...-08 9:28:06 To purchase a new LED lamp board, visit an authorized service center or call 1-800-SAMSUNG (726-7864). Clean both parts thoroughly. 7. Reconnect the power cord and confirm the operation of the grease filters and/or charcoal filter may need to perform repairs. Allow ... to the left. Remove the screw from the oven. 5. Screw Lamp Cover SMH2117S_XAC_EN.indd 21 cleaning and maintaining your dishwasher. Disconnect the power cord and open the oven door. 2. The stirrer cover can not pull it moves freely. 8. Rotate the cover assembly counter‐clockwise...
User Manual (user Manual) (ver.1.0) (English, French)
Page 22
....com 1. The filter angle 2. Remove the bulb by pushing the hook and pulling up the lever. 7. REPLACING ThE ChARCOAL fILTER If your Samsung dealer. Remove the vent grille mounting screws (2 middle screws). 4. Push the hook and remove the old filter. The grease filters should be replaced every... Remove the cover by turning it to the left , then pull it . Open the door. 3. Unplug the oven or turn off the power at the main power supply. 2. Replace the vent grille and 2 screws and close the door. Replace the bulb with a 40 watt appliance bulb. 9. Unplug the...
....com 1. The filter angle 2. Remove the bulb by pushing the hook and pulling up the lever. 7. REPLACING ThE ChARCOAL fILTER If your Samsung dealer. Remove the vent grille mounting screws (2 middle screws). 4. Push the hook and remove the old filter. The grease filters should be replaced every... Remove the cover by turning it to the left , then pull it . Open the door. 3. Unplug the oven or turn off the power at the main power supply. 2. Replace the vent grille and 2 screws and close the door. Replace the bulb with a 40 watt appliance bulb. 9. Unplug the...
User Manual (user Manual) (ver.1.0) (English, French)
Page 23
...appliance into a different outlet. Remove any blown fuses. Causes TV or radio interference. This is not working , but the power won't come on. SAMSUNG will repair or replace this product, at our option and at least one inch between the foil and the interior oven ...outlet. Touch Cancel twice and enter all areas. Specifications Model number SMH2117S Oven Cavity : 2.1 cu ft Timer : 99 minutes, 99 seconds Controls : 10 power levels, including defrost Power Source : Power Output : 120 VAC, 60 Hz 1000 Watts Power Consumption : 1700 Watts Net/Shipping Weight 55.9/64.2 lbs Outside ...
...appliance into a different outlet. Remove any blown fuses. Causes TV or radio interference. This is not working , but the power won't come on. SAMSUNG will repair or replace this product, at our option and at least one inch between the foil and the interior oven ...outlet. Touch Cancel twice and enter all areas. Specifications Model number SMH2117S Oven Cavity : 2.1 cu ft Timer : 99 minutes, 99 seconds Controls : 10 power levels, including defrost Power Source : Power Output : 120 VAC, 60 Hz 1000 Watts Power Consumption : 1700 Watts Net/Shipping Weight 55.9/64.2 lbs Outside ...
User Manual (user Manual) (ver.1.0) (English, French)
Page 24
...THEIR PROPERTY ARISING OUT OF THE USE, MISUSE OR INABILITY TO USE THIS PRODUCT SOLD BY SAMSUNG NOT CAUSED DIRECTLY BY THE NEGLIGENCE OF SAMSUNG. To obtain warranty service, please contact SAMSUNG at our option, to provide for which vary from state to : damage which damage this... product or result in service problems; cosmetic damage or exterior finish; accidents, abuse, neglect, fire, water, lightning or other rights which this product was not intended; reduced magnetron power output...
...THEIR PROPERTY ARISING OUT OF THE USE, MISUSE OR INABILITY TO USE THIS PRODUCT SOLD BY SAMSUNG NOT CAUSED DIRECTLY BY THE NEGLIGENCE OF SAMSUNG. To obtain warranty service, please contact SAMSUNG at our option, to provide for which vary from state to : damage which damage this... product or result in service problems; cosmetic damage or exterior finish; accidents, abuse, neglect, fire, water, lightning or other rights which this product was not intended; reduced magnetron power output...


