SGH T528G Phone - Samsung
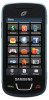
SGH T528G Phone
Related Manual Pages
Related Videos

Straight Talk Samsung SGH-T528G (T528) Unboxing 3G Wi-Fi
Duration: 10:26
Total Views: 209,849
Duration: 10:26
Total Views: 209,849
How to turn Wi-Fi on Samsung SGH-T528G
Duration: :55
Total Views: 297
Duration: :55
Total Views: 297
Similar Questions

Getting Contacts Out Of Phone
The phone was dropped in water, worked for a few days after now it won't turn on, like to get contac...
The phone was dropped in water, worked for a few days after now it won't turn on, like to get contac...
(Posted by woodscomputerrepair 12 years ago)
Network Settings:samsungt528g Cell Phone?
Where are network settings on SamsungT528G cell phone?
Where are network settings on SamsungT528G cell phone?
(Posted by ladyjezira 12 years ago)


Locked Up Phone
my phone is locked up and all you can see is the blue screen that says trac phone and if you take ou...
my phone is locked up and all you can see is the blue screen that says trac phone and if you take ou...
(Posted by dogone 12 years ago)

How Do You Unlock Your Phone If You Don't Recall The Pin Code???
The phone model is a Samsung t528g, Straight Talk
The phone model is a Samsung t528g, Straight Talk
(Posted by cheese 12 years ago)