SGH T249 Phone - Samsung
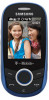
SGH T249 Phone
Related Manual Pages


Related Videos

Unlock Samsung SGH-T249 - How to Sim Unlock Samsung T249r Network by remote lock code
Duration: 2:06
Total Views: 22,015
Duration: 2:06
Total Views: 22,015
Similar Questions

How Do I Get Pictures Off My T249r Samsung Phone
Hello. What cable do I need to transfer the pictures i have on my phone to my pc? do i need any soft...
Hello. What cable do I need to transfer the pictures i have on my phone to my pc? do i need any soft...
(Posted by simonmasson 10 years ago)

Delete Phone Numbers
What are the steps to delete phone numbers from t249.
What are the steps to delete phone numbers from t249.
(Posted by fadiarte 12 years ago)

How Do You Unlock Your Phone If You Don't Recall The Pin Code???
The phone model is a Samsung t528g, Straight Talk
The phone model is a Samsung t528g, Straight Talk
(Posted by cheese 12 years ago)
Related Terms
The following terms were also used when searching for SGH T249 Phone - Samsung:- samsung sgh-t249
- samsung sgh t249
- samsung sgh t249 unlock
- sgh t249 unlock
- samsung sgh t249 unlock code
- samsung sgh-t249 unlock
- sgh t249 manual
- t-mobile samsung sgh t249 prepaid
- sgh t249 cell phone
- sgh t249 unlock code
- sgh-t249 manual
- sgh-t249 unlock
- sgh-t249 user manual
- unlock samsung sgh-t249
- desbloquear sgh-t249
- how to unlock samsung sgh t249
- how to unlock samsung sgh-t249
- how to unlock sgh t249
- how to unlock sgh-t249
- samsung sgh t249 battery charge instructions
- samsung sgh t249 cell phone
- samsung sgh t249 charger
- samsung sgh t249 cover
- samsung sgh t249 games
- samsung sgh t249 headphones
- samsung sgh t249 manual
- samsung sgh t249 price
- samsung sgh t249 programing codes
- samsung sgh t249 programming codes
- samsung sgh t249 reset
- samsung sgh t249 review
- samsung sgh t249 service programing codes
- samsung sgh t249 service programming codes
- samsung sgh t249 sim
- samsung sgh t249 software
- samsung sgh t249 support
- samsung sgh t249 t mobile
- samsung sgh t249 t-mobile
- samsung sgh t249 unlocked
- samsung sgh t249 usb
- samsung sgh t249 user manual
- samsung sgh t249 wont turn on
- samsung sgh t249r
- samsung sgh t259 cell phone
- samsung sgh t259 manual
- samsung sgh t259 no bluetooth
- samsung sgh t259 unlock
- samsung sgh-t249 accessories
- samsung sgh-t249 battery
- samsung sgh-t249 buy
- samsung sgh-t249 car charger
- samsung sgh-t249 case
- samsung sgh-t249 cell phone owners manual
- samsung sgh-t249 charger
- samsung sgh-t249 cover
- samsung sgh-t249 driver
- samsung sgh-t249 hard reset
- samsung sgh-t249 manual
- samsung sgh-t249 memory card
- samsung sgh-t249 owner's manual
- samsung sgh-t249 phone
- samsung sgh-t249 price
- samsung sgh-t249 price in india
- samsung sgh-t249 review
- samsung sgh-t249 reviews
- samsung sgh-t249 sar
- samsung sgh-t249 software
- samsung sgh-t249 specs
- samsung sgh-t249 sync software
- samsung sgh-t249 t-mobile
- samsung sgh-t249 unlock code
- samsung sgh-t249 unlock code free
- samsung sgh-t249 usb driver
- samsung sgh-t249 user manual
- samsung sgh-t249r
- samsung sgh-t249r unlock
- samsung sgh-t249r unlock code
- samsung sgh-t259
- samsung sgh-t259 manual
- sgh t249
- sgh t249 battery
- sgh t249 battery charge instructions
- sgh t249 charger
- sgh t249 cover
- sgh t249 driver
- sgh t249 games
- sgh t249 headphones
- sgh t249 help
- sgh t249 phone
- sgh t249 price
- sgh t249 programing codes
- sgh t249 programming codes
- sgh t249 reset
- sgh t249 review
- sgh t249 samsung
- sgh t249 service programing codes
- sgh t249 service programming codes
- sgh t249 sim
- sgh t249 software
- sgh t249 specs
- sgh t249 support
- sgh t249 t mobile
- sgh t249 t-mobile
- sgh t249 unlocked
- sgh t249 usb
- sgh t249 usb driver
- sgh t249 user manual
- sgh t249 video format
- sgh t249 wifi
- sgh t249 wont turn on
- sgh t249r
- sgh t259
- sgh t259 case
- sgh t259 cell phone
- sgh t259 manual
- sgh t259 no bluetooth
- sgh t259 phone
- sgh t259 unlock
- sgh-t249
- sgh-t249 accessories
- sgh-t249 battery
- sgh-t249 bluetooth
- sgh-t249 buy
- sgh-t249 cable
- sgh-t249 car charger
- sgh-t249 case
- sgh-t249 cell phone owners manual
- sgh-t249 charger
- sgh-t249 cover
- sgh-t249 driver
- sgh-t249 earphone
- sgh-t249 free games
- sgh-t249 games download
- sgh-t249 hands free compatible
- sgh-t249 hard reset
- sgh-t249 headset
- sgh-t249 internet settings
- sgh-t249 master code
- sgh-t249 memory card
- sgh-t249 owner's manual
- sgh-t249 phone
- sgh-t249 prepaid manual
- sgh-t249 price
- sgh-t249 price in india
- sgh-t249 rebooting
- sgh-t249 review
- sgh-t249 reviews
- sgh-t249 samsung
- sgh-t249 sar
- sgh-t249 software
- sgh-t249 specs
- sgh-t249 sync software
- sgh-t249 t-mobile
- sgh-t249 unlock code
- sgh-t249 unlock code free
- sgh-t249 usb driver
- sgh-t249 video format
- sgh-t249 white screen
- sgh-t249 wrong sim card
- sgh-t249r
- sgh-t249r unlock
- sgh-t249r unlock code
- sgh-t259 manual
- sght249 driver
- sght249 usb driver
- sprint sgh t249
- t mobile samsung sgh-t249 unlock
- t mobile sgh-t249 unlock
- t-mobile samsung sgh t249
- t-mobile samsung sgh-t249
- t-mobile sgh t249
- t-mobile sgh t249 memory card
- t-mobile sgh t249 prepaid
- t-mobile sgh-t249
- transfer music to sgh t249
- unlock code for samsung sgh-t249
- unlock code for sgh-t249
- unlock samsung sgh t249
- unlock sgh t249
- unlock sgh-t249