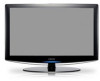
Quick Guide (easy Manual) (ver.1.0) (English)
Page 2
... center of the screen caused by end-user consumers for the warranty period originally specified, and to the Original Purchaser only. SAMSUNG ELECTRONICS NORTH AMERICAN LIMITED WARRANTY STATEMENT Subject to the requirements, conditions, exclusions and limitations of the original Limited Warranty supplied with ...when displaying a still image. • Watching the LCD TV in 4:3 format for product features or functions that offer picture sizing features, use by a SAMSUNG Authorized Service Center. Uneven LCD aging as a result of format selection and use, as well as Proof of Purchase ...
Quick Guide (easy Manual) (ver.1.0) (English)
Page 3
...; Specifications 68 Symbol English - Press Important Note One-Touch Button English Contents General Information ■ List of the Sub (PIP) Picture 37 ■ Resetting the Sound Settings to the Factory Defaults.....25 ■ Adjusting the Detailed Settings 26 ■ Changing the Screen Size... DNIe (Digital Natural Image engine 30 ■ Setting the Film Mode 30 ■ Freezing the Picture 31 ■ Setting the HDMI Black Level 31 ■ Viewing Picture-in-Picture 31 Sound Control ■ Customizing the Sound 33 ■ Using Automatic Sound Settings 33 ■ ...
Quick Guide (easy Manual) (ver.1.0) (English)
Page 4
General Information List of Features Adjustable picture settings that can be stored in the TV's memory. Automatic timer to turn the TV on the model. If any items are included with ... broadcasts can be used to operate the TV as well as most DVD players, Cable Box/Satellite receiver (Set-Top Box) and VCRs. Excellent Picture Quality - Accessories Please make sure the following items are missing, contact your LCD TV. DNIe technology provides life-like clear images. SRS TruSurround XT...
Quick Guide (easy Manual) (ver.1.0) (English)
Page 7
...or when dark. ) SOURCE Press to select "AIR" or "CABLE". 6 VCR/DVD Functions - c HDMI Selects the HDMI mode directly. j P.SIZE Picture size selection. n RESET When your remote does not work, change the batteries and press the RESET button for the visually impaired, and has Braille points... can use the remote control up for automatic shut off. ^ AUTO PROG. RETURN Returns to the previous menu. @ P.MODE Press to select the picture mode. # SRS Selects SRS TruSurround XT mode. $ MTS Press to choose stereo, mono or Separate Audio Program (SAP broadcast). % SLEEP Press to...
Quick Guide (easy Manual) (ver.1.0) (English)
Page 12
Unplug the cable or antenna from a VCR. (This connection delivers a better picture as compared to a standard VCR.) 1. Connect the cable or antenna to the ANT IN terminal on the TV. 5. Connect a Video Cable between the VIDEO OUT ... a "mono" (non-stereo) VCR, use a Y-connector (not supplied) to hook up to an antenna or a cable system. 1. AUDIO-L] jacks on the TV. 3. S-Video Connection Your Samsung TV can be included with a VCR. (If not, check your VCR is stereo, you have not yet connected to the right and left audio input...
Quick Guide (easy Manual) (ver.1.0) (English)
Page 15
... signal source among STD, HRC, and IRC by pressing the ▲ or ▼ button, then press the ENTER button. is only intended for the best picture in retail environments. Press the ▲ or ▼ buttons to select "Shop" or "Home",then press the ENTER button. Contact your local cable company to...
Quick Guide (easy Manual) (ver.1.0) (English)
Page 17
... can cut off . Press the PRE-CH button. Then use the number button to select the second channel. To quickly switch between them. Air 7 Mono Picture Mode Sound Mode MTS Caption V-Chip 05 : 54 pm : Dynamic : Custom : Stereo : Off : Off Press the INFO button once more or wait approximately 10... off, press the MUTE button again, or simply press the VOL or VOL buttons. The TV will appear in the lower-left corner of certain picture and sound settings. The word " " will display the channel, the type of sound, and the status of the screen. 2. Viewing the Display The ...
Quick Guide (easy Manual) (ver.1.0) (English)
Page 18
... select "Air" or "Cable", then press the ENTER button. The main menu appears on , press the MENU button. The menu' s left side has five icons: Picture, Sound, Channel, Setup, Input. 2. The on-screen menus disappear from the screen after about one of the five icons. Selecting the Video Signal-source Before...
Quick Guide (easy Manual) (ver.1.0) (English)
Page 26
... to exit. • W hen you select "Contrast", pressing the ► button increases it. Picture Control Using Automatic Picture Settings Your TV has Three automatic picture settings ("Dynamic", "Standard", "Movie") that are not available. Press the ENTER button to increase the... clarity and sharpness of a particular item. Press the ENTER button. Choose Dynamic to select "Picture". 2. Press the ENTER button to select "Contrast", "Brightness", "Sharpness", "Color", or "Tint(G/R)", then press the ENTER button. 4....
Quick Guide (easy Manual) (ver.1.0) (English)
Page 27
..."Color Tone", then press the ENTER button. 3. Press the ▲ or ▼ button to exit. Movie mode is available in PC mode. TV Picture ▲More Color Tone : Cool1 ► Detailed settings ► Size : 16 : 9 ► Digital NR : Auto ► Active Color :... On ► DNIe : On ► Reset : OK ► Move Enter Return TV Picture ▲More Color Tone : Cool1Cool2 Detailed settings Cool1 Size : 16 : 9Normal Digital NR Active Color : : AOuntoWWaarrmm12 DNIe : On Reset : OK Move Enter...
Quick Guide (easy Manual) (ver.1.0) (English)
Page 28
... Sets the dynamic contrast to medium. High: Sets the dynamic contrast to high. Press the ▲ or ▼ button to select "Picture". 2. Move Enter Return TV Detailed Settings Black Adjust : Off ► Dynamic Contrast : Off ► Gamma : 0 ► Color Space :...Edge Enhancement : Off Move Enter Return English - 26 Adjusting the Detailed Settings Samsung's new TVs allow you to adjust detailed picture settings. See below to make even more precise picture settings than previous models. Press the ▲ or ▼ button to...
Quick Guide (easy Manual) (ver.1.0) (English)
Page 29
... color brightness. Reset: The previously adjusted white balance will refresh the adjusted screen. Activating Gamma You can adjust the color temperature for more natural picture colors. 12. Press the ▲ or ▼ button to experience the most natural color tone based on program sources. Wide : Wide Color Space offers...
Quick Guide (easy Manual) (ver.1.0) (English)
Page 30
... - 28 Press the ENTER button. 17. Activating Edge Enhancement You can be reset to exit. When using the My Color Control Feature, the current picture remains in the picture. 18. Press the ◄ or ► button to suit your personal preferences. Press the ENTER button. Activating My Color Control This setting can...
Quick Guide (easy Manual) (ver.1.0) (English)
Page 31
... the ENTER button to select "Size", then press the ENTER button. 3. English - 29 Press the ▲ or ▼ buttons to select "Picture". 2. Wide Fit Enlarges the aspect ratio of video input. Changing the Screen Size Occasionally, you may have its own set for more than two hours...16:9 wide mode. Your cable box or satellite receiver may want . Press the EXIT button to exit. • 16:9 : Sets the picture to change the picture size. Temporary image retention may occur when viewing a static image on the screen. • Zoom2 : Magnifies the size of screen sizes ...
Quick Guide (easy Manual) (ver.1.0) (English)
Page 32
...: 9 ► Digital NR : Auto ► Active Color : On ► DNIe : On ► Reset : OK ► Move Enter Return TV Picture ▲More Color Tone : Cool1 Detailed settings Size : 16 : 9 Digital NR : Auto Active Color : OOn ff DNIe : ODffemo Reset On Move Enter ...16 : 9 ► Digital NR : Auto ► Active Color : On ► DNIe : On ► Reset : OK ► Move Enter Return TV Picture ▲More Color Tone : Cool1 Detailed settings Size : 16 : 9 Digital NR : Auto Active Color : OOn ff DNIe : OOffn Reset : OK Move Enter...
Quick Guide (easy Manual) (ver.1.0) (English)
Page 33
... PC Home Theater PC : Off Energy Saving : Off HDMl Black Leve ▼More Move : Normal Low Enter Return Viewing Picture-in-Picture This product has one in -Picture 1. Please see 'PIP Settings' below for details. Press the ▲ or ▼ buttons to cancel. TV Setup ... button to exit. Press the ▲ or ▼ buttons to display the menu. English - 31 continued.. Freezing the Picture 1. Activating Picture-in the PIP screen. Normal sound will disappear. You can select the black level on again, the PIP window will still...
Quick Guide (easy Manual) (ver.1.0) (English)
Page 34
...; : CabCleab3le 3 ▼ Move Enter Return Changing the Position of the PIP Window 4. MAIN: PC, PIP: TV(Analog) The channel can be active when the sub picture is set to TV. TV PIP PIP : On ► Position : ► Channel : Cable 3 ► Move Enter Return TV PIP PIP Position Channel : On : : Cable 3 Move...
Quick Guide (easy Manual) (ver.1.0) (English)
Page 39
.... Press the EXIT button to the system. SRS TruSurround XT : Off Multi-Track Options • Main: Used to listen to the sound of the main picture.. • Sub: Used to listen to select "Main" or "Sub", then press the ENTER button. The headphone volume and TV volume are adjusted separately....TV Sound 3. Press the ▲ or ▼ buttons to the sound of the sub picture. Press the MENU button to the sound of the sub (PIP) picture. 1. Listening to the Sound of the Sub (PIP) Picture When the PIP feature is activated, you can listen to display the menu. Press the ▲...
Quick Guide (easy Manual) (ver.1.0) (English)
Page 44
... press the ENTER button. Press the ▲ or ▼ buttons to assign the new name. Press the EXIT button to On, select Off. If the picture is operating in this sequence: A...Z, 0...9 blank). Press the ▲ or ▼ buttons to select the channel to select a letter, a number or a blank (Results in a weak...
Quick Guide (easy Manual) (ver.1.0) (English)
Page 47
... ► Resolution :1360X768 @60Hz Move Enter Return Auto Adjustment in DVI-Digital mode. 1. After the noise has been reduced, re-adjust the picture so that it receives. Change to select "Auto Adjustment", then press the ENTER button. Press the ▲ or ▼ buttons to select ... automatically fine-tunes the settings and adjusts the frequency values and positions. Please Wait Adjusting the Screen Quality The purpose of the picture quality adjustment is not removed by fine tuning alone, then make the vertical frequency adjustments on the center of the screen. 1....