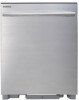
Samsung DMT400RHS Not Draining
Related Manual Pages


Similar Questions

Draining Issues
Samsung DMT400RHS/AXX will drain sometime completely and other times it drain partial and other time...
Samsung DMT400RHS/AXX will drain sometime completely and other times it drain partial and other time...
(Posted by Anonymous-155782 8 years ago)

Dishwasher Draining
My brand new samsung dishwasher does not drain completely. What can I do?
My brand new samsung dishwasher does not drain completely. What can I do?
(Posted by annarbuckle3 8 years ago)

Dmt400rhs/xaa My Dishwasher Comes On Feels Up With Water And Drains 4 Times The
(Posted by louisianagurl35 10 years ago)

Dmt400rhs Samsung Dishwasher Wont Drain, Not Clogged
(Posted by adiDriad 10 years ago)

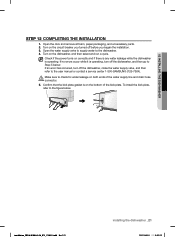
How To Replace Drain Hose
please provide instructions for drain hose replacement and detail actual hoseconnection to dishwashe...
please provide instructions for drain hose replacement and detail actual hoseconnection to dishwashe...
(Posted by bartlettc 11 years ago)
Related Terms
The following terms were also used when searching for Samsung DMT400RHS Not Draining:- samsung dmt400rhs
- dmt400rhs xaa
- dmt400rhs/xaa
- dmt400rhs samsung
- model dmt400rhs
- samsung dmt400rhs xaa
- dmt400rhs dishwasher
- samsung dishwasher dmt400rhs
- dmt400rhs dishwasher reviews
- dmt400rhs installation
- samsung dmt400rhs dishwasher
- dmt400rhs installation manual
- dmt400rhs manual
- dmt400rhs prices
- dishwasher dmt400rhs
- dmt400rhs
- dmt400rhs 24
- dmt400rhs 24 dishwasher
- dmt400rhs all lights flashing
- dmt400rhs best buy
- dmt400rhs blinking delicate light
- dmt400rhs blinking heavy light
- dmt400rhs blinking lights
- dmt400rhs bottom door seal
- dmt400rhs bottom panel
- dmt400rhs case sensor
- dmt400rhs clean filter
- dmt400rhs delicate light flashing
- dmt400rhs diagrams
- dmt400rhs dimensions
- dmt400rhs dishwasher delay start
- dmt400rhs dishwasher manual
- dmt400rhs dishwasher review
- dmt400rhs door seal
- dmt400rhs drain
- dmt400rhs drain error
- dmt400rhs drain hose
- dmt400rhs drain pump
- dmt400rhs drying
- dmt400rhs error
- dmt400rhs error codes
- dmt400rhs filter
- dmt400rhs flashing heavy light
- dmt400rhs float
- dmt400rhs for sale
- dmt400rhs grinding sound
- dmt400rhs guide
- dmt400rhs heavy light blinking
- dmt400rhs install guide
- dmt400rhs installation guide
- dmt400rhs installation instructions
- dmt400rhs installation/owners manual
- dmt400rhs kick plate
- dmt400rhs leakage error
- dmt400rhs low level water error fix
- dmt400rhs low rinse lock
- dmt400rhs low water error
- dmt400rhs low water level error
- dmt400rhs lowes
- dmt400rhs manual pdf
- dmt400rhs no power
- dmt400rhs not cleaning
- dmt400rhs not draining
- dmt400rhs not draining fix
- dmt400rhs over-level water error
- dmt400rhs overfill
- dmt400rhs owners manual
- dmt400rhs parts
- dmt400rhs parts diagram
- dmt400rhs parts list
- dmt400rhs parts manual
- dmt400rhs power cord
- dmt400rhs price
- dmt400rhs pricing
- dmt400rhs problems
- dmt400rhs pump
- dmt400rhs ratings
- dmt400rhs recall
- dmt400rhs repair
- dmt400rhs repair manual
- dmt400rhs reset
- dmt400rhs sale
- dmt400rhs samsung dishwasher
- dmt400rhs samsung stainless steel dishwasher
- dmt400rhs serial number
- dmt400rhs service manual
- dmt400rhs troubleshooting
- dmt400rhs user manual
- dmt400rhs warranty
- dmt400rhs water level sensor
- dmt400rhs won't drain
- dmt400rhs xaa installation
- dmt400rhs xaa samsung
- dmt400rhs/x dishwasher
- dmt400rhs/x manual
- dmt400rhs/xaa samsung dishwasher
- samsung dishwasher dmt400rhs xaa
- samsung dmt400rhs 24 dishwasher
- samsung dmt400rhs best buy
- samsung dmt400rhs blinking delicate light
- samsung dmt400rhs blinking heavy light
- samsung dmt400rhs blinking lights
- samsung dmt400rhs bottom door seal
- samsung dmt400rhs bottom panel
- samsung dmt400rhs case sensor
- samsung dmt400rhs clean filter
- samsung dmt400rhs delicate light flashing
- samsung dmt400rhs dimensions
- samsung dmt400rhs dishwasher delay start
- samsung dmt400rhs dishwasher manual
- samsung dmt400rhs dishwasher review
- samsung dmt400rhs dishwasher reviews
- samsung dmt400rhs door seal
- samsung dmt400rhs drain
- samsung dmt400rhs drain error
- samsung dmt400rhs drain hose
- samsung dmt400rhs drain pump
- samsung dmt400rhs drying
- samsung dmt400rhs error codes
- samsung dmt400rhs filter
- samsung dmt400rhs float
- samsung dmt400rhs for sale
- samsung dmt400rhs grinding sound
- samsung dmt400rhs heavy light blinking
- samsung dmt400rhs installation
- samsung dmt400rhs installation guide
- samsung dmt400rhs installation instructions
- samsung dmt400rhs installation manual
- samsung dmt400rhs leakage error
- samsung dmt400rhs low water level error
- samsung dmt400rhs lowes
- samsung dmt400rhs manual
- samsung dmt400rhs no power
- samsung dmt400rhs not cleaning
- samsung dmt400rhs not draining
- samsung dmt400rhs not draining fix
- samsung dmt400rhs over-level water error
- samsung dmt400rhs overfill
- samsung dmt400rhs owners manual
- samsung dmt400rhs parts
- samsung dmt400rhs parts diagram
- samsung dmt400rhs parts list
- samsung dmt400rhs parts manual
- samsung dmt400rhs power cord
- samsung dmt400rhs price
- samsung dmt400rhs prices
- samsung dmt400rhs pricing
- samsung dmt400rhs problems
- samsung dmt400rhs recall
- samsung dmt400rhs repair
- samsung dmt400rhs repair manual
- samsung dmt400rhs reset
- samsung dmt400rhs sale
- samsung dmt400rhs service manual
- samsung dmt400rhs troubleshooting
- samsung dmt400rhs user manual
- samsung dmt400rhs warranty
- samsung dmt400rhs water level sensor
- samsung dmt400rhs won't drain
- samsung dmt400rhs/x dishwasher
- samsung dmt400rhs/xaa