User Manual (ENGLISH)
Page 18
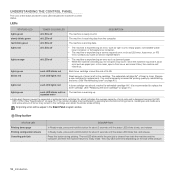
...front cover and close . Press this button for replacement. UNDERSTANDING THE CONTROL PANEL The color of its estimated cartridge lifea. It is recommended to ISO/ OEC 19752. (See "Specifications" on page 41.) lights green each LED lights red Small amount of toner is close it as an error such as jammed paper. &#... of print-outs and is booting up . This may take some amount of pages may be appear in the cartridge even when the printer stops printing. fast blinks green all LEDs off The machine is receiving data from both the machine and the computer, and then the ...
...front cover and close . Press this button for replacement. UNDERSTANDING THE CONTROL PANEL The color of its estimated cartridge lifea. It is recommended to ISO/ OEC 19752. (See "Specifications" on page 41.) lights green each LED lights red Small amount of toner is close it as an error such as jammed paper. &#... of print-outs and is booting up . This may take some amount of pages may be appear in the cartridge even when the printer stops printing. fast blinks green all LEDs off The machine is receiving data from both the machine and the computer, and then the ...

User Manual (ENGLISH)
Page 43
... not close. 11. Close the front cover firmly. If any toner cartridge is installed improperly, the front cover do not expose the imaging unit to light for your machine to protect it is not completely closed, the machine will not operate. Insert the waste toner container into the machine. • Don... it with a piece of its package. 9. If the front cover is firmly seated in to scratch the surface of the imaging unit. 8. Each LED blinks red in a repeated order. 5. Wait for about 1.5 minutes for more than a few minutes. Maintenance_ 43
... not close. 11. Close the front cover firmly. If any toner cartridge is installed improperly, the front cover do not expose the imaging unit to light for your machine to protect it is not completely closed, the machine will not operate. Insert the waste toner container into the machine. • Don... it with a piece of its package. 9. If the front cover is firmly seated in to scratch the surface of the imaging unit. 8. Each LED blinks red in a repeated order. 5. Wait for about 1.5 minutes for more than a few minutes. Maintenance_ 43
User Manual (ENGLISH)
Page 46
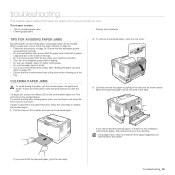
... the paper size and type" on page 34. Follow the instructions in the direction as shown below the paper capacity mark on the control panel lights red. To remove the jammed paper, open and close the front cover or rear cover. When a paper jam occurs, follow the next steps to ...the next step. Most of the printer and remove the jammed paper. 2. Find and remove the jammed paper. troubleshooting This chapter gives helpful information for avoiding paper jams • Clearing paper ...
... the paper size and type" on page 34. Follow the instructions in the direction as shown below the paper capacity mark on the control panel lights red. To remove the jammed paper, open and close the front cover or rear cover. When a paper jam occurs, follow the next steps to ...the next step. Most of the printer and remove the jammed paper. 2. Find and remove the jammed paper. troubleshooting This chapter gives helpful information for avoiding paper jams • Clearing paper ...


