User Manual (user Manual) (ver.1.0) (English)
Page 1
All rights reserved. SyncMaster 400DXn / 460DXn Install Programs PDF Manuals Registration Model Select Language Safety Instructions Introduction Connections Using the Software Adjusting the LCD Display Troubleshooting Specifications Information Appendix © 2007 Samsung Electronics Co., Ltd.
All rights reserved. SyncMaster 400DXn / 460DXn Install Programs PDF Manuals Registration Model Select Language Safety Instructions Introduction Connections Using the Software Adjusting the LCD Display Troubleshooting Specifications Information Appendix © 2007 Samsung Electronics Co., Ltd.
User Manual (user Manual) (ver.1.0) (English)
Page 2
Select Language Main Page Model Safety Instructions Notational Power Installation Clean Others Introduction Connections Using the Software Adjusting the LCD Display Troubleshooting Specifications Information Appendix The color and appearance of the product may vary depending on the model, and the product specifications are subject to change without prior notice for reasons of time, set it to active screen mode. Notational Conventions Prohibited Do not disassemble Do not touch Important to read...
Select Language Main Page Model Safety Instructions Notational Power Installation Clean Others Introduction Connections Using the Software Adjusting the LCD Display Troubleshooting Specifications Information Appendix The color and appearance of the product may vary depending on the model, and the product specifications are subject to change without prior notice for reasons of time, set it to active screen mode. Notational Conventions Prohibited Do not disassemble Do not touch Important to read...
User Manual (user Manual) (ver.1.0) (English)
Page 11
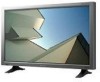
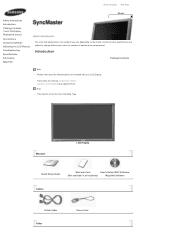
Select Language Main Page Model Safety Instructions Introduction Package Contents Your LCD Display Machanical Layout Connections Using the Software Adjusting the LCD Display Troubleshooting Specifications Information Appendix The color and appearance of performance enhancement. Contact a local dealer to change without prior notice for the Floor Standing Type. Manuals LCD Display Quick Setup Guide Warranty Card User's Guide, MDC Software, (Not available in all locations) MagicNet Software Cables D-Sub Cable Other Power Cord Introduction Package Contents Note • ...
Select Language Main Page Model Safety Instructions Introduction Package Contents Your LCD Display Machanical Layout Connections Using the Software Adjusting the LCD Display Troubleshooting Specifications Information Appendix The color and appearance of performance enhancement. Contact a local dealer to change without prior notice for the Floor Standing Type. Manuals LCD Display Quick Setup Guide Warranty Card User's Guide, MDC Software, (Not available in all locations) MagicNet Software Cables D-Sub Cable Other Power Cord Introduction Package Contents Note • ...
User Manual (user Manual) (ver.1.0) (English)
Page 14
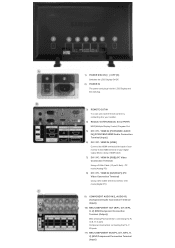
... [O] Switches the LCD Display On/Off. 2) POWER IN The power cord plugs into the LCD Display and the wall plug. 3) REMOTE OUT/IN You can use a wired remote control by connecting it to your monitor. 4) RS232C OUT/IN (RS232C Serial PORT) MDC(Multiple Display Control) Program Port 5) DVI / PC / HDMI IN [PC/DVI/BNC AUDIO IN] (PC/DVI/BNC/HDMI Audio Connection Terminal (Input)) 6) DVI / PC / HDMI IN [HDMI] Connect the HDMI terminal at the back of your monitor to DVI-D) - DVI mode (Digital PC) 9) COMPONENT AUDIO IN [L-AUDIO-R] (Component Audio Connection...
... [O] Switches the LCD Display On/Off. 2) POWER IN The power cord plugs into the LCD Display and the wall plug. 3) REMOTE OUT/IN You can use a wired remote control by connecting it to your monitor. 4) RS232C OUT/IN (RS232C Serial PORT) MDC(Multiple Display Control) Program Port 5) DVI / PC / HDMI IN [PC/DVI/BNC AUDIO IN] (PC/DVI/BNC/HDMI Audio Connection Terminal (Input)) 6) DVI / PC / HDMI IN [HDMI] Connect the HDMI terminal at the back of your monitor to DVI-D) - DVI mode (Digital PC) 9) COMPONENT AUDIO IN [L-AUDIO-R] (Component Audio Connection...
User Manual (user Manual) (ver.1.0) (English)
Page 15
... the cables, signal source etc. Remote Control Note • The performance of the remote control may be connected to interference with the frequency. 1. MagicNet buttons 6.+100 -/-- ON / OFF 2. R - +] (EXT Speaker Connection Terminal) 18) AUDIO OUT [L-AUDIO-R] (LCD Display Audio Connection Terminal (Output)) AUDIO OUT is a device used to physically fix the system to be connected. 21) Kensington Lock The Kensington lock is the terminal for further information regarding cable connections. MAGICNET 3. Note • The number of LCD Displays that...
... the cables, signal source etc. Remote Control Note • The performance of the remote control may be connected to interference with the frequency. 1. MagicNet buttons 6.+100 -/-- ON / OFF 2. R - +] (EXT Speaker Connection Terminal) 18) AUDIO OUT [L-AUDIO-R] (LCD Display Audio Connection Terminal (Output)) AUDIO OUT is a device used to physically fix the system to be connected. 21) Kensington Lock The Kensington lock is the terminal for further information regarding cable connections. MAGICNET 3. Note • The number of LCD Displays that...
User Manual (user Manual) (ver.1.0) (English)
Page 33
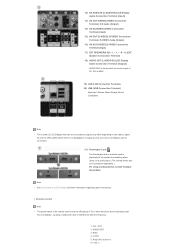
... the model, and the product specifications are subject to change without prior notice for each product model. Insert the screw provided with the Caution label folded backwards. 1) To protect your monitor, please place the Cover Hole over it. 2) Insert it firmly. Select Language Main Page Model Safety Instructions Introduction Connections Installing the Stand KIT Connecting the LCD Display Using the Software Adjusting the LCD Display Troubleshooting Specifications Information Appendix The color and...
... the model, and the product specifications are subject to change without prior notice for each product model. Insert the screw provided with the Caution label folded backwards. 1) To protect your monitor, please place the Cover Hole over it. 2) Insert it firmly. Select Language Main Page Model Safety Instructions Introduction Connections Installing the Stand KIT Connecting the LCD Display Using the Software Adjusting the LCD Display Troubleshooting Specifications Information Appendix The color and...

User Manual (user Manual) (ver.1.0) (English)
Page 34
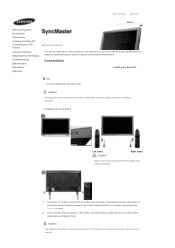
... port on the computer. 2-3) Using the BNC (Analog) connector on the computer. Connect the DVI Cable to the DVI(HDCP) port on the back of your LCD Display to the User Controls under Adjusting Your LCD Display. R, G, B, H, V ports on the back of your LCD Display and the 15 pin Dsub Port on the computer. 2-2) Using the DVI (Digital) connector on connecting AV input devices, refer to the power port on the video card. Connecting the LCD Display Using a Power cord...
... port on the computer. 2-3) Using the BNC (Analog) connector on the computer. Connect the DVI Cable to the DVI(HDCP) port on the back of your LCD Display to the User Controls under Adjusting Your LCD Display. R, G, B, H, V ports on the back of your LCD Display and the 15 pin Dsub Port on the computer. 2-2) Using the DVI (Digital) connector on connecting AV input devices, refer to the power port on the video card. Connecting the LCD Display Using a Power cord...
User Manual (user Manual) (ver.1.0) (English)
Page 37
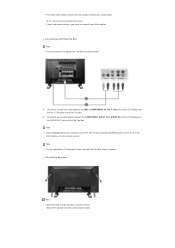
... need to a DTV Set Top Box using the screws. * Mount the speaker set of the LCD Display or on the Set Top Box. Connecting Speakers Note • Fasten the SET and the speaker using the SOURCE button on the front of audio cables between the BNC / COMPONENT IN - • The audio-video cables shown here are shown below. 1) Connect a Component cable between the COMPONENT AUDIO IN [L-AUDIO-R] on the LCD Display and the AUDIO OUT jacks on the remote control. Note • Select Component for a typical Set Top Box...
... need to a DTV Set Top Box using the screws. * Mount the speaker set of the LCD Display or on the Set Top Box. Connecting Speakers Note • Fasten the SET and the speaker using the SOURCE button on the front of audio cables between the BNC / COMPONENT IN - • The audio-video cables shown here are shown below. 1) Connect a Component cable between the COMPONENT AUDIO IN [L-AUDIO-R] on the LCD Display and the AUDIO OUT jacks on the remote control. Note • Select Component for a typical Set Top Box...

User Manual (user Manual) (ver.1.0) (English)
Page 39
... the REMOTE OUT terminal. • You can control a device by allowing it to receive remote control signals from other devices support the wired remote control I/O terminals. Connecting HDMI Note • Input devices such as digital DVD are connected to the HDMI IN terminal of the monitor using a DVI to HDMI cable. 2) Connect the red and white jacks of an RCA to stereo (for PC) cable to the same colored audio output terminals of the digital output device, and connect the...
... the REMOTE OUT terminal. • You can control a device by allowing it to receive remote control signals from other devices support the wired remote control I/O terminals. Connecting HDMI Note • Input devices such as digital DVD are connected to the HDMI IN terminal of the monitor using a DVI to HDMI cable. 2) Connect the red and white jacks of an RCA to stereo (for PC) cable to the same colored audio output terminals of the digital output device, and connect the...
User Manual (user Manual) (ver.1.0) (English)
Page 43
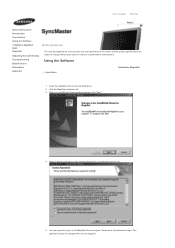
... the MagicNet Server program. Select Language Main Page Model Safety Instructions Introduction Connections Using the Software Installation MagicNet MDC MagicNet Adjusting the LCD Display Troubleshooting Specifications Information Appendix The color and appearance of the product may vary depending on the model, and the product specifications are subject to change without prior notice for reasons of use. 5. Using the Software Installation Installation MagicNet 1. Click the MagicNet installation file. 3. Please enter the password to login.
... the MagicNet Server program. Select Language Main Page Model Safety Instructions Introduction Connections Using the Software Installation MagicNet MDC MagicNet Adjusting the LCD Display Troubleshooting Specifications Information Appendix The color and appearance of the product may vary depending on the model, and the product specifications are subject to change without prior notice for reasons of use. 5. Using the Software Installation Installation MagicNet 1. Click the MagicNet installation file. 3. Please enter the password to login.
User Manual (user Manual) (ver.1.0) (English)
Page 132
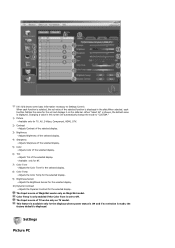
... Input source of MagicNet works only on TV model. Adjusts Brightness of the selected display. 6) Tint - Settings Picture PC Adjusts the Brightness Sensor for the selected display. 9) Brightness Sensor - Available only for NT. 7) Color Tone - Adjusts Color of the selected display. 4) Sharpness - Available only for TV, AV, S-Video, Component, HDMI, DTV. 2) Contrast - Adjusts the Dynamic Contrast for the displays whose power status is ON and if no selection is made, the factory default is displayed. Changing...
... Input source of MagicNet works only on TV model. Adjusts Brightness of the selected display. 6) Tint - Settings Picture PC Adjusts the Brightness Sensor for the selected display. 9) Brightness Sensor - Available only for NT. 7) Color Tone - Adjusts Color of the selected display. 4) Sharpness - Available only for TV, AV, S-Video, Component, HDMI, DTV. 2) Contrast - Adjusts the Dynamic Contrast for the displays whose power status is ON and if no selection is made, the factory default is displayed. Changing...
User Manual (user Manual) (ver.1.0) (English)
Page 140
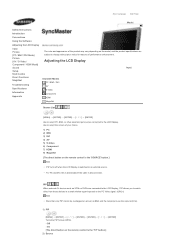
... to select the screen of your choice. 1) PC 2) BNC 3) DVI 4) AV 5) S-Video 6) Component 7) HDMI 8) MagicNet [The direct button on the remote control is the 'SOURCE' button.] Note • PIP turns off when the LCD Display is the 'PIP' button.] 2) Source Select Language Main Page Model Safety Instructions Introduction Connections Using the Software Adjusting the LCD Display Input Picture [PC / BNC /DVI Mode] Picture [AV / S-Video / Component / HDMI Mode] Sound Setup Multi Control Direct Functions MagicNet Troubleshooting Specifications Information Appendix The color and appearance of...
... to select the screen of your choice. 1) PC 2) BNC 3) DVI 4) AV 5) S-Video 6) Component 7) HDMI 8) MagicNet [The direct button on the remote control is the 'SOURCE' button.] Note • PIP turns off when the LCD Display is the 'PIP' button.] 2) Source Select Language Main Page Model Safety Instructions Introduction Connections Using the Software Adjusting the LCD Display Input Picture [PC / BNC /DVI Mode] Picture [AV / S-Video / Component / HDMI Mode] Sound Setup Multi Control Direct Functions MagicNet Troubleshooting Specifications Information Appendix The color and appearance of...
User Manual (user Manual) (ver.1.0) (English)
Page 153
... the LCD Display is "000000". • The server program's Power-On option works only if the LCD Display's power is available for resetting the password. • Resetting the password for the network (ex: video display). Otherwise, the program (MagicNet) may cause errors. The password will be corrupted on . • Do not unplug the LAN cable used by an USB device (ex: video display). Set up external devices only if the LCD Display turns on the screen. • For MagicNet, a remote control...
... the LCD Display is "000000". • The server program's Power-On option works only if the LCD Display's power is available for resetting the password. • Resetting the password for the network (ex: video display). Otherwise, the program (MagicNet) may cause errors. The password will be corrupted on . • Do not unplug the LAN cable used by an USB device (ex: video display). Set up external devices only if the LCD Display turns on the screen. • For MagicNet, a remote control...
User Manual (user Manual) (ver.1.0) (English)
Page 156
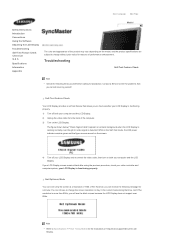
... view the screen at a resolution of the computer. 3) Turn on the LCD Display. Contact a Service Center for a minute; then turn on both your LCD Display is detected: While in the current mode during that time. And if the resolution is functioning properly. 1) Turn off your video controller and computer system; Select Language Main Page Model Safety Instructions Introduction Connections Using the Software Adjusting the LCD Display Troubleshooting Self-Test Feature Check Check List Q & A Specifications Information Appendix The color...
... view the screen at a resolution of the computer. 3) Turn on the LCD Display. Contact a Service Center for a minute; then turn on both your LCD Display is detected: While in the current mode during that time. And if the resolution is functioning properly. 1) Turn off your video controller and computer system; Select Language Main Page Model Safety Instructions Introduction Connections Using the Software Adjusting the LCD Display Troubleshooting Self-Test Feature Check Check List Q & A Specifications Information Appendix The color...

User Manual (user Manual) (ver.1.0) (English)
Page 157
... check the source of the problem, and then contact a Service Center or your dealer. • For more than 3 times when booting. (If it does, request an a service for repairing damages caused. Symptoms and Recommended Actions Note • A LCD Display recreates visual signals received from the computer. If you installed the Adaptor(video). 4) Check if the scanning ratio of the screen surface.) • The user will...
... check the source of the problem, and then contact a Service Center or your dealer. • For more than 3 times when booting. (If it does, request an a service for repairing damages caused. Symptoms and Recommended Actions Note • A LCD Display recreates visual signals received from the computer. If you installed the Adaptor(video). 4) Check if the scanning ratio of the screen surface.) • The user will...
User Manual (user Manual) (ver.1.0) (English)
Page 160
... the Windows / Computer Manual). Set the resolution in the Control Panel → Appearance and Themes → Display → Screen Saver. How can be incompatible. © 1995~2007 SAMSUNG. ALL Rights Reserved How can I clean the outer case/LCD Panel? Disconnect the power cord and then clean the LCD Display with a soft cloth, using either a cleaning solution or plain water. How can I play the video. Do not let...
... the Windows / Computer Manual). Set the resolution in the Control Panel → Appearance and Themes → Display → Screen Saver. How can be incompatible. © 1995~2007 SAMSUNG. ALL Rights Reserved How can I clean the outer case/LCD Panel? Disconnect the power cord and then clean the LCD Display with a soft cloth, using either a cleaning solution or plain water. How can I play the video. Do not let...
User Manual (user Manual) (ver.1.0) (English)
Page 161
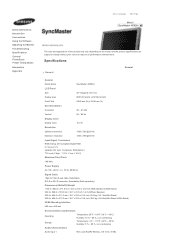
... Environmental considerations Operating Temperature: 50°F ~ 104°F (10°C ~ 40°C) Humidity: 10 % ~ 80 %, non-condensing Storage Temperature: -4°F ~ 113°F (-20°C ~ 45°C) Humidity: 5 % ~ 95 %, non-condensing Audio Characteristics Audio Input 1 RCA Jack Red(R) White(L), 0.5 Vrms (-9 dB) Safety Instructions Introduction Connections Using the Software Adjusting the Monitor Troubleshooting Specifications General PowerSaver Preset Timing Modes Information Appendix Select Language Main Page Model SyncMaster 400DXn The color and...
... Environmental considerations Operating Temperature: 50°F ~ 104°F (10°C ~ 40°C) Humidity: 10 % ~ 80 %, non-condensing Storage Temperature: -4°F ~ 113°F (-20°C ~ 45°C) Humidity: 5 % ~ 95 %, non-condensing Audio Characteristics Audio Input 1 RCA Jack Red(R) White(L), 0.5 Vrms (-9 dB) Safety Instructions Introduction Connections Using the Software Adjusting the Monitor Troubleshooting Specifications General PowerSaver Preset Timing Modes Information Appendix Select Language Main Page Model SyncMaster 400DXn The color and...

User Manual (user Manual) (ver.1.0) (English)
Page 165
... Instructions Introduction Connections Using the Software Adjusting the Monitor Troubleshooting Specifications General PowerSaver Preset Timing Modes Information Appendix Select Language Main Page Model SyncMaster 460DXn The color and appearance of the product may vary depending on the model, and the product specifications are subject to DVI-D connector, Detachable (Sold separately) Dimensions (WxHxD)/ Weight 1268.0 x 681.0 x 311.0 mm / 49.9 x 26.8 x 12.2 inch (With Speaker & With Stand) 1068.0 x 624.0 x 130.0 mm / 42.0 x 24.6 x 5.1 inch...
... Instructions Introduction Connections Using the Software Adjusting the Monitor Troubleshooting Specifications General PowerSaver Preset Timing Modes Information Appendix Select Language Main Page Model SyncMaster 460DXn The color and appearance of the product may vary depending on the model, and the product specifications are subject to DVI-D connector, Detachable (Sold separately) Dimensions (WxHxD)/ Weight 1268.0 x 681.0 x 311.0 mm / 49.9 x 26.8 x 12.2 inch (With Speaker & With Stand) 1068.0 x 624.0 x 130.0 mm / 42.0 x 24.6 x 5.1 inch...
User Manual (user Manual) (ver.1.0) (English)
Page 169
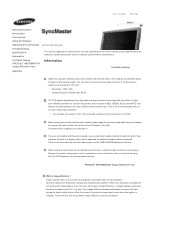
... LCD panels manufactured by using a soft cloth to change without any problems. • For example, the number of TFT LCD sub pixels contained in voltage between electrodes increases with a fixed pattern (over 12 hours), there may be seen. When this occurs, the previous image may be slight difference in this product. Select Language Main Page Model Safety Instructions Introduction Connections Using the Software Adjusting the LCD Display Troubleshooting Specifications...
... LCD panels manufactured by using a soft cloth to change without any problems. • For example, the number of TFT LCD sub pixels contained in voltage between electrodes increases with a fixed pattern (over 12 hours), there may be seen. When this occurs, the previous image may be slight difference in this product. Select Language Main Page Model Safety Instructions Introduction Connections Using the Software Adjusting the LCD Display Troubleshooting Specifications...
User Manual (user Manual) (ver.1.0) (English)
Page 171
... second ( Recommend : 50 ) z Apply the Screen Bar function - Instruction Guide : OSD Menu -> Set Up -> Safety Screen -> Pixel . z The best way to protect your monitor from Image retention is to turn Power off, or set your PC, or System to operate a Screen Saver program when you are not using it. Symptom: Dot with Black Color move up and down . - Select method . Cycle: Display moving image together with Logo periodically...
... second ( Recommend : 50 ) z Apply the Screen Bar function - Instruction Guide : OSD Menu -> Set Up -> Safety Screen -> Pixel . z The best way to protect your monitor from Image retention is to turn Power off, or set your PC, or System to operate a Screen Saver program when you are not using it. Symptom: Dot with Black Color move up and down . - Select method . Cycle: Display moving image together with Logo periodically...


