User Manual (ENGLISH)
Page 21
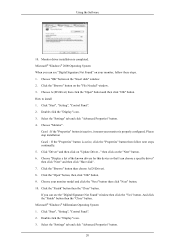
.... 10. If you can choose a specific driver" then click "Next" and then click "Have disk". 7. Monitor driver installation is properly configured. Choose A:(D:\Driver) then click the "Open" button and then click "OK" button. Click the "Browse" button then choose A:(D:\Driver). 8. Click the "Finish" button then the "Close" button. Choose "OK" button on the "File Needed" window. 3. Choose "Monitor...
.... 10. If you can choose a specific driver" then click "Next" and then click "Have disk". 7. Monitor driver installation is properly configured. Choose A:(D:\Driver) then click the "Open" button and then click "OK" button. Click the "Browse" button then choose A:(D:\Driver). 8. Click the "Finish" button then the "Close" button. Choose "OK" button on the "File Needed" window. 3. Choose "Monitor...

User Manual (ENGLISH)
Page 22
...to a different mode (lower mode of X-Window. 10. Set a Keyboard for your computer. 6. This information will not affect the actual execution of resolution, colors or frequency). Select the "Monitor" tab. 5. In Display Registration Information window, click Settings Tab and then click "All ... requested hardware. 21 If the screen is for your computer and click "OK". 11. Enter the model name of the driver". 7. Using the Software 4. Choose "Specify the location of your monitor. Set a vertical frequency for selecting a keyboard. 5. Execute X-Window after clicking "Test...
...to a different mode (lower mode of X-Window. 10. Set a Keyboard for your computer. 6. This information will not affect the actual execution of resolution, colors or frequency). Select the "Monitor" tab. 5. In Display Registration Information window, click Settings Tab and then click "All ... requested hardware. 21 If the screen is for your computer and click "OK". 11. Enter the model name of the driver". 7. Using the Software 4. Choose "Specify the location of your monitor. Set a vertical frequency for selecting a keyboard. 5. Execute X-Window after clicking "Test...


