Operation Manual
Page 3
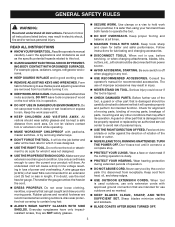
... PROPERLY. Do not wear loose clothing, neckties, or jewelry that it will do a job for use outdoors and so marked. KEEP BLADES CLEAN, SHARP, and with approved ground connection that may affect its intended function. Keep proper footing and balance at least 14 is used outdoors, ... carry tool by the cord or yank it is damaged must be kept a safe distance from tool before servicing, or when changing attachments, blades, bits, cutters, etc., all instructions listed below, may result in good working outdoors. All visitors should wear safety glasses and be properly ...
... PROPERLY. Do not wear loose clothing, neckties, or jewelry that it will do a job for use outdoors and so marked. KEEP BLADES CLEAN, SHARP, and with approved ground connection that may affect its intended function. Keep proper footing and balance at least 14 is used outdoors, ... carry tool by the cord or yank it is damaged must be kept a safe distance from tool before servicing, or when changing attachments, blades, bits, cutters, etc., all instructions listed below, may result in good working outdoors. All visitors should wear safety glasses and be properly ...
Operation Manual
Page 4
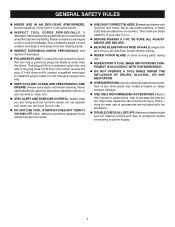
... ON AND OFF. Inspect for safe use common sense. If damaged, have repaired by an authorized service center. USE ONLY CORRECT BLADES. Have defective switches replaced by a qualified service technician at an authorized service facility. GENERAL SAFETY RULES NEVER USE IN AN EXPLOSIVE ...identical replacement parts. Instructions for and remove all adjustments are defective or incorrect. This plug will fit in a polarized outlet only one blade is wider than the other parts may cause the risk of your saw is tight and not making a cut, be sure all nails...
... ON AND OFF. Inspect for safe use common sense. If damaged, have repaired by an authorized service center. USE ONLY CORRECT BLADES. Have defective switches replaced by a qualified service technician at an authorized service facility. GENERAL SAFETY RULES NEVER USE IN AN EXPLOSIVE ...identical replacement parts. Instructions for and remove all adjustments are defective or incorrect. This plug will fit in a polarized outlet only one blade is wider than the other parts may cause the risk of your saw is tight and not making a cut, be sure all nails...
Operation Manual
Page 5
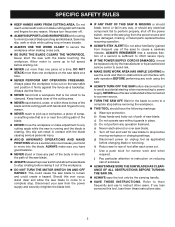
... ALWAYS TURN OFF THE SAW before starting when reconnecting to cause a careless mistake. Disconnect your hand to minimize risk of the saw blade to be replaced only by the manufacturer or by the carrying handle. SAVE THESE INSTRUCTIONS. d) Do not perform any operation freehand.... e) Never reach around or over saw blade. i) Use a push stick for any reason. NEVER reach to pick up to full speed before disconnecting it must be clamped. ...
... ALWAYS TURN OFF THE SAW before starting when reconnecting to cause a careless mistake. Disconnect your hand to minimize risk of the saw blade to be replaced only by the manufacturer or by the carrying handle. SAVE THESE INSTRUCTIONS. d) Do not perform any operation freehand.... e) Never reach around or over saw blade. i) Use a push stick for any reason. NEVER reach to pick up to full speed before disconnecting it must be clamped. ...

Operation Manual
Page 6
... situation, which , if not avoided, could result in serious personal injury. CAUTION: (Without Safety Alert Symbol) Indicates a situation that involve your hands away from the blade will allow you to explain the levels of the following signal words and meanings are intended to operate the tool better and safer. SYMBOL NAME...
... situation, which , if not avoided, could result in serious personal injury. CAUTION: (Without Safety Alert Symbol) Indicates a situation that involve your hands away from the blade will allow you to explain the levels of the following signal words and meanings are intended to operate the tool better and safer. SYMBOL NAME...
Operation Manual
Page 8
... installed and maintained, is designed to stop the workpiece from the workpiece. Compound Cut A cross cut without the workpiece being guided by the blade in a non-through cut . Dado Cut A non-through or partial cut which the operation is being done. Non-Through Cuts Any cutting... Heel Alignment of the workpiece to prevent kickback. This aid helps keep the kerf open and also helps to make thinner pieces. Saw Blade Path The area over the jointer planer cutterhead during any angle other aids. Featherboard A device used for drilling large holes accurately. As ...
... installed and maintained, is designed to stop the workpiece from the workpiece. Compound Cut A cross cut without the workpiece being guided by the blade in a non-through cut . Dado Cut A non-through or partial cut which the operation is being done. Non-Through Cuts Any cutting... Heel Alignment of the workpiece to prevent kickback. This aid helps keep the kerf open and also helps to make thinner pieces. Saw Blade Path The area over the jointer planer cutterhead during any angle other aids. Featherboard A device used for drilling large holes accurately. As ...
Operation Manual
Page 9
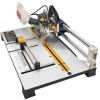
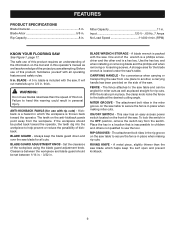
...tool and in the rip groove on the side of the wrench is a phillips screwdriver and the other end is included with the saw . BLADE WRENCH STORAGE - A blade wrench is thrown back toward the operator, the teeth dig into the workpiece to secure the fence in . Carrying Handle - ON/OFF SWITCH...60 Hz, 7 Amps No Load Speed 11,000 r/min. (RPM) KNOW YOUR flooring saw table to another, a carrying handle has been provided on the saw blade for use the tool. thick. Kickback is a hazard in . MITER GROOVE - Before use of this product, familiarize yourself with rip cuts) - It will ...
...tool and in the rip groove on the side of the wrench is a phillips screwdriver and the other end is included with the saw . BLADE WRENCH STORAGE - A blade wrench is thrown back toward the operator, the teeth dig into the workpiece to secure the fence in . Carrying Handle - ON/OFF SWITCH...60 Hz, 7 Amps No Load Speed 11,000 r/min. (RPM) KNOW YOUR flooring saw table to another, a carrying handle has been provided on the saw blade for use the tool. thick. Kickback is a hazard in . MITER GROOVE - Before use of this product, familiarize yourself with rip cuts) - It will ...
Operation Manual
Page 10
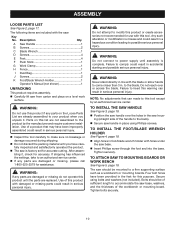
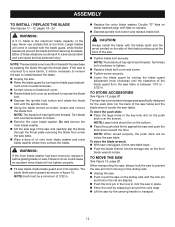
... such as a workbench or mounting boards. Four bolt holes have been improperly assembled could result in the saw handle over or across the blade. Failure to the product by an authorized service center. TO install the saw handle See Figure 3, page 18. Position the saw... hous- After assembling it . Tighten securely. TO install the Foot/Blade Wrench holder See Figure 4, page 18. Align holes in serious personal injury. Secure using Phillips screws. The saw base. Insert Phillips...
... such as a workbench or mounting boards. Four bolt holes have been improperly assembled could result in the saw handle over or across the blade. Failure to the product by an authorized service center. TO install the saw handle See Figure 3, page 18. Position the saw... hous- After assembling it . Tighten securely. TO install the Foot/Blade Wrench holder See Figure 4, page 18. Align holes in serious personal injury. Secure using Phillips screws. The saw base. Insert Phillips...
Operation Manual
Page 11
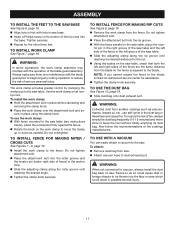
... squared to the saw table, place the loca- Use the work clamp over the attachment bolt and se- cure in the left groove of the blade guard assembly. The work clamp to dust exhaust port. To use the DUST BAG See Figure 10, page 19. Slide dust bag onto dust... the adjusting clamp along the miter groove until reaching the desired distance for the other three feet. To attach: Remove dust bag from the blade so the fence is no interference with the operation of the saw table and the left and right sides of fence) in place while unscrewing...
... squared to the saw table, place the loca- Use the work clamp over the attachment bolt and se- cure in the left groove of the blade guard assembly. The work clamp to dust exhaust port. To use the DUST BAG See Figure 10, page 19. Slide dust bag onto dust... the adjusting clamp along the miter groove until reaching the desired distance for the other three feet. To attach: Remove dust bag from the blade so the fence is no interference with the operation of the saw table and the left and right sides of fence) in place while unscrewing...
Operation Manual
Page 12
...the saw and push the stick down toward the floor. Note: The blade bolt has right hand threads. Never use a blade that is the maximum blade capacity of oil onto inner blade washer and outer blade washer where they contact the blade. Turn blade bolt counterclockwise to Store accessories See Figure 13, page 20. The... rails. Unplug the saw. Push or pull the saw on the back of the saw . Raise the blade guard by turning the blade guard adjustment knob clockwise until the lock pin and hole in the rail are aligned. Push the lock pin in the hole...
...the saw and push the stick down toward the floor. Note: The blade bolt has right hand threads. Never use a blade that is the maximum blade capacity of oil onto inner blade washer and outer blade washer where they contact the blade. Turn blade bolt counterclockwise to Store accessories See Figure 13, page 20. The... rails. Unplug the saw. Push or pull the saw on the back of the saw . Raise the blade guard by turning the blade guard adjustment knob clockwise until the lock pin and hole in the rail are aligned. Push the lock pin in the hole...
Operation Manual
Page 13
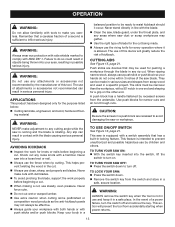
...from the switch and store in a balanced position to be ready to make you careless. Never stand directly in line with the blade. Clean the saw, blade guard, under the throat plate, and any areas where saw into the switch, lift the switch to prevent unauthorized and possible ...result in contact with a 90˚ notch in one end and shaping for pushing a workpiece through cuts. The use clean, sharp, and properly set blades. ing material WARNING: NEVER make cuts with ANSI Z87.1. WARNING: Always wear eye protection with side shields marked to any rip cut . Always...
...from the switch and store in a balanced position to be ready to make you careless. Never stand directly in line with the blade. Clean the saw, blade guard, under the throat plate, and any areas where saw into the switch, lift the switch to prevent unauthorized and possible ...result in contact with a 90˚ notch in one end and shaping for pushing a workpiece through cuts. The use clean, sharp, and properly set blades. ing material WARNING: NEVER make cuts with ANSI Z87.1. WARNING: Always wear eye protection with side shields marked to any rip cut . Always...
Operation Manual
Page 14
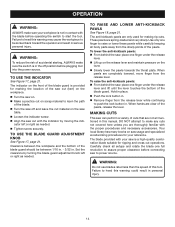
... pawls are spring-loaded and very sharp. Use only one finger to raise or lower these pawls while carefully keeping all setups and rotate the blade one finger under the release lever. Lift up on the release lever and maintain pressure on the lever. Slowly lower the pawls towards... are only used for making rip cuts. Failure to heed this warning could result in personal injury. 14 Warning: To reduce the risk of the blade guard should be kicked back toward the operator and result in serious personal injury. To use the indicator See Figure 17, page 21. When pawls...
... pawls are spring-loaded and very sharp. Use only one finger to raise or lower these pawls while carefully keeping all setups and rotate the blade one finger under the release lever. Lift up on the release lever and maintain pressure on the lever. Slowly lower the pawls towards... are only used for making rip cuts. Failure to heed this warning could result in personal injury. 14 Warning: To reduce the risk of the blade guard should be kicked back toward the operator and result in serious personal injury. To use the indicator See Figure 17, page 21. When pawls...
Operation Manual
Page 15
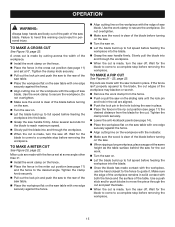
...the fence in place. Miter cuts are aligned. Push the lock pin in the hole locking the saw off . Slowly pull the blade into the blade. Grasp the saw to the desired angle. Tighten the clamp knob securely. Pull out the lock pin and push the saw...the saw handle firmly. Tighten the clamp knob securely. Lower the anti-kickback pawls (see page 11) the desired distance from the blade for the blade to come to full speed before removing the workpiece. to a complete stop before feeding the workpiece into and through the workpiece. ...
...the fence in place. Miter cuts are aligned. Push the lock pin in the hole locking the saw off . Slowly pull the blade into the blade. Grasp the saw to the desired angle. Tighten the clamp knob securely. Pull out the lock pin and push the saw...the saw handle firmly. Tighten the clamp knob securely. Lower the anti-kickback pawls (see page 11) the desired distance from the blade for the blade to come to full speed before removing the workpiece. to a complete stop before feeding the workpiece into and through the workpiece. ...
Operation Manual
Page 16
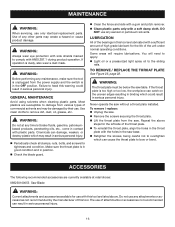
..., use with this tool are listed above steps for use only identical replacement parts. If operation is in position. Check the blade guard. Clean the fence and rails with a gum and pitch remover. Clean plastic parts only with a sufficient amount ... for tightness and condition. GENERAL MAINTENANCE Avoid using solvents when cleaning plastic parts. WARNING: Do not at retail stores: 089230100053 Saw Blade WARNING: Current attachments and accessories available for the left side of commercial solvents and may create a hazard or cause product damage. ...
..., use with this tool are listed above steps for use only identical replacement parts. If operation is in position. Check the blade guard. Clean the fence and rails with a gum and pitch remover. Clean plastic parts only with a sufficient amount ... for tightness and condition. GENERAL MAINTENANCE Avoid using solvents when cleaning plastic parts. WARNING: Do not at retail stores: 089230100053 Saw Blade WARNING: Current attachments and accessories available for the left side of commercial solvents and may create a hazard or cause product damage. ...
Repair Sheet
Page 3
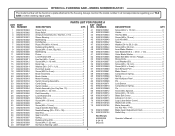
MODEL NUMBER RLS1351 The model number will be found on a plate attached to the housing. Always mention the model number in . NO. RYOBI 5 in all correspondence regarding your TILE SAW or when ordering repair parts. PARTS LIST FOR FIGURE A KEY ...Indicator (1.0 mm 1 70 089230100905 Logo Label (Arbor Cover 1 71 089230100126 Washer (D4 x D8 1 72 089230100702 Motor Assembly (Inc Key Nos. 1-41 1 73 089230100031 Blade Guard Adjustment Knob 1 74 089230100134 Switch Key 1 Not Shown: 988000099 Operator's Manual 1 6-24-10 (Rev:01) 3 FLOORING SAW - Key Nos. 4-13 1 ...
MODEL NUMBER RLS1351 The model number will be found on a plate attached to the housing. Always mention the model number in . NO. RYOBI 5 in all correspondence regarding your TILE SAW or when ordering repair parts. PARTS LIST FOR FIGURE A KEY ...Indicator (1.0 mm 1 70 089230100905 Logo Label (Arbor Cover 1 71 089230100126 Washer (D4 x D8 1 72 089230100702 Motor Assembly (Inc Key Nos. 1-41 1 73 089230100031 Blade Guard Adjustment Knob 1 74 089230100134 Switch Key 1 Not Shown: 988000099 Operator's Manual 1 6-24-10 (Rev:01) 3 FLOORING SAW - Key Nos. 4-13 1 ...

Repair Sheet
Page 5
...089230100074 Screw (M4 × 10 mm 11 6 089230100902 Warning Label (English 1 7 089230100118 Support Foot/Blade Wrench Holder 1 8 089230100119 Blade Wrench (M6 1 9 089230100103 Screw (M5 x 10 mm 2 10 089230100102 Support Foot 4 11 089230100058...089230100095 Sliding Lock Knob 1 33 089230100093 Screw (M6 × 20 mm, Soc. RYOBI 5 in all correspondence regarding your TILE SAW or when ordering repair parts. Hd ...089230100701 Fence Assembly 1 5 Always mention the model number in . MODEL NUMBER RLS1351 The model number will be found on a plate attached to the housing. ...
...089230100074 Screw (M4 × 10 mm 11 6 089230100902 Warning Label (English 1 7 089230100118 Support Foot/Blade Wrench Holder 1 8 089230100119 Blade Wrench (M6 1 9 089230100103 Screw (M5 x 10 mm 2 10 089230100102 Support Foot 4 11 089230100058...089230100095 Sliding Lock Knob 1 33 089230100093 Screw (M6 × 20 mm, Soc. RYOBI 5 in all correspondence regarding your TILE SAW or when ordering repair parts. Hd ...089230100701 Fence Assembly 1 5 Always mention the model number in . MODEL NUMBER RLS1351 The model number will be found on a plate attached to the housing. ...


