User Guide
Page 18
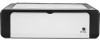
...or [inch] in this section is an example based on the operating system you are using. Click [Smart Organizing Monitor for SP 100 Series]. 3. Click [Smart Organizing Monitor for SP 100 Series Status]. 4. In the [Vertical: (148 to 216 mm)] box, enter the width. 7. 2. On the [...Status] tab, click [Change...]. 5. Open the front cover and tray extension. Click [Smart Organizing Monitor for SP 100 Series]. 3. Click [OK]. 9. Loading Paper 6. The actual procedure may vary depending on Windows 7. Specifying the paper type and paper size 1....
...or [inch] in this section is an example based on the operating system you are using. Click [Smart Organizing Monitor for SP 100 Series]. 3. Click [Smart Organizing Monitor for SP 100 Series Status]. 4. In the [Vertical: (148 to 216 mm)] box, enter the width. 7. 2. On the [...Status] tab, click [Change...]. 5. Open the front cover and tray extension. Click [Smart Organizing Monitor for SP 100 Series]. 3. Click [OK]. 9. Loading Paper 6. The actual procedure may vary depending on Windows 7. Specifying the paper type and paper size 1....
User Guide
Page 24
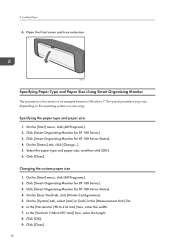
Message area Displays the status of this machine with a message. Click [Smart Organizing Monitor for SP 100 Series]. 3. Configuring the Machine Using Smart Organizing Monitor 3. Printing the Configuration Page 1. On the [Start] menu, click [All Programs]. 2. 4. Click [Smart Organizing Monitor for SP 100 Series Status]. 4. On the [User Tool] tab, select [Configuration Page] in the [List / Test:] list. 5. For details about error messages, see p.37 "Error and Status Messages Appear on the Smart Organizing Monitor". Click [Print]. 22
Message area Displays the status of this machine with a message. Click [Smart Organizing Monitor for SP 100 Series]. 3. Configuring the Machine Using Smart Organizing Monitor 3. Printing the Configuration Page 1. On the [Start] menu, click [All Programs]. 2. 4. Click [Smart Organizing Monitor for SP 100 Series Status]. 4. On the [User Tool] tab, select [Configuration Page] in the [List / Test:] list. 5. For details about error messages, see p.37 "Error and Status Messages Appear on the Smart Organizing Monitor". Click [Print]. 22
User Guide
Page 25
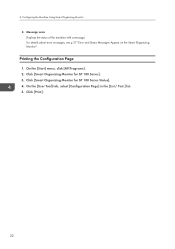
... the amount of the machine settings that will elapse before switching to it fails to modify the machine's settings. 1. Click [Smart Organizing Monitor for SP 100 Series]. 3. Change the settings if necessary. 6. Click [Smart Organizing Monitor for SP 100 Series Status]. 4. For more information on each setting item, see the Smart Organizing Monitor Help.
... the amount of the machine settings that will elapse before switching to it fails to modify the machine's settings. 1. Click [Smart Organizing Monitor for SP 100 Series]. 3. Change the settings if necessary. 6. Click [Smart Organizing Monitor for SP 100 Series Status]. 4. For more information on each setting item, see the Smart Organizing Monitor Help.
User Guide
Page 26
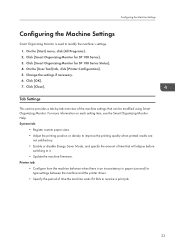
... [Printer Firmware Update...]. 6. Click [OK]. 7. On the [Start] menu, click [All Programs]. 2. On the [User Tool] tab, click [Printer Configuration]. 5. 4. Click [Smart Organizing Monitor for SP 100 Series]. 3. Configuring the Machine Using Smart Organizing Monitor Updating the Firmware • In no event shall the company be held liable to customers for damages...
... [Printer Firmware Update...]. 6. Click [OK]. 7. On the [Start] menu, click [All Programs]. 2. On the [User Tool] tab, click [Printer Configuration]. 5. 4. Click [Smart Organizing Monitor for SP 100 Series]. 3. Configuring the Machine Using Smart Organizing Monitor Updating the Firmware • In no event shall the company be held liable to customers for damages...


