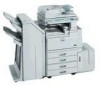
Operating Instructions
Page 1
For safe and correct use this machine and keep it handy for future reference. Operating Instructions Copy Reference 1 Placing Originals 2 Copying 3 Troubleshooting 4 User Tools (Copier/Document Server Features) 5 Specifications Read this manual carefully before you use , be sure to read the Safety Information in the "General Settings Guide" before using the machine.
Operating Instructions
Page 3
... to this machine. Manuals for This Machine The following manuals describe the operational procedures of this manual) Describes operations, functions, and troubleshooting for the machine's copier function. ❖ Facsimile Reference Describes operations, functions, and troubleshooting for the machine's facsimile function. ❖ Facsimile Reference Describes advanced facsimile functions such as Tray Paper...
Operating Instructions
Page 8
... Require Options 4 Control Panel...5 Display Panel ...7 1. Copying Basic Procedure 17 Interrupt Copy ...18 Original Beeper ...18 Job Preset ...19 Copying from the Bypass Tray 20 Copier Functions 23 Adjusting Image Density 23 Selecting Original Type Setting 24 Selecting Copy Paper 25 Preset Reduce/Enlarge 28 Zoom ...29 Auto Reduce/Enlarge 30...
Operating Instructions
Page 9
... Want 80 When Memory Is Full 83 4. Specifications Combination Chart 105 Supplementary Informations 106 INDEX...119 vii User Tools (Copier/Document Server Features) User Tools Menu (Copier/Document Server Features 85 Accessing User Tools (Copier/Document Server Features 91 Changing Default Settings 91 Exiting User Tools ...91 General Features P.1/4 92 General Features P.2/4 94...
Operating Instructions
Page 16
... stop a copy job in progress. 15. {#} key Press to the image quality settings before starting a long copy run. Press to select the following functions: • Copier • Document Server • Facsimile • Printer • Scanner 18. Function keys Press to start copying.
Operating Instructions
Page 25
..., and then press the {Start} key. C Place the first part of an original, and ❒ When [Batch] is placed page by page in User Tools (Copier/Document Server Features), so that can be reduced. ❒ You can place originals of two different sizes at the same time, the machine automatically checks...
Operating Instructions
Page 33
... density You can adjust foreground density while leaving the background unchanged. B Press [Lighter] or [Darker] to adjust 2 The machine automatically adjusts the image density. Copier Functions Copier Functions Adjusting Image Density Manual image density A There are three types of the overall original in seven increments. ❖ Combined auto and manual image density...
Operating Instructions
Page 35
... the paper trays set to [No display] or [Recycled paper] in Paper Type and also set to copy onto: a paper tray, bypass tray or LCT. Copier Functions Selecting Copy Paper There are two ways to select copy paper: ❖ Auto Paper Select The machine selects a suitable size of copy paper automatically...
Operating Instructions
Page 37
..." or 11" u 17" GCROTA4E ❒ You cannot use the Rotated Copy function when enlarging onto A3, B4 JIS or 11" u 17", 81/2" u 14" size paper. Copier Functions -Rotated copy If the orientation in the L orientation. See p.92 "Auto Tray Switching". ❒ You cannot use the Rotated Copy function when "Left 2" or...
Operating Instructions
Page 39
Zoom You can also select a preset ratio near the desired ratio using [Reduce] or [Enlarge]. 2 B Adjust the ratio with [n] or [o]. Ratio]. C Press [#]. Copier Functions B A Press [Create Margin] displayed on the initial display. C Place your originals, and then press the {Start} key. To change the ratio in increments of ...
Operating Instructions
Page 41
Copier Functions B Press [Specifd. Note ❒ To change the length after pressing [#], select [Original] or [Copy] and enter the desired length. G Press [OK]. Horizontal ratio 2. Ratio]. ...
Operating Instructions
Page 43
... and automatically sort copies. E Enter the horizontal size of the original with the number keys, and then press [#]. G Enter the vertical size of the origi- Copier Functions A Press [Reduce/Enlarge]. Reference Related initial settings 2 p.103 "Select Stack Function" B Press [Specifd. Ratio]. F Enter the vertical size of the copy with the number...
Operating Instructions
Page 45
... [Suspend] after all the originals have been scanned. D Press [Continue]. B Press the {Sample Copy} key. C If the sample is displayed, press the {Clear/Stop} key. Copier Functions Note ❒ When placing an original on the exposure glass, start with the number keys, and then press the {#} key. Note ❒ This function...
Operating Instructions
Page 47
... in the orientation in size and orientation to your original, the staple positions are required for this function. Each copy set the original facing downwards. Copier Functions Staple An optional finisher and the bridge unit are as follows: 37
Operating Instructions
Page 49
❖ 2 Tray finisher STAPLEAE Top Copier Functions Original location Exposure glass ADF K Stapling position *1 2 L K Top Slant STAPLEBE STAPLECE L K L Bottom STAPLEDE K L Left 2 STAPLE25 STAPLE26 STAPLE27 STAPLE28 STAPLE29 *2 STAPLE30 STAPLE31 STAPLE32 STAPLE33 39
Operating Instructions
Page 51
STAPLEDE Left 2 Original location Exposure glass ADF K L Copier Functions Stapling position *1 *2 2 K STAPLE31 STAPLE32 STAPLE33 STAPLEEE Top 2 L STAPLE22ADA STAPLE23ADA *2 STAPLE24ADA L STAPLE10ADA STAPLE14ADA STAPLE20ADA Saddle Stitch STAPLEFE K STAPLE34 STAPLE35 STAPLE36 STAPLE37 STAPLE38 *1 This table shows the stapling positions, not the orientation of delivery. *2 Not available for A3 and B4 JIS size paper. STAPLE39 41
Operating Instructions
Page 53
You can make punch holes in copies. ❖ 2 holes 2 ❖ 3 holes GCPNCH1E ❖ 4 holes GCPNCH3E GCPNCH0E Note ❒ You cannot use the bypass tray with this function. Copier Functions Punch The optional 2 Tray finisher and the bridge unit are required for this function. ❒ The relationship between the orientation in which you place the original and the punch hole positions is as follows: 43
Operating Instructions
Page 55
Original location Exposure glass ADF 2 holes K Copier Functions Punch hole positions *1 L 2 3 holes K 90º Turn L 4 holes K L *1 This table shows the punch hole positions, not the orientation of the punch hole positions. A Select one of delivery. B Enter the number of copy sets with the number keys. C Place your originals, and then press the {Start} key. 45
Operating Instructions
Page 57
Copier Functions A Press [Dup./Combine/Series]. ❒ When placing an original on the bottom. In that case, proceed to be copied. See p.47 "Originals and copy ...
Operating Instructions
Page 59
... 4 Pages o Combine 2 Side Copies 4 one-sided originals to combine, and then press [OK]. A Press [Dup./Combine/Series]. inal, and then press [Combine 1 Side] for Orig- Copier Functions Two-Sided Combine Combines various pages of originals to one sheet with two pages per side. 1. D Select the paper size.