
User Guide
Page 5
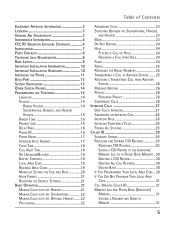
...Line 15 Delay Ring 16 Phone ID 16 Phone Name 17 Intercom Auto Answer 17 Flash Time 18 Call Alert Tone 18 No Unknown/Blocked 18 Display Contrast 19 Local Area Code 19 Regional Area Codes 19 Manually Setting the Time and ...RF Radiation Exposure Statement 4 Introduction 7 Parts Checklist 8 Telephone Jack Requirements 8 Base Layout 9 Important Installation Information 10 Important Installation Guidelines 10 Installing the Phone 11 Data Port 13 System Verification 13 Other System Phones 14 Programming the Telephone 14 Language 14 Volume 14 Ringer Volume 14 Speakerphone, ...
...Line 15 Delay Ring 16 Phone ID 16 Phone Name 17 Intercom Auto Answer 17 Flash Time 18 Call Alert Tone 18 No Unknown/Blocked 18 Display Contrast 19 Local Area Code 19 Regional Area Codes 19 Manually Setting the Time and ...RF Radiation Exposure Statement 4 Introduction 7 Parts Checklist 8 Telephone Jack Requirements 8 Base Layout 9 Important Installation Information 10 Important Installation Guidelines 10 Installing the Phone 11 Data Port 13 System Verification 13 Other System Phones 14 Programming the Telephone 14 Language 14 Volume 14 Ringer Volume 14 Speakerphone, ...

User Guide
Page 16
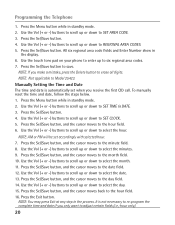
... Central Office ring. 1. A maximum of 16 phones can be connected in the display. Programming the Telephone Delay Ring Use this setting to the system. Press the Sel/Save button to SET PHONE OPTIONS. 3. Press the Sel/Save button. 4. If you manually select a phone ID that you set the phone ID, or press any time to 2 rings...
... Central Office ring. 1. A maximum of 16 phones can be connected in the display. Programming the Telephone Delay Ring Use this setting to the system. Press the Sel/Save button to SET PHONE OPTIONS. 3. Press the Sel/Save button. 4. If you manually select a phone ID that you set the phone ID, or press any time to 2 rings...
User Guide
Page 20
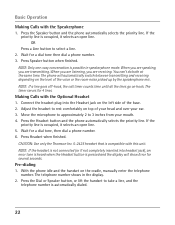
... in the display. 6. Press the Sel/Save button. 4. Use the touch tone pad on your phone to enter up or down to six regional area codes. 7. NOTE: Not applicable to the month...Press the Sel/Save button, and the cursor moves to the minute field. 8. hour only). 20 Programming the Telephone 1. Press the Sel/Save button, and the cursor moves to the hour field. 6. Press the Exit button. ... Sel/Save button to the date field. 12. NOTE: If you receive the first CID call. Manually Setting the Time and Date The time and date is not necessary to re-program the complete time ...
... in the display. 6. Press the Sel/Save button. 4. Use the touch tone pad on your phone to enter up or down to six regional area codes. 7. NOTE: Not applicable to the month...Press the Sel/Save button, and the cursor moves to the minute field. 8. hour only). 20 Programming the Telephone 1. Press the Sel/Save button, and the cursor moves to the hour field. 6. Press the Exit button. ... Sel/Save button to the date field. 12. NOTE: If you receive the first CID call. Manually Setting the Time and Date The time and date is not necessary to re-program the complete time ...
User Guide
Page 22
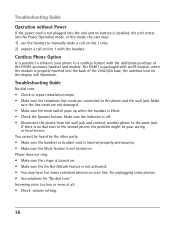
..., you are transmitting. The timer serves for a dial tone, then dial a phone number. 6. Press Headset when finished. NOTE: If the headset is occupied, it selects an open line. 5. The telephone number shows in speakerphone mode. Wait for several seconds. When you are listening, ...priority line is not connected (or if not completely inserted into the Headset jack on the cradle, manually enter the telephone number. Press the Headset button and the phone automatically selects the priority line. Making Calls with the Speakerphone 1. OR Press a Line button to take...
..., you are transmitting. The timer serves for a dial tone, then dial a phone number. 6. Press Headset when finished. NOTE: If the headset is occupied, it selects an open line. 5. The telephone number shows in speakerphone mode. Wait for several seconds. When you are listening, ...priority line is not connected (or if not completely inserted into the Headset jack on the cradle, manually enter the telephone number. Press the Headset button and the phone automatically selects the priority line. Making Calls with the Speakerphone 1. OR Press a Line button to take...
User Guide
Page 36
... tone • Check or repeat installation steps: • Make sure the telephone line cords are not damaged. • Make sure the hook switch pops up when the handset is off. • Disconnect the phone from the wall jack and connect another phone to manually make a call on line 1 only, 2) answer a call on . You cannot be...
... tone • Check or repeat installation steps: • Make sure the telephone line cords are not damaged. • Make sure the hook switch pops up when the handset is off. • Disconnect the phone from the wall jack and connect another phone to manually make a call on line 1 only, 2) answer a call on . You cannot be...

User Guide
Page 43
...with the Handset 21 Making Calls with the Optional Headset 22 Making Calls with the Speakerphone 22 Manually Setting the Time and Date 20 Memory Delete/Clear 34 Memory Log and Phone Book (Directory) Memory 31 Message Waiting 26 Mute 23 N No Unknown/Blocked 18 O One-... By Battery 35 Operation without Power 36 Other System Phones 14 P Paging All Stations 29 Parts Checklist 8 Phone ID 16 Phone Name 17 Placing a Call on Hold 24 Pre-dialing 22 Priority Line 15 Privacy 26 Programming the Telephone 14 Providing Privacy 26 R Receiving a Transferred Call ...
...with the Handset 21 Making Calls with the Optional Headset 22 Making Calls with the Speakerphone 22 Manually Setting the Time and Date 20 Memory Delete/Clear 34 Memory Log and Phone Book (Directory) Memory 31 Message Waiting 26 Mute 23 N No Unknown/Blocked 18 O One-... By Battery 35 Operation without Power 36 Other System Phones 14 P Paging All Stations 29 Parts Checklist 8 Phone ID 16 Phone Name 17 Placing a Call on Hold 24 Pre-dialing 22 Priority Line 15 Privacy 26 Programming the Telephone 14 Providing Privacy 26 R Receiving a Transferred Call ...


