User Guide
Page 3
... B digital device, pursuant to maintain uninterrupted service. Important Information 2 Rights of the Telephone Company Should your equipment cause trouble on a circuit different from the U.S. Where prior notice is not practicable and the circumstances warrant such action, the telephone company may make changes in its business and not inconsistent with the instructions, may cause harmful interference to procedures set forth...
... B digital device, pursuant to maintain uninterrupted service. Important Information 2 Rights of the Telephone Company Should your equipment cause trouble on a circuit different from the U.S. Where prior notice is not practicable and the circumstances warrant such action, the telephone company may make changes in its business and not inconsistent with the instructions, may cause harmful interference to procedures set forth...
User Guide
Page 5
... Call Screening 23 Introduction 7 Message Alert 23 Parts Checklist 7 Remote Password 24 Telephone Jack Requirements 7 Restore Setting 24 Installation 8 Telephone Operation 24 Digital Security System 8 Making Calls with the Cordless Handset24 Your cordless phone uses a digital security Making Calls in the Speakerphone mode system to protect against false ringing, (from the base 24 unauthorized access, and charges to your Making Call in the Speakerphone mode phone line 8 (from Another Register 17 Extension 28 Remove Handset 17 Ringer On/Off and Ringer Volume...
... Call Screening 23 Introduction 7 Message Alert 23 Parts Checklist 7 Remote Password 24 Telephone Jack Requirements 7 Restore Setting 24 Installation 8 Telephone Operation 24 Digital Security System 8 Making Calls with the Cordless Handset24 Your cordless phone uses a digital security Making Calls in the Speakerphone mode system to protect against false ringing, (from the base 24 unauthorized access, and charges to your Making Call in the Speakerphone mode phone line 8 (from Another Register 17 Extension 28 Remove Handset 17 Ringer On/Off and Ringer Volume...
User Guide
Page 6
... Display Messages 40 Handset Sound Signals 40 Troubleshooting Guide 41 Telephone Solutions 41 No dial tone 41 Dial tone is restored to Phone Book Memory 32 Deleting a CID Record 32 Deleting All Call Records 32 Dialing Back 32 If You Programmed Your Local Area Code 32 If You Did Not Program Your Local Area Code 33 Call Waiting Caller ID 33 Memory Log and Phone Book (Directory) Memory 33 Adding Phone Book Entries 33 Storing Record in One-Touch Dialing (Only applicable for base 34 Reviewing Phone Book Records...
... Display Messages 40 Handset Sound Signals 40 Troubleshooting Guide 41 Telephone Solutions 41 No dial tone 41 Dial tone is restored to Phone Book Memory 32 Deleting a CID Record 32 Deleting All Call Records 32 Dialing Back 32 If You Programmed Your Local Area Code 32 If You Did Not Program Your Local Area Code 33 Call Waiting Caller ID 33 Memory Log and Phone Book (Directory) Memory 33 Adding Phone Book Entries 33 Storing Record in One-Touch Dialing (Only applicable for base 34 Reviewing Phone Book Records...
User Guide
Page 8
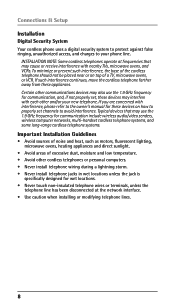
... interference, the base of the cordless telephone should not be placed near or on how to properly set , these appliances. Certain other and/or your phone line. Connections & Setup Installation Digital Security System Your cordless phone uses a digital security system to protect against false ringing, unauthorized access, and charges to your new telephone. Typical devices that may cause or receive interference with each other communications devices may also use the 1.9 GHz frequency for communication...
... interference, the base of the cordless telephone should not be placed near or on how to properly set , these appliances. Certain other and/or your phone line. Connections & Setup Installation Digital Security System Your cordless phone uses a digital security system to protect against false ringing, unauthorized access, and charges to your new telephone. Typical devices that may cause or receive interference with each other communications devices may also use the 1.9 GHz frequency for communication...
User Guide
Page 14
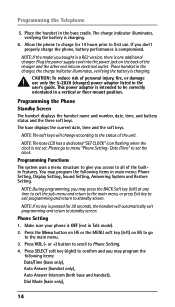
... go to standby screen. Programming the Phone Standby Screen The handset displays the handset name and number, date, time, and battery status and the three soft keys. NOTE: The base LCD has a dedicated "SET CLOCK" icon flashing when the clock is charging. 6. Programming Functions The system uses a menu structure to give you may program the following items: Date/Time (base only), Auto Answer (handset only), Auto Answer Intercom (both base and handset), Dial Mode (base only), 14 Phone Setting 1. or +) button to scroll to...
... go to standby screen. Programming the Phone Standby Screen The handset displays the handset name and number, date, time, and battery status and the three soft keys. NOTE: The base LCD has a dedicated "SET CLOCK" icon flashing when the clock is charging. 6. Programming Functions The system uses a menu structure to give you may program the following items: Date/Time (base only), Auto Answer (handset only), Auto Answer Intercom (both base and handset), Dial Mode (base only), 14 Phone Setting 1. or +) button to scroll to...
User Guide
Page 15
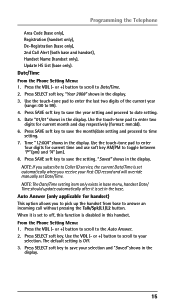
... digits for handset) This option allows you subscribe to 99). 4. or +) button to scroll to toggle between "P" (pm) and "A" (am). 8. Programming the Telephone Area Code (base only), Registration (handset only), De-Registration (base only), 2nd Call Alert (both base and handset), Handset Name (handset only), Update HS List (base only). Press SELECT soft key. Press SAVE soft key to save the month/date setting and proceed to time setting. 7. Auto Answer (only applicable for current time and use...
... digits for handset) This option allows you subscribe to 99). 4. or +) button to scroll to toggle between "P" (pm) and "A" (am). 8. Programming the Telephone Area Code (base only), Registration (handset only), De-Registration (base only), 2nd Call Alert (both base and handset), Handset Name (handset only), Update HS List (base only). Press SELECT soft key. Press SAVE soft key to save the month/date setting and proceed to time setting. 7. Auto Answer (only applicable for current time and use...
User Guide
Page 16
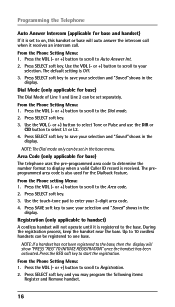
... the display will auto answer the intercom call when it receives an intercom call. Press the VOL (- NOTE: If a handset has not been registered to select L1 or L2. 4. Press the VOL (- or +) button to scroll to display when a valid Caller ID record is received. Area Code (only applicable for base) The telephone uses the pre-programmed area code to determine the number format to the Dial mode. 2. From the Phone setting Menu: 1. Use...
... the display will auto answer the intercom call when it receives an intercom call. Press the VOL (- NOTE: If a handset has not been registered to select L1 or L2. 4. Press the VOL (- or +) button to scroll to display when a valid Caller ID record is received. Area Code (only applicable for base) The telephone uses the pre-programmed area code to determine the number format to the Dial mode. 2. From the Phone setting Menu: 1. Use...

User Guide
Page 19
.... Press SELECT soft key. 3. Press SELECT soft key. Backlight (Only applicable for both lines. 4. Use the VOL (- or +) button to save your phone is English. 4. Press SELECT soft key to select Always On or Automatic. 3. Ring Tone There are Melody 1 to the Backlight. 2. Make sure your selection and "Saved" shows in base and handset: Ring Tone, Ring Volume and Key Tone. Press SELECT soft key. 3. From the Sound Setting Menu: 1.
.... Press SELECT soft key. 3. Press SELECT soft key. Backlight (Only applicable for both lines. 4. Use the VOL (- or +) button to save your phone is English. 4. Press SELECT soft key to select Always On or Automatic. 3. Ring Tone There are Melody 1 to the Backlight. 2. Make sure your selection and "Saved" shows in base and handset: Ring Tone, Ring Volume and Key Tone. Press SELECT soft key. 3. From the Sound Setting Menu: 1.
User Guide
Page 20
... the VOL (- Use the VOL (- Press SELECT soft key to save your selection and the status shows in the display. 20 The default setting is OFF (not in base: On/Off Status, OGA Playback, OGA Record, Set OGA, Set Office Time, Ring Delay, Message Length, Call Screening, Message Alert, Remote Password. or +) button to scroll to your selection and "Saved" shows in the display. Programming the Telephone Ring Volume There are 5 volume levels and OFF...
... the VOL (- Use the VOL (- Press SELECT soft key to save your selection and the status shows in the display. 20 The default setting is OFF (not in base: On/Off Status, OGA Playback, OGA Record, Set OGA, Set Office Time, Ring Delay, Message Length, Call Screening, Message Alert, Remote Password. or +) button to scroll to your selection and "Saved" shows in the display. Programming the Telephone Ring Volume There are 5 volume levels and OFF...
User Guide
Page 24
... unit reset to dial stored phone number. 3. Telephone Operation Making Calls with the Cordless Handset 1. Press the Speaker button (in another (remote) location. Wait for you . Press the Speaker button when finished. The current Remote password shows in the display. 5. Press SELECT soft key. displays on the base. 2. Making Calls in the Speakerphone mode (from a tone dialing telephone in base), the unit will pick the available line for you . -OR- If both 2 lines. 24 Telephone Operation Remote Password You can access the answering system from the base) 1. The security code...
... unit reset to dial stored phone number. 3. Telephone Operation Making Calls with the Cordless Handset 1. Press the Speaker button (in another (remote) location. Wait for you . Press the Speaker button when finished. The current Remote password shows in the display. 5. Press SELECT soft key. displays on the base. 2. Making Calls in the Speakerphone mode (from a tone dialing telephone in base), the unit will pick the available line for you . -OR- If both 2 lines. 24 Telephone Operation Remote Password You can access the answering system from the base) 1. The security code...
User Guide
Page 25
... telephone number will be used. 5. With the phone idle, manually enter the telephone number. Answering a Call For cordless handset: 1. When finished, press END button. 25 Plug the headset into headset jack), an error tone is heard when the Headset button is not connected (or if not completely inserted into the Headset jack on base only), Speaker button, Talk button (handset only), or Line 1 or Line 2 button to answer the call in receiver mode. 4. Wait for a dial tone then dial the phone number. 4. Wait for a dial tone, and then dial the phone number. 7. Press Headset...
... telephone number will be used. 5. With the phone idle, manually enter the telephone number. Answering a Call For cordless handset: 1. When finished, press END button. 25 Plug the headset into headset jack), an error tone is heard when the Headset button is not connected (or if not completely inserted into the Headset jack on base only), Speaker button, Talk button (handset only), or Line 1 or Line 2 button to answer the call in receiver mode. 4. Wait for a dial tone then dial the phone number. 4. Wait for a dial tone, and then dial the phone number. 7. Press Headset...
User Guide
Page 27
... a Line button to disable (silence) an incoming ring signal, intercom ring. When the phone is set at individual telephones to dial the phone number. 27 Use the VOL (- When there is activated, the unit automatically answers the intercom call forwarding, which are available, Line 1 will not ring. 1. or +) button to dial out the number. NOTE: If Intercom Auto Answer is an incoming call or an intercom call, the status indicators function as "P" in the dialing sequence, and is activated. Press the DIAL soft key...
... a Line button to disable (silence) an incoming ring signal, intercom ring. When the phone is set at individual telephones to dial the phone number. 27 Use the VOL (- When there is activated, the unit automatically answers the intercom call forwarding, which are available, Line 1 will not ring. 1. or +) button to dial out the number. NOTE: If Intercom Auto Answer is an incoming call or an intercom call, the status indicators function as "P" in the dialing sequence, and is activated. Press the DIAL soft key...
User Guide
Page 28
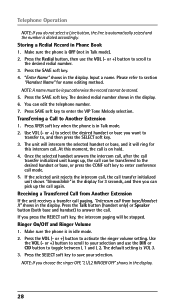
... base you can edit the telephone number. 7. Ringer On/Off and Ringer Volume 1. The default setting is on hold. 4. Telephone Operation NOTE: If you press the REJECT soft key, the intercom paging will ring for name editing method. Make sure the phone is in the display. Please refer to answer the call mode. 5. Press XFER soft key when the phone is dialed accordingly. Press the Talk button (handset only) or Speaker button (both base and handset) to section "Handset...
... base you can edit the telephone number. 7. Ringer On/Off and Ringer Volume 1. The default setting is on hold. 4. Telephone Operation NOTE: If you press the REJECT soft key, the intercom paging will ring for name editing method. Make sure the phone is in the display. Please refer to answer the call mode. 5. Press XFER soft key when the phone is dialed accordingly. Press the Talk button (handset only) or Speaker button (both base and handset) to section "Handset...
User Guide
Page 30
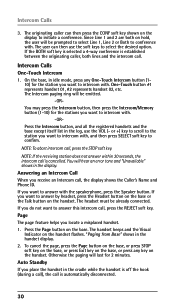
... idle mode, press any key on the handset flashes. If you want to answer by headset, press the Headset button on the base or the Talk button on the base. Press the Intercom button, and all the registered handsets and the base except itself list in the log, use the soft keys to the station you receive an Intercom call is off the hook (during a call), the call , the display shows the Caller's Name and Phone...
... idle mode, press any key on the handset flashes. If you want to answer by headset, press the Headset button on the base or the Talk button on the base. Press the Intercom button, and all the registered handsets and the base except itself list in the log, use the soft keys to the station you receive an Intercom call is off the hook (during a call), the call , the display shows the Caller's Name and Phone...

User Guide
Page 33
... base). The Phone Book and each Intercom/Memory Log stores up to 99 records) or an Intercom/Memory (10 buttons located to see 10-digit numbers (i.e. 234-555-1234). 2. Press the NEW soft key. TIP: Press the #pause button twice to display the number you hear the call . Memory Number of this unit, you 're talking on hold and answer the incoming call waiting beep. To dial the displayed number, select a Line or press Talk, Spk, or Headset button. Use the CID button...
... base). The Phone Book and each Intercom/Memory Log stores up to 99 records) or an Intercom/Memory (10 buttons located to see 10-digit numbers (i.e. 234-555-1234). 2. Press the NEW soft key. TIP: Press the #pause button twice to display the number you hear the call . Memory Number of this unit, you 're talking on hold and answer the incoming call waiting beep. To dial the displayed number, select a Line or press Talk, Spk, or Headset button. Use the CID button...
User Guide
Page 36
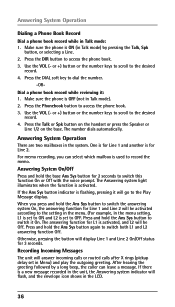
... press the Speaker or Line 1/2 on the base. One is for Line 1 and Line 2 will answer incoming calls or routed calls after X rings (pickup delay set to switch this function On or Off with the voice prompt. Press and hold the base Ans Sys button for 3 seconds. Make sure the phone is activated. or +) button or the number keys to scroll to dial the number. -OR- The number dials automatically. Answering System Operation Dialing a Phone Book Record Dial a phone book record while in...
... press the Speaker or Line 1/2 on the base. One is for Line 1 and Line 2 will answer incoming calls or routed calls after X rings (pickup delay set to switch this function On or Off with the voice prompt. Press and hold the base Ans Sys button for 3 seconds. Make sure the phone is activated. or +) button or the number keys to scroll to dial the number. -OR- The number dials automatically. Answering System Operation Dialing a Phone Book Record Dial a phone book record while in...
User Guide
Page 39
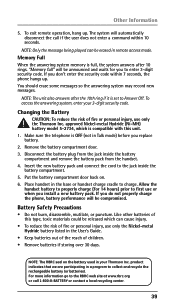
... in remote access mode. Make sure the telephone is compatible with this type, toxic materials could be released which can be erased in Talk mode) before you install a new battery pack. Put the battery compartment door back on the battery used in the base or handset charge cradle to Answer Off. Allow the handset battery to properly charge (for you don't enter the security code within 10 seconds. Like other batteries of this unit. 1. product indicates...
... in remote access mode. Make sure the telephone is compatible with this type, toxic materials could be released which can be erased in Talk mode) before you install a new battery pack. Put the battery compartment door back on the battery used in the base or handset charge cradle to Answer Off. Allow the handset battery to properly charge (for you don't enter the security code within 10 seconds. Like other batteries of this unit. 1. product indicates...
User Guide
Page 41
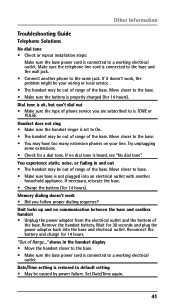
... handset may be out of range of phone service you follow proper dialing sequence? shows in and out • The handset may be out of range of Range..." Reconnect the battery and charge for 14 hours. Other Information Troubleshooting Guide Telephone Solutions No dial tone • Check or repeat installation steps: Make sure the base power cord is connected to a working electrical outlet. Set Date/Time again. 41 Make sure the telephone line cord is connected to the base and the wall jack. • Connect...
... handset may be out of range of phone service you follow proper dialing sequence? shows in and out • The handset may be out of range of Range..." Reconnect the battery and charge for 14 hours. Other Information Troubleshooting Guide Telephone Solutions No dial tone • Check or repeat installation steps: Make sure the base power cord is connected to a working electrical outlet. Set Date/Time again. 41 Make sure the telephone line cord is connected to the base and the wall jack. • Connect...

User Guide
Page 48
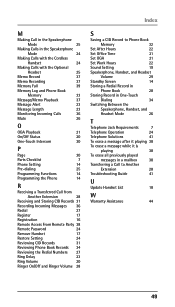
... 2nd Call Alert 18 3-way conference call by an intercom call 29 3-way conference call with two lines 29 4-way conference call (Line 1 + Line 2 + 2 extension) 29 Accessory Information 47 Adding Phone Book Entries 33 Answering a Call 25 Answering an Intercom Call 30 Answering System 20 Answering System On/Off 36 Answering System Operation 36 Area Code 16 Auto Answer 15 Auto Answer Intercom 16 Auto Standby 30 B Backlight 19 Base 26 Base Layout 10 Base Station 12 Battery 42 Battery Safety Precautions 39 C Call Screening 23 Call Waiting Caller ID...
... 2nd Call Alert 18 3-way conference call by an intercom call 29 3-way conference call with two lines 29 4-way conference call (Line 1 + Line 2 + 2 extension) 29 Accessory Information 47 Adding Phone Book Entries 33 Answering a Call 25 Answering an Intercom Call 30 Answering System 20 Answering System On/Off 36 Answering System Operation 36 Area Code 16 Auto Answer 15 Auto Answer Intercom 16 Auto Standby 30 B Backlight 19 Base 26 Base Layout 10 Base Station 12 Battery 42 Battery Safety Precautions 39 C Call Screening 23 Call Waiting Caller ID...
User Guide
Page 49
... Set Work Hours 22 Sound Setting 19 Speakerphone, Handset, and Headset Volume 29 Standby Screen 14 Storing a Redial Record in Phone Book 28 Storing Record in One-Touch Dialing 34 Switching Between the Speakerphone, Handset, and Headset Mode 26 T Telephone Jack Requirements 7 Telephone Operation 24 Telephone Solutions 41 To erase a message after it playing 38 To erase a message while it is playing 38 To erase all previously played messages in a mailbox 38 Transferring a Call to Another Extension 28 Troubleshooting Guide 41 U Update Handset...
... Set Work Hours 22 Sound Setting 19 Speakerphone, Handset, and Headset Volume 29 Standby Screen 14 Storing a Redial Record in Phone Book 28 Storing Record in One-Touch Dialing 34 Switching Between the Speakerphone, Handset, and Headset Mode 26 T Telephone Jack Requirements 7 Telephone Operation 24 Telephone Solutions 41 To erase a message after it playing 38 To erase a message while it is playing 38 To erase all previously played messages in a mailbox 38 Transferring a Call to Another Extension 28 Troubleshooting Guide 41 U Update Handset...


