
Basic and Advanced Manual English
Page 1
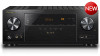
> Before Start > Part Names > Install > Initial Setup > Playback > Advanced Manual Troubleshooting | Supplementary Information, etc. Basic Manual VSX-LX102 AV RECEIVER Before Start 2 What's in the box 2 Part Names 3 Part Names 3 Install 7 Installation procedure 7 Step1: Speaker Layout 8 Step2: Connect the Speakers 14 Step3: ... 23 BLUETOOTH® Playback 23 Network Functions 24 USB Storage Device 25 Listening To the AM/FM Radio 26 Listening Mode 28 The Basic Manual includes information needed when starting up and also instructions for frequently used operations. The Advanced...
> Before Start > Part Names > Install > Initial Setup > Playback > Advanced Manual Troubleshooting | Supplementary Information, etc. Basic Manual VSX-LX102 AV RECEIVER Before Start 2 What's in the box 2 Part Names 3 Part Names 3 Install 7 Installation procedure 7 Step1: Speaker Layout 8 Step2: Connect the Speakers 14 Step3: ... 23 BLUETOOTH® Playback 23 Network Functions 24 USB Storage Device 25 Listening To the AM/FM Radio 26 Listening Mode 28 The Basic Manual includes information needed when starting up and also instructions for frequently used operations. The Advanced...

Basic and Advanced Manual English
Page 2
... 1 2 3 4 5 1. Speaker setup microphone (1) 0 Used during Initial Setup. 4. Power cord (1) 0 Quick Start Guide (1) 0 Basic Manual (This manual) 0 Connect speakers with 4 Ω to 16 Ω impedance. 0 The power cord must be connected only after all other cable connections are.... 0 We will be introduced by other means at a later date. 0 Specifications and appearance are subject to change without prior notice. > Advanced Manual Troubleshooting | Supplementary Information, etc. 6 2 > Before Start > Part Names > Install > Initial Setup > Playback What's in the future. AM...
... 1 2 3 4 5 1. Speaker setup microphone (1) 0 Used during Initial Setup. 4. Power cord (1) 0 Quick Start Guide (1) 0 Basic Manual (This manual) 0 Connect speakers with 4 Ω to 16 Ω impedance. 0 The power cord must be connected only after all other cable connections are.... 0 We will be introduced by other means at a later date. 0 Specifications and appearance are subject to change without prior notice. > Advanced Manual Troubleshooting | Supplementary Information, etc. 6 2 > Before Start > Part Names > Install > Initial Setup > Playback What's in the future. AM...

Basic and Advanced Manual English
Page 3
TUNING MODE button: Switches tuning to an AM/FM station between automatic tuning and manual tuning. 6. +FAVORITE button: Used to confirm. WIRELESS indicator: Lights when the unit is connected to the previous state. 14.MASTER VOLUME 15.Í STANDBY/ON ... to be played. 2. If the unit is in three steps. 5. HOME MENU button: Displays the Home. (*) 8. > Before Start > Part Names > Install > Initial Setup > Playback > Advanced Manual Troubleshooting | Supplementary Information, etc.
TUNING MODE button: Switches tuning to an AM/FM station between automatic tuning and manual tuning. 6. +FAVORITE button: Used to confirm. WIRELESS indicator: Lights when the unit is connected to the previous state. 14.MASTER VOLUME 15.Í STANDBY/ON ... to be played. 2. If the unit is in three steps. 5. HOME MENU button: Displays the Home. (*) 8. > Before Start > Part Names > Install > Initial Setup > Playback > Advanced Manual Troubleshooting | Supplementary Information, etc.

Basic and Advanced Manual English
Page 4
... TUNED: Receiving AM/FM radio. STEREO: Receiving FM stereo. > Before Start > Part Names > Install > Initial Setup > Playback > Advanced Manual Troubleshooting | Supplementary Information, etc. 18.Listening mode button: Press "AUTO/DIRECT", "SURROUND" or "STEREO" to switch the listening mode (P28). ...When "NET" is selected. It will flash if the connection to the network. Flashes when muting is not correct. Lights in the Advanced Manual. Display 1. Lights when adjusting the volume. 9. You...
... TUNED: Receiving AM/FM radio. STEREO: Receiving FM stereo. > Before Start > Part Names > Install > Initial Setup > Playback > Advanced Manual Troubleshooting | Supplementary Information, etc. 18.Listening mode button: Press "AUTO/DIRECT", "SURROUND" or "STEREO" to switch the listening mode (P28). ...When "NET" is selected. It will flash if the connection to the network. Flashes when muting is not correct. Lights in the Advanced Manual. Display 1. Lights when adjusting the volume. 9. You...

Basic and Advanced Manual English
Page 5
... cable. 2. NETWORK port: Connect to a TV. 7. Adjust their angles according to the home control system. 11. > Before Start > Part Names > Install > Initial Setup > Playback > Advanced Manual Troubleshooting | Supplementary Information, etc. 90° 180° Rear Panel 1.
... cable. 2. NETWORK port: Connect to a TV. 7. Adjust their angles according to the home control system. 11. > Before Start > Part Names > Install > Initial Setup > Playback > Advanced Manual Troubleshooting | Supplementary Information, etc. 90° 180° Rear Panel 1.

Basic and Advanced Manual English
Page 6
... confirm your selection. button: Returns the display to the previous state. 14.MODE button: Switches tuning to an AM/FM station between automatic tuning and manual tuning. 15.+Fav button: Used to register AM/FM radio stations. 0 MAIN, ZONE 2, ZONE 3 and ZONE are not shown on one screen on the...the AV Adjust on the display. 13. When the folder or file lists are not used. (*)You can find details in the Advanced Manual. button: Displays the Home. (*) 7. Volume buttons 8. > Before Start > Part Names > Install > Initial Setup > Playback > Advanced...
... confirm your selection. button: Returns the display to the previous state. 14.MODE button: Switches tuning to an AM/FM station between automatic tuning and manual tuning. 15.+Fav button: Used to register AM/FM radio stations. 0 MAIN, ZONE 2, ZONE 3 and ZONE are not shown on one screen on the...the AV Adjust on the display. 13. When the folder or file lists are not used. (*)You can find details in the Advanced Manual. button: Displays the Home. (*) 7. Volume buttons 8. > Before Start > Part Names > Install > Initial Setup > Playback > Advanced...

Basic and Advanced Manual English
Page 7
... of speakers you have and the conditions they will be used in "Speaker combinations" on P13. > Before Start > Part Names > Install > Initial Setup > Playback > Advanced Manual Troubleshooting | Supplementary Information, etc. Step2: Connect the Speakers To connect the speaker systems to this unit, refer to P14 if you are using a speaker layout...
... of speakers you have and the conditions they will be used in "Speaker combinations" on P13. > Before Start > Part Names > Install > Initial Setup > Playback > Advanced Manual Troubleshooting | Supplementary Information, etc. Step2: Connect the Speakers To connect the speaker systems to this unit, refer to P14 if you are using a speaker layout...

Basic and Advanced Manual English
Page 8
... can select the Dolby Atmos listening mode, which realizes the most up facing the listening position. > Before Start > Part Names > Install > Initial Setup > Playback > Advanced Manual Troubleshooting | Supplementary Information, etc. Furthermore, by the back sound field and provides a more real sound field. The optimal positioning is Dolby Atmos. Surround speakers create...
... can select the Dolby Atmos listening mode, which realizes the most up facing the listening position. > Before Start > Part Names > Install > Initial Setup > Playback > Advanced Manual Troubleshooting | Supplementary Information, etc. Furthermore, by the back sound field and provides a more real sound field. The optimal positioning is Dolby Atmos. Surround speakers create...

Basic and Advanced Manual English
Page 9
...; (0.9 m) or more ˎ1 ˎ2 5.1.2 Channel System-1 (Front High Speakers/Rear High Speakers) This is Dolby Atmos. > Before Start > Part Names > Install > Initial Setup > Playback > Advanced Manual Troubleshooting | Supplementary Information, etc. 3´ (0.9 m) or more 9 By installing height speakers, you can select the Dolby Atmos listening mode, which realizes the most up facing...
...; (0.9 m) or more ˎ1 ˎ2 5.1.2 Channel System-1 (Front High Speakers/Rear High Speakers) This is Dolby Atmos. > Before Start > Part Names > Install > Initial Setup > Playback > Advanced Manual Troubleshooting | Supplementary Information, etc. 3´ (0.9 m) or more 9 By installing height speakers, you can select the Dolby Atmos listening mode, which realizes the most up facing...

Basic and Advanced Manual English
Page 10
... directly above the seating position, and top rear speakers on the ceiling behind the seating position. > Before Start > Part Names > Install > Initial Setup > Playback > Advanced Manual Troubleshooting | Supplementary Information, etc. ˎ3 ˎ2 ˎ1 5.1.2 Channel System-2 (Ceiling Speakers) This is Dolby Atmos.
... directly above the seating position, and top rear speakers on the ceiling behind the seating position. > Before Start > Part Names > Install > Initial Setup > Playback > Advanced Manual Troubleshooting | Supplementary Information, etc. ˎ3 ˎ2 ˎ1 5.1.2 Channel System-2 (Ceiling Speakers) This is Dolby Atmos.

Basic and Advanced Manual English
Page 11
... sound appears to be coming from overhead. Dolby enabled speakers are both types of height speakers. > Before Start > Part Names > Install > Initial Setup > Playback > Advanced Manual Troubleshooting | Supplementary Information, etc. ˎ1 ˎ2 5.1.2 Channel System-3 (Dolby Enabled Speakers (Dolby Speakers)) This is a basic 5.1 channel system consisting of front speakers, a center speaker, surround...
... sound appears to be coming from overhead. Dolby enabled speakers are both types of height speakers. > Before Start > Part Names > Install > Initial Setup > Playback > Advanced Manual Troubleshooting | Supplementary Information, etc. ˎ1 ˎ2 5.1.2 Channel System-3 (Dolby Enabled Speakers (Dolby Speakers)) This is a basic 5.1 channel system consisting of front speakers, a center speaker, surround...

Basic and Advanced Manual English
Page 12
> Before Start > Part Names > Install > Initial Setup > Playback > Advanced Manual Troubleshooting | Supplementary Information, etc. ˎ1 ˎ2 Bi-Amping the Speakers It is 5.1 because Bi-Amping speakers require one amplifier for the tweeter jacks and one ...
> Before Start > Part Names > Install > Initial Setup > Playback > Advanced Manual Troubleshooting | Supplementary Information, etc. ˎ1 ˎ2 Bi-Amping the Speakers It is 5.1 because Bi-Amping speakers require one amplifier for the tweeter jacks and one ...

Basic and Advanced Manual English
Page 13
Speaker combinations 0 In any of the combinations, up to two powered subwoofers can be connected. > Before Start > Part Names > Install > Initial Setup > Playback > Advanced Manual Troubleshooting | Supplementary Information, etc. Speaker Channels 2.1 ch 3.1 ch 4.1 ch 5.1 ch 6.1 ch 7.1 ch 2.1.2 ch 3.1.2 ch 4.1.2 ch 5.1.2 ch FRONT CENTER SURROUND SURROUND BACK HEIGHT Bi-Amp 13
Speaker combinations 0 In any of the combinations, up to two powered subwoofers can be connected. > Before Start > Part Names > Install > Initial Setup > Playback > Advanced Manual Troubleshooting | Supplementary Information, etc. Speaker Channels 2.1 ch 3.1 ch 4.1 ch 5.1 ch 6.1 ch 7.1 ch 2.1.2 ch 3.1.2 ch 4.1.2 ch 5.1.2 ch FRONT CENTER SURROUND SURROUND BACK HEIGHT Bi-Amp 13

Basic and Advanced Manual English
Page 14
..." in the System Setup menu. "Speaker" - If the exposed wires of the speaker terminals when connecting. > Before Start > Part Names > Install > Initial Setup > Playback > Advanced Manual Troubleshooting | Supplementary Information, etc. If connection is output from each of the SUBWOOFER PRE OUT jacks. The same signal is wrong, reverse phase may make...
..." in the System Setup menu. "Speaker" - If the exposed wires of the speaker terminals when connecting. > Before Start > Part Names > Install > Initial Setup > Playback > Advanced Manual Troubleshooting | Supplementary Information, etc. If connection is output from each of the SUBWOOFER PRE OUT jacks. The same signal is wrong, reverse phase may make...

Basic and Advanced Manual English
Page 15
... do not stick out of the speakers touch the rear panel or the + and - wires touch each channel. to the instruction manual for your speakers when using connections for the speaker configuration you have an impedance of 4 Ω or more to less than 6...and powered subwoofer. Make sure you need to make bass output poor. "Speaker" - > Before Start > Part Names > Install > Initial Setup > Playback > Advanced Manual Troubleshooting | Supplementary Information, etc. 1/2˝ (12 mm) Connecting with Bi-Amping Speakers (Page 12) 0 Refer to "Standard Connections (Pages 8 to 11)" (P14)...
... do not stick out of the speakers touch the rear panel or the + and - wires touch each channel. to the instruction manual for your speakers when using connections for the speaker configuration you have an impedance of 4 Ω or more to less than 6...and powered subwoofer. Make sure you need to make bass output poor. "Speaker" - > Before Start > Part Names > Install > Initial Setup > Playback > Advanced Manual Troubleshooting | Supplementary Information, etc. 1/2˝ (12 mm) Connecting with Bi-Amping Speakers (Page 12) 0 Refer to "Standard Connections (Pages 8 to 11)" (P14)...

Basic and Advanced Manual English
Page 16
... connecting. Audio Return Channel" (P22) in "4. Choose an HDMI IN jack on connections and setup for your TV to the TV's operation manual for directions on the TV that supports the ARC (Audio Return Channel) (*) feature, use the ARC function. Refer to illustration "a". Select "...see if it supports ARC. Step3: Connect the TV & AV Components a b 1. > Before Start > Part Names > Install > Initial Setup > Playback > Advanced Manual Troubleshooting | Supplementary Information, etc. Setup 0 Settings are required to use an HDMI cable and connect according to the instruction...
... connecting. Audio Return Channel" (P22) in "4. Choose an HDMI IN jack on connections and setup for your TV to the TV's operation manual for directions on the TV that supports the ARC (Audio Return Channel) (*) feature, use the ARC function. Refer to illustration "a". Select "...see if it supports ARC. Step3: Connect the TV & AV Components a b 1. > Before Start > Part Names > Install > Initial Setup > Playback > Advanced Manual Troubleshooting | Supplementary Information, etc. Setup 0 Settings are required to use an HDMI cable and connect according to the instruction...

Basic and Advanced Manual English
Page 17
..., audio output should be set -top box Streaming media player GAME 2. With connection to "System Setup" - > Before Start > Part Names > Install > Initial Setup > Playback > Advanced Manual Troubleshooting | Supplementary Information, etc.
..., audio output should be set -top box Streaming media player GAME 2. With connection to "System Setup" - > Before Start > Part Names > Install > Initial Setup > Playback > Advanced Manual Troubleshooting | Supplementary Information, etc.

Basic and Advanced Manual English
Page 18
> Before Start > Part Names > Install > Initial Setup > Playback > Advanced Manual Troubleshooting | Supplementary Information, etc. 3. Make the connections to the AV component to "Bitstream output" on , so that does not have an HDMI jack. a Cable/Satellite ... -top box a Analog audio/video cable 18 Connect the Non-HDMI AV Component This is an example of the input jacks you see the Advanced Manual. Setup 0 To enjoy digital surround sound including Dolby Digital, audio output should also be set to match the jacks it has.
> Before Start > Part Names > Install > Initial Setup > Playback > Advanced Manual Troubleshooting | Supplementary Information, etc. 3. Make the connections to the AV component to "Bitstream output" on , so that does not have an HDMI jack. a Cable/Satellite ... -top box a Analog audio/video cable 18 Connect the Non-HDMI AV Component This is an example of the input jacks you see the Advanced Manual. Setup 0 To enjoy digital surround sound including Dolby Digital, audio output should also be set to match the jacks it has.

Basic and Advanced Manual English
Page 19
... the Audio Component Example of this unit. b a CD a Analog audio cable, b Digital coaxial cable Turntable 19 > Before Start > Part Names > Install > Initial Setup > Playback > Advanced Manual Troubleshooting | Supplementary Information, etc. 4. Connect a CD player using a digital coaxial cable. If the turntable has a ground wire, connect it to any AUDIO IN jack other...
... the Audio Component Example of this unit. b a CD a Analog audio cable, b Digital coaxial cable Turntable 19 > Before Start > Part Names > Install > Initial Setup > Playback > Advanced Manual Troubleshooting | Supplementary Information, etc. 4. Connect a CD player using a digital coaxial cable. If the turntable has a ground wire, connect it to any AUDIO IN jack other...

Basic and Advanced Manual English
Page 20
> Before Start > Part Names > Install > Initial Setup > Playback > Advanced Manual Troubleshooting | Supplementary Information, etc. 2 a b c 5. Network Hookup Connect this unit to configure d the connection. Network Connection" (P22) in Initial Setup, select the desired setting method and ...
> Before Start > Part Names > Install > Initial Setup > Playback > Advanced Manual Troubleshooting | Supplementary Information, etc. 2 a b c 5. Network Hookup Connect this unit to configure d the connection. Network Connection" (P22) in Initial Setup, select the desired setting method and ...


