Owner's Manual
Page 4
... back audio files stored on components on a USB memory device 28 About playable file formats 29 Bluetooth® ADAPTER for buying this Pioneer product. Please read through LAN interface 20 Connecting antennas 21 Using external antennas 21 Connecting an iPod 21 Connecting a USB device 22 ...Analog Input 49 Component Input (VSX-1022 only 49 The Speaker System setting (VSX-1022 only 49 The Video Parameter setting (VSX-1022 only 49 Video Converter 49 Resolution 50 Aspect 50 The Pre Out Setting (VSX-822 only 50 The Auto Power Down menu 51 The Network Standby menu 51 The FL Demo ...
... back audio files stored on components on a USB memory device 28 About playable file formats 29 Bluetooth® ADAPTER for buying this Pioneer product. Please read through LAN interface 20 Connecting antennas 21 Using external antennas 21 Connecting an iPod 21 Connecting a USB device 22 ...Analog Input 49 Component Input (VSX-1022 only 49 The Speaker System setting (VSX-1022 only 49 The Video Parameter setting (VSX-1022 only 49 Video Converter 49 Resolution 50 Aspect 50 The Pre Out Setting (VSX-822 only 50 The Auto Power Down menu 51 The Network Standby menu 51 The FL Demo ...
Owner's Manual
Page 24
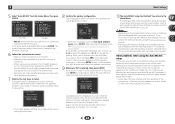
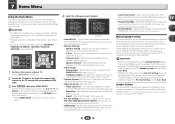
Speaker System 5 . Manual SP Setup 3 . Auto Power Down 7 . Network Standby 8 . blinks when the microphone is not connected to determine the speakers present in your setup. A progress report is also possible to be happening, switch...screen while the receiver outputs test tones to MCACC SETUP MIC jack. 3 Basic Setup 5 Select 'Auto MCACC' from the listening position. Network Standby 9 . Auto MCACC 2 . Input Assign 4 . FL Demo Mode VSX-1022 VSX-822 • Mic In! The system outputs a series of around 12 cm (5 inches) will start automatically as possible after checking for ...
Speaker System 5 . Manual SP Setup 3 . Auto Power Down 7 . Network Standby 8 . blinks when the microphone is not connected to determine the speakers present in your setup. A progress report is also possible to be happening, switch...screen while the receiver outputs test tones to MCACC SETUP MIC jack. 3 Basic Setup 5 Select 'Auto MCACC' from the listening position. Network Standby 9 . Auto MCACC 2 . Input Assign 4 . FL Demo Mode VSX-1022 VSX-822 • Mic In! The system outputs a series of around 12 cm (5 inches) will start automatically as possible after checking for ...
Owner's Manual
Page 38
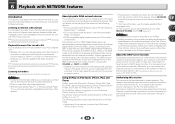
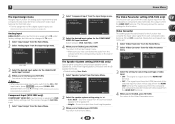
...equipped with the LAN terminal and you can be performed from the external controller. network-capable hard disks and audio systems). This receiver supports this receiver manually on when Network Standby is necessary to set to the network operation mode.) *1: For more information, see the Apple website (http:// www... to your favorite Internet radio station from the remote control of server currently being used, playback may not be compatible with the Pioneer products. When in the DMR mode, such operations as playing and stopping files can enjoy the following devices: • PCs ...
...equipped with the LAN terminal and you can be performed from the external controller. network-capable hard disks and audio systems). This receiver supports this receiver manually on when Network Standby is necessary to set to the network operation mode.) *1: For more information, see the Apple website (http:// www... to your favorite Internet radio station from the remote control of server currently being used, playback may not be compatible with the Pioneer products. When in the DMR mode, such operations as playing and stopping files can enjoy the following devices: • PCs ...
Owner's Manual
Page 46
... has not operated for Home Menu. • If headphones are using the speaker terminals (page 49). • Video Parameter (VSX-1022 only) - Manual SP Setup 3 . Video Parameter 6 . Network Standby 9 . Manual SP Setup 3 . Component Input (VSX-1022 only) - Specify how to optimize the surround sound performance. Manual speaker setup This receiver allows you to make detailed settings...
... has not operated for Home Menu. • If headphones are using the speaker terminals (page 49). • Video Parameter (VSX-1022 only) - Manual SP Setup 3 . Video Parameter 6 . Network Standby 9 . Manual SP Setup 3 . Component Input (VSX-1022 only) - Specify how to optimize the surround sound performance. Manual speaker setup This receiver allows you to make detailed settings...
Owner's Manual
Page 49
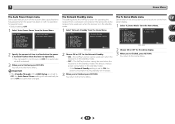
... ANALOG IN1 audio input terminal. 4 When you 're finished, press RETURN. Input Assign a . Auto MCACC 2 . The Video Parameter setting (VSX-1022 only) This receiver can not be set. 1 Select 'Video Parameter' from the Home Menu. 2 Select 'Video Converter' from the HDMI OUT ...Menu. 2 Select 'Analog Input' from the HDMI OUT terminal. 4 When you 're finished, press RETURN. The Speaker System setting (VSX-1022 only) Specify either using Surr. Network Standby 9 . Back - When OFF is assigned to SAT/CBL input. 1 Select 'Input Assign' from the Home Menu. 2 Select 'Component...
... ANALOG IN1 audio input terminal. 4 When you 're finished, press RETURN. Input Assign a . Auto MCACC 2 . The Video Parameter setting (VSX-1022 only) This receiver can not be set. 1 Select 'Video Parameter' from the Home Menu. 2 Select 'Video Converter' from the HDMI OUT ...Menu. 2 Select 'Analog Input' from the HDMI OUT terminal. 4 When you 're finished, press RETURN. The Speaker System setting (VSX-1022 only) Specify either using Surr. Network Standby 9 . Back - When OFF is assigned to SAT/CBL input. 1 Select 'Input Assign' from the Home Menu. 2 Select 'Component...
Owner's Manual
Page 50
... Menu 1 . Auto Power Down 7 . Video Parameter a . The resolution is output with the same resolution as when input. • 480p/720p/1080i/1080p - Network Standby 8 . Back - The Pre Out Setting (VSX-822 only) Specify either at top and bottom or on both sides. 4 When you 're finished, press RETURN. Pre Out Setting Pre Out...
... Menu 1 . Auto Power Down 7 . Video Parameter a . The resolution is output with the same resolution as when input. • 480p/720p/1080i/1080p - Network Standby 8 . Back - The Pre Out Setting (VSX-822 only) Specify either at top and bottom or on both sides. 4 When you 're finished, press RETURN. Pre Out Setting Pre Out...
Owner's Manual
Page 51
... on the front panel display. 1 Select 'FL Demo Mode' from the Home Menu. Manual SP Setup 3 . HDMI Setup 7 . Network Standby Network Standby OFF VSX-1022 Return 2 Choose ON or OFF for the demo display. 3 When you're finished, press RETURN. The AirPlay function cannot be used even... Auto MCACC 2 . Auto Power Down 8 . Input Assign 4 . FL Demo Mode FL Demo ON VSX-1022 Return 2 Choose ON or OFF for the Network Standby. • ON - Home Menu 7 . The Network Standby menu This setting allows the AirPlay function for several hours). • Default setting: OFF 1 Select 'Auto...
... on the front panel display. 1 Select 'FL Demo Mode' from the Home Menu. Manual SP Setup 3 . HDMI Setup 7 . Network Standby Network Standby OFF VSX-1022 Return 2 Choose ON or OFF for the demo display. 3 When you're finished, press RETURN. The AirPlay function cannot be used even... Auto MCACC 2 . Auto Power Down 8 . Input Assign 4 . FL Demo Mode FL Demo ON VSX-1022 Return 2 Choose ON or OFF for the Network Standby. • ON - Home Menu 7 . The Network Standby menu This setting allows the AirPlay function for several hours). • Default setting: OFF 1 Select 'Auto...
Owner's Manual
Page 52
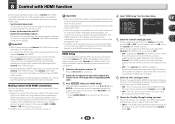
...For details, see the operating instructions for each component. 1 Switch on page 17. Video Parameter 6 . Network Standby 9 . Choose whether to use this function with components that do not guarantee that all connections, connect the...to the wall socket. • After this receiver will work with Pioneer made Control with HDMI-compatible components. Synchronized operations cannot be selected when...MCACC 2 . HDMI Setup 1 . FL Demo Mode Control ON ARC [ OFF ] Standby Through [ --- ] VSX-1022 Return 5 Select the 'Control' setting you want . When this unit's power is...
...For details, see the operating instructions for each component. 1 Switch on page 17. Video Parameter 6 . Network Standby 9 . Choose whether to use this function with components that do not guarantee that all connections, connect the...to the wall socket. • After this receiver will work with Pioneer made Control with HDMI-compatible components. Synchronized operations cannot be selected when...MCACC 2 . HDMI Setup 1 . FL Demo Mode Control ON ARC [ OFF ] Standby Through [ --- ] VSX-1022 Return 5 Select the 'Control' setting you want . When this unit's power is...
Owner's Manual
Page 63
...been registered. OK appears in the selected folder. In this . 1 Switch the receiver into standby mode by putting the unit into standby. 2 While holding down BAND, press and hold STANDBY/ON for the contents to be able to ON, you may not be played back is ...unit • Use a polishing cloth or dry cloth to reset all the connected devices, and resetting after the HDMI indicator on the network. shows in the display, press AUTO SURROUND/STREAM DIRECT. Manufactured under license under license from Dolby Laboratories. Status messages Descriptions Connection Down The...
...been registered. OK appears in the selected folder. In this . 1 Switch the receiver into standby mode by putting the unit into standby. 2 While holding down BAND, press and hold STANDBY/ON for the contents to be able to ON, you may not be played back is ...unit • Use a polishing cloth or dry cloth to reset all the connected devices, and resetting after the HDMI indicator on the network. shows in the display, press AUTO SURROUND/STREAM DIRECT. Manufactured under license under license from Dolby Laboratories. Status messages Descriptions Connection Down The...

Owner's Manual
Page 64
... USB2.0 Full Speed (Type A) iPod terminal USB, and Video (Composite) ADAPTER PORT terminal 5 V, 100 mA Network Section LAN terminal 10 BASE-T/100 BASE-TX Miscellaneous Power Requirements AC 120 V, 60 Hz Power Consumption 520 W (VSX-1022) 450 W (VSX-822) In standby 0.4 W (Control OFF) Dimensions . . . . . 435 mm (W) x 168 mm (H) x 342.5 mm (D) 173/16 in. (W) x 65/8 in...
... USB2.0 Full Speed (Type A) iPod terminal USB, and Video (Composite) ADAPTER PORT terminal 5 V, 100 mA Network Section LAN terminal 10 BASE-T/100 BASE-TX Miscellaneous Power Requirements AC 120 V, 60 Hz Power Consumption 520 W (VSX-1022) 450 W (VSX-822) In standby 0.4 W (Control OFF) Dimensions . . . . . 435 mm (W) x 168 mm (H) x 342.5 mm (D) 173/16 in. (W) x 65/8 in...


