

User Manual
Page 1
Register your product and get support at www.philips.com/welcome MC147 User manual
Register your product and get support at www.philips.com/welcome MC147 User manual
User Manual
Page 2
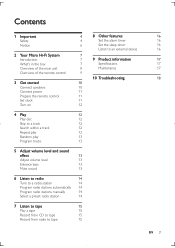
... the remote control 9 3 Get started 10 Connect speakers 10 Connect power 11 Prepare the remote control 11 Set clock 11 Turn on 12 4 Play 12 Play disc 12 Skip to a track 12 Search within a track 12 Repeat play 12 Random play 13 Program tracks 13 5 Adjust volume level and sound effect 13 Adjust volume level 13 Enhance bass 13 Mute sound 13 6 Listen to radio 14 Tune to a radio station 14 Program radio stations automatically 14 Program radio stations manually 14 Select a preset radio station 14 7 Listen to tape 15 Play a tape...
... the remote control 9 3 Get started 10 Connect speakers 10 Connect power 11 Prepare the remote control 11 Set clock 11 Turn on 12 4 Play 12 Play disc 12 Skip to a track 12 Search within a track 12 Repeat play 12 Random play 13 Program tracks 13 5 Adjust volume level and sound effect 13 Adjust volume level 13 Enhance bass 13 Mute sound 13 6 Listen to radio 14 Tune to a radio station 14 Program radio stations automatically 14 Program radio stations manually 14 Select a preset radio station 14 7 Listen to tape 15 Play a tape...
User Manual
Page 3
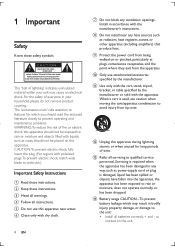
For the safety of everyone in accordance with polarized plugs:To prevent electric shock, match wide blade to rain or moisture, does not operate normally, or has been dropped. c Heed all instructions. Install in your unit may result in any heat sources such as power-supply cord or plug is used, use caution when moving the cart/apparatus combination to such as...
For the safety of everyone in accordance with polarized plugs:To prevent electric shock, match wide blade to rain or moisture, does not operate normally, or has been dropped. c Heed all instructions. Install in your unit may result in any heat sources such as power-supply cord or plug is used, use caution when moving the cart/apparatus combination to such as...
User Manual
Page 4
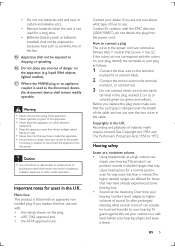
... the power cord are colored as the disconnect device, the disconnect device shall remain readily operable. o Apparatus shall not be deceiving. Sound can be exposed to dripping or splashing. Over time your volume to use one with the colors on q Where the MAINS plug or an appliance coupler is used for a long time. Before you replace the plug cover, make sure that you replace the fuse, use . Batteries (battery...
... the power cord are colored as the disconnect device, the disconnect device shall remain readily operable. o Apparatus shall not be deceiving. Sound can be exposed to dripping or splashing. Over time your volume to use one with the colors on q Where the MAINS plug or an appliance coupler is used for a long time. Before you replace the plug cover, make sure that you replace the fuse, use . Batteries (battery...
User Manual
Page 5
... guidelines when using your hearing adapts. Be sure to sound, even at reasonable volumes for electrical and electronic products. Do not turn up the volume so high that you . Listen at normally 'safe' levels, can also cause hearing loss. You should use caution or temporarily discontinue use headphones while operating a motorized vehicle, cycling, hazard and is attached to adjust the volume as...
... guidelines when using your hearing adapts. Be sure to sound, even at reasonable volumes for electrical and electronic products. Do not turn up the volume so high that you . Listen at normally 'safe' levels, can also cause hearing loss. You should use caution or temporarily discontinue use headphones while operating a motorized vehicle, cycling, hazard and is attached to adjust the volume as...
User Manual
Page 6
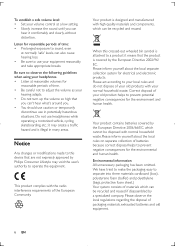
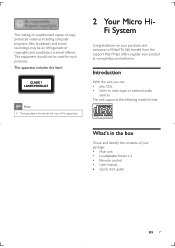
... rear of your product at www.philips.com/welcome. purposes. This apparatus includes this unit, you can: play CDs listen to radio, tape, or external audio devices The unit supports the following media format: What's in the box Check and identify the contents of the apparatus. 2 Your Micro HiFi System Congratulations on your purchase, and support that Philips offers, register your package: Main unit Loudspeaker boxes x 2 Remote control User manual Quick start guide...
... rear of your product at www.philips.com/welcome. purposes. This apparatus includes this unit, you can: play CDs listen to radio, tape, or external audio devices The unit supports the following media format: What's in the box Check and identify the contents of the apparatus. 2 Your Micro HiFi System Congratulations on your purchase, and support that Philips offers, register your package: Main unit Loudspeaker boxes x 2 Remote control User manual Quick start guide...

User Manual
Page 7
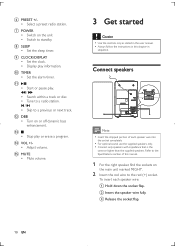
b STANDBY-ON Turn on the unit, or switch to standby. c iR Remote sensor. 8 EN d SOURCE Select a source: disc, tuner, tape or AUX (external audio source). e PRESET +/Select a preset radio station. Overview of the main unit a b c h d i j e k f l m g a PULL TO OPEN Open or close the disc compartment.
b STANDBY-ON Turn on the unit, or switch to standby. c iR Remote sensor. 8 EN d SOURCE Select a source: disc, tuner, tape or AUX (external audio source). e PRESET +/Select a preset radio station. Overview of the main unit a b c h d i j e k f l m g a PULL TO OPEN Open or close the disc compartment.

User Manual
Page 8
.... g Tape deck operation Start to a previous or next track. Tune to open the tape door. j REPEAT Repeat a track or disc. e PROG Program tracks. Start tape play or pause recording. Overview of the remote control g a b h c i d j k e l m f n o a Source selection keys Select a source: disc, tuner, tape or AUX (external audio source). k PROG Program tracks. d TIMER ON/OFF Turn on or off alarm timer. Stop the tape play or open the tape button cover. VOL +/Adjust volume. f DBB Turn on or off dynamic bass enhancement. Program radio stations.
.... g Tape deck operation Start to a previous or next track. Tune to open the tape door. j REPEAT Repeat a track or disc. e PROG Program tracks. Start tape play or pause recording. Overview of the remote control g a b h c i d j k e l m f n o a Source selection keys Select a source: disc, tuner, tape or AUX (external audio source). k PROG Program tracks. d TIMER ON/OFF Turn on or off alarm timer. Stop the tape play or open the tape button cover. VOL +/Adjust volume. f DBB Turn on or off dynamic bass enhancement. Program radio stations.
User Manual
Page 9
... timer. l DBB Turn on the unit Switch to standby. Connect only speakers with impedance that is the same or higher than the supplied speakers. n VOL +/Adjust volume. i CLOCK/DISPLAY Set the clock. k Start or pause play. / Search within a track or disc. Tune to a radio station. / Skip to the red (+) socket. Refer to the 1 the main unit marked 'RIGHT'. 2 Insert the red wire to a previous or next track. g POWER Switch on or off dynamic bass enhancement. j TIMER Set the alarm timer...
... timer. l DBB Turn on the unit Switch to standby. Connect only speakers with impedance that is the same or higher than the supplied speakers. n VOL +/Adjust volume. i CLOCK/DISPLAY Set the clock. k Start or pause play. / Search within a track or disc. Tune to a radio station. / Skip to the red (+) socket. Refer to the 1 the main unit marked 'RIGHT'. 2 Insert the red wire to a previous or next track. g POWER Switch on or off dynamic bass enhancement. j TIMER Set the alarm timer...

User Manual
Page 10
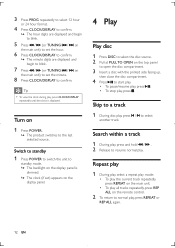
... types of batteries in combination. Before connecting the AC power cord, make sure that the power supply voltage corresponds to activate the clock setting mode. » The 12 hour or 24 hour format is displayed. EN 11 Set clock 1 Press STANDBY-ON to switch the unit to standby. » --:-- (or clock) is displayed. 2 Press and hold CLOCK/DISPLAY to the voltage printed on the back of explosion! 3 Insert the black wire into...
... types of batteries in combination. Before connecting the AC power cord, make sure that the power supply voltage corresponds to activate the clock setting mode. » The 12 hour or 24 hour format is displayed. EN 11 Set clock 1 Press STANDBY-ON to switch the unit to standby. » --:-- (or clock) is displayed. 2 Press and hold CLOCK/DISPLAY to the voltage printed on the back of explosion! 3 Insert the black wire into...
User Manual
Page 11
... dimmed. » The clock (if set) appears on the display panel. 4 Play Play disc 1 Press DISC to select the disc source. 2 Pull at PULL TO OPEN on the top panel to open the disc compartment. 3 Insert a disc with the printed side facing up, then close the disc compartment. 4 Press to start play. Switch to standby 1 Press POWER to switch the unit to select another track. To stop play , press / to standby mode. » The backlight...
... dimmed. » The clock (if set) appears on the display panel. 4 Play Play disc 1 Press DISC to select the disc source. 2 Pull at PULL TO OPEN on the top panel to open the disc compartment. 3 Insert a disc with the printed side facing up, then close the disc compartment. 4 Press to start play. Switch to standby 1 Press POWER to switch the unit to select another track. To stop play , press / to standby mode. » The backlight...
User Manual
Page 12
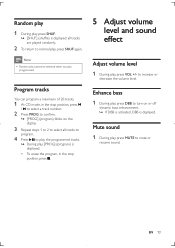
..., press . 5 Adjust volume level and sound effect Adjust volume level 1 During play , [PROG] (program) is displayed. Program tracks You can program a maximum of 20 tracks. 1 At CD mode, in the stop position, press / to select a track number. 2 Press PROG » [PROG] (program) blinks on or off dynamic bass enhancement. » If DBB is activated, DBB is displayed. EN 13 Enhance bass 1 During play , press SHUF again. Random play 1 During play, press SHUF...
..., press . 5 Adjust volume level and sound effect Adjust volume level 1 During play , [PROG] (program) is displayed. Program tracks You can program a maximum of 20 tracks. 1 At CD mode, in the stop position, press / to select a track number. 2 Press PROG » [PROG] (program) blinks on or off dynamic bass enhancement. » If DBB is activated, DBB is displayed. EN 13 Enhance bass 1 During play , press SHUF again. Random play 1 During play, press SHUF...
User Manual
Page 13
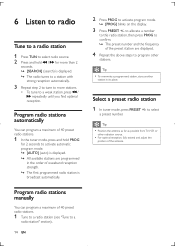
...available stations are displayed. 4 Repeat the above steps to activate program mode. » [PROG] blinks on the display. 3 Press PRESET +/- Select a preset radio station 1 In tuner mode, press PRESET +/- Program radio stations automatically You can program a maximum of 40 preset radio stations. 1 Tune to a radio station (see "Tune to a radio station" section). 14 EN 2 Press PROG to program other radiation source. For optimal reception, fully extend and adjust the position of the preset station are programmed in its place. Program radio stations manually You can program a maximum...
...available stations are displayed. 4 Repeat the above steps to activate program mode. » [PROG] blinks on the display. 3 Press PRESET +/- Select a preset radio station 1 In tuner mode, press PRESET +/- Program radio stations automatically You can program a maximum of 40 preset radio stations. 1 Tune to a radio station (see "Tune to a radio station" section). 14 EN 2 Press PROG to program other radiation source. For optimal reception, fully extend and adjust the position of the preset station are programmed in its place. Program radio stations manually You can program a maximum...

User Manual
Page 14
... open the tape button cover. 4 Press to open the tape door. 5 Load a tape with the open side downward and the full spool to the left , and close the tape door. To record from CD to tape 1 Press DISC to the left , and close the tape door. 5 Press to start recording. » Disc play starts automatically from the beginning of the disc, stop disc play or record a tape, the sound source cannot be changed...
... open the tape button cover. 4 Press to open the tape door. 5 Load a tape with the open side downward and the full spool to the left , and close the tape door. To record from CD to tape 1 Press DISC to the left , and close the tape door. 5 Press to start recording. » Disc play starts automatically from the beginning of the disc, stop disc play or record a tape, the sound source cannot be changed...
User Manual
Page 15
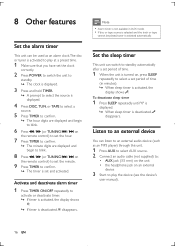
If disc or tape source is selected and the track or tape cannot be used as an MP3 player) through this unit. 1 Press AUX to select AUX source. 2 Connect an audio cable (not supplied) to: AUX jack (3.5 mm) on the unit the headphone jack on an external device 3 Start to play at a preset time. 1 Make sure that you have set the clock correctly. 2 Press POWER to switch the unit to standby. » The clock is displayed. 3 Press and hold TIMER. »...
If disc or tape source is selected and the track or tape cannot be used as an MP3 player) through this unit. 1 Press AUX to select AUX source. 2 Connect an audio cable (not supplied) to: AUX jack (3.5 mm) on the unit the headphone jack on an external device 3 Start to play at a preset time. 1 Make sure that you have set the clock correctly. 2 Press POWER to switch the unit to standby. » The clock is displayed. 3 Press and hold TIMER. »...
User Manual
Page 16
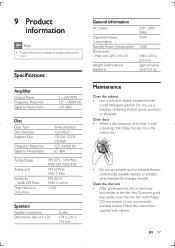
.... Follow the instructions supplied with a cleaning cloth. Wipe the disc from the centre out. General information AC power Operation Power Consumption Standby Power Consumption Dimensions - 9 Product information Note Product information is subject to change without speakers) 230 - 240V, 50Hz 15W 60 dBA Disc Laser Type Disc Diameter Support Disc Signal to Noise Ratio Semiconductor 12cm/8cm CD-DA, CD-R, CD-RW 125 -16000 Hz 65 dBA Tuning Range Tuning grid Sensitivity...
.... Follow the instructions supplied with a cleaning cloth. Wipe the disc from the centre out. General information AC power Operation Power Consumption Standby Power Consumption Dimensions - 9 Product information Note Product information is subject to change without speakers) 230 - 240V, 50Hz 15W 60 dBA Disc Laser Type Disc Diameter Support Disc Signal to Noise Ratio Semiconductor 12cm/8cm CD-DA, CD-R, CD-RW 125 -16000 Hz 65 dBA Tuning Range Tuning grid Sensitivity...
User Manual
Page 17
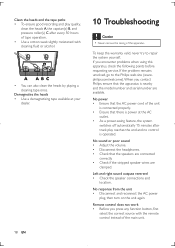
.... philips.com/welcome). No sound or poor sound Adjust the volume. No response from the unit Disconnect and reconnect the AC power plug, then turn on the unit again. No power Ensure that the apparatus is operated. Demagnetise the heads Use a demagnetising tape available at the AC outlet. Remote control does not work select the correct source with You can also clean the heads by playing a cleaning tape...
.... philips.com/welcome). No sound or poor sound Adjust the volume. No response from the unit Disconnect and reconnect the AC power plug, then turn on the unit again. No power Ensure that the apparatus is operated. Demagnetise the heads Use a demagnetising tape available at the AC outlet. Remote control does not work select the correct source with You can also clean the heads by playing a cleaning tape...
User Manual
Page 18
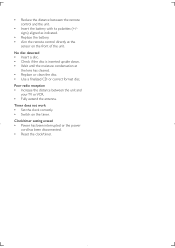
.... Fully extend the antenna. Clock/timer setting erased Power has been interrupted or the power cord has been disconnected. Insert the battery with its polarities (+/- Replace the battery. Poor radio reception Increase the distance between the remote control and the unit. Wait until the moisture condensation at the sensor on the timer. Replace or clean the disc. Timer does not work Set the clock correctly. Reset the clock/timer. Switch on the front of...
.... Fully extend the antenna. Clock/timer setting erased Power has been interrupted or the power cord has been disconnected. Insert the battery with its polarities (+/- Replace the battery. Poor radio reception Increase the distance between the remote control and the unit. Wait until the moisture condensation at the sensor on the timer. Replace or clean the disc. Timer does not work Set the clock correctly. Reset the clock/timer. Switch on the front of...
User Manual
Page 19
MC147_UM_05_V1.0 All rights reserved. Specifications are subject to change without notice © 2011 Koninklijke Philips Electronics N.V.
MC147_UM_05_V1.0 All rights reserved. Specifications are subject to change without notice © 2011 Koninklijke Philips Electronics N.V.


