Leaflet
Page 1
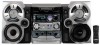
... with Auto Replay • Digital out and Line out for perfect CD recording • Bedroom Clock with Wake-up and Sleep-timer • 31-key Remote Control FWC788 VAC
... with Auto Replay • Digital out and Line out for perfect CD recording • Bedroom Clock with Wake-up and Sleep-timer • 31-key Remote Control FWC788 VAC
Leaflet
Page 2
...Package Dimensions: 21.4" W x 28" H x 15.7" D Product weight: 41.8 lbs. All rights reserved. wOOx Technology Philips patented wOOx Techonolgy ensures superior bass results. The dual suspension bass radiator, together with dedicated amplifier circuitry, is especially designed to ...Allows you like. Carton contains: 3CD Changer Mini System, MultiFunction Remote Control, Operating instructions, Warranty information Printed in which shows minimal...feature employs an auto rewind mechanism to switch from one button. FWC788 Sound Enhancement 2 x 140 Watts RMS Stereo 140 watts continuous RMS...
...Package Dimensions: 21.4" W x 28" H x 15.7" D Product weight: 41.8 lbs. All rights reserved. wOOx Technology Philips patented wOOx Techonolgy ensures superior bass results. The dual suspension bass radiator, together with dedicated amplifier circuitry, is especially designed to ...Allows you like. Carton contains: 3CD Changer Mini System, MultiFunction Remote Control, Operating instructions, Warranty information Printed in which shows minimal...feature employs an auto rewind mechanism to switch from one button. FWC788 Sound Enhancement 2 x 140 Watts RMS Stereo 140 watts continuous RMS...
User manual
Page 7
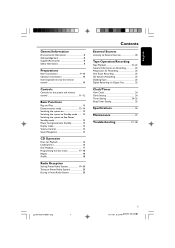
English General Information Environmental Information 8 Acknowledgement 8 Supplied Accessories 8 Safety Information 8 Preparations Rear Connections 9-10 Optional Connections 10 Inserting batteries into the remote control 10 Controls Controls on the system and remote control 11-12 Basic Functions Plug and Play 13 Demonstration mode 13-14 Switching the system on 14 Switching the system to...
English General Information Environmental Information 8 Acknowledgement 8 Supplied Accessories 8 Safety Information 8 Preparations Rear Connections 9-10 Optional Connections 10 Inserting batteries into the remote control 10 Controls Controls on the system and remote control 11-12 Basic Functions Plug and Play 13 Demonstration mode 13-14 Switching the system on 14 Switching the system to...
User manual
Page 8
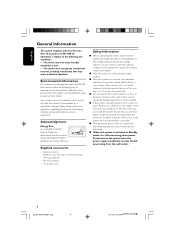
... in a very damp room, moisture may condense on a flat, hard and stable surface. Remote control - G Place the system in a location with 21 CFR 1040.10. Leave the power on for remote control - G The mechanical parts of the set contain selflubricating bearings and must accept any interference... pg 001-029/C788/37-Eng 8 12/11/01, 5:32 PM 3139 115 21181 Acknowledgement Energy Star As an ENERGY STARR Partner, Philips has determined that the operating voltage indicated on the typeplate (or the voltage indication beside the voltage selector) of packaging materials, exhausted batteries ...
... in a very damp room, moisture may condense on a flat, hard and stable surface. Remote control - G Place the system in a location with 21 CFR 1040.10. Leave the power on for remote control - G The mechanical parts of the set contain selflubricating bearings and must accept any interference... pg 001-029/C788/37-Eng 8 12/11/01, 5:32 PM 3139 115 21181 Acknowledgement Energy Star As an ENERGY STARR Partner, Philips has determined that the operating voltage indicated on the typeplate (or the voltage indication beside the voltage selector) of packaging materials, exhausted batteries ...
User manual
Page 10
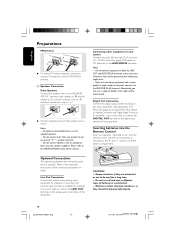
... the equipment. speaker terminals. - Do not connect equipment to the digital input terminal of the equipment. Inserting batteries into the Remote Control Insert two batteries (Type R06 or AA) into the remote control with digital input (CD Recorder, Digital Audio Tape [DAT] deck, Digital to Analog Converter and Digital Signal Processor, for...
... the equipment. speaker terminals. - Do not connect equipment to the digital input terminal of the equipment. Inserting batteries into the Remote Control Insert two batteries (Type R06 or AA) into the remote control with digital input (CD Recorder, Digital Audio Tape [DAT] deck, Digital to Analog Converter and Digital Signal Processor, for...

User manual
Page 11
... - for CD to open the tape deck door. ^ TAPE DECK 2 & TAPE DECK 1 * SOURCE - English Controls (main system's illustration on page 3) Controls on the system and remote control 1 ECO POWER -
... - for CD to open the tape deck door. ^ TAPE DECK 2 & TAPE DECK 1 * SOURCE - English Controls (main system's illustration on page 3) Controls on the system and remote control 1 ECO POWER -

User manual
Page 12
... to program disc tracks. English Controls PREV / PRESET / NEXT í ë for CD to skip to the beginning of the source select keys on the remote control (CD 123 or TUNER, for example). - to program preset radio stations. • 0 for CLOCK ....... (on the system only) to set the sleep timer. º... select 12- ) or 24-hour clock mode. £ CLOCK•TIMER 9 9 - Notes for CLOCK ....... (on the system only) to select a preset radio station. º for remote control: - First, select the source you wish to activate or deactivate the timer. ª SLEEP -
... to program disc tracks. English Controls PREV / PRESET / NEXT í ë for CD to skip to the beginning of the source select keys on the remote control (CD 123 or TUNER, for example). - to program preset radio stations. • 0 for CLOCK ....... (on the system only) to set the sleep timer. º... select 12- ) or 24-hour clock mode. £ CLOCK•TIMER 9 9 - Notes for CLOCK ....... (on the system only) to select a preset radio station. º for remote control: - First, select the source you wish to activate or deactivate the timer. ª SLEEP -
User manual
Page 14
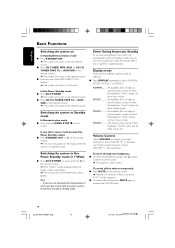
...Switching the system to the selected source. In any other source mode (except Eco Power Standby mode) G Press STANDBY ON (or B on the remote control). ➜ The clock will appear on the display when the system is in music mode. G Press DISPLAY repeatedly to the selected source. MODE...will have full brightness. The VU meter will have full brightness. The VU meter will be off the volume temporarily G Press MUTE on the remote control. ➜ Playback will continue without sound and "MUTE" will be in music mode. Switching the system to the last selected source. Note...
...Switching the system to the selected source. In any other source mode (except Eco Power Standby mode) G Press STANDBY ON (or B on the remote control). ➜ The clock will appear on the display when the system is in music mode. G Press DISPLAY repeatedly to the selected source. MODE...will have full brightness. The VU meter will have full brightness. The VU meter will be off the volume temporarily G Press MUTE on the remote control. ➜ Playback will continue without sound and "MUTE" will be in music mode. Switching the system to the last selected source. Note...
User manual
Page 15
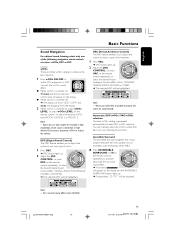
... NEWAGE, CLASSIC or ELECTRIC. ➜ The selected DSC will be displayed. Note: - When you select VAC, Incredible Surround will appear on the remote control repeatedly) to select the desired Virtual Ambience Control effect : HALL, CONCERT, CINEMA, DISCO, ARCADE or CYBER. ➜ The selected VAC will... will disappear from the display. 2 When wOOx is switched on; ➜ WOOX and the last selected wOOx level will switch on the remote control) to switch ON (enhanced) or OFF (normal) the wOOx sound effect. If this occurs, deactivate wOOx or reduce the volume. ...
... NEWAGE, CLASSIC or ELECTRIC. ➜ The selected DSC will be displayed. Note: - When you select VAC, Incredible Surround will appear on the remote control repeatedly) to select the desired Virtual Ambience Control effect : HALL, CONCERT, CINEMA, DISCO, ARCADE or CYBER. ➜ The selected VAC will... will disappear from the display. 2 When wOOx is switched on; ➜ WOOX and the last selected wOOx level will switch on the remote control) to switch ON (enhanced) or OFF (normal) the wOOx sound effect. If this occurs, deactivate wOOx or reduce the volume. ...
User manual
Page 18
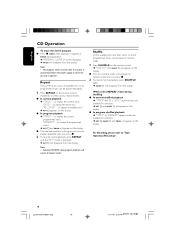
... played repeatedly. 1 Press REPEAT on the display. to select various repeat modes. to repeat all available discs. ➜ RPT appears on the remote control repeatedly to repeat all programmed tracks. ➜ RPT and PROG will appear on the display. Selecting SHUFFLE during shuffling G In normal shuffled ...G The discs and the tracks will appear on the display. The program will be played in random order. 1 Press SHUFFLE on the remote control. ➜ "SHUFFLE" and SHUFF will be erased when the system is displayed. ➜ RPT will disappear from the display. "ALL DISC" ...
... played repeatedly. 1 Press REPEAT on the display. to select various repeat modes. to repeat all available discs. ➜ RPT appears on the remote control repeatedly to repeat all programmed tracks. ➜ RPT and PROG will appear on the display. Selecting SHUFFLE during shuffling G In normal shuffled ...G The discs and the tracks will appear on the display. The program will be played in random order. 1 Press SHUFFLE on the remote control. ➜ "SHUFFLE" and SHUFF will be erased when the system is displayed. ➜ RPT will disappear from the display. "ALL DISC" ...
User manual
Page 24
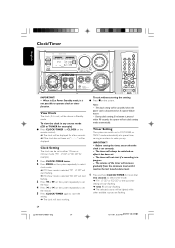
..., "AM 12:00" will start flashing. ➜ If 24-hour mode is set . - Notes: - When in progress. - The timer will always be switched on the remote control). ➜ The clock will start if a recording is in Eco Power Standby mode, it reaches the last tuned volume level. 1 Press and hold CLOCK...
..., "AM 12:00" will start flashing. ➜ If 24-hour mode is set . - Notes: - When in progress. - The timer will always be switched on the remote control). ➜ The clock will start if a recording is in Eco Power Standby mode, it reaches the last tuned volume level. 1 Press and hold CLOCK...
User manual
Page 25
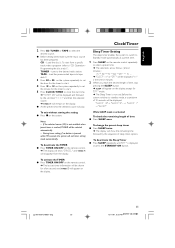
.... ➜ "TIMER ON" will be shown for the timer to start from the display. To deactivate the TIMER G Press TIMER ON/OFF on the remote control. ➜ The last set timer "XX:XX" and then the selected source. ➜ TIMER will be displayed. While SLEEP mode is displayed, ... Load the disc(s).To start . 5 Press CLOCK•TIMER to set . During timer setting, if no button is reached,TUNER will remain on the remote control repeatedly to Standby mode automatically at a preset time. 1 Press SLEEP on the display. To activate the TIMER G Press TIMER ON/OFF on the...
.... ➜ "TIMER ON" will be shown for the timer to start from the display. To deactivate the TIMER G Press TIMER ON/OFF on the remote control. ➜ The last set timer "XX:XX" and then the selected source. ➜ TIMER will be displayed. While SLEEP mode is displayed, ... Load the disc(s).To start . 5 Press CLOCK•TIMER to set . During timer setting, if no button is reached,TUNER will remain on the remote control repeatedly to Standby mode automatically at a preset time. 1 Press SLEEP on the display. To activate the TIMER G Press TIMER ON/OFF on the...
User manual
Page 28
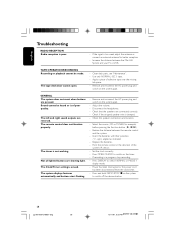
...door cannot open. - Use only NORMAL (IEC I) tape. - Remove and reconnect the AC power plug and switch on the timer. - The remote control does not function properly. Adjust the volume. - Reduce the distance between the Mini HiFi System and your TV or VCR. Press TIMER ON... correctly. - The system displays features automatically and buttons start flashing. - Check that the speakers are pressed. Sound cannot be made. Point the remote control in progress, stop recording. - Press DISPLAY to switch off the demonstration. 28 pg 001-029/C788/37-Eng 28 12/11/01, ...
...door cannot open. - Use only NORMAL (IEC I) tape. - Remove and reconnect the AC power plug and switch on the timer. - The remote control does not function properly. Adjust the volume. - Reduce the distance between the Mini HiFi System and your TV or VCR. Press TIMER ON... correctly. - The system displays features automatically and buttons start flashing. - Check that the speakers are pressed. Sound cannot be made. Point the remote control in progress, stop recording. - Press DISPLAY to switch off the demonstration. 28 pg 001-029/C788/37-Eng 28 12/11/01, ...
Quick start guide
Page 1
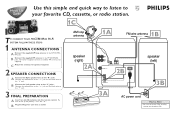
Connect the colored wire to the "-" jack and the black wire to -. to the "+" jack. B Plug the AC power cord into the remote control. B Connect the Left speaker wires to the "R" jacks . C Adjust the antennas for optimal reception. 2 SPEAKER CONNECTIONS A Connect the Right speaker wires to the "L" jacks . ... an outlet. Hook Up Guide Use this simple and quick way to listen to your favorite CD, cassette, or radio station. 1C TO CONNECT YOUR FWC788 MINI HI-FI SYSTEM FOLLOW THESE STEPS: 1 ANTENNA CONNECTIONS A Connect the supplied AM loop antenna to the AM ANTENNA jacks.
Connect the colored wire to the "-" jack and the black wire to -. to the "+" jack. B Plug the AC power cord into the remote control. B Connect the Left speaker wires to the "R" jacks . C Adjust the antennas for optimal reception. 2 SPEAKER CONNECTIONS A Connect the Right speaker wires to the "L" jacks . ... an outlet. Hook Up Guide Use this simple and quick way to listen to your favorite CD, cassette, or radio station. 1C TO CONNECT YOUR FWC788 MINI HI-FI SYSTEM FOLLOW THESE STEPS: 1 ANTENNA CONNECTIONS A Connect the supplied AM loop antenna to the AM ANTENNA jacks.


