Installation Guide
Page 1
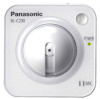
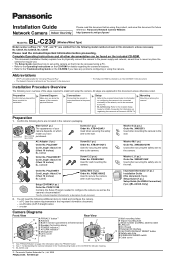
...otherwise noted. a LAN cable (CAT-5 straight cable) - Panasonic Network Camera Website: http://panasonic.net/pcc/ipcam/ BL-C230 Model No. (Wireless/Wired Type) Model number suffixes ("A", "CE", and "E") are omitted from a PC. • BL-C230A only: Refer to the included Setup Guide for VIERA... Troubleshooting Guide on the CD-ROM for indicator meaning. *3 BL-C230A only © Panasonic System Networks Co., Ltd. 2009 PNQX2272ZA KK1009CQ0 Washer S (2 pcs.) Order No. Washer M (1 pc.) Order No. Complete Operating Instructions and all the items required for a description of the camera...
...otherwise noted. a LAN cable (CAT-5 straight cable) - Panasonic Network Camera Website: http://panasonic.net/pcc/ipcam/ BL-C230 Model No. (Wireless/Wired Type) Model number suffixes ("A", "CE", and "E") are omitted from a PC. • BL-C230A only: Refer to the included Setup Guide for VIERA... Troubleshooting Guide on the CD-ROM for indicator meaning. *3 BL-C230A only © Panasonic System Networks Co., Ltd. 2009 PNQX2272ZA KK1009CQ0 Washer S (2 pcs.) Order No. Washer M (1 pc.) Order No. Complete Operating Instructions and all the items required for a description of the camera...
Installation Guide
Page 2
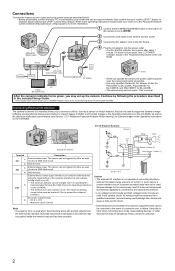
...the camera circuit. External device control output. If it does not turn green, see 7.4 Controlling the External Output Terminal (BL-C230 Only) in the event of terminal 6. This is not capable of connecting directly to devices that require large amounts of ...Panasonic AC adaptor (Order No. Connections Connect the camera to your router and to the power outlet as described below. • Before proceeding, confirm that your PC is connected to the external I/O interface. • Low voltage/current circuits and high voltage/current circuits are used in the Operating Instructions...
...the camera circuit. External device control output. If it does not turn green, see 7.4 Controlling the External Output Terminal (BL-C230 Only) in the event of terminal 6. This is not capable of connecting directly to devices that require large amounts of ...Panasonic AC adaptor (Order No. Connections Connect the camera to your router and to the power outlet as described below. • Before proceeding, confirm that your PC is connected to the external I/O interface. • Low voltage/current circuits and high voltage/current circuits are used in the Operating Instructions...
Installation Guide
Page 3
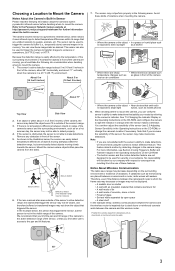
... detect the object even if it uses infrared rays to detect temperature differences within the detection range, but the person is aimed at http://panasonic.net/pcc/support/netwkcam/ for security or surveillance. If obstacles such as a kitchen • Where there are placed between a camera and...due to steel doors or reinforced concrete walls between the camera and the wireless router is exposed to light the indicator in the Operating Instructions on a hot summer day, the sensor may make detections that triggered the sensor. Therefore, even if the distance between objects in...
... detect the object even if it uses infrared rays to detect temperature differences within the detection range, but the person is aimed at http://panasonic.net/pcc/support/netwkcam/ for security or surveillance. If obstacles such as a kitchen • Where there are placed between a camera and...due to steel doors or reinforced concrete walls between the camera and the wireless router is exposed to light the indicator in the Operating Instructions on a hot summer day, the sensor may make detections that triggered the sensor. Therefore, even if the distance between objects in...
Installation Guide
Page 4
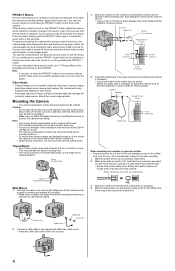
... and use with a thread of the installation area must be damaged. • Make sure you plan on , the camera image area displayed in the Operating Instructions on a mortar or concrete surface • Prepare anchors for a 4 mm (3/16 inch) diameter screw for the safety wire, and 3.5 mm (1/8 inch) diameter...that privacy mode cannot be mounted outdoors. • To ensure that if the camera were to turn privacy mode on this document depict the BL-C230A. Mounting the Camera • The camera illustrations in case of mortar which also serves as shown below. Drive the screws into the ...
... and use with a thread of the installation area must be damaged. • Make sure you plan on , the camera image area displayed in the Operating Instructions on a mortar or concrete surface • Prepare anchors for a 4 mm (3/16 inch) diameter screw for the safety wire, and 3.5 mm (1/8 inch) diameter...that privacy mode cannot be mounted outdoors. • To ensure that if the camera were to turn privacy mode on this document depict the BL-C230A. Mounting the Camera • The camera illustrations in case of mortar which also serves as shown below. Drive the screws into the ...