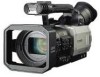
Dvc Camcorder
Page 6
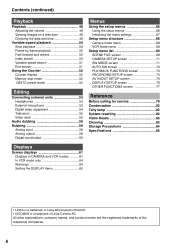
... 53 Headphones 53 External microphone 53 Digital video equipment 54 Television 55 Video deck 55 Audio dubbing 56 Dubbing 58 Analog input 58 Analog output 59 Digital input/output 60 Menus Using the setup menus 66 Using the setup menus 66 Initializing the menu settings 67 Setup menu structure 68 Camera mode... Microsystems IRGmbH. • DICOMAR is a trademark of the respective companies. 6 All other explanations, company names, and product names are the registered trademarks of Leica Camera AG.
... 53 Headphones 53 External microphone 53 Digital video equipment 54 Television 55 Video deck 55 Audio dubbing 56 Dubbing 58 Analog input 58 Analog output 59 Digital input/output 60 Menus Using the setup menus 66 Using the setup menus 66 Initializing the menu settings 67 Setup menu structure 68 Camera mode... Microsystems IRGmbH. • DICOMAR is a trademark of the respective companies. 6 All other explanations, company names, and product names are the registered trademarks of Leica Camera AG.

Dvc Camcorder
Page 35
... by hand. Shooting Optical Image Stabilizer Use the Optical Image Stabilizer (OIS) to the tape. When you have allocated to the COLOR BAR feature to output a color bar screen to the images you can allocate one of the three USER buttons. Audio also fades out. Press the OIS button to each...
... by hand. Shooting Optical Image Stabilizer Use the Optical Image Stabilizer (OIS) to the tape. When you have allocated to the COLOR BAR feature to output a color bar screen to the images you can allocate one of the three USER buttons. Audio also fades out. Press the OIS button to each...

Dvc Camcorder
Page 37
... conversion. 24 PA A B C D E F G H 60 i AoAeBoBeBoCeCoCeDoDeEoEeFoFe Fo Ge GoGeHo He 37 For output and recording, the 30-frame-persecond signal is converted to 1/50 (OFF) or 1/60 for shooting. For output and recording, the 24-frame-persecond signal is converted to 60-field-persecond interlace using the widely... used "2:3" ratio. For output and recording, the 24-frame-persecond signal is three seconds. 60 i AoAeBoBeBoCeCoDeDoDeEoEeFoFe Fo Ge GoHe Ho He 24P advanced mode: ...
... conversion. 24 PA A B C D E F G H 60 i AoAeBoBeBoCeCoCeDoDeEoEeFoFe Fo Ge GoGeHo He 37 For output and recording, the 30-frame-persecond signal is converted to 1/50 (OFF) or 1/60 for shooting. For output and recording, the 24-frame-persecond signal is converted to 60-field-persecond interlace using the widely... used "2:3" ratio. For output and recording, the 24-frame-persecond signal is three seconds. 60 i AoAeBoBeBoCeCoDeDoDeEoEeFoFe Fo Ge GoHe Ho He 24P advanced mode: ...

Dvc Camcorder
Page 49
... volume AUDIO MON/VAR button Checking the date and time Press the DATE/TIME button on the remote control to show the information that is output from the internal speaker and PHONES jack. The display changes as follows each time you press the button. Press the OSD button again to the...
... volume AUDIO MON/VAR button Checking the date and time Press the DATE/TIME button on the remote control to show the information that is output from the internal speaker and PHONES jack. The display changes as follows each time you press the button. Press the OSD button again to the...

Dvc Camcorder
Page 52
... the counter Press the COUNTER RESET button while the counter is not displayed. For connection (Page 54) 2 Put the MASTER camera in CAMERA mode and output a video signal from the input 1394 signal. 7 Reset the SLAVE camera to stop dubbing with memory stop mode TC XX : XX : XX : XX: Time code...
... the counter Press the COUNTER RESET button while the counter is not displayed. For connection (Page 54) 2 Put the MASTER camera in CAMERA mode and output a video signal from the input 1394 signal. 7 Reset the SLAVE camera to stop dubbing with memory stop mode TC XX : XX : XX : XX: Time code...

Dvc Camcorder
Page 54
... a 6-pin type DV connector, carefully check the shape of cables. Furthermore, connect the DV (IEEE1394) cable to recognize the signals when you do not stop output on the external unit side or disconnect any of the DV (IEEE1394) cable and the connectors on the DV (IEEE1394) cable.
... a 6-pin type DV connector, carefully check the shape of cables. Furthermore, connect the DV (IEEE1394) cable to recognize the signals when you do not stop output on the external unit side or disconnect any of the DV (IEEE1394) cable and the connectors on the DV (IEEE1394) cable.

Dvc Camcorder
Page 55
...CH2 (Rch) audio White: CH1 (Lch) audio Yellow: Video S-video cable (optional) VCR with S-video connector g When connecting the external unit in order to output video and audio signal to the external unit, connect it to the input connectors on the external unit. • When video signals are input to... the output connectors on existing recordings, audio signals cannot be connected to the SVIDEO IN/OUT connector and/or VIDEO IN/OUT jack. 55 g When ...
...CH2 (Rch) audio White: CH1 (Lch) audio Yellow: Video S-video cable (optional) VCR with S-video connector g When connecting the external unit in order to output video and audio signal to the external unit, connect it to the input connectors on the external unit. • When video signals are input to... the output connectors on existing recordings, audio signals cannot be connected to the SVIDEO IN/OUT connector and/or VIDEO IN/OUT jack. 55 g When ...

Dvc Camcorder
Page 58
... TITLE ZOOM MULTI/ P-IN-P REC A.DUB /REW PLAY FF/ STILL ADV PAUSE STILL ADV INDEX STOP INDEX Camera or Remote control • If you to output digital images, which were input as analog signals from the connected devices, press two VCR REC buttons at a time. Images may be disrupted if you...
... TITLE ZOOM MULTI/ P-IN-P REC A.DUB /REW PLAY FF/ STILL ADV PAUSE STILL ADV INDEX STOP INDEX Camera or Remote control • If you to output digital images, which were input as analog signals from the connected devices, press two VCR REC buttons at a time. Images may be disrupted if you...

Dvc Camcorder
Page 59
CAMERA VCR 3 Move the OPERATION lever [q] to start play on this unit. 4 Start recording on the video deck. 5 Stop recording on this unit to an S-VHS (VHS) tape in a video deck. 1 Connect this unit to a video deck. (Page 55) 2 Press the CAMERA/VCR button and switch to stop play. 59 Editing Analog output You can record images you have shot on the video deck. 6 Move the OPERATION lever [g] to the VCR mode.
CAMERA VCR 3 Move the OPERATION lever [q] to start play on this unit. 4 Start recording on the video deck. 5 Stop recording on this unit to an S-VHS (VHS) tape in a video deck. 1 Connect this unit to a video deck. (Page 55) 2 Press the CAMERA/VCR button and switch to stop play. 59 Editing Analog output You can record images you have shot on the video deck. 6 Move the OPERATION lever [g] to the VCR mode.

Dvc Camcorder
Page 60
... to on in the recorder. • If you are using this unit, move the operation lever [q]. 4 Start recording in the player. Dubbing (continued) Digital input/output You can perform dubbing with a high image quality by means of the settings on the recording unit. • If you have set 1394TC REGEN or...
... to on in the recorder. • If you are using this unit, move the operation lever [q]. 4 Start recording in the player. Dubbing (continued) Digital input/output You can perform dubbing with a high image quality by means of the settings on the recording unit. • If you have set 1394TC REGEN or...

Dvc Camcorder
Page 62
... charge As the remaining battery charge drops, the display changes as 0% to display the level meter showing the volume level of the sound that is output from the internal speaker and PHONES jack. 19 Calendar Month: JAN (January), FEB (February), MAR (March), APR (April), MAY (May), JUN (June), JUL (July), AUG...
... charge As the remaining battery charge drops, the display changes as 0% to display the level meter showing the volume level of the sound that is output from the internal speaker and PHONES jack. 19 Calendar Month: JAN (January), FEB (February), MAR (March), APR (April), MAY (May), JUN (June), JUL (July), AUG...

Dvc Camcorder
Page 73
...tape that was dubbed on the recording. CH1 signals = CH1 track CH2 signals = CH2 track AUDIO OUT (VCR) Sets the audio signals to be output from the AUDIO IN/ OUT jack Audio recording mode 32K (12bit) 32K (12bit) AUDIO item setting ST1 ST2 MIX AUDIO OUT item setting CH1&#...8226;CH2 CH1 CH2 CH1•CH2 CH1 CH2 - CH1•CH2: CH1 output = CH1 signals CH2 output = CH2 signals CH1: CH1 output = CH1 signals CCH2 output = CH1 signals CH2: CH1 output = CH2 signals CH2 output = CH2 signals are the factory settings. 32K (12bit) AUDIO item/AUDIO OUT item settings ...
...tape that was dubbed on the recording. CH1 signals = CH1 track CH2 signals = CH2 track AUDIO OUT (VCR) Sets the audio signals to be output from the AUDIO IN/ OUT jack Audio recording mode 32K (12bit) 32K (12bit) AUDIO item setting ST1 ST2 MIX AUDIO OUT item setting CH1&#...8226;CH2 CH1 CH2 CH1•CH2 CH1 CH2 - CH1•CH2: CH1 output = CH1 signals CH2 output = CH2 signals CH1: CH1 output = CH1 signals CCH2 output = CH1 signals CH2: CH1 output = CH2 signals CH2 output = CH2 signals are the factory settings. 32K (12bit) AUDIO item/AUDIO OUT item settings ...

Dvc Camcorder
Page 75
...) Description of settings Selects the sound to be recorded for user information b: Frame sequence No. • 0 to convert analog input signals into digital signals and output them from the time code generator. Make sure you press the TC SET button. RECORDING SETUP screen (continued) Item/ (Display mode) UB MODE (camera) (VCR...
...) Description of settings Selects the sound to be recorded for user information b: Frame sequence No. • 0 to convert analog input signals into digital signals and output them from the time code generator. Make sure you press the TC SET button. RECORDING SETUP screen (continued) Item/ (Display mode) UB MODE (camera) (VCR...

Dvc Camcorder
Page 76
...is displayed. ON OFF DATE/TIME (camera) (VCR) Sets whether to display the date and time on the screen and whether to output information displayed in the image output signals regardless of the VIDEO OUT OSD setting. Setup menu list (continued) DISPLAY SETUP screen Item/ (Display mode) Description of settings... battery charge. ON OFF • To display the marker, press the ZEBRA button. (Page 33) VIDEO OUT OSD (camera) (VCR) Select ON to output from the VIDEO IN/OUT jack. TIME: The time is open. TIME&DATE: The time and date are displayed. • If you select OFF. LEVEL...
...is displayed. ON OFF DATE/TIME (camera) (VCR) Sets whether to display the date and time on the screen and whether to output information displayed in the image output signals regardless of the VIDEO OUT OSD setting. Setup menu list (continued) DISPLAY SETUP screen Item/ (Display mode) Description of settings... battery charge. ON OFF • To display the marker, press the ZEBRA button. (Page 33) VIDEO OUT OSD (camera) (VCR) Select ON to output from the VIDEO IN/OUT jack. TIME: The time is open. TIME&DATE: The time and date are displayed. • If you select OFF. LEVEL...

Dvc Camcorder
Page 77
...-protect • when condensation has formed inside the camera-recorder • when a problem has occurred in the camera-recorder Ten beeps • when it is output instead. REAR: Rear tally lamp (viewfinder side) lights. BOTH: Both tally lamps light. The time set using this item is also recorded on the tape...
...-protect • when condensation has formed inside the camera-recorder • when a problem has occurred in the camera-recorder Ten beeps • when it is output instead. REAR: Rear tally lamp (viewfinder side) lights. BOTH: Both tally lamps light. The time set using this item is also recorded on the tape...

Dvc Camcorder
Page 78
...SHUTTER button • SPEED SEL button • Zoom button and ring • HANDLE ZOOM switch • Opening or closing the LCD Select headphone output. INITIAL: The user file settings are returned to the factory settings. • After LOAD or INITIAL, switch camera-recorder OFF and then back ON... to receive scene files from another camera. (Page 47) Note RECEIVE MODE appears on the tape is output. Makes the camera ready to ensure that sound delay becomes noticeable. Setup menu list (continued) OTHER FUNCTIONS screen Item/ (Display mode) POWER ...
...SHUTTER button • SPEED SEL button • Zoom button and ring • HANDLE ZOOM switch • Opening or closing the LCD Select headphone output. INITIAL: The user file settings are returned to the factory settings. • After LOAD or INITIAL, switch camera-recorder OFF and then back ON... to receive scene files from another camera. (Page 47) Note RECEIVE MODE appears on the tape is output. Makes the camera ready to ensure that sound delay becomes noticeable. Setup menu list (continued) OTHER FUNCTIONS screen Item/ (Display mode) POWER ...

Dvc Camcorder
Page 85
... 60i mode: 1/4, 1/8, 1/15, 1/30 30P mode: 1/4, 1/8, 1/15 24P/24P (ADV) mode: 1/6, 1/12 Minimum subject luminance 3 lx (F1.6, gain 18 dB, video output 50 IRE) Lens hood Large-sized lens hood with wide angle of effective pixels: 380,000 (pixel offset system) Lens LEICA DICOMAR Optical image stabilizer...shutter mode is used) Pickup devices CCD image sensor (x3) (1/3-inch, interline transfer, progressive-capable) Number of pixels Total number of pixels: 410,000, Number of view Filter diameter 72 mm LCD monitor 3.5-inch LCD color monitor, 210,000 pixels Viewfinder 0.44-inch LCD color viewfinder, ...
... 60i mode: 1/4, 1/8, 1/15, 1/30 30P mode: 1/4, 1/8, 1/15 24P/24P (ADV) mode: 1/6, 1/12 Minimum subject luminance 3 lx (F1.6, gain 18 dB, video output 50 IRE) Lens hood Large-sized lens hood with wide angle of effective pixels: 380,000 (pixel offset system) Lens LEICA DICOMAR Optical image stabilizer...shutter mode is used) Pickup devices CCD image sensor (x3) (1/3-inch, interline transfer, progressive-capable) Number of pixels Total number of pixels: 410,000, Number of view Filter diameter 72 mm LCD monitor 3.5-inch LCD color monitor, 210,000 pixels Viewfinder 0.44-inch LCD color viewfinder, ...

Dvc Camcorder
Page 86
...) CGA-D54 (5400 mAh: equivalent to accessory battery) AC adapter kit AG-B15 (equivalent to 20 kHz Wow & flutter Below measurable limits [CONNECTORS] VIDEO IN/OUT (automatic input/output switching) Pin jack, Analog composite input/output, 1.0 V [p-p], 75 Ω S-VIDEO IN/OUT (automatic input/output switching) S-connector, Y/C separate signal Y: 1.0 V [p-p], C: 0.286 V [p-p], 75 Ω AUDIO IN/OUT...
...) CGA-D54 (5400 mAh: equivalent to accessory battery) AC adapter kit AG-B15 (equivalent to 20 kHz Wow & flutter Below measurable limits [CONNECTORS] VIDEO IN/OUT (automatic input/output switching) Pin jack, Analog composite input/output, 1.0 V [p-p], 75 Ω S-VIDEO IN/OUT (automatic input/output switching) S-connector, Y/C separate signal Y: 1.0 V [p-p], C: 0.286 V [p-p], 75 Ω AUDIO IN/OUT...

