

User's Manual
Page 5
...; User-friendly, multi-language on-screen display „ Advanced electronic keystone correction „ RS-232 connector for serial control Note „ The information in this manual is subject to deliver high reliability and ease of this document is not permitted without express written consent. Introduction Projector Features The projector integrates high...
...; User-friendly, multi-language on-screen display „ Advanced electronic keystone correction „ RS-232 connector for serial control Note „ The information in this manual is subject to deliver high reliability and ease of this document is not permitted without express written consent. Introduction Projector Features The projector integrates high...

User's Manual
Page 6
... it was originally packed at the factory. Carry Bag (optional for Remote Control (IR) & batteries SUB) certain models) (AAA *2 PCS) for certain regions Documentation: 5User's Manual 5Warranty Card 5Quick Start Card 5WEEE Card (for EMEA only) Note „ For European warrant information please visit www.optomaeurope.com „ Due to the...
... it was originally packed at the factory. Carry Bag (optional for Remote Control (IR) & batteries SUB) certain models) (AAA *2 PCS) for certain regions Documentation: 5User's Manual 5Warranty Card 5Quick Start Card 5WEEE Card (for EMEA only) Note „ For European warrant information please visit www.optomaeurope.com „ Due to the...

User's Manual
Page 9
Using the Product Control Panel 1 2 345 6 7 8 4 1 Power Turn the projector on or off. 2 SOURCE Switch between input signals. 3 MENU/EXIT Display or exit the on-screen display menus. 4 Keystone ( / ) Manually correct distorted images resulting from an angled projection. 5 Four directional buttons Use four directional buttons to select items or make adjustments to your selection. 6 Re-SYNC Automatically synchronize the projector to the input source. 7 POWER (Power LED indicator) Refer to "LED Indicator Messages". 8 TEMP/LAMP (Temp/Lamp LED indicator) Refer to "LED Indicator Messages". EN-9
Using the Product Control Panel 1 2 345 6 7 8 4 1 Power Turn the projector on or off. 2 SOURCE Switch between input signals. 3 MENU/EXIT Display or exit the on-screen display menus. 4 Keystone ( / ) Manually correct distorted images resulting from an angled projection. 5 Four directional buttons Use four directional buttons to select items or make adjustments to your selection. 6 Re-SYNC Automatically synchronize the projector to the input source. 7 POWER (Power LED indicator) Refer to "LED Indicator Messages". 8 TEMP/LAMP (Temp/Lamp LED indicator) Refer to "LED Indicator Messages". EN-9

User's Manual
Page 11
... 4 15 adjustments to your selection. 4 Left mouse 5 16 Perform the left button of the 6 17 mouse when mouse mode is activated. 7 5 Keystone ( / ) 8 18 19 20 Manually correct distorted 9 21 images resulting from an 10 22 angled projection. 11 6 Brightness Display the setting bar for adjustment of brightness. 7 Freeze Freeze the projected...
... 4 15 adjustments to your selection. 4 Left mouse 5 16 Perform the left button of the 6 17 mouse when mouse mode is activated. 7 5 Keystone ( / ) 8 18 19 20 Manually correct distorted 9 21 images resulting from an 10 22 angled projection. 11 6 Brightness Display the setting bar for adjustment of brightness. 7 Freeze Freeze the projected...

User's Manual
Page 26
at lower temperature, the screen looks warmer. Keystone Manually correct distorted images resulting from an angled projection. Aspect Ratio Use this function to 800 x 480 (show 1024 x 768). For SVGA models: „ 4:3 The input ...
at lower temperature, the screen looks warmer. Keystone Manually correct distorted images resulting from an angled projection. Aspect Ratio Use this function to 800 x 480 (show 1024 x 768). For SVGA models: „ 4:3 The input ...
User's Manual
Page 43
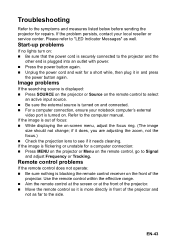
...; Unplug the power cord and wait for repairs. EN-43 Refer to the side. Please refer to "LED Indicator Messages" as far to the computer manual.
...; Unplug the power cord and wait for repairs. EN-43 Refer to the side. Please refer to "LED Indicator Messages" as far to the computer manual.

User's Manual
Page 50
... input source. Brightness Display the setting bar for adjustment of brightness. 3D Turn on or off . R Button Perform the right button of the mouse. Keystone+/Manually correct distorted images resulting from an angled projection. Menu Display on-screen display menus. Remote Control Power Turn the projector on or off 3D function.
... input source. Brightness Display the setting bar for adjustment of brightness. 3D Turn on or off . R Button Perform the right button of the mouse. Keystone+/Manually correct distorted images resulting from an angled projection. Menu Display on-screen display menus. Remote Control Power Turn the projector on or off 3D function.


