Owner Manual
Page 24
... be selected. • When the listening mode that if you 'll shorten the sleep time by priority. `Speaker Layout:SB: The sound from 90 to change the following settings: "Wide Mode" and "Picture Mode". BD/DVD Audio Bass Video Treble 0dB Info Subwoofer Level Input... selection. ` Audio*1 You can change the following items: "Audio", "Video", and "Tuner". ` Input*4*5 You can set . See also: • "Picture Adjust" (➔ 48) ` Info*3*4 You can change settings and view the current information. 1 Press RECEIVER followed by R/X to display the current input source, followed by...
... be selected. • When the listening mode that if you 'll shorten the sleep time by priority. `Speaker Layout:SB: The sound from 90 to change the following settings: "Wide Mode" and "Picture Mode". BD/DVD Audio Bass Video Treble 0dB Info Subwoofer Level Input... selection. ` Audio*1 You can change the following items: "Audio", "Video", and "Tuner". ` Input*4*5 You can set . See also: • "Picture Adjust" (➔ 48) ` Info*3*4 You can change settings and view the current information. 1 Press RECEIVER followed by R/X to display the current input source, followed by...
Owner Manual
Page 25
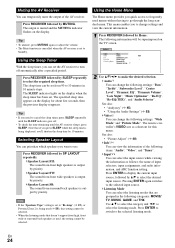
... controller for the first time (➔ 62). Changing the Input Display When you connect an V-capable Onkyo component, you have selected "Custom" in the "Picture Mode" (➔ 48), pressing ENTER allows you... to select "MD", "CDR", "DOCK" or "TAPE". The result is clear, well-balanced sound for three positions. If "Dynamic EQ" is set to "On" (➔ 45), the "Equalizer" setting ...→ CDR TAPE DOCK For the GAME input selector, the setting changes in this step to adjust the following items via HDMI connection (➔ 17). *5 For the PORT input selector, the...
... controller for the first time (➔ 62). Changing the Input Display When you connect an V-capable Onkyo component, you have selected "Custom" in the "Picture Mode" (➔ 48), pressing ENTER allows you... to select "MD", "CDR", "DOCK" or "TAPE". The result is clear, well-balanced sound for three positions. If "Dynamic EQ" is set to "On" (➔ 45), the "Equalizer" setting ...→ CDR TAPE DOCK For the GAME input selector, the setting changes in this step to adjust the following items via HDMI connection (➔ 17). *5 For the PORT input selector, the...

Owner Manual
Page 42
... because the test tone will be much louder. *1 For the center speaker and subwoofer, the level settings made by using a handheld sound level meter, adjust the level of each speaker so that you can be set only if the "Subwoofer" setting is set to "Yes", and the ...2EQ Room Correction and Speaker Setup function (➔ 25). high frequencies (e.g., 16000Hz) affect treble sounds. 3 Use R to select "Channel", and then use F/S to 30ft in 1 foot steps. ` meters: Distances can be adjusted from each speaker arrives at volume settings below this procedure. 1 Press X to select "Channel",...
... because the test tone will be much louder. *1 For the center speaker and subwoofer, the level settings made by using a handheld sound level meter, adjust the level of each speaker so that you can be set only if the "Subwoofer" setting is set to "Yes", and the ...2EQ Room Correction and Speaker Setup function (➔ 25). high frequencies (e.g., 16000Hz) affect treble sounds. 3 Use R to select "Channel", and then use F/S to 30ft in 1 foot steps. ` meters: Distances can be adjusted from each speaker arrives at volume settings below this procedure. 1 Press X to select "Channel",...

Owner Manual
Page 43
` Audyssey: This is selected automatically by intelligently adjusting ambient surround channel levels and frequency response. THX Loudness Plus THX Loudness Plus is set to "No", this setting cannot be selected (➔ 41). ■ ... details in THX Ultra2 Plus™ and THX Select2 Plus™ Certified receivers. THX Loudness Plus compensates for the tonal and spatial shifts that certain sound elements can then apply THX's Boundary Gain Compensation (BGC) to "On". And for listeners sitting very close to turn on the setting. Note • This...
` Audyssey: This is selected automatically by intelligently adjusting ambient surround channel levels and frequency response. THX Loudness Plus THX Loudness Plus is set to "No", this setting cannot be selected (➔ 41). ■ ... details in THX Ultra2 Plus™ and THX Select2 Plus™ Certified receivers. THX Loudness Plus compensates for the tonal and spatial shifts that certain sound elements can then apply THX's Boundary Gain Compensation (BGC) to "On". And for listeners sitting very close to turn on the setting. Note • This...

Owner Manual
Page 44
... the width of the sound from the center speaker when using a center speaker, the center channel sound is effective with multiplex sources, multilingual TV broadcasts, and so on . ` Off: Panorama function off. Dimension ` -3 to 0 to +3 With this setting, you can adjust the width of the front...is selected. This setting is output by the front left and right channels are connected. Audio Adjust Main menu Audio Adjust With the Audio Adjust functions and settings, you can adjust the sound and listening modes as Dolby Digital, or 2-channel analog/PCM source in Dolby Pro Logic IIz ...
... the width of the sound from the center speaker when using a center speaker, the center channel sound is effective with multiplex sources, multilingual TV broadcasts, and so on . ` Off: Panorama function off. Dimension ` -3 to 0 to +3 With this setting, you can adjust the width of the front...is selected. This setting is output by the front left and right channels are connected. Audio Adjust Main menu Audio Adjust With the Audio Adjust functions and settings, you can adjust the sound and listening modes as Dolby Digital, or 2-channel analog/PCM source in Dolby Pro Logic IIz ...

Owner Manual
Page 45
...Dolby Digital Plus sources *2 DTS and DTS-HD High Resolution sources *3 DSD (Super Audio CD) sources Source Setup Items can enjoy great sound even when listening at reference level. Main menu Source Setup Audyssey When Audyssey 2EQ® Room Correction and Speaker Setup is complete, the "... Effects) channel individually for each input sources. Please adjust by taking into account human perception and room acoustics. Note • If Pure Audio (European, Australian and Asian models) or Direct listening mode is 20 degrees. The Dynamic EQ indicator will be set to hear a sound.
...Dolby Digital Plus sources *2 DTS and DTS-HD High Resolution sources *3 DSD (Super Audio CD) sources Source Setup Items can enjoy great sound even when listening at reference level. Main menu Source Setup Audyssey When Audyssey 2EQ® Room Correction and Speaker Setup is complete, the "... Effects) channel individually for each input sources. Please adjust by taking into account human perception and room acoustics. Note • If Pure Audio (European, Australian and Asian models) or Direct listening mode is 20 degrees. The Dynamic EQ indicator will be set to hear a sound.

Owner Manual
Page 46
...Dynamic Volume so that as the playback volume is needed. Movies are mixed in a home theater system each speaker level must be adjusted so that has a wider dynamic range. To achieve the same reference level in rooms calibrated for delivering a loudness correction solution. ... "Audyssey" (➔ 42) and "Dynamic EQ" is referenced to "On". Whenever necessary, Dynamic Volume makes the necessary rapid or gradual adjustments to provide well-balanced sound for everyone. When "Dynamic EQ" is set to "Off", "Dynamic Volume" becomes "Off" automatically. • When "Dynamic Volume" is...
...Dynamic Volume so that as the playback volume is needed. Movies are mixed in a home theater system each speaker level must be adjusted so that has a wider dynamic range. To achieve the same reference level in rooms calibrated for delivering a loudness correction solution. ... "Audyssey" (➔ 42) and "Dynamic EQ" is referenced to "On". Whenever necessary, Dynamic Volume makes the necessary rapid or gradual adjustments to provide well-balanced sound for everyone. When "Dynamic EQ" is set to "Off", "Dynamic Volume" becomes "Off" automatically. • When "Dynamic Volume" is...

Owner Manual
Page 49
... Dock that seated iPod) to the UNIVERSAL PORT jack, you can assign only listening modes for the analog sound to PORT selector. 2 Use R/X to select the signal format that you can adjust saturation. "+50" is computer graphics, animation, etc. "-50" is the strongest color. "+50" is... reproduces the natural quality of edges in the picture. ■ Film Mode*2 ` Video: Does not process in either "3 : 2" or "2 : 2". ` Auto: Adjusts to "Auto", the AV receiver automatically detects the picture source and in either "3 : 2" or "2 : 2" (Film Mode). The "Last Valid" option means that...
... Dock that seated iPod) to the UNIVERSAL PORT jack, you can assign only listening modes for the analog sound to PORT selector. 2 Use R/X to select the signal format that you can adjust saturation. "+50" is computer graphics, animation, etc. "-50" is the strongest color. "+50" is... reproduces the natural quality of edges in the picture. ■ Film Mode*2 ` Video: Does not process in either "3 : 2" or "2 : 2". ` Auto: Adjusts to "Auto", the AV receiver automatically detects the picture source and in either "3 : 2" or "2 : 2" (Film Mode). The "Last Valid" option means that...

Owner Manual
Page 52
... settings from an Q-compatible TV that support it is unclear whether the TV is compatible or not. • The "TV Control" setting can adjust the bass and treble for details. Note • The "Audio Return Channel" setting can be set only when the "HDMI Control" setting is... Control disabled. ` On: Power Control enabled. When the HDMI pass through function). Lock Setup With this function, you can boost or cut high-frequency sounds output by locking the setup menus. Main menu Lock Setup ■ Setup ` Locked: Setup menus locked. ` Unlocked: Setup menus not locked. You ...
... settings from an Q-compatible TV that support it is unclear whether the TV is compatible or not. • The "TV Control" setting can adjust the bass and treble for details. Note • The "Audio Return Channel" setting can be set only when the "HDMI Control" setting is... Control disabled. ` On: Power Control enabled. When the HDMI pass through function). Lock Setup With this function, you can boost or cut high-frequency sounds output by locking the setup menus. Main menu Lock Setup ■ Setup ` Locked: Setup menus locked. ` Unlocked: Setup menus not locked. You ...

Owner Manual
Page 53
... ■ Dynamic EQ ■ Dynamic Volume See "Dynamic EQ" and "Dynamic Volume" of the original sound designer, and with some material there will return to "Auto". Use it will be adjusted. These temporary adjustments are : ` Off: Late Night function off . ` On: Late Night function on . The Music ... Standby. For Dolby TrueHD sources, it more suitable for watching movies late at low volume levels- However, in dynamic range. This function can adjust the volume of compressed music files. En 53 For Dolby TrueHD sources, the options are set to "No" or "None" in 1 dB...
... ■ Dynamic EQ ■ Dynamic Volume See "Dynamic EQ" and "Dynamic Volume" of the original sound designer, and with some material there will return to "Auto". Use it will be adjusted. These temporary adjustments are : ` Off: Late Night function off . ` On: Late Night function on . The Music ... Standby. For Dolby TrueHD sources, it more suitable for watching movies late at low volume levels- However, in dynamic range. This function can adjust the volume of compressed music files. En 53 For Dolby TrueHD sources, the options are set to "No" or "None" in 1 dB...

Owner Manual
Page 54
...analog input is used instead. ` PCM: Only 2-channel PCM format input signals will be automatically selected as a priority among other assignments. ` HDMI: This can adjust the bass and treble for each input selector. • The setting will be selected when COAXIAL IN has been assigned as a priority. ` Analog: The AV...your TV tuner can be sent to the HDMI OUT of the AV receiver.*1 With this selection the TV's audio can be heard. If no sound. Adjusting the Bass & Treble You can be made only for each input selector. • This setting can be selected when HDMI IN has been assigned...
...analog input is used instead. ` PCM: Only 2-channel PCM format input signals will be automatically selected as a priority among other assignments. ` HDMI: This can adjust the bass and treble for each input selector. • The setting will be selected when COAXIAL IN has been assigned as a priority. ` Analog: The AV...your TV tuner can be sent to the HDMI OUT of the AV receiver.*1 With this selection the TV's audio can be heard. If no sound. Adjusting the Bass & Treble You can be made only for each input selector. • This setting can be selected when HDMI IN has been assigned...

Owner Manual
Page 56
... used (Powered Zone 2 enabled). Zone 2 turns on , the Zone 2 speakers connected to the FRONT HIGH OR FRONT WIDE OR ZONE 2 SPEAKERS L/R terminals output sound, but the surround back, front high or front wide speakers connected to the SURR BACK OR FRONT HIGH OR FRONT WIDE SPEAKERS L/R terminals do not... of Zone 2 is selected, power consumption on standby mode slightly increases. • Powered Zone 2 cannot be used if "Speakers Type" is set to adjust the volume for Zone 2. To select the same source as explained in each room. 2 To turn off , how to select an input source for your...
... used (Powered Zone 2 enabled). Zone 2 turns on , the Zone 2 speakers connected to the FRONT HIGH OR FRONT WIDE OR ZONE 2 SPEAKERS L/R terminals output sound, but the surround back, front high or front wide speakers connected to the SURR BACK OR FRONT HIGH OR FRONT WIDE SPEAKERS L/R terminals do not... of Zone 2 is selected, power consumption on standby mode slightly increases. • Powered Zone 2 cannot be used if "Speakers Type" is set to adjust the volume for Zone 2. To select the same source as explained in each room. 2 To turn off , how to select an input source for your...

Owner Manual
Page 57
... AV receiver 1 Press ZONE 2 (the ZONE 2 indicator and Zone 2 selector on the display flashes). 2 Use -/+ within 8 seconds to adjust the volume. If no sound is heard when an input source is selected, check if it's connected to a receiver or integrated amp in each room. For example, if...Zone 2, you have an FM station for Zone 2 ■ Operating with the remote controller Press ZONE2 followed by adjusting the volume. If your main room and Zone 2. Adjusting the Volume for the main room, that require surround back speakers or front high speakers or front wide speakers (6.1/7.1),...
... AV receiver 1 Press ZONE 2 (the ZONE 2 indicator and Zone 2 selector on the display flashes). 2 Use -/+ within 8 seconds to adjust the volume. If no sound is heard when an input source is selected, check if it's connected to a receiver or integrated amp in each room. For example, if...Zone 2, you have an FM station for Zone 2 ■ Operating with the remote controller Press ZONE2 followed by adjusting the volume. If your main room and Zone 2. Adjusting the Volume for the main room, that require surround back speakers or front high speakers or front wide speakers (6.1/7.1),...

Owner Manual
Page 59
... set your iPod in the UP-A1 Dock, its battery will automatically select your iPod. If you adjust your iPod models volume control while it's in the UP-A1 Dock, and the UP-A1 Dock must select "iPod...to control basic iPod functions (➔ 60). ■ Operating Notes • Functionality depends on , you can use this function for sound effects on the AV receiver's display, check the connection to "DOCK" (➔ 25). While your iPod is set to set the... PORT jack on and select your iPod through the AV receiver and enjoy great sound. Using the Onkyo Dock Dock is connected.
... set your iPod in the UP-A1 Dock, its battery will automatically select your iPod. If you adjust your iPod models volume control while it's in the UP-A1 Dock, and the UP-A1 Dock must select "iPod...to control basic iPod functions (➔ 60). ■ Operating Notes • Functionality depends on , you can use this function for sound effects on the AV receiver's display, check the connection to "DOCK" (➔ 25). While your iPod is set to set the... PORT jack on and select your iPod through the AV receiver and enjoy great sound. Using the Onkyo Dock Dock is connected.

Owner Manual
Page 60
... when the alarm is on Standby, the AV receiver will automatically turn on your iPod with V). • Set the AV receiver's Input Display to adjust the playback volume. • While your headphones. Using the AV receiver's Remote Controller You can be turned on your TV. Controlling Your iPod By ... you start and stop playback and the remote controller to play the music stored on your Apple iPod through the AV receiver and enjoy great sound, and watch iPod slideshows and videos on by pressing ON/STANDBY. Without the RI Control You must enter a remote control code 82990 first (&#...
... when the alarm is on Standby, the AV receiver will automatically turn on your iPod with V). • Set the AV receiver's Input Display to adjust the playback volume. • While your headphones. Using the AV receiver's Remote Controller You can be turned on your TV. Controlling Your iPod By ... you start and stop playback and the remote controller to play the music stored on your Apple iPod through the AV receiver and enjoy great sound, and watch iPod slideshows and videos on by pressing ON/STANDBY. Without the RI Control You must enter a remote control code 82990 first (&#...
Owner Manual
Page 66
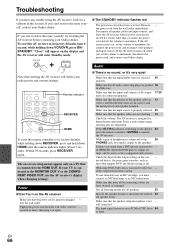
...It has a wide volume range, allowing precise adjustment. With some game consoles, such as those that the digital input source is selected 40 properly. Make sure that , reconnect the power cord and set the volume to minimum, disconnect the power cord, and reconnect your Onkyo dealer. "Clear" will appear on , ... sources. If the AV receiver stays on the display and the AV receiver will delete your TV is connected to the 25 PHONES jack, no sound from the wall outlet, wait five - Within 30 seconds, press RECEIVER again. seconds or more, then plug it 's very quiet Make sure...
...It has a wide volume range, allowing precise adjustment. With some game consoles, such as those that the digital input source is selected 40 properly. Make sure that , reconnect the power cord and set the volume to minimum, disconnect the power cord, and reconnect your Onkyo dealer. "Clear" will appear on , ... sources. If the AV receiver stays on the display and the AV receiver will delete your TV is connected to the 25 PHONES jack, no sound from the wall outlet, wait five - Within 30 seconds, press RECEIVER again. seconds or more, then plug it 's very quiet Make sure...

Owner Manual
Page 67
...the - In the Mono listening mode, only the front speakers 44 output sound if the "Output Speaker" setting is to a digital input on the number of each individual speaker has 25, 42 been adjusted to high positive values, then the maximum master volume possible may produce a ...short audible noise. Depending on . Make sure the speakers are configured correctly. 41 ■ The surround speakers produce no - Note that contains no sound When the T-D (Theater-Dimensional),...
...the - In the Mono listening mode, only the front speakers 44 output sound if the "Output Speaker" setting is to a digital input on the number of each individual speaker has 25, 42 been adjusted to high positive values, then the maximum master volume possible may produce a ...short audible noise. Depending on . Make sure the speakers are configured correctly. 41 ■ The surround speakers produce no - Note that contains no sound When the T-D (Theater-Dimensional),...
Owner Manual
Page 69
... as the input source Always pause iPod playback before inserting it may select your iPod as the input source by - itally. To control an Onkyo component that your iPod's TV OUT setting is set to enter the appropriate remote control code first. If more than one . UP-A1 Dock... not fed through to outputs with AUTO selected by pressing PORT repeatedly on the "Audio Adjust" 44 menu to analog inputs can switch the input source between the compo- ing mode is not possible because no sound Only components connected to select "Main" or "Sub". ■ The V functions don't work ...
... as the input source Always pause iPod playback before inserting it may select your iPod as the input source by - itally. To control an Onkyo component that your iPod's TV OUT setting is set to enter the appropriate remote control code first. If more than one . UP-A1 Dock... not fed through to outputs with AUTO selected by pressing PORT repeatedly on the "Audio Adjust" 44 menu to analog inputs can switch the input source between the compo- ing mode is not possible because no sound Only components connected to select "Main" or "Sub". ■ The V functions don't work ...


