
Camedia Master 4.1 Instruction Manual (4.9MB)
Page 3
...Watching movies 43 Playing Back Sound 45 Checking File Information 46 Checking file information 46 Changing the shooting date 49 Playing linked sound 50 Recording linked sound 51 Organizing Files 52 Conventions for File Organization 52 Creating a Group or Album 53 Creating a Folder 55 ...Files 60 Deleting Files 60 Renaming a File 62 Renaming Files in a Single Operation 63 Converting Images to a Format Viewable on the Camera 65 Printing 67 Print Window 67 Printer Settings 69 Automatic compensation settings 70 Photo Printing 71 Making Index Prints 74 Creating and Printing a...
...Watching movies 43 Playing Back Sound 45 Checking File Information 46 Checking file information 46 Changing the shooting date 49 Playing linked sound 50 Recording linked sound 51 Organizing Files 52 Conventions for File Organization 52 Creating a Group or Album 53 Creating a Folder 55 ...Files 60 Deleting Files 60 Renaming a File 62 Renaming Files in a Single Operation 63 Converting Images to a Format Viewable on the Camera 65 Printing 67 Print Window 67 Printer Settings 69 Automatic compensation settings 70 Photo Printing 71 Making Index Prints 74 Creating and Printing a...

Camedia Master 4.1 Instruction Manual (4.9MB)
Page 50
2 Click the [Modify] button. To stop playback Click the sound icon again, or press the Esc key. 50 This changes the shooting date in the [Properties] dialog box. Date Time OK button 3 Set the date and time, and click the [OK] button. appears as part of the file Click To play the linked sound Click the sound icon. Playing linked sound When an image has linked sound, the sound icon information. The [Modify Date] dialog box appears.
2 Click the [Modify] button. To stop playback Click the sound icon again, or press the Esc key. 50 This changes the shooting date in the [Properties] dialog box. Date Time OK button 3 Set the date and time, and click the [OK] button. appears as part of the file Click To play the linked sound Click the sound icon. Playing linked sound When an image has linked sound, the sound icon information. The [Modify Date] dialog box appears.

Camedia Master 4.1 Instruction Manual (4.9MB)
Page 51
For more details, refer to record a memo in audio. About linked sound playback, see "Playing linked sound" (page 50). OK button Record button Play button 2 Click the [Record] button, and provide the sound through the microphone. When you to the operating instructions provided with ...
For more details, refer to record a memo in audio. About linked sound playback, see "Playing linked sound" (page 50). OK button Record button Play button 2 Click the [Record] button, and provide the sound through the microphone. When you to the operating instructions provided with ...

Camedia Master 4.1 Instruction Manual (4.9MB)
Page 108
... size for the file, and click [OK]. 108 To change the background color of the original images. • Large (100%) • Medium (70%) • Small (50%) 8 Click the [Save] button. The [Save As] dialog box appears. The saving operation may take a little time. 9 Enter the name and location for the panorama...
... size for the file, and click [OK]. 108 To change the background color of the original images. • Large (100%) • Medium (70%) • Small (50%) 8 Click the [Save] button. The [Save As] dialog box appears. The saving operation may take a little time. 9 Enter the name and location for the panorama...

Camedia Master 4.1 Instruction Manual (4.9MB)
Page 111
.... 7 Select the image size (size as a proportion of the original image size) after stitching from the following: • Large (100%) • Medium (70%) • Small (50%) 8 Click the [Save] button. Image size selection Background color selection Save button Try again button To go back to the unstitched state Click the [Try...
.... 7 Select the image size (size as a proportion of the original image size) after stitching from the following: • Large (100%) • Medium (70%) • Small (50%) 8 Click the [Save] button. Image size selection Background color selection Save button Try again button To go back to the unstitched state Click the [Try...

Camedia Master 4.1 Instruction Manual (4.9MB)
Page 117
.... To display the image at the center. You can change the display magnification in the image display area, to zoom in pixels: 12.5%, 25%, 33%, 50%, 70%, 100%, 140%, 200%, 300%, and 400%. this enlarges the selected area. To drag the image 1 Click the Scrool button in the tool bar. To...
.... To display the image at the center. You can change the display magnification in the image display area, to zoom in pixels: 12.5%, 25%, 33%, 50%, 70%, 100%, 140%, 200%, 300%, and 400%. this enlarges the selected area. To drag the image 1 Click the Scrool button in the tool bar. To...

Camedia Master 4.1 Instruction Manual (4.9MB)
Page 147
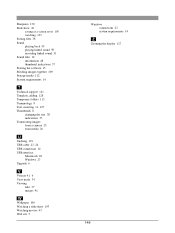
... 11 viewing 41 with the calendar 28 Index prints 74 Information, files 46 Inserting text 127 Instant fix 130, 132 L Lightness 130 Linked sound playing 50 recording 51 M Macintosh connections 24 system requirements 14 Main menu for Pro version 18 for version 4.1 16 Making a backup direct to storage media 112 ...indications 37 Movies editing 134 making 106 saving a frame as a still 138 watching 43 Moving an image 117 My Album 52 changing the location 21 O Olympus web site 5 Organizing files 52 P Panorama 107 automatic 107 free stitch 109 Photo printing 71 Playing back sound 45 Playing linked sound...
... 11 viewing 41 with the calendar 28 Index prints 74 Information, files 46 Inserting text 127 Instant fix 130, 132 L Lightness 130 Linked sound playing 50 recording 51 M Macintosh connections 24 system requirements 14 Main menu for Pro version 18 for version 4.1 16 Making a backup direct to storage media 112 ...indications 37 Movies editing 134 making 106 saving a frame as a still 138 watching 43 Moving an image 117 My Album 52 changing the location 21 O Olympus web site 5 Organizing files 52 P Panorama 107 automatic 107 free stitch 109 Photo printing 71 Playing back sound 45 Playing linked sound...
Camedia Master 4.1 Instruction Manual (4.9MB)
Page 148
... 130 Slide show 10 saving as a screen saver 105 watching 103 Sorting files 38 Sound playing back 45 playing linked sound 50 recording linked sound 51 Sound files 12 information 48 thumbnail indications 37 Starting the software 15 Stitching images together 109 Storage media... Technical support 141 Template, adding 128 Temporary folders 113 Terminology 8 Text, inserting 11, 127 Thumbnails 8 changing the size 38 indications 37 Transferring images from a camera 25 from media 26 U Undoing 119 USB cable 23, 24 USB connection 14 USB interface Macintosh 24 Windows 23 Upgrade 6 V Version 4.1 6 View mode ...
... 130 Slide show 10 saving as a screen saver 105 watching 103 Sorting files 38 Sound playing back 45 playing linked sound 50 recording linked sound 51 Sound files 12 information 48 thumbnail indications 37 Starting the software 15 Stitching images together 109 Storage media... Technical support 141 Template, adding 128 Temporary folders 113 Terminology 8 Text, inserting 11, 127 Thumbnails 8 changing the size 38 indications 37 Transferring images from a camera 25 from media 26 U Undoing 119 USB cable 23, 24 USB connection 14 USB interface Macintosh 24 Windows 23 Upgrade 6 V Version 4.1 6 View mode ...

C-50 Zoom Quick Start Guide (833 KB)
Page 1
...the direction of non-use . • Insert the Lithium ion battery into the slot. C-50 Zoom Digital Camera Strap LI-10B lithium ion battery LI-10C battery charger Battery charger AC cable CAMEDIA Master 4.0 CD-ROM USB cable 32 MB (grey color) xD-Picture Card The following ...format. • Press twice to store the date and time and exit the menu. You must fully charge the battery using your Olympus C-50 Zoom Digital Camera... The card will b. The "No Picture" message should be displayed Printed in Monitor Print reserve Number of memory capacities. Two Corporate...
...the direction of non-use . • Insert the Lithium ion battery into the slot. C-50 Zoom Digital Camera Strap LI-10B lithium ion battery LI-10C battery charger Battery charger AC cable CAMEDIA Master 4.0 CD-ROM USB cable 32 MB (grey color) xD-Picture Card The following ...format. • Press twice to store the date and time and exit the menu. You must fully charge the battery using your Olympus C-50 Zoom Digital Camera... The card will b. The "No Picture" message should be displayed Printed in Monitor Print reserve Number of memory capacities. Two Corporate...

C-50 Zoom Quick Start Guide (833 KB)
Page 2
... it to install all pictures on the Mode dial position selected. About the Olympus CAMEDIA Master 4.0 CD-ROM Your Olympus C-50 Zoom Digital Camera comes bundled with the lens barrier fully open the lens barrier, or press . You may or may be erased while in the "... No icon Auto-flash Red-eye Reduction Flash Description The camera automatically decides if the flash is your new Olympus C-50 Zoom Camera! Reduces incidence of red-eye by emitting pre-flashes to shrink pupil size before connecting the C-50 Zoom Digital Camera to give you complete control of computer and whether you ...
... it to install all pictures on the Mode dial position selected. About the Olympus CAMEDIA Master 4.0 CD-ROM Your Olympus C-50 Zoom Digital Camera comes bundled with the lens barrier fully open the lens barrier, or press . You may or may be erased while in the "... No icon Auto-flash Red-eye Reduction Flash Description The camera automatically decides if the flash is your new Olympus C-50 Zoom Camera! Reduces incidence of red-eye by emitting pre-flashes to shrink pupil size before connecting the C-50 Zoom Digital Camera to give you complete control of computer and whether you ...

C-50 Zoom Basic Manual (3.3 MB)
Page 3
...Corporation. • Macintosh is subject to the following two conditions: (1) This device may cause undesired operation. "CE" mark cameras are the "Design Rule for safety, health, environment and customer protection. For customers in Europe "CE" mark indicates that... of the Canadian Interference-Causing Equipment Regulations. For customers in Canada This Class B digital apparatus meets all requirements of Conformity En Model Number : C-50 ZOOM Trade Name : OLYMPUS Responsible Party : Olympus America Inc. Address : 2 Corporate Center Drive, Melville, New York 11747-3157...
...Corporation. • Macintosh is subject to the following two conditions: (1) This device may cause undesired operation. "CE" mark cameras are the "Design Rule for safety, health, environment and customer protection. For customers in Europe "CE" mark indicates that... of the Canadian Interference-Causing Equipment Regulations. For customers in Canada This Class B digital apparatus meets all requirements of Conformity En Model Number : C-50 ZOOM Trade Name : OLYMPUS Responsible Party : Olympus America Inc. Address : 2 Corporate Center Drive, Melville, New York 11747-3157...

C-50 Zoom Reference Manual (4.7 MB)
Page 1
PC CONNECTION OPERATION MANUAL Explanation of digital camera functions and operating instructions. DIGITAL CAMERA C-50 ZOOM REFERENCE MANUAL CAMERA OPERATION MANUAL Explanation of how to download images between your digital camera and PC. DIGITAL CAMERA -
PC CONNECTION OPERATION MANUAL Explanation of digital camera functions and operating instructions. DIGITAL CAMERA C-50 ZOOM REFERENCE MANUAL CAMERA OPERATION MANUAL Explanation of how to download images between your digital camera and PC. DIGITAL CAMERA -

C-50 Zoom Reference Manual (4.7 MB)
Page 2
Keep this manual in a safe place for purchasing an Olympus digital camera. DIGITAL CAMERA C-50 ZOOM REFERENCE MANUAL Ⅲ Thank you start to enjoy optimum performance and a longer service life. Before you for future reference. Ⅲ We recommend that you take test shots to get accustomed to your new camera, please read these instructions carefully to use your camera before taking important photographs. Ⅲ The images and illustrations in this manual may differ from their real versions.
Keep this manual in a safe place for purchasing an Olympus digital camera. DIGITAL CAMERA C-50 ZOOM REFERENCE MANUAL Ⅲ Thank you start to enjoy optimum performance and a longer service life. Before you for future reference. Ⅲ We recommend that you take test shots to get accustomed to your new camera, please read these instructions carefully to use your camera before taking important photographs. Ⅲ The images and illustrations in this manual may differ from their real versions.
C-50 Zoom Reference Manual (4.7 MB)
Page 3
... manual are the "Design Rule for Camera File System/DCF" standards stipulated by the Japan Electronics and Information Technology Industries Association (JEITA). 2 For customers in Europe. For customers in Canada This Class B digital apparatus meets all requirements of Conformity Model Number : C-50 ZOOM Trade Name : OLYMPUS Responsible Party : Olympus America Inc. Operation is a trademark of...
... manual are the "Design Rule for Camera File System/DCF" standards stipulated by the Japan Electronics and Information Technology Industries Association (JEITA). 2 For customers in Europe. For customers in Canada This Class B digital apparatus meets all requirements of Conformity Model Number : C-50 ZOOM Trade Name : OLYMPUS Responsible Party : Olympus America Inc. Operation is a trademark of...

C-50 Zoom Reference Manual (4.7 MB)
Page 6
... setting (Shutter priority shooting 42 Aperture & Shutter speed setting (Manual shooting 43 Movie recording 44 Zoom (Telephoto/Wide-angle shooting 46 Digital zoom 46 Flash shooting 48 Using the flash 50 Flash intensity control 53 Advanced shooting 54 Spot metering (Selecting the metering area) ....54 Macro mode shooting (Taking close-up pictures...
... setting (Shutter priority shooting 42 Aperture & Shutter speed setting (Manual shooting 43 Movie recording 44 Zoom (Telephoto/Wide-angle shooting 46 Digital zoom 46 Flash shooting 48 Using the flash 50 Flash intensity control 53 Advanced shooting 54 Spot metering (Selecting the metering area) ....54 Macro mode shooting (Taking close-up pictures...

C-50 Zoom Reference Manual (4.7 MB)
Page 12
..." 7 Record mode TIFF, SHQ, HQ, SQ1, SQ2 8 Memory gauge ,,, 9 Battery check , 0 Self-timer/ Remote control ! P. 39 P. 44 P. 70 P. 13 P. 13 P. 56 P. 57 P. 59 P. 77 P. 74 - P. 50, 52 P. 50 P. 54, 55 11 Monitor indications Items Indications 1 Shooting mode , P, A, S, M, ,,,, , , 2 Aperture value F2.8 - page P. 31 P. 41, 43 P. 42, 43 P. 76 P. 43 -
..." 7 Record mode TIFF, SHQ, HQ, SQ1, SQ2 8 Memory gauge ,,, 9 Battery check , 0 Self-timer/ Remote control ! P. 39 P. 44 P. 70 P. 13 P. 13 P. 56 P. 57 P. 59 P. 77 P. 74 - P. 50, 52 P. 50 P. 54, 55 11 Monitor indications Items Indications 1 Shooting mode , P, A, S, M, ,,,, , , 2 Aperture value F2.8 - page P. 31 P. 41, 43 P. 42, 43 P. 76 P. 43 -

C-50 Zoom Reference Manual (4.7 MB)
Page 51
When stops blinking, the camera is displayed on the monitor. Flash working range W (max.) : Approx. 0.2 m - 3.4 m (0.6 ft - 11.2 ft) T (max.) : Approx. 0.3 m - 2.0 m (1.0 ft - 6.6 ft) HQ Orange lamp 50 button Shutter button 2 Take the picture. ● When the flash is ready to fire, the orange lamp next to the viewfinder lights up and the (...
When stops blinking, the camera is displayed on the monitor. Flash working range W (max.) : Approx. 0.2 m - 3.4 m (0.6 ft - 11.2 ft) T (max.) : Approx. 0.3 m - 2.0 m (1.0 ft - 6.6 ft) HQ Orange lamp 50 button Shutter button 2 Take the picture. ● When the flash is ready to fire, the orange lamp next to the viewfinder lights up and the (...

C-50 Zoom Reference Manual (4.7 MB)
Page 56
Normal shooting Macro mode shooting Available modes 1 Press repeatedly until (macro mode) or (spot metering+ macro mode) appears. Mode indication OFF (Digital ESP) ᮡ ᮤ ᮣ ᮢ ● If is pressed to the maximum T position. Chapter 4 Macro mode shooting (Taking close-up... while observing your subject on the monitor. Macro shooting range Wide-angle (W) : 20 cm to 50 cm (0.7 ft to 1.6 ft) Telephoto (T) : 30 cm to 50 cm (1.0 ft to 1.6 ft) Factory default setting: Digital ESP button HQ Macro mark 55 You can fill the entire frame with a very small subject. ...
Normal shooting Macro mode shooting Available modes 1 Press repeatedly until (macro mode) or (spot metering+ macro mode) appears. Mode indication OFF (Digital ESP) ᮡ ᮤ ᮣ ᮢ ● If is pressed to the maximum T position. Chapter 4 Macro mode shooting (Taking close-up... while observing your subject on the monitor. Macro shooting range Wide-angle (W) : 20 cm to 50 cm (0.7 ft to 1.6 ft) Telephoto (T) : 30 cm to 50 cm (1.0 ft to 1.6 ft) Factory default setting: Digital ESP button HQ Macro mark 55 You can fill the entire frame with a very small subject. ...

C-50 Zoom Reference Manual (4.7 MB)
Page 65
.... Example: When setting the aperture on which is complete. 7 Press twice to save settings in CURRENT, the zoom position value will be saved as 38, 50, 70 or 114 mm, depending on the CUSTOM screen. CUSTOM P/A/S/M M FNo SHUTTER CUSTOM P/A/S/M FNo SHUTTER LCD OFF LCD Press to exit the menu. Custom setting...
.... Example: When setting the aperture on which is complete. 7 Press twice to save settings in CURRENT, the zoom position value will be saved as 38, 50, 70 or 114 mm, depending on the CUSTOM screen. CUSTOM P/A/S/M M FNo SHUTTER CUSTOM P/A/S/M FNo SHUTTER LCD OFF LCD Press to exit the menu. Custom setting...

C-50 Zoom Reference Manual (4.7 MB)
Page 66
... 43 ±0 LCD*1 ON P. 76 - ZOOM*2 FLASH MODE 38mm AUTO P. 46 P. 48 OFF OFF P. 54, 55 P. 56, 57 DRIVE ISO AUTO P. 59 P. 74 DIGITAL ZOOM ±0 OFF P. 53 P. 46 (for still pictures) WB HQ AUTO P. 70 P. 77 SHARPNESS NORMAL P. 78 CONTRAST NORMAL P. 78 *1 This sets the monitor to ON... or OFF when the camera is turned on. *2 In the mode, available zoom positions are 38/50/70/114mm (these numbers are based on a 35 mm film). 65 Chapter 4 My Mode setting Available items and factory...
... 43 ±0 LCD*1 ON P. 76 - ZOOM*2 FLASH MODE 38mm AUTO P. 46 P. 48 OFF OFF P. 54, 55 P. 56, 57 DRIVE ISO AUTO P. 59 P. 74 DIGITAL ZOOM ±0 OFF P. 53 P. 46 (for still pictures) WB HQ AUTO P. 70 P. 77 SHARPNESS NORMAL P. 78 CONTRAST NORMAL P. 78 *1 This sets the monitor to ON... or OFF when the camera is turned on. *2 In the mode, available zoom positions are 38/50/70/114mm (these numbers are based on a 35 mm film). 65 Chapter 4 My Mode setting Available items and factory...
