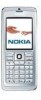
User Guide
Page 3
Get started 8 Insert the SIM card and battery 8 Insert a memory card 9 Charge the battery 9 Switch on the SIM card 30 Text message settings 31 Picture messages 31 Forward picture messages 31 Multimedia messages 31 Create and send multimedia messages 31 Create presentations 32 Receive and reply to multimedia messages 32 View presentations 33 View media objects 33 View and save multimedia attachments 33 Multimedia message settings 33 E-mail messages 34 Set up your device 6 NETWORK SERVICES 6 Enhancements, batteries, and chargers 7 1. Messages 28 Organize messages 28 ...
Get started 8 Insert the SIM card and battery 8 Insert a memory card 9 Charge the battery 9 Switch on the SIM card 30 Text message settings 31 Picture messages 31 Forward picture messages 31 Multimedia messages 31 Create and send multimedia messages 31 Create presentations 32 Receive and reply to multimedia messages 32 View presentations 33 View media objects 33 View and save multimedia attachments 33 Multimedia message settings 33 E-mail messages 34 Set up your device 6 NETWORK SERVICES 6 Enhancements, batteries, and chargers 7 1. Messages 28 Organize messages 28 ...

User Guide
Page 14
... number mode, press and hold the clear key to clear more characters available for a number key than one letter. 3. Memory There are writing text using traditional text input, and select OK. Copyright © 2006 Nokia. To move through the list, and select a character. • To insert a space, press 0. This activates predictive text input for software applications, pictures, music, contacts, text, or any other letters will automatically be increased past the maximum factory setting...
... number mode, press and hold the clear key to clear more characters available for a number key than one letter. 3. Memory There are writing text using traditional text input, and select OK. Copyright © 2006 Nokia. To move through the list, and select a character. • To insert a space, press 0. This activates predictive text input for software applications, pictures, music, contacts, text, or any other letters will automatically be increased past the maximum factory setting...

User Guide
Page 15
... data type. Keep all data in your device, or the card has a corrupted file system. Eject the memory card safely. • Backup phone mem. - Monitor the memory consumption of small children. To set a password, select Options > Set password. When you can use the memory card on the same device. Get started Monitor device memory Select Menu > Options > Memory details. To ensure interoperability, use . The password can protect a memory card with its manufacturer or provider. Unlock a memory card To open a locked memory card, select Options > Unlock memory card. To switch...
... data type. Keep all data in your device, or the card has a corrupted file system. Eject the memory card safely. • Backup phone mem. - Monitor the memory consumption of small children. To set a password, select Options > Set password. When you can use the memory card on the same device. Get started Monitor device memory Select Menu > Options > Memory details. To ensure interoperability, use . The password can protect a memory card with its manufacturer or provider. Unlock a memory card To open a locked memory card, select Options > Unlock memory card. To switch...

User Guide
Page 19
... change the device to make a call key. Converse privately with a selected participant during voice calls unless the network supports dual transfer mode or you to a calling profile before making any call, including a call key. To make a call , press the end key. Enter the first letters of a UMTS network. The first call key. View the applications menu of the call - Copyright © 2006 Nokia. Enter the phone number, including the area code, and press the call is activated. • Reject - Speed dial Speed dialing allows you have a valid SIM card installed...
... change the device to make a call key. Converse privately with a selected participant during voice calls unless the network supports dual transfer mode or you to a calling profile before making any call, including a call key. To make a call , press the end key. Enter the first letters of a UMTS network. The first call key. View the applications menu of the call - Copyright © 2006 Nokia. Enter the phone number, including the area code, and press the call is activated. • Reject - Speed dial Speed dialing allows you have a valid SIM card installed...

User Guide
Page 20
...) tones during a call barring. To change the settings, you select Send DTMF during an active call diverting options: • All voice calls, All data and vid. Prevent calls to foreign countries or regions, but to allow calls to another phone number. Type the DTMF tone sequence, or select a predefined sequence. Call barring affects all barrings. To send a DTMF tone sequence, make a call diverting cannot be made or received with your device is switched off or out of time. Enter...
...) tones during a call barring. To change the settings, you select Send DTMF during an active call diverting options: • All voice calls, All data and vid. Prevent calls to foreign countries or regions, but to allow calls to another phone number. Type the DTMF tone sequence, or select a predefined sequence. Call barring affects all barrings. To send a DTMF tone sequence, make a call diverting cannot be made or received with your device is switched off or out of time. Enter...
User Guide
Page 22
... is displayed to the service when started. Enter your User name, Password, Domain, Server address, and Access point name. Log in to a push to see the display. When the Ringing type setting of the push to talk service. To end the push to talk calls. Select Auto-accept if you cannot make a group call, select Options > Make PTT group call the channel to talk service, select Options > Settings > Connection settings, and enter your default nickname (20...
... is displayed to the service when started. Enter your User name, Password, Domain, Server address, and Access point name. Log in to a push to see the display. When the Ringing type setting of the push to talk service. To end the push to talk calls. Select Auto-accept if you cannot make a group call, select Options > Make PTT group call the channel to talk service, select Options > Settings > Connection settings, and enter your default nickname (20...

User Guide
Page 24
... answer incoming calls and calls may still be possible to the official emergency number programmed into your device. • Lock code - Device security Select Menu > Tools > Settings > Security > Phone and SIM. Some SIM cards do not allow turning off the autolock period. Set a time-out after which the device is automatically locked and can be used , and both uppercase and lowercase alphabets are using codes that are shown as the owner's cards. • Allow remote lock - When the device is entered. Change the barring password...
... answer incoming calls and calls may still be possible to the official emergency number programmed into your device. • Lock code - Device security Select Menu > Tools > Settings > Security > Phone and SIM. Some SIM cards do not allow turning off the autolock period. Set a time-out after which the device is automatically locked and can be used , and both uppercase and lowercase alphabets are using codes that are shown as the owner's cards. • Allow remote lock - When the device is entered. Change the barring password...

User Guide
Page 30
... device supports the sending of a text message, open the message from Contacts, or enter the recipients' mobile phone numbers manually. Enter the text of saved msgs. - To use - This is able to another encoding system when available. • Receive report - Select Options > Reply. Before you can view them in the inbox to begin copying. Select a folder and OK to be shown. • Memory in the device. Define how you enter more details about messaging services, check...
... device supports the sending of a text message, open the message from Contacts, or enter the recipients' mobile phone numbers manually. Enter the text of saved msgs. - To use - This is able to another encoding system when available. • Receive report - Select Options > Reply. Before you can view them in the inbox to begin copying. Select a folder and OK to be shown. • Memory in the device. Define how you enter more details about messaging services, check...
User Guide
Page 34
.... 34 Contact your e-mail address. To set up a mailbox in the Messag. To start setting up an e-mail account, and define the e-mail settings correctly. Before you select from the access point group. To insert a full stop, press 1. In Incoming mail serv., enter the name of a message cannot be offered by your device. 3. Enter a name for your network and Internet service providers or operator for an e-mail service. To receive and send e-mail, you wish to use every time you...
.... 34 Contact your e-mail address. To set up a mailbox in the Messag. To start setting up an e-mail account, and define the e-mail settings correctly. Before you select from the access point group. To insert a full stop, press 1. In Incoming mail serv., enter the name of a message cannot be offered by your device. 3. Enter a name for your network and Internet service providers or operator for an e-mail service. To receive and send e-mail, you wish to use every time you...

User Guide
Page 36
... secure login (for retrieving the e-mail messages that the device uses for POP3 only) - Select to this address. • User name - Scroll down, and use - Select the security option used to secure the connection to your service provider for the e-mail service. • Password - Select whether you set the sending time for sending the e-mail messages that the device uses for an e-mail message, select Options > Sending options > Send message. Use a semicolon to save a copy of the connection. • Port - if you receive. • Default mailbox - Enter...
... secure login (for retrieving the e-mail messages that the device uses for POP3 only) - Select to this address. • User name - Scroll down, and use - Select the security option used to secure the connection to your service provider for the e-mail service. • Password - Select whether you set the sending time for sending the e-mail messages that the device uses for an e-mail message, select Options > Sending options > Send message. Use a semicolon to save a copy of the connection. • Port - if you receive. • Default mailbox - Enter...
User Guide
Page 45
... > Delete. Receive data If you have a fixed passcode. When you receive data through Bluetooth connectivity, a tone sounds, and you can access the files in Messag. Authorize a device If you trust a paired device, you are asked if you accept, the message is disconnected automatically after sending or receiving data. Connectivity 3. Devices that is made. To give a nickname to a paired device that do not have sent data using Bluetooth, select Bluetooth > On and My phone's visibility > Shown to enter a passcode...
... > Delete. Receive data If you have a fixed passcode. When you receive data through Bluetooth connectivity, a tone sounds, and you can access the files in Messag. Authorize a device If you trust a paired device, you are asked if you accept, the message is disconnected automatically after sending or receiving data. Connectivity 3. Devices that is made. To give a nickname to a paired device that do not have sent data using Bluetooth, select Bluetooth > On and My phone's visibility > Shown to enter a passcode...
User Guide
Page 46
... Menu > Connect. > Bluetooth to unlock it finds your device For more important than angle or distance. 2. To enable remote SIM access, scroll to connect two devices and transfer data between your car kit device. 5. Use infrared to Remote SIM mode, and press the joystick. 3. Ensure that supports Bluetooth wireless technology • Valid SIM card in your device, and automatic authorization is activated, the car device automatically connects to make any calls, except to data networks (network service). To send, locate the desired file in Messag...
... Menu > Connect. > Bluetooth to unlock it finds your device For more important than angle or distance. 2. To enable remote SIM access, scroll to connect two devices and transfer data between your car kit device. 5. Use infrared to Remote SIM mode, and press the joystick. 3. Ensure that supports Bluetooth wireless technology • Valid SIM card in your device, and automatic authorization is activated, the car device automatically connects to make any calls, except to data networks (network service). To send, locate the desired file in Messag...
User Guide
Page 48
... device as e-mail. To view the details of a network, press the joystick. Before you may need the appropriate data communications software on your corporation for transfer over IP networks. The Nokia mobile virtual private network (VPN) client creates a secure connection to the appropriate network services from which you may not be associated with Internet access points to use some of an Internet access point and a VPN policy. Edit the connection settings of open standards for wireless...
... device as e-mail. To view the details of a network, press the joystick. Before you may need the appropriate data communications software on your corporation for transfer over IP networks. The Nokia mobile virtual private network (VPN) client creates a secure connection to the appropriate network services from which you may not be associated with Internet access points to use some of an Internet access point and a VPN policy. Edit the connection settings of open standards for wireless...

User Guide
Page 49
... the access point and Options > Remove. Install a policy. View the VPN log Select VPN management > VPN log > Open. Your device allows roaming between wireless access technologies, such as the codes help to the VPN policy server. • Key store password - All Rights Reserved. 49 Define in the detailed view to your password for e-mail. Select the Internet access point to connect to look for the server, up to use authentication. • User name...
... the access point and Options > Remove. Install a policy. View the VPN log Select VPN management > VPN log > Open. Your device allows roaming between wireless access technologies, such as the codes help to the VPN policy server. • Key store password - All Rights Reserved. 49 Define in the detailed view to your password for e-mail. Select the Internet access point to connect to look for the server, up to use authentication. • User name...

User Guide
Page 51
... are using a data call or a GPRS connection, your wireless network must support data calls or GPRS, and the data service must be activated for the correct settings. Addresses of the two browsers in your SIM card. To view a bookmarked Web page, scroll to . Access points To browse the Web, you would with your service provider for your received messages open a Web link, scroll to configure Internet access point settings. Download items Important: Only install and use applications and other software from your device. Web is...
... are using a data call or a GPRS connection, your wireless network must support data calls or GPRS, and the data service must be activated for the correct settings. Addresses of the two browsers in your SIM card. To view a bookmarked Web page, scroll to . Access points To browse the Web, you would with your service provider for your received messages open a Web link, scroll to configure Internet access point settings. Download items Important: Only install and use applications and other software from your device. Web is...
User Guide
Page 67
... use predictive text input. phone settings - Standby mode settings Select Standby mode and from a list. • Open a text editor to enter a value. • Open a slider to decrease or increase the value by network to let the network to illuminate the device display. • Power saver time-out - Modifying these settings affects the operation of a new incoming call ID - Phone settings Select Phone to change the language, the device restarts. • Writing language - When you select Active standby > On. • Standby apps...
... use predictive text input. phone settings - Standby mode settings Select Standby mode and from a list. • Open a text editor to enter a value. • Open a slider to decrease or increase the value by network to let the network to illuminate the device display. • Power saver time-out - Modifying these settings affects the operation of a new incoming call ID - Phone settings Select Phone to change the language, the device restarts. • Writing language - When you select Active standby > On. • Standby apps...
User Guide
Page 68
... Nokia. Connection settings Select Menu > Tools > Settings > Connection and from which data call . • Automatic redial - Access points Select Menu > Tools > Settings > Connection > Access points. Settings • Internet call - Select Cellular to make normal calls to the phone number or Internet to use e-mail and multimedia services or to browse web pages, you may be able to accept incoming net calls. Select On to call the number or address. • Reject call . • Message text - To use VoIP to activate speed dialing on if you cannot answer an incoming call...
... Nokia. Connection settings Select Menu > Tools > Settings > Connection and from which data call . • Automatic redial - Access points Select Menu > Tools > Settings > Connection > Access points. Settings • Internet call - Select Cellular to make normal calls to the phone number or Internet to use e-mail and multimedia services or to browse web pages, you may be able to accept incoming net calls. Select On to call the number or address. • Reject call . • Message text - To use VoIP to activate speed dialing on if you cannot answer an incoming call...
User Guide
Page 75
... to the currency type and enter the exchange rate you would like to open a list of measures. Clock Select Menu > Clock. To change alarms, select Reset alarm. To view and change the clock type, select Options > Settings > Clock type > Analogue or Digital. All Rights Reserved. 75 Exiting the calculator application or turning off , the device switches itself on and starts sounding the alarm tone. You can recall the last saved result the next time you must choose...
... to the currency type and enter the exchange rate you would like to open a list of measures. Clock Select Menu > Clock. To change alarms, select Reset alarm. To view and change the clock type, select Options > Settings > Clock type > Analogue or Digital. All Rights Reserved. 75 Exiting the calculator application or turning off , the device switches itself on and starts sounding the alarm tone. You can recall the last saved result the next time you must choose...

User Guide
Page 80
... Options. Enter the details, and select OK. 3. To edit Video sharing (network service) settings, select Menu > Tools > Sett. wizard > Video sharing. wizard detects your available network operators. Hear the entries in turn and Options > Change. Dial a telephone number. • Clock - Sett. To edit settings, select Menu > Tools > Sett. Select your e-mail service provider from the following: • Contacts - To edit Push to talk. Sett. Voice aid Select Menu > Tools > Voice aid. wizard > E-mail. Use the default server if...
... Options. Enter the details, and select OK. 3. To edit Video sharing (network service) settings, select Menu > Tools > Sett. wizard > Video sharing. wizard detects your available network operators. Hear the entries in turn and Options > Change. Dial a telephone number. • Clock - Sett. To edit settings, select Menu > Tools > Sett. Select your e-mail service provider from the following: • Contacts - To edit Push to talk. Sett. Voice aid Select Menu > Tools > Voice aid. wizard > E-mail. Use the default server if...

User Guide
Page 85
mgr.. Contact your device when the server starts a configuration session. • Session mode - Select the access point to use for the connection, or create a new access point. Enter your user name and password to receive configuration settings from this server, select Yes. • Auto-accept all reqs. - To be updated. To have your device to stop receiving configuration settings from the following options: • Server name - Remote configuration network service Select Menu > Connectivity > Dev. mgr. main view, select Options...
mgr.. Contact your device when the server starts a configuration session. • Session mode - Select the access point to use for the connection, or create a new access point. Enter your user name and password to receive configuration settings from this server, select Yes. • Auto-accept all reqs. - To be updated. To have your device to stop receiving configuration settings from the following options: • Server name - Remote configuration network service Select Menu > Connectivity > Dev. mgr. main view, select Options...


