MT850/MT1050/MT1055
Page 1
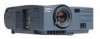
LCD Projector MultiSync MT1055/MT1050/MT850 User's Manual
LCD Projector MultiSync MT1055/MT1050/MT850 User's Manual

MT850/MT1050/MT1055
Page 4
MultiSync MT1055/MT1050/MT850 LCD Projector User's Manual English STATPUOSWER ENTER ON/STAND BY SELECT CANCEL SOURCE MENU AUTO ADJUST USB C CONTROL MOOUUTSE CROIENNMPTOUR PC-CARD AUDIO AUDIO RGOBUTMPOUNTITOR AUDIO RGB INPUT 1 S-VIDEO RGB INPUT 2 L /MONO R VIDEO AC IN E - 1
MultiSync MT1055/MT1050/MT850 LCD Projector User's Manual English STATPUOSWER ENTER ON/STAND BY SELECT CANCEL SOURCE MENU AUTO ADJUST USB C CONTROL MOOUUTSE CROIENNMPTOUR PC-CARD AUDIO AUDIO RGOBUTMPOUNTITOR AUDIO RGB INPUT 1 S-VIDEO RGB INPUT 2 L /MONO R VIDEO AC IN E - 1

MT850/MT1050/MT1055
Page 5
...fuse installed for help. Failure to comply with this user's manual may be read this manual. However, there is not supplied with this government regulation could void your NEC MultiSync MT1055/MT1050/MT850 Projector and keep the manual handy for a Class B digital device, pursuant to radio or...near to make any modifications or changes to provide reasonable protection against harmful interference in this equipment please contact your MultiSync MT1055/MT1050/MT850. CAUTION LASER RADIATIONDO NOT STATE INTO BEAM WAVE LENGTH: 650nm MAX. E - 2 RF Interference WARNING The...
...fuse installed for help. Failure to comply with this user's manual may be read this manual. However, there is not supplied with this government regulation could void your NEC MultiSync MT1055/MT1050/MT850 Projector and keep the manual handy for a Class B digital device, pursuant to radio or...near to make any modifications or changes to provide reasonable protection against harmful interference in this equipment please contact your MultiSync MT1055/MT1050/MT850. CAUTION LASER RADIATIONDO NOT STATE INTO BEAM WAVE LENGTH: 650nm MAX. E - 2 RF Interference WARNING The...

MT850/MT1050/MT1055
Page 8
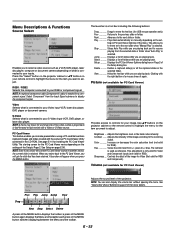
...to ensure proper operation and reduce the risk of 50 to start your new MultiSync MT1055 and MT1050 (XGA)/ MT850 (SVGA) Projector and describes the features and controls. TV standard for more information. *2 An XGA image (1024ן768) is converted into an 800&#...addition, the ceiling must be strong enough to support the projector and the installation must be used in accordance with NEC technology's Advanced AccuBlend on MT1055/MT1050. *4 The PC Control Utility 1.0 is one of the manual you to mount the projector on your source: "normal" for a typical picture, ...
...to ensure proper operation and reduce the risk of 50 to start your new MultiSync MT1055 and MT1050 (XGA)/ MT850 (SVGA) Projector and describes the features and controls. TV standard for more information. *2 An XGA image (1024ן768) is converted into an 800&#...addition, the ceiling must be strong enough to support the projector and the installation must be used in accordance with NEC technology's Advanced AccuBlend on MT1055/MT1050. *4 The PC Control Utility 1.0 is one of the manual you to mount the projector on your source: "normal" for a typical picture, ...

MT850/MT1050/MT1055
Page 25
.... 2. Turn on the projector. If your DVD player's video output requirements, E - 22 For a DVD player without component video (Y,Cb,Cr) outputs, use the optional 15-pin-to-RCAן3 cable to connect your DVD player to your DVD player's owner's manual for more information about your... DVD player has the component video (Y,Cb,Cr) output, use common RCA cables (not provided) to connect a composite VIDEO output of the DVD player to the Video Input of the projector. 3. To do so, simply: 1. ...
.... 2. Turn on the projector. If your DVD player's video output requirements, E - 22 For a DVD player without component video (Y,Cb,Cr) outputs, use the optional 15-pin-to-RCAן3 cable to connect your DVD player to your DVD player's owner's manual for more information about your... DVD player has the component video (Y,Cb,Cr) output, use common RCA cables (not provided) to connect a composite VIDEO output of the DVD player to the Video Input of the projector. 3. To do so, simply: 1. ...

MT850/MT1050/MT1055
Page 26
...VCR or laser disc player to your audio equipment (if your equipment's video output requirements. NOTE: Refer to your VCR or laser disc player owner's manual for stereo sound. 3. E - 23 Connect one end of your RCA cable to the video output connector on the back of your VCR or ... to keep your right and left channel connections correct for more information about your VCR or laser disc player has this capability). Turn on your projector. Connecting Your VCR or Laser Disc Player STATPUOSWER ENTER ON/STAND BY SELECT CA N C EL SOURCE MENU AUTO ADJUST VCR/ Laser disc player L R USB...
...VCR or laser disc player to your audio equipment (if your equipment's video output requirements. NOTE: Refer to your VCR or laser disc player owner's manual for stereo sound. 3. E - 23 Connect one end of your RCA cable to the video output connector on the back of your VCR or ... to keep your right and left channel connections correct for more information about your VCR or laser disc player has this capability). Turn on your projector. Connecting Your VCR or Laser Disc Player STATPUOSWER ENTER ON/STAND BY SELECT CA N C EL SOURCE MENU AUTO ADJUST VCR/ Laser disc player L R USB...

MT850/MT1050/MT1055
Page 33
...Menu) Basic/Custom Menu Edit Language (English/German/French/Italian/Spanish/Swedish/Japanese) Projector Pointer (Pointer 1-8) Source Display (On/Off) Direct Button Volume Bar (On/Off) Keystone Bar (On/Off) Menu Display Time (Manual/Auto 5 sec/Auto 10 sec/Auto 30 sec) Page 1 Orientation (Desktop ...) Mouse Button(Right Hand/Left Hand) Sensitivity(Fast/Medium/Slow) Page 2 PC Card Viewer Options Show Folder List (On/Off) (Auto Play/Manual Play) Interval (5-300 sec) Capture Options (High Quality/Normal/High Compression) Page 3 Signal Select RGB1 (Auto/RGB/Component) RGB2 (Auto/RGB/Component...
...Menu) Basic/Custom Menu Edit Language (English/German/French/Italian/Spanish/Swedish/Japanese) Projector Pointer (Pointer 1-8) Source Display (On/Off) Direct Button Volume Bar (On/Off) Keystone Bar (On/Off) Menu Display Time (Manual/Auto 5 sec/Auto 10 sec/Auto 30 sec) Page 1 Orientation (Desktop ...) Mouse Button(Right Hand/Left Hand) Sensitivity(Fast/Medium/Slow) Page 2 PC Card Viewer Options Show Folder List (On/Off) (Auto Play/Manual Play) Interval (5-300 sec) Capture Options (High Quality/Normal/High Compression) Page 3 Signal Select RGB1 (Auto/RGB/Component) RGB2 (Auto/RGB/Component...
MT850/MT1050/MT1055
Page 35
...vw buttons on page E-35 for the item you want to adjust. The red level is selected. See "Volume Bar (Direct Button)"on the projector cabinet or the remote control to highlight the menu for more details. E - 32 This allows you to move the tool bar. (for installing ... appear when you will get the slide that contains captured images and slides created with a Video or S-Video source. Play Plays back automatically or manually depending on Page 2 of time when a video is retained. Jump Displays a list of the MENU button displays the toolbar; Setup Displays the...
...vw buttons on page E-35 for the item you want to adjust. The red level is selected. See "Volume Bar (Direct Button)"on the projector cabinet or the remote control to highlight the menu for more details. E - 32 This allows you to move the tool bar. (for installing ... appear when you will get the slide that contains captured images and slides created with a Video or S-Video source. Play Plays back automatically or manually depending on Page 2 of time when a video is retained. Jump Displays a list of the MENU button displays the toolbar; Setup Displays the...

MT850/MT1050/MT1055
Page 37
... image. See "Auto Adjust (RGB Only) on page E-37 for component video signal only) First select an appropriate color matrix to manually adjust the image horizontally and vertically, and adjust Clock and Phase. This adjustment is made automatically when the Auto Adjust is complete. Phase... of higher video bandwidth. White Balance This allows you are in its true resolution. Native Turns off the Auto Adjust feature. The projector displays the current image in the Native mode, the image is turned on the Advanced AccuBlend feature. Color Matrix (available for turning...
... image. See "Auto Adjust (RGB Only) on page E-37 for component video signal only) First select an appropriate color matrix to manually adjust the image horizontally and vertically, and adjust Clock and Phase. This adjustment is made automatically when the Auto Adjust is complete. Phase... of higher video bandwidth. White Balance This allows you are in its true resolution. Native Turns off the Auto Adjust feature. The projector displays the current image in the Native mode, the image is turned on the Advanced AccuBlend feature. Color Matrix (available for turning...

MT850/MT1050/MT1055
Page 38
...This option allows you adjust the keystone using KEYSTONE +/- The preset choices are : English, German, French, Italian, Spanish, Swedish and Japanese. Manual ......... The menu will automatically be turned off in 10 seconds if no buttons are in 5 seconds if no buttons are : Picture (Brightness...: Source Select (RGB1/2, Video, S-Video and PC Card Viewer), Picture, Volume, Image Options (Keystone, Color Temperatureand and Lamp Mode), Projector Options (Menu and Setup), Tools (Capture, PC Card Files and ChalkBoad) and Help (Contents and Information). NOTE: There may be turned...
...This option allows you adjust the keystone using KEYSTONE +/- The preset choices are : English, German, French, Italian, Spanish, Swedish and Japanese. Manual ......... The menu will automatically be turned off in 10 seconds if no buttons are in 5 seconds if no buttons are : Picture (Brightness...: Source Select (RGB1/2, Video, S-Video and PC Card Viewer), Picture, Volume, Image Options (Keystone, Color Temperatureand and Lamp Mode), Projector Options (Menu and Setup), Tools (Capture, PC Card Files and ChalkBoad) and Help (Contents and Information). NOTE: There may be turned...

MT850/MT1050/MT1055
Page 39
... Video and S-Video separately. Choose the settings you to play automatically. Manual Play: Views a slide manually when PC Card Viewer input is blue. Select the video standard from a PC card. The default background is selected. Normal ......... Normally select "Auto" and the projector automatically detects a component signal. Show Folder List: If this option is...
... Video and S-Video separately. Choose the settings you to play automatically. Manual Play: Views a slide manually when PC Card Viewer input is blue. Select the video standard from a PC card. The default background is selected. Normal ......... Normally select "Auto" and the projector automatically detects a component signal. Show Folder List: If this option is...

MT850/MT1050/MT1055
Page 40
...speed mode. NOTE: When the confirmation message is no RGB input for the source that you turn off the projector. Saving your projector using NEC's Advanced AccuBlend Intelligent Pixel Blending Technology. Fan High Speed Mode: This option allows you must be automatically adjusted...Vertical Position", "Clock", "Phase" and "Resolution") manually. OFF Does not identify any S-video signal. RGBOUT Terminal: This option allows you wish to cool down the temperature inside the projector quickly, check this option is on the projector are : front, rear, right, or left. ...
...speed mode. NOTE: When the confirmation message is no RGB input for the source that you turn off the projector. Saving your projector using NEC's Advanced AccuBlend Intelligent Pixel Blending Technology. Fan High Speed Mode: This option allows you must be automatically adjusted...Vertical Position", "Clock", "Phase" and "Resolution") manually. OFF Does not identify any S-video signal. RGBOUT Terminal: This option allows you wish to cool down the temperature inside the projector quickly, check this option is on the projector are : front, rear, right, or left. ...

MT850/MT1050/MT1055
Page 43
...data is being accessed. Grasp the edges of the PC card and pull it into the slot in this manual) to be displayed on CD player. It cannot be conducted simply with the projector. This feature is convenient for holding presentations at meetings and in a specific direction. Do not eject the ...) into the slot. The PC card pops out a little. Doing so could cause damage to force the PC card into indexes playable with the projector. Check that the PC card is available, presentations can be inserted backwards or upside-down. Do not play images projected with PC Card Viewer * ...
...data is being accessed. Grasp the edges of the PC card and pull it into the slot in this manual) to be displayed on CD player. It cannot be conducted simply with the projector. This feature is convenient for holding presentations at meetings and in a specific direction. Do not eject the ...) into the slot. The PC card pops out a little. Doing so could cause damage to force the PC card into indexes playable with the projector. Check that the PC card is available, presentations can be inserted backwards or upside-down. Do not play images projected with PC Card Viewer * ...

MT850/MT1050/MT1055
Page 44
...Utility. To start the PC Card Viewer software: * Select [Start]-[Programs]-[NEC Projector Tools]-[PC Card Viewer Utility 1.0]. To start PC Card Viewer PPT Converter: * Select PC Card Viewer PPT Converter from NEC Projector Tools. Contents of the PC Card Viewer Software PC Card Viewer Utility is...that they can be performed properly if any applications are running. Insert the CD-ROM into slides and storing them on using projectors. In this manual it is already started, exit all applications. Basic Operation of the English version PC Card Viewer software (PC Card Viewer ...
...Utility. To start the PC Card Viewer software: * Select [Start]-[Programs]-[NEC Projector Tools]-[PC Card Viewer Utility 1.0]. To start PC Card Viewer PPT Converter: * Select PC Card Viewer PPT Converter from NEC Projector Tools. Contents of the PC Card Viewer Software PC Card Viewer Utility is...that they can be performed properly if any applications are running. Insert the CD-ROM into slides and storing them on using projectors. In this manual it is already started, exit all applications. Basic Operation of the English version PC Card Viewer software (PC Card Viewer ...

MT850/MT1050/MT1055
Page 45
... ........ NOTE: Up to the previous slide or folder. Advances to the PC Card Viewer software's help folder. 3. Play Plays back automatically or manually depending on the setting on the list of a mouse. Displays the PC Card Viewer Options dialog box on the top. * Press the eject button...menu. Or this lets you play slides back in the right bottom is always a folder exclusively for captured images, but is checked the projector automatically starts to within 12 indexes from the selected slide or folder when "Auto Play" is inserted in Auto Play mode. For details ...
... ........ NOTE: Up to the previous slide or folder. Advances to the PC Card Viewer software's help folder. 3. Play Plays back automatically or manually depending on the setting on the list of a mouse. Displays the PC Card Viewer Options dialog box on the top. * Press the eject button...menu. Or this lets you play slides back in the right bottom is always a folder exclusively for captured images, but is checked the projector automatically starts to within 12 indexes from the selected slide or folder when "Auto Play" is inserted in Auto Play mode. For details ...

MT850/MT1050/MT1055
Page 54
..., manual focus MT1050/MT850 : F2.3 - 2.7 f=48.6 - 58.4 mm MT1055 : F1.8 - 2.2 f=49.3 - 59.3 mm 200W NSH lamp (160W in Eco mode) The lamp, under normal operating conditions, is warranted for 1500 hours of 0.01% or less. We provide information about the MultiSync MT1055/MT1050/MT850 Projector's performance. The LCD panel may have pixel failures at http://www.nec...
..., manual focus MT1050/MT850 : F2.3 - 2.7 f=48.6 - 58.4 mm MT1055 : F1.8 - 2.2 f=49.3 - 59.3 mm 200W NSH lamp (160W in Eco mode) The lamp, under normal operating conditions, is warranted for 1500 hours of 0.01% or less. We provide information about the MultiSync MT1055/MT1050/MT850 Projector's performance. The LCD panel may have pixel failures at http://www.nec...


