Owners Manual
Page 2
...oils. Piling, stacking or storing these kinds of items may prevent heat from escaping and can warm these items from the clothes dryer hot or interrupt the drying cycle until the items have been spotted or soaked with vegetable oil or cooking oil. Never remove...Number Serial Number Date of purchase. Eastern Time) Internet: http://www.maytag.com U.S.A. Customers using TTY for future reference. Heat sources, such as proof of Purchase If you do not understand. Important Safety Instructions Installer: Please leave this manual with extra detergent will reduce, but will ...
...oils. Piling, stacking or storing these kinds of items may prevent heat from escaping and can warm these items from the clothes dryer hot or interrupt the drying cycle until the items have been spotted or soaked with vegetable oil or cooking oil. Never remove...Number Serial Number Date of purchase. Eastern Time) Internet: http://www.maytag.com U.S.A. Customers using TTY for future reference. Heat sources, such as proof of Purchase If you do not understand. Important Safety Instructions Installer: Please leave this manual with extra detergent will reduce, but will ...

Owners Manual
Page 3
...load to eliminate static unless recommended for dryer use fabric softeners or products to catch...of continuing product improvements, Maytag reserves the right to carry out. 9. For complete details, see the Installation Instructions packed with gasoline..., dry-cleaning solvents, other flammable or explosive substances as : acetone, denatured alcohol, gasoline, kerosene, some liquid household cleaners, some spot removers, turpentine, waxes and wax removers. Important Safety Instructions WARNING To reduce the risk of fire, explosion, electric...
...load to eliminate static unless recommended for dryer use fabric softeners or products to catch...of continuing product improvements, Maytag reserves the right to carry out. 9. For complete details, see the Installation Instructions packed with gasoline..., dry-cleaning solvents, other flammable or explosive substances as : acetone, denatured alcohol, gasoline, kerosene, some liquid household cleaners, some spot removers, turpentine, waxes and wax removers. Important Safety Instructions WARNING To reduce the risk of fire, explosion, electric...
Owners Manual
Page 9
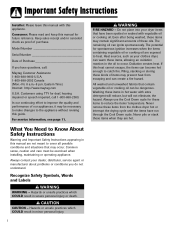
... are not available, use abrasive substances. Care & Cleaning Control Panel Clean with a mild, non-abrasive cleaner suitable for stainless steel surfaces. IMPORTANT: Avoid Dryer Drying . . . • Fiberglass Items (curtains, draperies, etc.). • Woolens, unless recommended on the label. • Vegetable or cooking oil...see page 2). 8 Do not use a damp cloth with a soft, damp cloth. Refer to the installation instructions for more frequently to fluff the item. • DO NOT dryer-dry kapok or foam pillows. • Use the Air Fluff cycle on a Low or Air Fluff temperature...
... are not available, use abrasive substances. Care & Cleaning Control Panel Clean with a mild, non-abrasive cleaner suitable for stainless steel surfaces. IMPORTANT: Avoid Dryer Drying . . . • Fiberglass Items (curtains, draperies, etc.). • Woolens, unless recommended on the label. • Vegetable or cooking oil...see page 2). 8 Do not use a damp cloth with a soft, damp cloth. Refer to the installation instructions for more frequently to fluff the item. • DO NOT dryer-dry kapok or foam pillows. • Use the Air Fluff cycle on a Low or Air Fluff temperature...

Owners Manual
Page 10
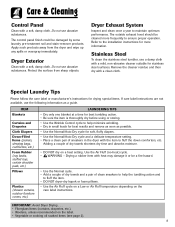
...exhaust system cause slow drying. Be sure vent flap opens and closes freely. Do Read the installation instructions and the use lint-trapping screws. Never use and care guide. Dryer Exhaust Tips WARNING Plastic or nonmetal flexible duct presents a potential fire hazard. Tape all old ...ducts before installing your dryer exhaust the air easily. Do Clean all joints, including at the dryer. Don't Use longer than necessary duct ...
...exhaust system cause slow drying. Be sure vent flap opens and closes freely. Do Read the installation instructions and the use lint-trapping screws. Never use and care guide. Dryer Exhaust Tips WARNING Plastic or nonmetal flexible duct presents a potential fire hazard. Tape all old ...ducts before installing your dryer exhaust the air easily. Do Clean all joints, including at the dryer. Don't Use longer than necessary duct ...
Owners Manual
Page 11
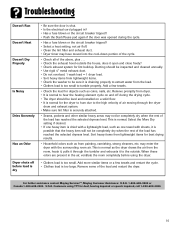
...outside the house, does it through the dryer drum and exhaust system. • Make sure lint filter is too large. For further assistance contact Maytag ServicesSM, Maytag Customer Assistance: U.S.A. 1-800-688-9900 ... and installed on a solid floor. • It is normal for best drying results. • Household odors such as coins, nails, etc. Remove some of the load and restart the dryer. Add...8226; Seams, pockets and other similar heavy areas may enter the dryer with sheets, it is shut. • Is the electrical cord plugged in the air, ventilate the room completely before load ...
...outside the house, does it through the dryer drum and exhaust system. • Make sure lint filter is too large. For further assistance contact Maytag ServicesSM, Maytag Customer Assistance: U.S.A. 1-800-688-9900 ... and installed on a solid floor. • It is normal for best drying results. • Household odors such as coins, nails, etc. Remove some of the load and restart the dryer. Add...8226; Seams, pockets and other similar heavy areas may enter the dryer with sheets, it is shut. • Is the electrical cord plugged in the air, ventilate the room completely before load ...
Owners Manual
Page 12
...have other rights which fails in remote locations. 8. What is Not Covered By These Warranties 1. b. c. Incorrect electric current, voltage, electrical and/or gas supply. Light bulbs, water filters and air filters. 4. customers using TTY for further information ... National Standard of charge. Misuse, abuse, accidents, unreasonable use . 5. Improper setting of purchase (sales receipt). 11 Correct installation errors. MAYTAG CORPORATION SHALL NOT BE LIABLE FOR INCIDENTAL OR CONSEQUENTIAL DAMAGES. e. Warranties are having; Instruct the user on owner's responsibilities for ...
...have other rights which fails in remote locations. 8. What is Not Covered By These Warranties 1. b. c. Incorrect electric current, voltage, electrical and/or gas supply. Light bulbs, water filters and air filters. 4. customers using TTY for further information ... National Standard of charge. Misuse, abuse, accidents, unreasonable use . 5. Improper setting of purchase (sales receipt). 11 Correct installation errors. MAYTAG CORPORATION SHALL NOT BE LIABLE FOR INCIDENTAL OR CONSEQUENTIAL DAMAGES. e. Warranties are having; Instruct the user on owner's responsibilities for ...
Installation Instructions
Page 2
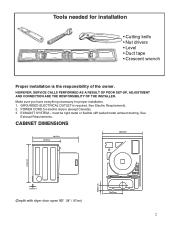
... PERFORMED AS A RESULT OF POOR SET-UP, ADJUSTMENT AND CONNECTION ARE THE RESPONSIBILITY OF THE INSTALLER. Make sure you have everything necessary for electric dryers (except Canada). 3. POWER CORD for proper installation. 1. must be rigid metal or flexible stiff walled metal exhaust ducting. GROUNDED ELECTRICAL OUTLET is the responsibility of the owner. Tools needed for...
... PERFORMED AS A RESULT OF POOR SET-UP, ADJUSTMENT AND CONNECTION ARE THE RESPONSIBILITY OF THE INSTALLER. Make sure you have everything necessary for electric dryers (except Canada). 3. POWER CORD for proper installation. 1. must be rigid metal or flexible stiff walled metal exhaust ducting. GROUNDED ELECTRICAL OUTLET is the responsibility of the owner. Tools needed for...

Installation Instructions
Page 3
... BE KEPT FREE OF LINT. WARNING WARNING - See EXHAUST INFORMATION section. • Minimum clearances between dryer cabinet and adjacent walls or other fuel-burning appliance installed in the same closet. • WARNING: To reduce the risk of open area equally distributed. 3 is factory-ready for the exhaust ... from floor to reduce the risk of fire when installed in an alcove or closet. • An appliance installed in front for loading the dryer, and sufficient room behind the dryer for rear exhaust. THE DRYER MUST NOT BE INSTALLED OR STORED IN AN AREA WHERE IT WILL BE EXPOSED...
... BE KEPT FREE OF LINT. WARNING WARNING - See EXHAUST INFORMATION section. • Minimum clearances between dryer cabinet and adjacent walls or other fuel-burning appliance installed in the same closet. • WARNING: To reduce the risk of open area equally distributed. 3 is factory-ready for the exhaust ... from floor to reduce the risk of fire when installed in an alcove or closet. • An appliance installed in front for loading the dryer, and sufficient room behind the dryer for rear exhaust. THE DRYER MUST NOT BE INSTALLED OR STORED IN AN AREA WHERE IT WILL BE EXPOSED...
Installation Instructions
Page 4
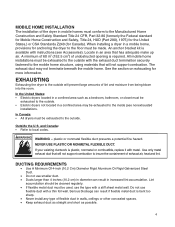
MOBILE HOME INSTALLATION The installation of unobstructed opening is required. A minimum of 60 in2 (152.5 cm2) of the dryer in mobile homes must be exhausted to the outside . • Electric dryers not located in a confined area may not terminate beneath the mobile home. In the United States: • Electric dryers located in walls, ceilings ...fastened to local codes. ! and Canada: • Refer to the mobile home structure, using materials that has adequate make up air. When installing a dryer in diameter can result if flexible metal duct is bent too sharp. • Never...
MOBILE HOME INSTALLATION The installation of unobstructed opening is required. A minimum of 60 in2 (152.5 cm2) of the dryer in mobile homes must be exhausted to the outside . • Electric dryers not located in a confined area may not terminate beneath the mobile home. In the United States: • Electric dryers located in walls, ceilings ...fastened to local codes. ! and Canada: • Refer to the mobile home structure, using materials that has adequate make up air. When installing a dryer in diameter can result if flexible metal duct is bent too sharp. • Never...
Installation Instructions
Page 5
...unheated area, the duct should be punctured, reduce airflow, extend drying times and affect dryer operation. • Exhaust systems longer than recommended can kink, sag, be insulated and slope slightly down . If new dryer is installed into a window well in order to be sure: • The exhaust system ... opening should point down towards the exhaust hood to prevent back drafts and entry of the hood and the ground or other obstruction. Disconnect electrical service prior to cleaning. • Frequently check to avoid lint build-up . • Inspect and clean the interior or the exhaust...
...unheated area, the duct should be punctured, reduce airflow, extend drying times and affect dryer operation. • Exhaust systems longer than recommended can kink, sag, be insulated and slope slightly down . If new dryer is installed into a window well in order to be sure: • The exhaust system ... opening should point down towards the exhaust hood to prevent back drafts and entry of the hood and the ground or other obstruction. Disconnect electrical service prior to cleaning. • Frequently check to avoid lint build-up . • Inspect and clean the interior or the exhaust...
Installation Instructions
Page 6
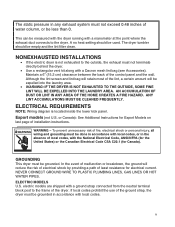
... LAUNDRY AREA. AN ACCUMULATION OF DUST OR LINT IN ANY AREA OF THE HOME CREATES A FIRE HAZARD. or Canada): See Additional Instructions for Canada). NONEXHAUSTED INSTALLATIONS • If the electric dryer is located inside the lower kick panel. NEVER CONNECT GROUND WIRE TO PLASTIC PLUMBING LINES, GAS LINES OR HOT WATER PIPES...
... LAUNDRY AREA. AN ACCUMULATION OF DUST OR LINT IN ANY AREA OF THE HOME CREATES A FIRE HAZARD. or Canada): See Additional Instructions for Canada). NONEXHAUSTED INSTALLATIONS • If the electric dryer is located inside the lower kick panel. NEVER CONNECT GROUND WIRE TO PLASTIC PLUMBING LINES, GAS LINES OR HOT WATER PIPES...
Installation Instructions
Page 7
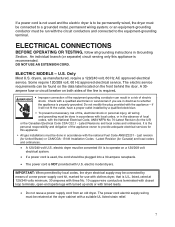
... - Latest Revisions and local codes and ordinances. Latest Revision (for United States) or CAN/CGA - electric dryer must be converted if it will not fit the outlet, have a proper outlet installed by means of local codes, with the National Electrical Code, ANSI/ NFPA No. 70-Latest Revision (for this appliance is U.L. listed, rated at...
... - Latest Revisions and local codes and ordinances. Latest Revision (for United States) or CAN/CGA - electric dryer must be converted if it will not fit the outlet, have a proper outlet installed by means of local codes, with the National Electrical Code, ANSI/ NFPA No. 70-Latest Revision (for this appliance is U.L. listed, rated at...
Installation Instructions
Page 8
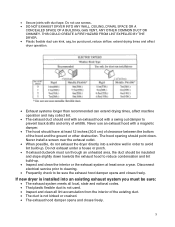
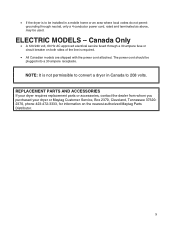
.... • If the dryer is to be installed in Canada to convert a dryer in a mobile home or an area where local codes do not permit grounding through a 30 ampere fuse or circuit breaker on the nearest authorized Maytag Parts Distributor. 8 Canada Only • A 120/240 volt, 60 Hz AC approved electrical service fused through neutral...
.... • If the dryer is to be installed in Canada to convert a dryer in a mobile home or an area where local codes do not permit grounding through a 30 ampere fuse or circuit breaker on the nearest authorized Maytag Parts Distributor. 8 Canada Only • A 120/240 volt, 60 Hz AC approved electrical service fused through neutral...
Installation Instructions
Page 9
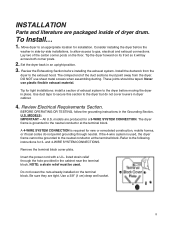
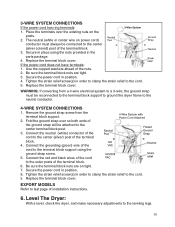
... both corner posts. 2. INSTALLATION Parts and literature are produced for a 3-WIRE SYSTEM CONNECTION. If the 4-wire system is used . Be sure they are tight. To Install... 1. Set the dryer back in the Grounding Section. U.S. Refer to an appropriate location for 3- Review Electrical Requirements Section. Move dryer to the following instructions for installation. DO NOT use plastic...
... both corner posts. 2. INSTALLATION Parts and literature are produced for a 3-WIRE SYSTEM CONNECTION. If the 4-wire system is used . Be sure they are tight. To Install... 1. Set the dryer back in the Grounding Section. U.S. Refer to an appropriate location for 3- Review Electrical Requirements Section. Move dryer to the following instructions for installation. DO NOT use plastic...
Installation Instructions
Page 10
... cover. Use the cupped washers ahead of the terminal block. 4. Tighten the strain relief screw(s) in position. 4. Level The Dryer: With a level, check the dryer, and make necessary adjustments to last page of the terminal block. 3. Tighten the strain relief screw(s) in position. 8. Be ... 1. Remove the ground strap screw from a 4-wire electrical system to a 3-wire, the ground strap must always be reconnected to the terminal block support to ground the dryer frame to the center (silver colored) post of installation instructions. 6. Fold the ground strap over the existing ...
... cover. Use the cupped washers ahead of the terminal block. 4. Tighten the strain relief screw(s) in position. 4. Level The Dryer: With a level, check the dryer, and make necessary adjustments to last page of the terminal block. 3. Tighten the strain relief screw(s) in position. 8. Be ... 1. Remove the ground strap screw from a 4-wire electrical system to a 3-wire, the ground strap must always be reconnected to the terminal block support to ground the dryer frame to the center (silver colored) post of installation instructions. 6. Fold the ground strap over the existing ...
Installation Instructions
Page 11
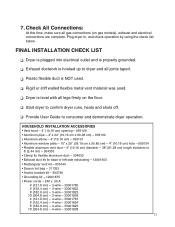
... length stretches to consumer and demonstrate dryer operation. Check All Connections: At this time, make sure all legs firmly on gas models), exhaust and electrical connections are complete. FINAL INSTALLATION CHECK LIST ❏q Dryer is plugged into electrical outlet and is properly grounded. &#...10063;q Exhaust ductwork is hooked up to dryer and all joints taped. ❏q Plastic flexible duct...
... length stretches to consumer and demonstrate dryer operation. Check All Connections: At this time, make sure all legs firmly on gas models), exhaust and electrical connections are complete. FINAL INSTALLATION CHECK LIST ❏q Dryer is plugged into electrical outlet and is properly grounded. &#...10063;q Exhaust ductwork is hooked up to dryer and all joints taped. ❏q Plastic flexible duct...
Installation Instructions
Page 12
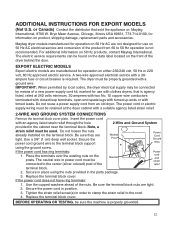
...the data label located on 50 Hz AC electrical service and conversion of the dryer behind the door. Do not loosen the nuts already installed on 50 Hz products, contact Maytag International. Secure in place using the ground screw. Maytag dryer models manufactured for operation on 60 Hz AC... are manufactured for use on the front of the product from an old dryer. Tighten the strain relief ...
...the data label located on 50 Hz AC electrical service and conversion of the dryer behind the door. Do not loosen the nuts already installed on 50 Hz products, contact Maytag International. Secure in place using the ground screw. Maytag dryer models manufactured for operation on 60 Hz AC... are manufactured for use on the front of the product from an old dryer. Tighten the strain relief ...


