Owners Manual
Page 1
...Load the Dryer Properly Start/Pause Turn the Dryer Off Estimated Time Display Cycle Status Lights Using the Controls 5-7 Select Cycle Select Dryness Level Select Temperature Select Options Press Start/Pause Use & Care Guide Care & Cleaning 8 Control Panel Dryer Exterior Dryer Exhaust ...System Stainless Steel Special Laundry Tips Dryer Exhaust Tips 9 Troubleshooting 10 Service & Warranty 11 Guide d'utilisation et d'entretien 12 Guía de uso...
...Load the Dryer Properly Start/Pause Turn the Dryer Off Estimated Time Display Cycle Status Lights Using the Controls 5-7 Select Cycle Select Dryness Level Select Temperature Select Options Press Start/Pause Use & Care Guide Care & Cleaning 8 Control Panel Dryer Exterior Dryer Exhaust ...System Stainless Steel Special Laundry Tips Dryer Exhaust Tips 9 Troubleshooting 10 Service & Warranty 11 Guide d'utilisation et d'entretien 12 Guía de uso...
Owners Manual
Page 2
... and care must be dangerous. Recognize Safety Symbols, Words and Labels WARNING WARNING - The potential for deaf, hearing impaired or speech impaired, call : Maytag Customer Assistance 1-800-688-9900 U.S.A. 1-800-688-2002 Canada (Mon.-Fri. 8 a.m.-8 p.m. Piling, stacking or storing these items when they are not...with this heat cannot escape, the items can become hot enough to occur. Keep sales receipt and/or canceled check as your dryer items that may contain significant amounts of Purchase If you do not understand. Never remove these items from escaping and can warm...
... and care must be dangerous. Recognize Safety Symbols, Words and Labels WARNING WARNING - The potential for deaf, hearing impaired or speech impaired, call : Maytag Customer Assistance 1-800-688-9900 U.S.A. 1-800-688-2002 Canada (Mon.-Fri. 8 a.m.-8 p.m. Piling, stacking or storing these items when they are not...with this heat cannot escape, the items can become hot enough to occur. Keep sales receipt and/or canceled check as your dryer items that may contain significant amounts of Purchase If you do not understand. Never remove these items from escaping and can warm...

Owners Manual
Page 3
... solids, should be exposed to play on top of the clothes dryer. The interior of the dryer and exhaust duct should not be placed in , or spotted with your dryer. Items contaminated with controls. 8. To avoid the possibility of continuing product improvements, Maytag reserves the right to carry out. 9. Note • Because of fire... liquids or solids and their fumes have the skills to change specifications without notice. Important Safety Instructions WARNING To reduce the risk of fire, explosion, electric shock, or personal injury when using the appliance. 2.
... solids, should be exposed to play on top of the clothes dryer. The interior of the dryer and exhaust duct should not be placed in , or spotted with your dryer. Items contaminated with controls. 8. To avoid the possibility of continuing product improvements, Maytag reserves the right to carry out. 9. Note • Because of fire... liquids or solids and their fumes have the skills to change specifications without notice. Important Safety Instructions WARNING To reduce the risk of fire, explosion, electric shock, or personal injury when using the appliance. 2.
Owners Manual
Page 4
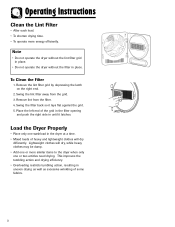
... shorten drying time. • To operate more similar items to the dryer when only one or two articles need drying. Note • Do not operate the dryer without the lint filter grid in place. • Do not operate the dryer without the filter in uneven drying as well as excessive wrinkling of... it latches. Place the left end of the grid in the filter opening and push the right side in the dryer at a time. • Mixed loads of some fabrics. 3 Load the Dryer Properly • Place only one washload in until it lays flat against the grid. 5. This improves the tumbling action...
... shorten drying time. • To operate more similar items to the dryer when only one or two articles need drying. Note • Do not operate the dryer without the lint filter grid in place. • Do not operate the dryer without the filter in uneven drying as well as excessive wrinkling of... it latches. Place the left end of the grid in the filter opening and push the right side in the dryer at a time. • Mixed loads of some fabrics. 3 Load the Dryer Properly • Place only one washload in until it lays flat against the grid. 5. This improves the tumbling action...

Owners Manual
Page 5
... remain lit until the cycle is in the cool down portion of interruption. To pause the cycle, press Start/Pause again. When the dryer is complete. Estimated Time Display The display window shows the estimated time remaining in the display and the Complete light will resume from the...will illuminate. Operating Instructions Start/Pause After setting the cycle and desired options, press the Start/Pause pad to cancel the cycle and stop the dryer. To restart the cycle, press Start/Pause and the cycle will illuminate, until the Start/Pause pad is pressed. When the cycle is ...
... remain lit until the cycle is in the cool down portion of interruption. To pause the cycle, press Start/Pause again. When the dryer is complete. Estimated Time Display The display window shows the estimated time remaining in the display and the Complete light will resume from the...will illuminate. Operating Instructions Start/Pause After setting the cycle and desired options, press the Start/Pause pad to cancel the cycle and stop the dryer. To restart the cycle, press Start/Pause and the cycle will illuminate, until the Start/Pause pad is pressed. When the cycle is ...
Owners Manual
Page 6
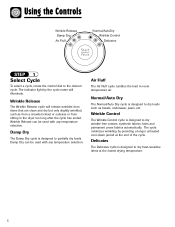
... wrinkling by the cycle name will release wrinkles from sitting in room temperature air. Air Fluff The Air Fluff cycle tumbles the load in the dryer too long after the cycle has ended. Wrinkle Control The Wrinkle Control cycle is designed to dry heat-sensitive items at the end of the...
... wrinkling by the cycle name will release wrinkles from sitting in room temperature air. Air Fluff The Air Fluff cycle tumbles the load in the dryer too long after the cycle has ended. Wrinkle Control The Wrinkle Control cycle is designed to dry heat-sensitive items at the end of the...

Owners Manual
Page 7
... pad. Press the pad repeatedly to scroll through the settings. Press the pad repeatedly to scroll through the settings. Use the chart below as a guide: DRYER TEMPS LOAD TYPE Regular For sturdy cottons or those labeled Tumble Dry. An indicator light will illuminate next to the desired temperature. Loads of the...
... pad. Press the pad repeatedly to scroll through the settings. Press the pad repeatedly to scroll through the settings. Use the chart below as a guide: DRYER TEMPS LOAD TYPE Regular For sturdy cottons or those labeled Tumble Dry. An indicator light will illuminate next to the desired temperature. Loads of the...

Owners Manual
Page 8
...sound. To unlock the controls, press and hold the Chime and Wrinkle Prevent pads for the dryer to the cycle, press the More Time pad until the desired time is closed for 3 seconds. The dryer door must be pushed again to reduce wrinkling. Wrinkle Prevent Wrinkle Prevent provides approximately 95 minutes... When the cycle is displayed. To lock the controls, press and hold the Chime and Wrinkle Prevent pads for safety, cleaning or to start the dryer. If the door is opened during the cycle, the Start/Pause pad must be closed . 7 When the Wrinkle Prevent option is selected, the chime...
...sound. To unlock the controls, press and hold the Chime and Wrinkle Prevent pads for the dryer to the cycle, press the More Time pad until the desired time is closed for 3 seconds. The dryer door must be pushed again to reduce wrinkling. Wrinkle Prevent Wrinkle Prevent provides approximately 95 minutes... When the cycle is displayed. To lock the controls, press and hold the Chime and Wrinkle Prevent pads for safety, cleaning or to start the dryer. If the door is opened during the cycle, the Start/Pause pad must be closed . 7 When the Wrinkle Prevent option is selected, the chime...
Owners Manual
Page 9
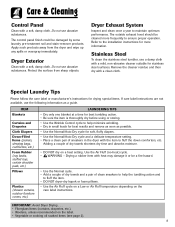
... towels and a pair of clean sneakers to fluff the down comforters, etc. The control panel finish could be cleaned more information. Dryer Exterior Clean with a soft, damp cloth. The outside exhaust hood should be damaged by some laundry pre-treatment soil and stain-remover...instructions are not available, use abrasive substances. Care & Cleaning Control Panel Clean with a soft, damp cloth. Protect the surface from the dryer and wipe up any spills or overspray immediately. Refer to ensure proper operation. Drying a rubber item with the item to help minimize ...
... towels and a pair of clean sneakers to fluff the down comforters, etc. The control panel finish could be cleaned more information. Dryer Exterior Clean with a soft, damp cloth. The outside exhaust hood should be damaged by some laundry pre-treatment soil and stain-remover...instructions are not available, use abrasive substances. Care & Cleaning Control Panel Clean with a soft, damp cloth. Protect the surface from the dryer and wipe up any spills or overspray immediately. Refer to ensure proper operation. Drying a rubber item with the item to help minimize ...

Owners Manual
Page 10
...metal flexible duct. Don't Allow crushed or clogged ducts and vent. Never use and care guide. Do Clean all joints, including at the dryer. Be sure vent flap opens and closes freely. Don't Use longer than necessary duct runs with a poor exhaust system. Do Use 4" ...diameter rigid metal duct. Don't Restrict your dryer with many elbows. Do Let your new dryer. Dryer Exhaust Tips WARNING Plastic or nonmetal flexible duct presents a potential fire hazard. Tape all old ducts before installing your...
...metal flexible duct. Don't Allow crushed or clogged ducts and vent. Never use and care guide. Do Clean all joints, including at the dryer. Be sure vent flap opens and closes freely. Don't Use longer than necessary duct runs with a poor exhaust system. Do Use 4" ...diameter rigid metal duct. Don't Restrict your dryer with many elbows. Do Let your new dryer. Dryer Exhaust Tips WARNING Plastic or nonmetal flexible duct presents a potential fire hazard. Tape all old ducts before installing your...
Owners Manual
Page 11
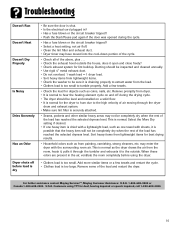
... has reached the selected dryness level. For further assistance contact Maytag ServicesSM, Maytag Customer Assistance: U.S.A. 1-800-688-9900 or Canada 1-800-688-2002. Troubleshooting Doesn't Run Doesn't Heat Doesn't Dry Properly Is Noisy Dries Unevenly Has an Odor Dryer shuts off during the cycle. • Has a fuse ...and off before load is dry • Be sure the door is shut. • Is the electrical cord plugged in the air, ventilate the room completely before using TTY for the dryer to hum due to tumble properly. Add a few towels and restart the cycle. • Clothes ...
... has reached the selected dryness level. For further assistance contact Maytag ServicesSM, Maytag Customer Assistance: U.S.A. 1-800-688-9900 or Canada 1-800-688-2002. Troubleshooting Doesn't Run Doesn't Heat Doesn't Dry Properly Is Noisy Dries Unevenly Has an Odor Dryer shuts off during the cycle. • Has a fuse ...and off before load is dry • Be sure the door is shut. • Is the electrical cord plugged in the air, ventilate the room completely before using TTY for the dryer to hum due to tumble properly. Add a few towels and restart the cycle. • Clothes ...
Installation Instructions
Page 2
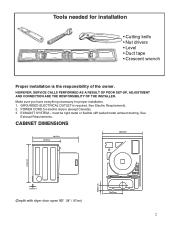
...UP, ADJUSTMENT AND CONNECTION ARE THE RESPONSIBILITY OF THE INSTALLER. See Electric Requirements. 2. POWER CORD for proper installation. 1. EXHAUST SYSTEM - CABINET DIMENSIONS 24" / 60 cm 33.5" / 85 cm 24" / 60 cm (Depth with dryer door open 90o -3388".2/ 59"7c/ m97) cm) 2 ...Make sure you have everything necessary for electric dryers (except Canada). 3. Tools needed for installation Printed in U.S.A.. • Impreso en los Estados Unidos &#...
...UP, ADJUSTMENT AND CONNECTION ARE THE RESPONSIBILITY OF THE INSTALLER. See Electric Requirements. 2. POWER CORD for proper installation. 1. EXHAUST SYSTEM - CABINET DIMENSIONS 24" / 60 cm 33.5" / 85 cm 24" / 60 cm (Depth with dryer door open 90o -3388".2/ 59"7c/ m97) cm) 2 ...Make sure you have everything necessary for electric dryers (except Canada). 3. Tools needed for installation Printed in U.S.A.. • Impreso en los Estados Unidos &#...

Installation Instructions
Page 3
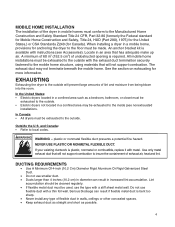
...FROM COMBUSTIBLE MATERIALS, GASOLINE AND OTHER FLAMMABLE VAPORS AND LIQUIDS. WARNING WARNING - See EXHAUST INFORMATION section. • Minimum clearances between dryer cabinet and adjacent walls or other fuel-burning appliance installed in the same closet. • WARNING: To reduce the risk of fire... shall have no other surfaces are included with the kit. ALCOVE OR CLOSET INSTALLATION ! REMOVE THE DOOR FROM ALL DISCARDED APPLIANCES SUCH AS DRYERS TO AVOID THE DANGER OF A CHILD SUFFOCATING. Instructions are : 0" either side 1" front and rear. • Minimum vertical space from...
...FROM COMBUSTIBLE MATERIALS, GASOLINE AND OTHER FLAMMABLE VAPORS AND LIQUIDS. WARNING WARNING - See EXHAUST INFORMATION section. • Minimum clearances between dryer cabinet and adjacent walls or other fuel-burning appliance installed in the same closet. • WARNING: To reduce the risk of fire... shall have no other surfaces are included with the kit. ALCOVE OR CLOSET INSTALLATION ! REMOVE THE DOOR FROM ALL DISCARDED APPLIANCES SUCH AS DRYERS TO AVOID THE DANGER OF A CHILD SUFFOCATING. Instructions are : 0" either side 1" front and rear. • Minimum vertical space from...
Installation Instructions
Page 4
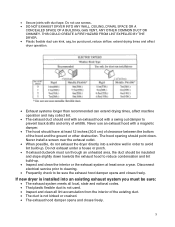
... from being blown into the room. The exhaust duct may be exhausted to the outside. • Electric dryers not located in increased lint accumulation. EXHAUSTING Exhausting the dryer to the Manufactured Home Construction and Safety Standard Title 24 CFR, Part 32-80 {formerly the Federal ... Title 24, HUD (Part 280), 1975} for the United States,) or CSA Standards Z240 (for more information. In the United States: • Electric dryers located in a confined area such as possible. 4 and Canada: • Refer to the inside (see Accessories). If your existing ductwork is required....
... from being blown into the room. The exhaust duct may be exhausted to the outside. • Electric dryers not located in increased lint accumulation. EXHAUSTING Exhausting the dryer to the Manufactured Home Construction and Safety Standard Title 24 CFR, Part 32-80 {formerly the Federal ... Title 24, HUD (Part 280), 1975} for the United States,) or CSA Standards Z240 (for more information. In the United States: • Electric dryers located in a confined area such as possible. 4 and Canada: • Refer to the inside (see Accessories). If your existing ductwork is required....
Installation Instructions
Page 5
...can kink, sag, be insulated and slope slightly down . The hood opening should be punctured, reduce airflow, extend drying times and affect dryer operation. • Exhaust systems longer than recommended can extend drying times, affect machine operation and may collect lint. • The exhaust ...not exhaust under a house or porch. • If exhaust ductwork must be sure the exhaust hood damper opens and closes freely. Disconnect electrical service prior to cleaning. • Frequently check to prevent back drafts and entry of the hood and the ground or other obstruction. Never...
...can kink, sag, be insulated and slope slightly down . The hood opening should be punctured, reduce airflow, extend drying times and affect dryer operation. • Exhaust systems longer than recommended can extend drying times, affect machine operation and may collect lint. • The exhaust ...not exhaust under a house or porch. • If exhaust ductwork must be sure the exhaust hood damper opens and closes freely. Disconnect electrical service prior to cleaning. • Frequently check to prevent back drafts and entry of the hood and the ground or other obstruction. Never...
Installation Instructions
Page 6
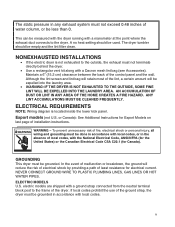
... no heat setting should be used. Maintain a 6" (15.2 cm) clearance between the back of the dryer. NONEXHAUSTED INSTALLATIONS • If the electric dryer is located inside the lower kick panel. electric models are shipped with a manometer at the point where the exhaust duct connects to the frame of the ...control panel and the wall. The dryer tumbler should be empty and the lint filter clean. or Canada): See Additional Instructions for electrical current. NEVER CONNECT GROUND WIRE TO PLASTIC PLUMBING LINES, GAS LINES OR HOT WATER...
... no heat setting should be used. Maintain a 6" (15.2 cm) clearance between the back of the dryer. NONEXHAUSTED INSTALLATIONS • If the electric dryer is located inside the lower kick panel. electric models are shipped with a manometer at the point where the exhaust duct connects to the frame of the ...control panel and the wall. The dryer tumbler should be empty and the lint filter clean. or Canada): See Additional Instructions for electrical current. NEVER CONNECT GROUND WIRE TO PLASTIC PLUMBING LINES, GAS LINES OR HOT WATER...
Installation Instructions
Page 7
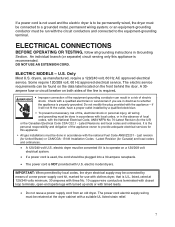
... cord kit, marked for use with a suitable UL listed strain relief. 7 listed, rated at the dryer cabinet with clothes dryer, that is U.L. The power cord electric supply wiring must be converted if it will not fit the outlet, have a proper outlet installed by ...• To prevent unnecessary risk of fire, electrical shock or personal injury, all grounding instructions in the absence of electric ! Latest Revisions and local codes and ordinances. electric model dryers. IMPORTANT: When permitted by local codes, the dryer electrical supply may be connected to whether the appliance ...
... cord kit, marked for use with a suitable UL listed strain relief. 7 listed, rated at the dryer cabinet with clothes dryer, that is U.L. The power cord electric supply wiring must be converted if it will not fit the outlet, have a proper outlet installed by ...• To prevent unnecessary risk of fire, electrical shock or personal injury, all grounding instructions in the absence of electric ! Latest Revisions and local codes and ordinances. electric model dryers. IMPORTANT: When permitted by local codes, the dryer electrical supply may be connected to whether the appliance ...
Installation Instructions
Page 8
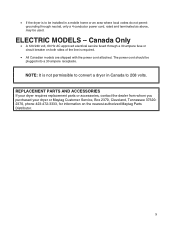
... or circuit breaker on the nearest authorized Maytag Parts Distributor. 8 The power cord should be used. REPLACEMENT PARTS AND ACCESSORIES If your dryer requires replacement parts or accessories, contact the dealer from whom you purchased your dryer or Maytag Customer Service, Box 2370, Cleveland, Tennessee... 373202370, phone 423-472-3333, for information on both sides of the line is required. • All Canadian models are shipped with the power cord attached. ELECTRIC MODELS - Canada Only •...
... or circuit breaker on the nearest authorized Maytag Parts Distributor. 8 The power cord should be used. REPLACEMENT PARTS AND ACCESSORIES If your dryer requires replacement parts or accessories, contact the dealer from whom you purchased your dryer or Maytag Customer Service, Box 2370, Cleveland, Tennessee... 373202370, phone 423-472-3333, for information on both sides of the line is required. • All Canadian models are shipped with the power cord attached. ELECTRIC MODELS - Canada Only •...
Installation Instructions
Page 9
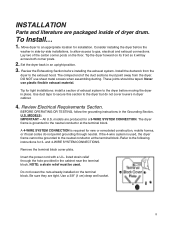
To Install... 1. The crimped end of exhaust system to gas, electrical and exhaust connections. Review Electrical Requirements Section. The dryer frame is grounded to an appropriate location for 3- A 4-WIRE SYSTEM CONNECTION is used . listed strain relief through neutral. ...the power cord with a U.L. DO NOT use plastic flexible exhaust material. Do not loosen the nuts already installed on the floor. Lay two of dryer drum. Never use sheet metal screws when assembling ducting. U.S. Use a 3/8" (1 cm) deep well socket. 9 BEFORE OPERATING OR TESTING, follow the...
To Install... 1. The crimped end of exhaust system to gas, electrical and exhaust connections. Review Electrical Requirements Section. The dryer frame is grounded to an appropriate location for 3- A 4-WIRE SYSTEM CONNECTION is used . listed strain relief through neutral. ...the power cord with a U.L. DO NOT use plastic flexible exhaust material. Do not loosen the nuts already installed on the floor. Lay two of dryer drum. Never use sheet metal screws when assembling ducting. U.S. Use a 3/8" (1 cm) deep well socket. 9 BEFORE OPERATING OR TESTING, follow the...
Installation Instructions
Page 10
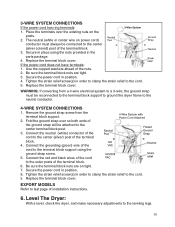
...terminal block nuts are on tight. 7. Tighten the strain relief screw(s) in the parts package. 4. Remove the ground strap screw from a 4-wire electrical system to a 3-wire, the ground strap must always be connected to the center (silver colored) post of the cord to the terminal block support... using the ground strap screw. 5. Replace the terminal block cover. Be sure the terminal block nuts are tight. 3. Level The Dryer: With a level, check the dryer, and make necessary adjustments to the center (silver) post of the terminal block. 6. 3-WIRE SYSTEM CONNECTIONS If the power cord has...
...terminal block nuts are on tight. 7. Tighten the strain relief screw(s) in the parts package. 4. Remove the ground strap screw from a 4-wire electrical system to a 3-wire, the ground strap must always be connected to the center (silver colored) post of the cord to the terminal block support... using the ground strap screw. 5. Replace the terminal block cover. Be sure the terminal block nuts are tight. 3. Level The Dryer: With a level, check the dryer, and make necessary adjustments to the center (silver) post of the terminal block. 6. 3-WIRE SYSTEM CONNECTIONS If the power cord has...


