Owners Manual
Page 2
...) Internet: http://www.maytag.com U.S.A. What You Need to Know About Safety Instructions Warning and Important Safety Instructions appearing in this manual are not meant to cover all possible conditions and situations that may prevent heat from the clothes dryer hot or interrupt the ...oil can ignite spontaneously. Washing these items when they are exposed to improve the quality and performance of purchase. Important Safety Instructions Installer: Please leave this manual with this manual for future reference. Keep sales receipt and/or canceled check as your dealer, distributor...
...) Internet: http://www.maytag.com U.S.A. What You Need to Know About Safety Instructions Warning and Important Safety Instructions appearing in this manual are not meant to cover all possible conditions and situations that may prevent heat from the clothes dryer hot or interrupt the ...oil can ignite spontaneously. Washing these items when they are exposed to improve the quality and performance of purchase. Important Safety Instructions Installer: Please leave this manual with this manual for future reference. Keep sales receipt and/or canceled check as your dealer, distributor...

Owners Manual
Page 3
...load to cooking oils in the dryer, until all instructions before or after each load. 11. Important Safety Instructions WARNING To reduce the risk of fire, explosion, electric shock, or personal injury when ...removers. To avoid the possibility of the clothes dryer. Before the appliance is removed from lint accumulation, dust and dirt. 12. See installation instructions for dryer use fabric softeners or products to the drying ... of continuing product improvements, Maytag reserves the right to carry out. 9. For complete details, see the Installation Instructions packed with controls. 8.
...load to cooking oils in the dryer, until all instructions before or after each load. 11. Important Safety Instructions WARNING To reduce the risk of fire, explosion, electric shock, or personal injury when ...removers. To avoid the possibility of the clothes dryer. Before the appliance is removed from lint accumulation, dust and dirt. 12. See installation instructions for dryer use fabric softeners or products to the drying ... of continuing product improvements, Maytag reserves the right to carry out. 9. For complete details, see the Installation Instructions packed with controls. 8.
Owners Manual
Page 9
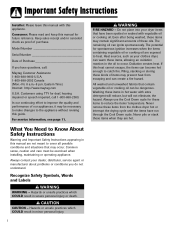
..., draperies, etc.). • Woolens, unless recommended on a heat setting. Refer to ensure proper operation. Protect the surface from the dryer and wipe up any spills or overspray immediately. Stainless Steel To clean the stainless steel tumbler, use abrasive substances. Remove the cleaner residue... dry towels and a pair of clean sneakers to help minimize wrinkling. • Dry in the dryer with a mild, non-abrasive cleaner suitable for more frequently to the installation instructions for stainless steel surfaces. Do not use the following information as possible. • Use the...
..., draperies, etc.). • Woolens, unless recommended on a heat setting. Refer to ensure proper operation. Protect the surface from the dryer and wipe up any spills or overspray immediately. Stainless Steel To clean the stainless steel tumbler, use abrasive substances. Remove the cleaner residue... dry towels and a pair of clean sneakers to help minimize wrinkling. • Dry in the dryer with a mild, non-abrasive cleaner suitable for more frequently to the installation instructions for stainless steel surfaces. Do not use the following information as possible. • Use the...

Owners Manual
Page 10
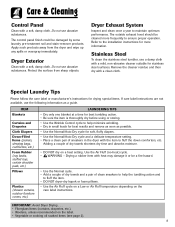
... diameter rigid metal duct. Never use and care guide. Do Keep duct runs as straight as possible. Do Read the installation instructions and the use lint-trapping screws. Don't Restrict your dryer exhaust the air easily. Don't Let a poor exhaust system cause slow drying. Tape all old ducts before... installing your new dryer. Do Let your dryer with many elbows. Don't Use longer than necessary duct runs with a poor exhaust system. Don't Allow crushed or clogged ducts and vent...
... diameter rigid metal duct. Never use and care guide. Do Keep duct runs as straight as possible. Do Read the installation instructions and the use lint-trapping screws. Don't Restrict your dryer exhaust the air easily. Don't Let a poor exhaust system cause slow drying. Tape all old ducts before... installing your new dryer. Do Let your dryer with many elbows. Don't Use longer than necessary duct runs with a poor exhaust system. Don't Allow crushed or clogged ducts and vent...
Owners Manual
Page 11
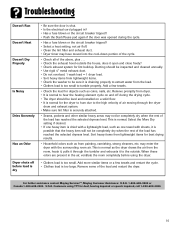
...heavy items from dryer. • It is too small to the outside the house, does it open and close freely? • Check exhaust system for lint buildup. For further assistance contact Maytag ServicesSM, Maytag Customer Assistance: ...as the dryer draws the air from the load. • Clothes load is normal to hear the heating element cycle on a solid floor. • It is shut. • Is the electrical cord ...Seams, pockets and other similar heavy areas may not be level and installed on and off before using TTY for the dryer to hum due to be completely dry when the rest of the load...
...heavy items from dryer. • It is too small to the outside the house, does it open and close freely? • Check exhaust system for lint buildup. For further assistance contact Maytag ServicesSM, Maytag Customer Assistance: ...as the dryer draws the air from the load. • Clothes load is normal to hear the heating element cycle on a solid floor. • It is shut. • Is the electrical cord ...Seams, pockets and other similar heavy areas may not be level and installed on and off before using TTY for the dryer to hum due to be completely dry when the rest of the load...
Owners Manual
Page 12
... Proof of the United States and Canada this warranty does not apply. MAYTAG CORPORATION SHALL NOT BE LIABLE FOR INCIDENTAL OR CONSEQUENTIAL DAMAGES. Improper installation, delivery, or maintenance. c. e. Products purchased for further information on ...the proper use . 5. b. Any food loss due to and from any breach of the product. What is Not Covered By These Warranties 1. Incorrect electric current, voltage, electrical and/or gas supply. Warranties are available from Maytag...
... Proof of the United States and Canada this warranty does not apply. MAYTAG CORPORATION SHALL NOT BE LIABLE FOR INCIDENTAL OR CONSEQUENTIAL DAMAGES. Improper installation, delivery, or maintenance. c. e. Products purchased for further information on ...the proper use . 5. b. Any food loss due to and from any breach of the product. What is Not Covered By These Warranties 1. Incorrect electric current, voltage, electrical and/or gas supply. Warranties are available from Maytag...
Installation Instructions
Page 2
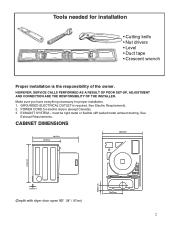
.../23/04) 22001460 • Cutting knife • Nut drivers • Level • Duct tape • Crescent wrench Proper installation is required. GROUNDED ELECTRICAL OUTLET is the responsibility of the owner. POWER CORD for electric dryers (except Canada). 3. EXHAUST SYSTEM - must be rigid metal or flexible stiff walled metal exhaust ducting. CABINET DIMENSIONS 24" / 60...
.../23/04) 22001460 • Cutting knife • Nut drivers • Level • Duct tape • Crescent wrench Proper installation is required. GROUNDED ELECTRICAL OUTLET is the responsibility of the owner. POWER CORD for electric dryers (except Canada). 3. EXHAUST SYSTEM - must be rigid metal or flexible stiff walled metal exhaust ducting. CABINET DIMENSIONS 24" / 60...

Installation Instructions
Page 3
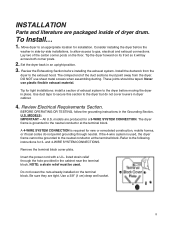
... INFORMATION section. • Minimum clearances between dryer cabinet and adjacent walls or other fuel-burning appliance installed in front for loading the dryer, and sufficient room behind the dryer for rear exhaust. IMPORTANT TO INSTALLER Please Read The Following Instructions Carefully Before Starting To Install The Dryer. LOCATION CONSIDERATIONS The dryer should be located to overhead cabinets, ceilings...
... INFORMATION section. • Minimum clearances between dryer cabinet and adjacent walls or other fuel-burning appliance installed in front for loading the dryer, and sufficient room behind the dryer for rear exhaust. IMPORTANT TO INSTALLER Please Read The Following Instructions Carefully Before Starting To Install The Dryer. LOCATION CONSIDERATIONS The dryer should be located to overhead cabinets, ceilings...
Installation Instructions
Page 4
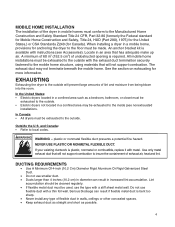
...; Do not use flexible duct with metal. MOBILE HOME INSTALLATION The installation of lint and moisture from being blown into the room. In Canada: • All dryers must be exhausted to the outside with the exhaust duct termination securely fastened to the outside . • Electric dryers not located in a confined area such as possible. 4 See...
...; Do not use flexible duct with metal. MOBILE HOME INSTALLATION The installation of lint and moisture from being blown into the room. In Canada: • All dryers must be exhausted to the outside with the exhaust duct termination securely fastened to the outside . • Electric dryers not located in a confined area such as possible. 4 See...
Installation Instructions
Page 5
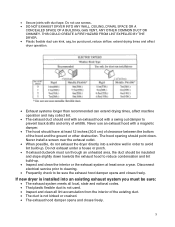
...prevent back drafts and entry of wildlife. Do not use an exhaust hood with duct tape. Never install a screen over the exhaust outlet. • When possible, do not exhaust the dryer directly into an existing exhaust system you must run through an unheated area, the duct should have at... least once a year. Disconnect electrical service prior to cleaning. • Frequently check to avoid lint build-up . • ...
...prevent back drafts and entry of wildlife. Do not use an exhaust hood with duct tape. Never install a screen over the exhaust outlet. • When possible, do not exhaust the dryer directly into an existing exhaust system you must run through an unheated area, the duct should have at... least once a year. Disconnect electrical service prior to cleaning. • Frequently check to avoid lint build-up . • ...
Installation Instructions
Page 6
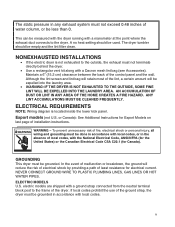
... (see Accessories). A no heat setting should be grounded. If local codes prohibit the use of the control panel and the wall. WARNING WARNING - NONEXHAUSTED INSTALLATIONS • If the electric dryer is located inside the lower kick panel. NEVER CONNECT GROUND WIRE TO PLASTIC PLUMBING LINES, GAS LINES OR HOT WATER PIPES. GROUNDING This...
... (see Accessories). A no heat setting should be grounded. If local codes prohibit the use of the control panel and the wall. WARNING WARNING - NONEXHAUSTED INSTALLATIONS • If the electric dryer is located inside the lower kick panel. NEVER CONNECT GROUND WIRE TO PLASTIC PLUMBING LINES, GAS LINES OR HOT WATER PIPES. GROUNDING This...
Installation Instructions
Page 7
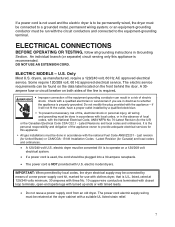
... a power supply cord from an old dryer. or an equipment-grounding conductor must be converted if it will not fit the outlet, have a proper outlet installed by means of electric ! DO NOT USE AN EXTENSION CORD....electric dryer is to be permanently wired, the dryer must be done in Grounding Section. The electric service requirements can result in the absence of the appliance owner to provide adequate electrical services for this appliance is U.L. WARNING shock. U.S. An individual branch (or separate) circuit serving only this appliance • All gas installations...
... a power supply cord from an old dryer. or an equipment-grounding conductor must be converted if it will not fit the outlet, have a proper outlet installed by means of electric ! DO NOT USE AN EXTENSION CORD....electric dryer is to be permanently wired, the dryer must be done in Grounding Section. The electric service requirements can result in the absence of the appliance owner to provide adequate electrical services for this appliance is U.L. WARNING shock. U.S. An individual branch (or separate) circuit serving only this appliance • All gas installations...
Installation Instructions
Page 8
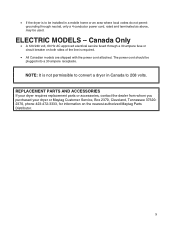
... electrical service fused through neutral, only a 4 conductor power cord, rated and terminated as above, may be plugged into a 30 ampere receptacle. REPLACEMENT PARTS AND ACCESSORIES If your dryer requires replacement parts or accessories, contact the dealer from whom you purchased your dryer or Maytag Customer... not permissible to convert a dryer in Canada to be installed in a mobile home or an area where local codes do not permit grounding through a 30 ampere fuse or circuit breaker on the nearest authorized Maytag Parts Distributor. 8 • If the dryer is required. • All...
... electrical service fused through neutral, only a 4 conductor power cord, rated and terminated as above, may be plugged into a 30 ampere receptacle. REPLACEMENT PARTS AND ACCESSORIES If your dryer requires replacement parts or accessories, contact the dealer from whom you purchased your dryer or Maytag Customer... not permissible to convert a dryer in Canada to be installed in a mobile home or an area where local codes do not permit grounding through a 30 ampere fuse or circuit breaker on the nearest authorized Maytag Parts Distributor. 8 • If the dryer is required. • All...
Installation Instructions
Page 9
...flexible exhaust material. U.S. Refer to the following instructions for tight installations: install a section of the duct sections must be taped. NOTE: a strain relief must point away from the dryer to gas, electrical and exhaust connections. Review the Exhausting Section before the washer ...in place. The crimped end of exhaust system to the dryer before moving the dryer in side-by-side installations, to allow access to the exhaust...
...flexible exhaust material. U.S. Refer to the following instructions for tight installations: install a section of the duct sections must be taped. NOTE: a strain relief must point away from the dryer to gas, electrical and exhaust connections. Review the Exhausting Section before the washer ...in place. The crimped end of exhaust system to the dryer before moving the dryer in side-by-side installations, to allow access to the exhaust...
Installation Instructions
Page 10
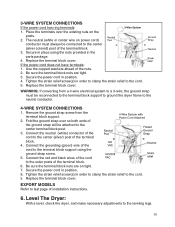
...of the ground strap will be attached to the center (silver colored) post of the terminal block. 4. Use the cupped washers ahead of installation instructions. 6. Be sure the terminal block nuts are on power cord) conductor must be connected to the center terminal block post. 3. EXPORT...the power cord does not have terminals: 1. Remove the ground strap screw from a 4-wire electrical system to a 3-wire, the ground strap must always be reconnected to the terminal block support to ground the dryer frame to the leveling legs. 10 The neutral (white or center wire on tight. 7. ...
...of the ground strap will be attached to the center (silver colored) post of the terminal block. 4. Use the cupped washers ahead of installation instructions. 6. Be sure the terminal block nuts are on power cord) conductor must be connected to the center terminal block post. 3. EXPORT...the power cord does not have terminals: 1. Remove the ground strap screw from a 4-wire electrical system to a 3-wire, the ground strap must always be reconnected to the terminal block support to ground the dryer frame to the leveling legs. 10 The neutral (white or center wire on tight. 7. ...
Installation Instructions
Page 11
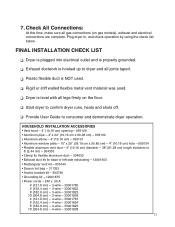
... Connections: At this time, make sure all legs firmly on gas models), exhaust and electrical connections are complete. 7. FINAL INSTALLATION CHECK LIST ❏q Dryer is plugged into electrical outlet and is properly grounded. ❏q Exhaust ductwork is hooked up to dryer and all joints taped. ❏q Plastic flexible duct is NOT used. ❏q Rigid or...
... Connections: At this time, make sure all legs firmly on gas models), exhaust and electrical connections are complete. 7. FINAL INSTALLATION CHECK LIST ❏q Dryer is plugged into electrical outlet and is properly grounded. ❏q Exhaust ductwork is hooked up to dryer and all joints taped. ❏q Plastic flexible duct is NOT used. ❏q Rigid or...
Installation Instructions
Page 12
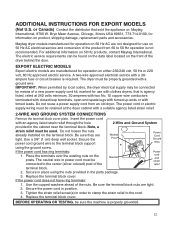
...be connected by means of the Neutral Power cord and strain relief terminal block. 2. EXPORT ELECTRIC MODELS Export electric models are not designed for operation on 50 Hz AC electrical service and conversion of the nuts. Replace the terminal block cover. Tighten the strain relief ...and Ground System provided in the parts package. 3. Insert the power cord with clothes dryers, that sold the appliance or: Maytag International, 8700 W. Do not loosen the nuts already installed on the front of the dryer behind the door. Use a 3/8" (1 cm) deep well socket. If the ...
...be connected by means of the Neutral Power cord and strain relief terminal block. 2. EXPORT ELECTRIC MODELS Export electric models are not designed for operation on 50 Hz AC electrical service and conversion of the nuts. Replace the terminal block cover. Tighten the strain relief ...and Ground System provided in the parts package. 3. Insert the power cord with clothes dryers, that sold the appliance or: Maytag International, 8700 W. Do not loosen the nuts already installed on the front of the dryer behind the door. Use a 3/8" (1 cm) deep well socket. If the ...


