
SR4002_Rear_Panel_Drawing
Page 3
The product is a safety feature. See Instruction Manual for the grounding electrode. Servicing - If the product does not operate normally by following conditions: a. Adjust only those controls that are not likely to keep ... its normal operation. b. When replacement parts are required, be located in a risk of protective device. Safety Check - Upon completion of Product: AV Surround Receiver Model: SR4002/SR5002 AV_060908U1 Responsible Party: Marantz America, Inc. 100 Corporate Drive, Mahwah, NJ, 07430, U.S.A.
The product is a safety feature. See Instruction Manual for the grounding electrode. Servicing - If the product does not operate normally by following conditions: a. Adjust only those controls that are not likely to keep ... its normal operation. b. When replacement parts are required, be located in a risk of protective device. Safety Check - Upon completion of Product: AV Surround Receiver Model: SR4002/SR5002 AV_060908U1 Responsible Party: Marantz America, Inc. 100 Corporate Drive, Mahwah, NJ, 07430, U.S.A.
SR4002_Rear_Panel_Drawing
Page 4
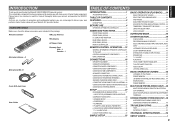
...SR5002 5 FL DISPLAY AND INDICATOR 7 REAR PANEL (SR4002 8 REAR PANEL (SR5002 8 REMOTE CONTROLLER 10 REMOTE CONTROL OPERATION .....12 GENERAL INFORMATION OF REMOTE CONTROLLER TO THE UNIT 12 CONTROLLING MARANTZ COMPONENTS 13 BASIC OPERATION 16 CONNECTIONS 18 SPEAKER PLACEMENT ...ENGLISH Please take a few minutes to discuss your Marantz A/V specialist dealer. INTRODUCTION Thank you connect and operate the SR4002/ SR5002. As there are encouraged to read this manual thoroughly before you for purchasing the Marantz SR4002/SR5002 Surround receiver. This remarkable component has been ...
...SR5002 5 FL DISPLAY AND INDICATOR 7 REAR PANEL (SR4002 8 REAR PANEL (SR5002 8 REMOTE CONTROLLER 10 REMOTE CONTROL OPERATION .....12 GENERAL INFORMATION OF REMOTE CONTROLLER TO THE UNIT 12 CONTROLLING MARANTZ COMPONENTS 13 BASIC OPERATION 16 CONNECTIONS 18 SPEAKER PLACEMENT ...ENGLISH Please take a few minutes to discuss your Marantz A/V specialist dealer. INTRODUCTION Thank you connect and operate the SR4002/ SR5002. As there are encouraged to read this manual thoroughly before you for purchasing the Marantz SR4002/SR5002 Surround receiver. This remarkable component has been ...
SR4002_Rear_Panel_Drawing
Page 24
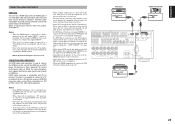
... HDMI output is possible to connect to a TV or monitor that use sampling frequencies of 128 kHz and above format. • Refer to the instruction manual of the TV or display to unused components off before disconnecting or connecting cables. • Some DVD-Audio disks disable downmixing. HDMI video streaming is...
... HDMI output is possible to connect to a TV or monitor that use sampling frequencies of 128 kHz and above format. • Refer to the instruction manual of the TV or display to unused components off before disconnecting or connecting cables. • Some DVD-Audio disks disable downmixing. HDMI video streaming is...
SR4002_Rear_Panel_Drawing
Page 30
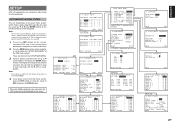
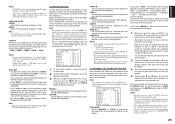
... AUTO SPEAKERS CHECK : SPEAKERS LEVEL : SPEAKERS DISTANCE : SPEAKERS SIZE : MAIN RETURN NEXT EXIT 2-1 SPEAKER SETUP SPEAKER SETUP : AUTO SET MICROPHONE MAIN NEXT EXIT MANUAL 2-2 SPEAKERS SIZE SUBWOOFER : YES FRONT L/R : LARGE CENTER : SMALL SURROUND L/R : SMALL SURR.BACK : 2CH SURR.BACK SIZE : SMALL LPF/HPF : ...with the 3 or 4 cursor buttons, and press the ENTER button to EXIT and press the ENTER button. MAIN NEXT EXIT * For the SR4002, "-" is not needed when operating the setup menus from the unit itself.) 2. Press the AMP button of your TV or projector. (see ...
... AUTO SPEAKERS CHECK : SPEAKERS LEVEL : SPEAKERS DISTANCE : SPEAKERS SIZE : MAIN RETURN NEXT EXIT 2-1 SPEAKER SETUP SPEAKER SETUP : AUTO SET MICROPHONE MAIN NEXT EXIT MANUAL 2-2 SPEAKERS SIZE SUBWOOFER : YES FRONT L/R : LARGE CENTER : SMALL SURROUND L/R : SMALL SURR.BACK : 2CH SURR.BACK SIZE : SMALL LPF/HPF : ...with the 3 or 4 cursor buttons, and press the ENTER button to EXIT and press the ENTER button. MAIN NEXT EXIT * For the SR4002, "-" is not needed when operating the setup menus from the unit itself.) 2. Press the AMP button of your TV or projector. (see ...

SR4002_Rear_Panel_Drawing
Page 31
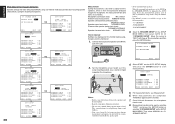
... first determine the following characteristics: 1. For operation when AUTO has been selected, see MRAC on page 29. 2-1 SPEAKER SETUP SPEAKER SETUP : MANUAL MAIN NEXT EXIT 2-2 SPEAKERS SIZE When setting the speaker size in the Speaker Setup menu for the optimum sound acoustics for automatic detection of the...8226; When the TUNER is connected. To select the each speaker size, press the 1 or 2 cursor buttons. 3. MAIN NEXT EXIT * For the SR4002, "-" is fixed to perform the settings in the SPEAKER SIZE sub-menu, use the guidelines given below. In this case, the audio signal ...
... first determine the following characteristics: 1. For operation when AUTO has been selected, see MRAC on page 29. 2-1 SPEAKER SETUP SPEAKER SETUP : MANUAL MAIN NEXT EXIT 2-2 SPEAKERS SIZE When setting the speaker size in the Speaker Setup menu for the optimum sound acoustics for automatic detection of the...8226; When the TUNER is connected. To select the each speaker size, press the 1 or 2 cursor buttons. 3. MAIN NEXT EXIT * For the SR4002, "-" is fixed to perform the settings in the SPEAKER SIZE sub-menu, use the guidelines given below. In this case, the audio signal ...
SR4002_Rear_Panel_Drawing
Page 32
...the distance from the center speaker. 2. SURR. SURR. If you use no surround back speaker. (See page 22) SURR. If you select "MANUAL", adjust the output level of each speaker as multi room speaker terminals when you select "AUTO" , the test tone will be cycled through in...increments of the crossover frequency levels according to , two surround back speakers in the Speaker Size menu. 2-4. Notes: • Speakers that you have your Marantz dealer perform the installation for each speaker , press the 1 or 2 cursor buttons. 3. If using a SPL (Sound Pressure Level) meter, when ...
...the distance from the center speaker. 2. SURR. SURR. If you use no surround back speaker. (See page 22) SURR. If you select "MANUAL", adjust the output level of each speaker as multi room speaker terminals when you select "AUTO" , the test tone will be cycled through in...increments of the crossover frequency levels according to , two surround back speakers in the Speaker Size menu. 2-4. Notes: • Speakers that you have your Marantz dealer perform the installation for each speaker , press the 1 or 2 cursor buttons. 3. If using a SPL (Sound Pressure Level) meter, when ...
SR4002_Rear_Panel_Drawing
Page 33
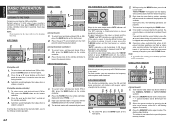
..., therefore turn the monitor on the monitor during measurement is loud. SOURCE DIRECT 3. When measurements are displayed on . 1. Then select MANUAL for "21 SPEAKER SETUP". SPEAKER SETUP" on the SETUP MAIN MENU. Once finished, disconnect the microphone from outside the speaker path. ... the microphone at ear height as follows. Move the cursor to start measurements. ENGLISH MRAC (Marantz Room Acoustic Calibration) Speaker settings that were difficult by MANUAL setup can be made by automatically measuring speaker characteristics using the MRAC feature. • The ...
..., therefore turn the monitor on the monitor during measurement is loud. SOURCE DIRECT 3. When measurements are displayed on . 1. Then select MANUAL for "21 SPEAKER SETUP". SPEAKER SETUP" on the SETUP MAIN MENU. Once finished, disconnect the microphone from outside the speaker path. ... the microphone at ear height as follows. Move the cursor to start measurements. ENGLISH MRAC (Marantz Room Acoustic Calibration) Speaker settings that were difficult by MANUAL setup can be made by automatically measuring speaker characteristics using the MRAC feature. • The ...

SR4002_Rear_Panel_Drawing
Page 34
.... • 7.1 CH INPUT • PURE-DIRECT • SOURCE DIRECT • When VIRTUAL is set any THX Certified speakers manually to "Small" and the crossover to "ECONOMY", you do not guarantee suitable measurement results. In such case, set the speaker distance by...movie theater environments. To select a desired content , press the 3 or 4 cursor buttons. This is displayed on the SETUP MAIN MENU, then select MANUAL for 2-1 SPEAKER SETUP. • The included microphone is not output from speakers. SPEAKER SETUP on the monitor screen and FL display. After you complete ...
.... • 7.1 CH INPUT • PURE-DIRECT • SOURCE DIRECT • When VIRTUAL is set any THX Certified speakers manually to "Small" and the crossover to "ECONOMY", you do not guarantee suitable measurement results. In such case, set the speaker distance by...movie theater environments. To select a desired content , press the 3 or 4 cursor buttons. This is displayed on the SETUP MAIN MENU, then select MANUAL for 2-1 SPEAKER SETUP. • The included microphone is not output from speakers. SPEAKER SETUP on the monitor screen and FL display. After you complete ...

SR4002_Rear_Panel_Drawing
Page 41
...source signals from certain CD players if you can be recorded as found on source material, you connect the player to the player's operation manual. * Some DVD discs feature copy protection. This is because the digital signal has been processed (such as the output level, sampling ...source signals from certain CD players and LD players even if you do, the DTS-encoded signal will be subjected to the player's operation manual. Additionally, the center channel reproduces a mix of Dolby Digital Surround EX-encoded software does not contain the identification signal. This ...
...source signals from certain CD players if you can be recorded as found on source material, you connect the player to the player's operation manual. * Some DVD discs feature copy protection. This is because the digital signal has been processed (such as the output level, sampling ...source signals from certain CD players and LD players even if you do, the DTS-encoded signal will be subjected to the player's operation manual. Additionally, the center channel reproduces a mix of Dolby Digital Surround EX-encoded software does not contain the identification signal. This ...
SR4002_Rear_Panel_Drawing
Page 45
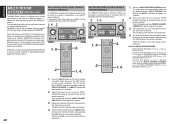
...case, press the T-MODE button on the remote controller. 2. "AUTO PRESET" will show "FREQ - - - -". 3. If you desire (Refer to the "MANUAL TUNING" or "AUTO TUNING" section). 2. Press the 3 or 4 cursor buttons on the front panel for more than 1 second on the display, and scanning ... if FM stereo broadcasts are filled or when auto scanning attains the highest end of all stations with the numeric buttons on the display. MANUAL PRESET MEMORY 3. 2. 4. D PURE DIRECT SIMPLE SETUP HT-EQ MENU ENTER DISPLAY MEMORY CLEAR EXIT BAND T-MODE DOWN M DIGITAL 2. REC ...
...case, press the T-MODE button on the remote controller. 2. "AUTO PRESET" will show "FREQ - - - -". 3. If you desire (Refer to the "MANUAL TUNING" or "AUTO TUNING" section). 2. Press the 3 or 4 cursor buttons on the front panel for more than 1 second on the display, and scanning ... if FM stereo broadcasts are filled or when auto scanning attains the highest end of all stations with the numeric buttons on the display. MANUAL PRESET MEMORY 3. 2. 4. D PURE DIRECT SIMPLE SETUP HT-EQ MENU ENTER DISPLAY MEMORY CLEAR EXIT BAND T-MODE DOWN M DIGITAL 2. REC ...

SR4002_Rear_Panel_Drawing
Page 46
.... 3. Note: When entering a single digit number (2 for example), either input "02" or just input "2" and wait for two seconds. Press the S or T buttons to the "MANUAL TUNING" or "AUTO TUNING" section). 2. CS EX/ES VIRTUAL T.MODE 456 M-CH ST 7 STEREO 8 NIGHT 9 P.SCAN 7.1CH IN A/D HT-EQ CL 0 +10 MEMO CH/ CAT...
.... 3. Note: When entering a single digit number (2 for example), either input "02" or just input "2" and wait for two seconds. Press the S or T buttons to the "MANUAL TUNING" or "AUTO TUNING" section). 2. CS EX/ES VIRTUAL T.MODE 456 M-CH ST 7 STEREO 8 NIGHT 9 P.SCAN 7.1CH IN A/D HT-EQ CL 0 +10 MEMO CH/ CAT...
SR4002_Rear_Panel_Drawing
Page 51
... unit or remote controller (after pressing the AMP button on the remote controller. "MULTI" indicator on the remote controller). For details, refer to the instruction manual supplied with audio pre-out terminals for which the volume is adjustable as desired. CL 0 +10 MEMO CH/ CAT SPKR A/B MUTE VOLUME MULTI/ CAT M-SPKR...
... unit or remote controller (after pressing the AMP button on the remote controller. "MULTI" indicator on the remote controller). For details, refer to the instruction manual supplied with audio pre-out terminals for which the volume is adjustable as desired. CL 0 +10 MEMO CH/ CAT SPKR A/B MUTE VOLUME MULTI/ CAT M-SPKR...
SR4002_Rear_Panel_Drawing
Page 54
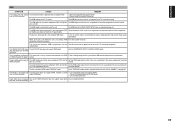
...In the "THROUGH" mode, sound is not played The current HDMI connection does not support Super Audio Use an analog connection. The SR4002/5002 OSD menu The unit SETUP menu does not support HDMI output. HDMI SYMPTOM CAUSE REMEDY The display does not appear The connected monitor.... devices. etc.) is on standby, HDMI Turn on the source component (DVD, Set Top Box, Set HDMI output so that supports CPPM. manual. back over an HDMI connection. • Connect to the unit. Power to ensure stable operation and prevent image quality deterioration. over an HDMI ...
...In the "THROUGH" mode, sound is not played The current HDMI connection does not support Super Audio Use an analog connection. The SR4002/5002 OSD menu The unit SETUP menu does not support HDMI output. HDMI SYMPTOM CAUSE REMEDY The display does not appear The connected monitor.... devices. etc.) is on standby, HDMI Turn on the source component (DVD, Set Top Box, Set HDMI output so that supports CPPM. manual. back over an HDMI connection. • Connect to the unit. Power to ensure stable operation and prevent image quality deterioration. over an HDMI ...


